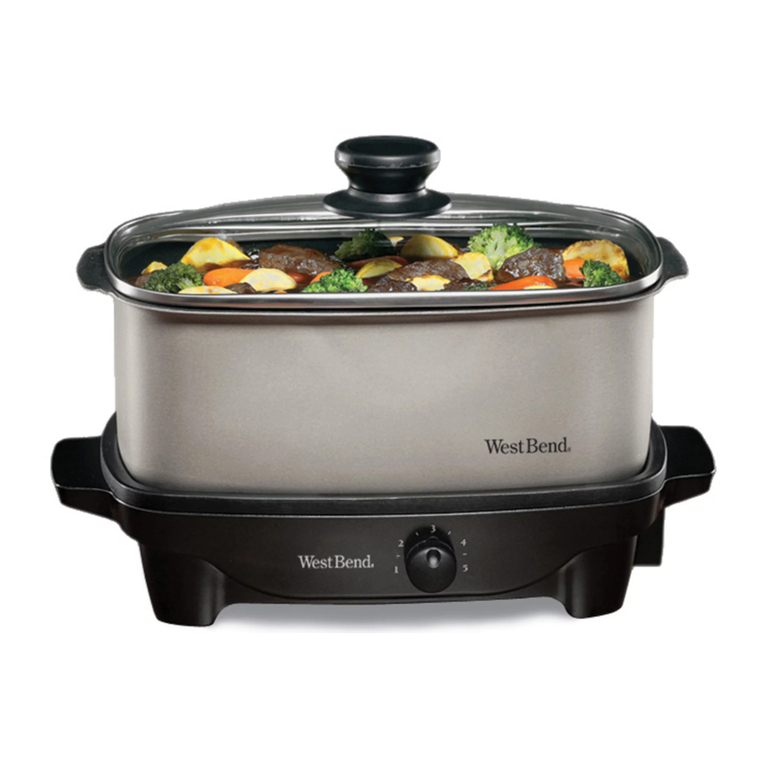
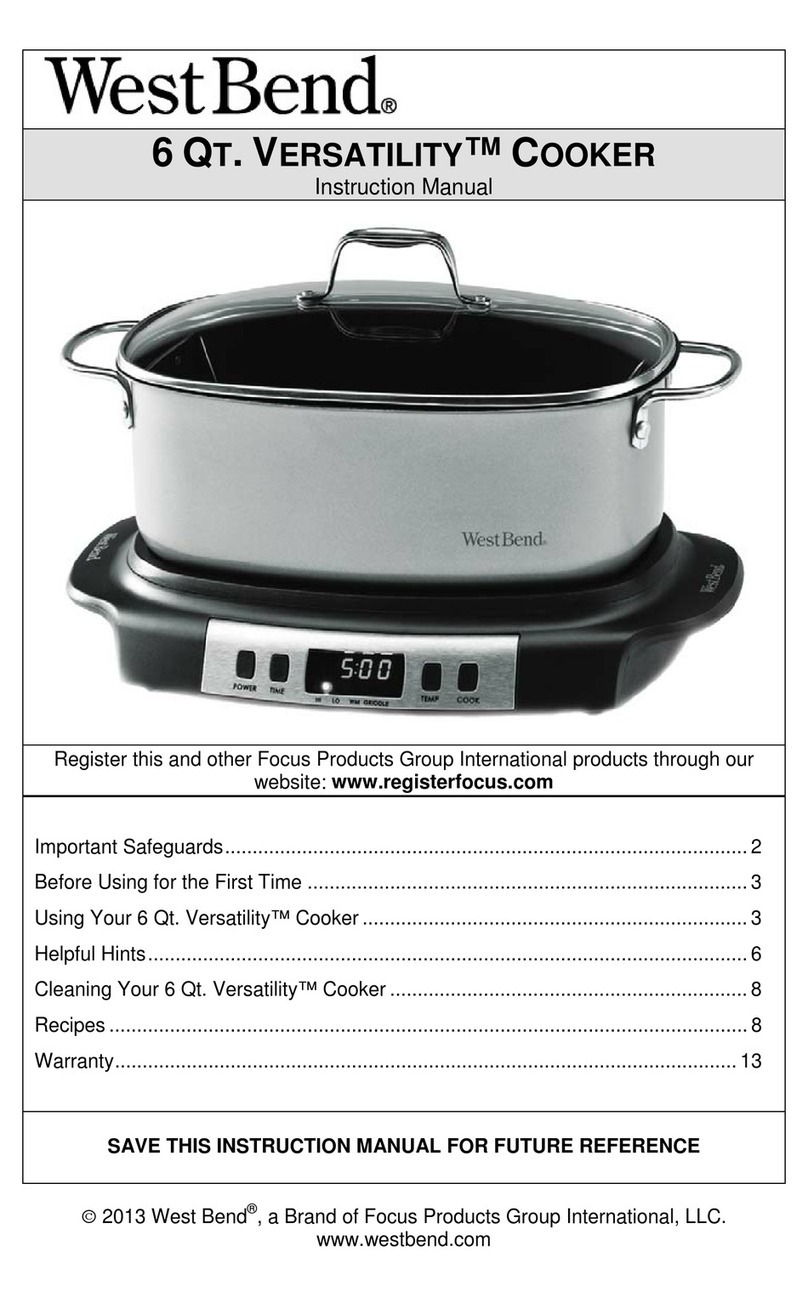
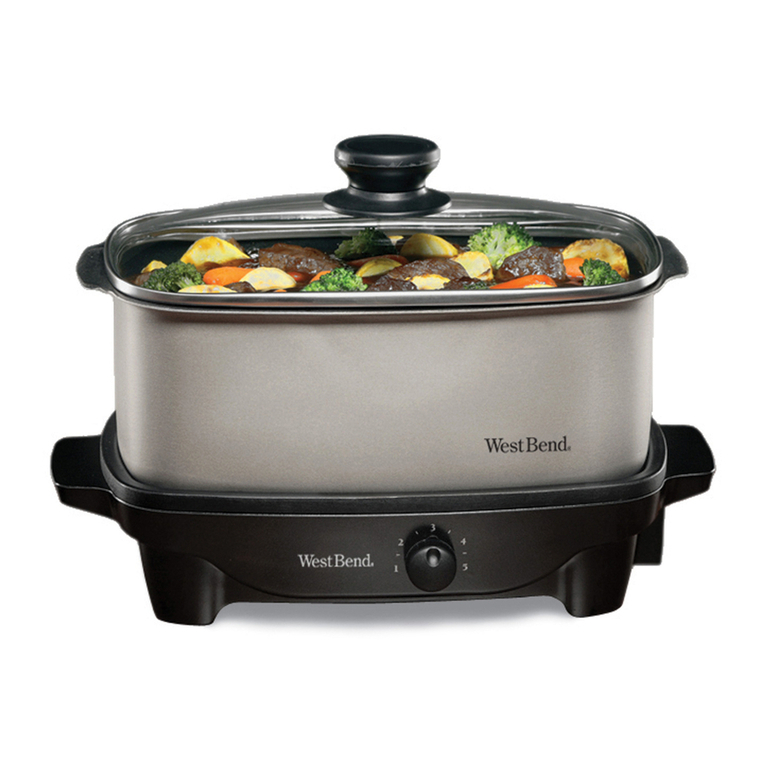
West Bend Versatility 84966 User manual

2009 West Bend®, a Brand of Focus Electrics, LLC.
www.focuselectrics.com
6
Q
T
.
V
ERSATILITY
™
C
OOKER
Instruction Manual
Register this and other Focus Electrics products through our website:
www.registerfocus.com
Important Safeguards............................................................................................... 2
Before Using for the First Time ................................................................................ 3
Using Your 6 Qt. Versatility™ Cooker ......................................................................4
Helpful Hints............................................................................................................. 6
Cleaning Your 6 Qt. Versatility™ Cooker ................................................................. 8
Recipes .................................................................................................................... 8
Warranty................................................................................................................. 13
SAVE THIS INSTRUCTION MANUAL FOR FUTURE REFERENCE

2
IMPORTANT SAFEGUARDS
To prevent personal injury or property damage, read and follow all instructions
and warnings.
When using electrical appliances, basic safety precautions should always be
followed including:
•Read all instructions, including these important safeguards and the care and use
instructions in this manual.
•Do not touch hot surfaces. Use handles or knobs and hot pads or oven mitts.
•Always unplug from outlet when not in use and before cleaning. Allow to cool
before putting on or taking off parts and before cleaning.
•Close supervision is necessary when this appliance is used by or near children.
•Do not operate any appliance with a damaged cord or plug, after the appliance
malfunctions, or has been damaged in any manner. For service information see
warranty page.
•The use of accessory attachments not recommended by Focus Electrics may
cause fire, electric shock, or injury.
•Do not use this appliance outdoors.
•Do not let cord hang over the edge of the table or counter, or touch hot surfaces.
•Do not place on or near a hot gas or electric burner, or in a heated oven.
•Extreme caution must be used when moving an appliance containing hot oil or
other hot liquids.
•Always attach plug to appliance first, then plug cord into the wall outlet. To
disconnect, turn any control to “OFF,” then remove plug from wall outlet.
•Do not use appliance for other than intended use.
•To protect against electric shock, do not immerse cord, plugs, or other electric
parts in water or other liquids.
•Do not attempt to repair this appliance yourself.
•A short power-supply cord is provided to reduce risks resulting from becoming
entangled in or tripping over a longer cord.
•Longer extension cords are available, but care must be exercised in their use.
While use of an extension cord is not recommended, if you must use one,
ensure that the marked electrical rating of the extension cord is equal to or
greater than that of the appliance. If the plug is of the grounded type, the
extension cord must be a grounding-type 3-wire cord. To avoid pulling, tripping
or entanglement, position the extension cord so that it does not hang over the
edge of the counter, table or other area where it can be pulled on by children or
tripped over.

3
•This appliance has a polarized plug (one blade is wider than the other). To
reduce the risk of electric shock, this plug is intended to fit into a polarized outlet
only one way. If the plug does not fit fully into the outlet, reverse the plug. If it
still does not fit, contact a qualified electrician. Do not attempt to modify the plug
in any way.
•Do not use an outlet or extension cord if the plug fits loosely or if the outlet or
extension cord feels hot.
•For household use only.
SAVE THESE INSTRUCTIONS
B
EFORE
U
SING FOR THE
F
IRST
T
IME
Please check all packaging material carefully before discarding. Accessory
parts may be contained within the packaging material.
Before using, wash the cooking pot, cover, and roasting rack as directed in the
“Cleaning your 6 Qt. Versatility™ Cooker” section of this manual. Wipe the non-stick
finish of the slow cooker heating base with a damp cloth and dry.
Using paper towel, wipe the non-stick interior of the cooking pot with a teaspoon of
vegetable oil. This will condition the non-stick finish to prevent sticking. NOTE: Do
NOT use shortening or butter to condition the finish. Leave a light film of oil on the
finish. The cooking pot’s non-stick interior will need to be reconditioned after each
time the cooking pot is 1) cleaned in an automatic dishwasher; 2) the finish is treated
with a special cleaner; 3) the finish is cleaned with lemon juice or vinegar to remove
a mineral film; or 4) when sticking becomes a problem during use. DO NOT
CONDITION THE NON-STICK SURFACE OF THE HEATING BASE BEFORE
USING IT AS A SLOW COOKER. The non-stick finish of heating base should only
be conditioned before it is used as a griddle.
Cover
Roasting Rack
Cooking Pot
Heating Base

4
U
SING
Y
OUR
6
Q
T
.
V
ERSATILITY
™
C
OOKER
To Use as a Slow Cooker:
1. Place heating base on dry, level, heat-resistant surface away from any edge.
2. Place foods into cooking pot, cover and place cooking pot onto heating base. If
you wish to brown or precook any foods before slow cooking, place cooking pot
directly on range top over medium heat. After foods are browned or cooked,
transfer cooking pot to heating base. NOTE: Use only plastic, rubber, wooden,
or non-metal cooking tools in the cooking pot. Use of metal cooking tools will
scratch the non-stick surface.
3. Attach cord to base, then plug cord into a 120 volt, AC electric outlet only. The
heating base will beep when plugged in. Nothing will show on the display until
the “POWER” button is pressed.
4. Press the “POWER” button. “SEL” will be displayed and “LO” temperature
setting is indicated with a flashing light. If you do not select a setting within 5
seconds, the slow cooker will default to “LO,” 9 hours.
5. Press “TEMP” to select “HI,” “LO,” keep warm “WM” or “Griddle” setting. Note:
Only “HI” or “LO” settings are available for programmed cooking times. Any time
the “TEMP” button is pressed, the time will reset to the default for that setting;
“LO,” 9 hours and “HI,” 5 hours.
6. Press ”TIME” button to scroll up to desired cooking time. You cannot program
the Versatility™ Slow Cooker to cook for longer than 12 hours. Note: The time
can be cycled from 1-12 hours. The clock starts at the default time; press the
“TIME” button past 12 hours to cycle to 1 hour.
•The timer, once set, will count down in minutes. If the “TIME” button is
pressed at any point, the time will cycle up to the next whole hour, and
then will increase in 1 hour increments.
7. Press “COOK” to start the cooking cycle. If “COOK” hasn’t been pressed within
5 seconds, the base will beep 5 times, indicating that it has begun the cooking
cycle. When the cooking cycle is completed, the program will shift to the keep
warm “WM” setting and timer will count up from zero showing the elapsed time
on warm. Note: The keep warm “WM” setting will automatically shut off after 24
hours of heating.
8. Press the “POWER” button to turn the appliance off. Pressing “POWER” at any
point in any cooking cycle, or keep warm “WM,” will turn the appliance off. All
settings will then be reset back to default when power is turned back on. No
previous settings are saved when the 6 Qt. Versatility™ Cooker is powered off.
9. Slow cooker base offers heat settings of keep warm “WM,” “LO,” “HI,” and
“GRIDDLE.” “WM” should only be used to keep cooked foods warm for serving,
whereas “LO” and “HI” are to be used for actual cooking of foods. NOTE: DO
NOT USE THE KEEP WARM “WM” SETTING FOR ACTUAL COOKING OF
RAW FOODS AS THE SLOW COOKER WILL NOT GET HOT ENOUGH TO
COOK FOODS. DO NOT USE THE GRIDDLE SETTING FOR SLOW
COOKING AS OVERCOOKING WILL OCCUR.

5
10. Select heat setting and cook food for recommended time as given in recipe or
the temperature guide below. As a general guideline, most meat and vegetable
combinations need 7 to 10 hours of cooking at “LO,” or 4 to 6 hours of cooking
at “HI.” Meats will become most tender when cooked for the longer time at the
lower heat setting. Avoid removing cover when slow cooking as cooking time will
be increased due to loss of heat. Remove cover only when needed to stir
occasionally or when adding ingredients.
To Use as a Griddle:
The heating base can be used as a light duty griddle.
1. Before using the heating base as a griddle, condition the non-stick surface
with vegetable oil.
2. Press the “TEMP” button until “GRIDDLE” is selected. Press the “COOK”
button to start the griddle, or wait 5 seconds, and the base will beep 5
times, indicating that the “GRIDDLE” setting has been selected and the
griddle has started heating. For best results, preheat base for about 8 - 10
minutes, then cook foods to desired doneness. Please refer to the
“TEMPERATURE GUIDE” below. The heating base will perform only as a
light duty griddle. “GRIDDLE” setting should NEVER be used as a slow
cooker setting.
3. When food is done cooking, press “POWER” to turn the appliance off.
Unplug the cord from the outlet, and allow to cool completely. Follow
cleaning instructions in the “Cleaning Your 6 Qt. Versatility™ Cooker”
section of this manual.
Note: The timer cannot be used on this setting, and will not shift to
keep warm “WM” at any point. The griddle will remain on indefinitely
until “POWER” is pressed, or the appliance is unplugged.
Do not strike utensils against vessel or cover rim. Glass cover may shatter as
a result.
•A small amount of smoke and/or odor may occur upon heating due to the
release of manufacturing oils – this is normal.
•Some minor expansion/contraction sounds may occur during heating and
cooling – this is normal.
T
EMPERATURE
G
UIDE
Be sure to cook foods to recommended food-safe temperatures. Always check with a
meat thermometer to ensure that the center is cooked completely.
MEAT INTERNAL TEMPERATURES
Beef Rare 140°F/60°C
Medium 160°F/71°C
Well 170°F/76°C
Pork Fresh 170°F/76°C
Smoked 160°F/71°C
Canned 140°F/60°C
Lamb 170°F to 180°F/76°C to 82°C
Veal 170°F/76°C
Poultry 180°F/82°C

6
H
ELPFUL
H
INTS
•Adapting Recipes to Slow Cooking: Many of your favorite oven and range top
recipes can be adapted to slow cooking with a few minor changes. Here are
some important points to remember:
Amount of Liquid: Because little moisture evaporates during slow cooking,
reduce amount of liquid in your recipe by one-half (1 cup of liquid is enough
for most recipes). For soup recipes, add all ingredients except water or
broth to vessel; add only enough liquid to cover ingredients.
Amount of Seasoning: Reduce amount of seasoning in proportion to
reduced amount of liquid. Use whole or leaf herbs and spices rather than
crushed or ground forms.
Slow Cooking Meat: Less tender, less expensive cuts of meat are better
suited to slow cooking than expensive cuts of meat. Remove excess fat
before slow cooking if desired. Meat can be browned in the cooking pot on
top of the range before slow cooking.
Slow Cooking Vegetables: Add partially frozen vegetables, Chinese
vegetables and fresh mushrooms during the last hour of cooking. Strong-
flavored vegetables such as spinach, eggplant, okra and collard greens
should be precooked before adding to cooker. The amount of onion
normally used in your recipe should be reduced because its flavor gets
stronger during cooking. In most cases, fresh vegetables take longer to
cook than meats because liquid simmers rather than boils.
Slow Cooking Raw Meats and Vegetables: Most raw meat and vegetable
combinations need at least 4 to 6 hours of cooking at “HI” or 7 to 10 hours
at “LO.”
Slow Cooking Fish and Seafood: Fresh or thawed seafood and fish fall
apart during long hours of cooking. Add these ingredients an hour before
serving and cook at “HI.”
Slow Cooking Milk, Sweet or Sour Cream and Cheese: Because milk,
sour or sweet cream and cheese break down during long hours of cooking,
add these ingredients just before serving or substitute undiluted condensed
canned soups or evaporated milk. Processed cheese tends to give better
results than aged cheese.
Rice and Pasta: Rice and pasta may either be cooked separately, or
added uncooked during last hour of cooking time. If added uncooked, make
sure there is at least 1 to 1½ cups of liquid in vessel and heat is set at “LO”
or higher.
Dumplings: Dumplings may be cooked in broth or gravy at “HI.” Drop by
spoonfuls on simmering broth or gravy. Cook covered for 30 minutes.
Thickening Juices for Gravies and Sauces: To thicken juices for gravies
and sauces, add 2 to 3 tablespoons of quick cooking tapioca at start, or
thicken after cooking by adding a smooth paste made of 2 to 4 tablespoons
cornstarch or flour and ¼ cup cold water. Bring to a boil at “HI.” Solid foods
may be removed first.
•Don’t Remove Cover During Cooking: To retain heat, moisture and food
flavor, don’t remove cover during cooking unless necessary for adding additional
ingredients.

7
•Using Cooking Tools on Non-Stick Finish: The following types of cooking
tools may be used on the non-stick finish: plastic, rubber or wooden. Do not use
sharp edged metal cooking tools (forks, knives, mashers) as these could scratch
the non-stick finish.
•Using Cooking pot on Top of Range: The cooking pot (without heating base)
can be used for range top cooking. Place vessel on large range unit. Use
medium to low heat. The use of low to medium heat will prevent foods from
overcooking, reduce spattering and help retain natural juices. Do not use high
heat except for bringing liquids to a boil. If cooking on a gas range, do not let
flame extend up side of cooking pot. ALWAYS USE OVEN MITTS WHEN
USING COOKING POT AND COVER ON RANGE UNIT.
•Cooking Meats: When cooking meats, preheat empty cooking pot over medium
to medium-low heat for 2 to 3 minutes or until a drop of water sizzles in cooking
pot. To prevent sticking of lean meats, you may wish to add a small amount of
cooking oil. Add meat and brown as desired. Cover cooking pot and reduce heat
to low for cooking on range top OR transfer cooking pot to heating base and
cook at desired setting. The shortest cooking time will be at “HI.”
•Using Cooking pot in Oven: The cooking pot (without heating base) can be
used in a conventional or convection oven up to preheated temperatures of
350°F/177°C. Cooking pot may be covered with aluminum foil for oven use.
ALWAYS USE OVEN MITTS WHEN USING COOKING POT IN OVEN.
•DO NOT USE THE COOKING POT IN A MICROWAVE OVEN, OVER A
CAMPFIRE OR UNDER AN OVEN BROILER UNIT TO PREVENT DAMAGE
TO THE COOKING POT OR OVEN.
•Using a Roasting Rack: Your slow cooker includes a small wire rack for
roasting meats and poultry. To use the rack, simply place into bottom of cooking
pot and place roast, chicken, or ham onto rack. Add a small amount of liquid to
cooking pot before cooking. If you wish, the meat can be browned in cooking pot
on top of range before roasting. The rack can also be used for steaming fresh
vegetables such as broccoli and corn-on-the-cob. Add 1 cup of water to cooking
pot to steam vegetables. Cook on top of range over medium to medium-low heat
or on heating base at “HI” to desired doneness.
•Bread, Cakes & Desserts: Use an 8 x 4-inch or a 9 x 5-inch loaf pan. Place the
roasting rack in the pan before placing the loaf pan. Check to ensure that your
pan fits completely into the cooking pot before mixing any ingredients. To
prevent condensation from dripping onto food while baking, place double layer
of paper toweling and single layer of aluminum foil across top of cooking pot.
Cover and bake according to recipe.

8
C
LEANING
Y
OUR
6
Q
T
.
V
ERSATILITY
™
C
OOKER
1. Press “POWER” to turn the appliance off. Unplug the cord from the outlet and
allow the entire appliance (base, cooking pot, rack, cover) to cool completely
before cleaning. Set the cooking pot and cover on a dry, heat-protective surface
for gradual cooling. NOTE: Do not run cold water over hot glass cover as it
may crack or shatter if cooled suddenly.
2. Wipe heating base and cord with a damp cloth.
3. The cooking pot, rack, and glass cover may be washed using warm, soapy
water by hand or cleaned in the dishwasher. If dishwasher cleaning, avoid
contact between pieces to prevent damage. The non-stick surface of the
cooking pot must be reconditioned with cooking oil after it is cleaned in a
dishwasher to restore the non-stick properties. Do not use metal scouring pads
or cleansers as damage can occur. Wipe with distilled vinegar to remove water
spots or mineral deposits. Rewash with warm, soapy water, rinse and dry.
Cleaning Heating Base: Always unplug cord from electrical outlet and allow base to
cool completely before cleaning. With a spoon or baster, remove any fat or grease
that has collected on the griddle surface. Wipe oil residue from base with paper
towel. Wipe non-stick finish with a damp, soapy dishcloth or nylon-scouring pad
recommended for non-stick finishes. Clean finish thoroughly, wiping base several
times with a clean, damp cloth to remove soap residue.
If a tacky oil film forms on the non-stick finish of base, wipe with a dry cloth to
remove. If this residue is not removed, it will adhere to the finish when reheated and
become impossible to remove.
R
ECIPES
Beef Vegetable Soup
1½ lbs. Beef soup bones or 1 pound beef
short ribs
1½ qt. Water
1 tsp. Salt
¼ tsp. Pepper
2 Carrots, chopped
2 Ribs celery, chopped
2 Potatoes, peeled and chopped
1 Small onion, chopped
1 Bay leaf
1 16 oz Can whole tomatoes, undrained
1. Place soup bone, water, salt, pepper, carrots, celery, potatoes, onion and
bay leaf into cooking pot. Cover and slow cook at “LO” for 6 to 7 hours.
2.
Remove soup bone and cool slightly. Remove meat from bones and return
to soup with tomatoes. Cover and slow cook an additional hour. Noodles or
barley may be added, if desired.

9
Herb Pork Roast
1 tsp. Salt
1 tsp. Thyme
½ tsp. Sage
½ tsp. Ground cloves
1 tsp. Grated lemon peel
4-5 lbs. Pork roast, boneless or bone-in
4 Large cloves garlic, quartered
2 tbsp. Water, optional
2 tbsp. Cornstarch, optional
1. In small bowl combine salt, thyme, sage, cloves and lemon peel. Rub into
pork roast. Cut 16 small pockets into roast and insert garlic pieces.
2. Place roast in cooking pot. Cover and cook at “LO” for 7 to 9 hours or
at ”HI” for 4 to 5 hours. Insert meat thermometer into roast to ensure
internal temperature is 170°F/77°C or higher before serving. Allow roast to
stand 10-15 minutes before carving. Remove garlic pieces. Juices may be
thickened for gravy, if desired. Dissolve 2 tablespoons cornstarch in 2
tablespoons water. Stir slowly into juices until thickened at “HI.”
Pepper Steak
1½ lbs Round steak, cut into thin strips
1 Clove garlic, minced
1 cup Chopped onion
½ tsp. Salt
¼ tsp. Pepper
¼ tsp. Ginger
1 tsp. Sugar
½ cup Soy sauce
1 Large green pepper, cut into thin
strips
4 Tomatoes, cut into eighths, or 1 1-
pound can whole tomatoes, undrained
1 lb. Can bean sprouts, drained
1 tbsp. Cornstarch
½ cup Cold water
1. Brown steak in cooking pot on range unit over medium heat. Transfer
cooking pot to heating base using hot pads.
2. In a small bowl, combine garlic, onion, salt, pepper, ginger, sugar and soy
sauce. Pour over steak. Cover and slow cook at “LO” for 6 to 8 hours or “HI”
for 4 to 5 hours.
3. Add green peppers, tomatoes, and bean sprouts, stir to blend. Slow cook
an additional hour. Just before serving, increase heat to “HI.” Combine
cornstarch and water. Gradually add to pepper steak, stirring until
thickened. Reduce to keep warm (“WM”) for serving.
Corned Beef and Cabbage
3 - 4 lb. Corned beef brisket
1 Medium onion, sliced
½ tsp. Celery seed
½ tsp. Mustard seed
1 Clove garlic, minced
1 Bay leaf
Water
1 Small head cabbage, cut into wedges
1.
Place brisket with liquid and spices from package in cooking pot. Add onion,
celery seed, mustard seed, garlic and bay leaf. Add just enough water to
cover brisket (about 4 cups). Cover and cook at “LO” for 7 to 9 hours or until
brisket is fork tender.
2. During last hour of cooking, add cabbage wedges and continue cooking at
“LO.” Discard cooking liquid and spices.

10
Hearty Chicken Noodle Soup
2 lbs. Chicken parts, skinned if desired
5 cups Water
1 Medium onion, chopped
4 Carrots, cut into ½-inch pieces
4 Ribs celery, cut into ½-inch pieces
1 16 oz. Can whole tomatoes, cut up
1 tbsp. Instant chicken bouillon
1 tbsp. Minced parsley
1 tsp. Salt
½ tsp. Dried rosemary
¼ tsp. Pepper
1 cup Uncooked fine egg noodles
1. Combine all ingredients, except egg noodles, in cooking pot. Cover and
cook at “LO” for 6 to 8 hours or at “HI” for 3 to 4 hours or until chicken and
vegetables are tender.
2.
Remove chicken pieces from cooking pot and set aside to cool slightly.
Increase heat to “HI” and add noodles, stirring to blend. Cover and continue
to cook for 30 minutes.
3.
Meanwhile, remove chicken from bones and cut into bite-size pieces.
Return meat to cooking pot to heat as noodles finish cooking. Reduce heat
to keep warm (“WM”) for serving.
Chili
1½ lbs. Ground beef
1 cup Onion, chopped
1 cup Green pepper, chopped
1 Clove garlic, minced
1 28 oz. Can whole tomatoes, undrained
1 16 oz Can kidney beans, undrained
1½ tbsp. Chili powder
1 tsp. Salt
1 tsp. Ground cumin
½ tsp. Pepper
1. Brown ground beef with onion and green pepper in cooking pot over
medium heat of range unit. Remove excess grease.
2. Transfer cooking pot to heating base using hot pads. Add remaining
ingredients, stir to blend. Cover and slow cook at “LO” for 7 to 8 hours.
Reduce heat to keep warm (“WM”) for serving.
Fish Chowder
2 lbs. Fresh or frozen fish fillets (haddock,
perch, cod, flounder)
2 tbsp. Lemon juice
4 Slices bacon
1 cup Chopped onion
¼ cup Diced celery
4 Medium potatoes, cut into cubes
4 cups Hot water
1 16 oz Can stewed tomatoes
1 cup Diced carrots
2 tsp. Salt
¼ tsp. Pepper
1 tbsp. Worcestershire sauce
2 tbsp. Dry sherry, optional
1. Cut fish into chunks and remove bones. Sprinkle with lemon juice. Cover
and refrigerate.
2. Fry bacon in cooking pot on range top over medium heat until crispy. Drain
on paper towel, crumble and set aside.
3. Sauté onion and celery in bacon drippings until brown. Transfer cooking pot
to heating base using hot pads. Add potatoes, water, tomatoes, carrots, salt
and pepper to cooking pot. Stir to combine. Cover and cook at “LO” for 4 to
5 hours or at “HI” for 2 to 3 hours.
4.
Drain lemon juice from fish. Add fish, Worcestershire sauce and sherry to
cooking pot. Simmer for 1 hour or until fish flakes easily with fork. Reduce
heat to keep warm (“WM”) for serving. Garnish with crumbled bacon.

11
German Beef Stew
1½ lbs. Beef chuck, cut into 2-inch cubes
2 tbsp. Flour
½ tsp. Celery salt
¼ tsp. Garlic powder
½ tsp. Ground ginger
¼ tsp. Pepper
1 lb. Can whole tomatoes, undrained
2 cups Thinly sliced carrots
¼ cup Sherry cooking wine
¼ cup Dark molasses
¼ cup Raisins
1. Place beef in cooking pot. In a small bowl, combine flour, celery salt, garlic
powder, ground ginger and pepper. Sprinkle over beef.
2. In a bowl, combine tomatoes, carrots, wine and molasses. Pour over beef.
3. Cover and place cooking pot on base. Simmer at “LO” for 6 to 8 hours. Add
raisins 30 minutes before serving. Reduce heat to keep warm (“WM”) for
serving. Serve over hot cooked noodles.
Cheese Curried Entree
2 10 oz. Packages frozen chopped
broccoli, partially thawed
3 cups (¾ pound) diced cooked ham,
turkey or chicken
1 11 oz Can condensed cheddar
cheese soup
1 cup Water
½ cup Salad dressing or mayonnaise
¼ cup Finely chopped onion
1 tbsp. Lemon juice
½ tsp. Curry powder
1. Place broccoli evenly in bottom of cooking pot. Add ham, turkey or chicken.
2. Combine soup, water, mayonnaise, onion, lemon juice and curry powder in
small mixing bowl; stir to blend. Pour soup mixture into cooking pot.
3. Place cooking pot on base, cover and simmer at “HI” for 2 hours or “LO” for
3 to 4 hours; or until broccoli is fork tender. Reduce heat to keep warm
(“WM”) for serving. Serve over toast or hot biscuits.
Country Ribs with Apples ‘N Kraut
3 lbs. Lean country-style pork ribs,
trimmed of any excess fat
Salt and pepper
1 16 oz Can sauerkraut, undrained
1 Medium onion, thinly sliced and
separated into rings
1 8 oz Can mushrooms stems and
pieces, drained
1 Large or 2 small apples, cored and
cut into wedges
¼ cup Brown sugar
½ tsp. Celery seed
1. Preheat cooking pot on electric or gas range top heating unit over medium
heat. Add ribs in batches to brown. Season with salt and pepper.
2. Return all ribs to cooking pot. Layer sauerkraut, onion, mushrooms, apple
wedges and brown sugar over ribs. Sprinkle with celery seed.
3. Place cooking pot on base, cover and cook at “LO” for 7 to 9 hours or at
“HI” for 3 to 4 hours until meat is tender. Reduce heat to keep warm (“WM”)
for serving.

12
Carrot Cake
2 cups Flour
2 cups Sugar
1 tsp. Baking soda
1 tsp. Salt
1 cup Vegetable oil
4 Eggs
3 cups Grated carrots
1 tsp. Cinnamon
1. Grease bottom only of a 9 x 5-inch or 8 x 4-inch loaf pan with solid
hydrogenated shortening. Dust with flour and shake out excess. Set
covered cooking pot on base and preheat at “HI” while mixing ingredients.
2. In mixing bowl, sift flour, sugar, baking soda and salt. Add vegetable oil and
stir until ingredients are moistened. Add eggs one at a time, beating well
after each egg is added. Stir in grated carrots and cinnamon until evenly
mixed. Pour batter into pan. Place pan in cooking pot.
3. Cover and bake at “HI” for 2 hours. Do not remove cover during this time.
To test for doneness at end of recommended baking time, insert a metal
cake tester in several places including center of cake. If cake tester comes
out clean, cake is done. If batter clings to cake tester, continue baking in
15-minute intervals. Remove cake from pan and cool on rack. Frost with
softened cream cheese, if desired. Makes a 1½-pound cake.
Cranberry Nut Bread
2 cups (8-ounces) fresh or frozen
cranberries
½ cup Walnuts
2 cups Flour
1 cup Sugar
1½ tsp. Baking powder
½ tsp. Baking soda
½ tsp. Salt
6 tbsp. Butter or margarine
1 Egg
1 tbsp. Grated orange peel
½ cup Orange juice
1. Grease 9 x 5-inch or 8 x 4-inch loaf pan with solid hydrogenated shortening.
Dust with flour and shake out excess. Set covered cooking pot on base and
preheat at “HI” while mixing ingredients.
2. Grind cranberries and walnuts with coarse blade of food chopper. In a large
mixing bowl, combine flour, sugar, baking powder, baking soda and salt.
Cut in butter or margarine to form a coarse mixture. Make an indentation in
mixture and add egg, orange peel and orange juice. Beat only until lumps
disappear. Add chopped cranberries and walnuts. Stir until evenly mixed.
Pour batter into pan. Place pan in cooking pot.
3. Cover and bake at “HI” for 3 hours. Do not remove cover during this time.
To test for doneness at end of recommended baking time, insert a metal
cake tester in several places including center of bread. If cake tester comes
out clean, bread is done. If batter clings to cake tester, continue baking for
15-minute intervals. Remove bread from pan and cool on rack. Makes a
1½-pound loaf.

13
L5800 01/10 West Bend
®
, una Marca de Focus Electrics, LLC. Impreso en China
P
RODUCT
W
ARRANTY
Appliance 1 Year Limited Warranty
Focus Electrics, LLC (“Focus Electrics”) warrants this appliance from failures in the material
and workmanship for one (1) year from the date of original purchase with proof of purchase,
provided the appliance is operated and maintained in conformity with the provided Instruction
Manual. Any failed part of the appliance will be repaired or replaced without charge at Focus
Electrics’ discretion. This warranty applies to indoor household use only.
This warranty does not cover any damage, including discoloration, to any non-stick surface of
the appliance. This warranty is null and void, as determined solely by Focus Electrics if the
appliance is damaged through accident, misuse, abuse, negligence, scratching, or if the
appliance is altered in any way.
THIS WARRANTY IS IN LIEU OF ALL IMPLIED WARRANTIES, INCLUDING WARRANTIES
OF MERCHANTABILITY, FITNESS FOR A PARTICULAR PURPOSE, PERFORMANCE, OR
OTHERWISE, WHICH ARE HEREBY EXCLUDED. IN NO EVENT SHALL FOCUS
ELECTRICS BE LIABLE FOR ANY DAMAGES, WHETHER DIRECT, INDIRECT,
INCIDENTAL, FORSEEABLE, CONSEQUENTIAL, OR SPECIAL, ARISING OUT OF OR IN
CONNECTION WITH THIS APPLIANCE.
If you think the appliance has failed or requires service within its warranty period, please
contact the Focus Electrics Customer Service Department at (866) 290-1851, or e-mail us at
service@focuselectrics.com. A receipt proving the original purchase date will be required for all
warranty claims, hand written receipts are not accepted. You may also be required to return
the appliance for inspection and evaluation. Return shipping costs are not refundable. Focus
Electrics is not responsible for returns lost in transit.
Valid only in USA and Canada
R
EPLACEMENT PARTS
Replacement parts, if available, may be ordered directly from Focus Electrics, LLC several
ways. Order online at www.focuselectrics.com, e-mail service@focuselectrics.com, over the
phone by calling (866)290-1851, or by writing to:
Focus Electrics, LLC
Attn: Customer Service
P. O. Box 2780
West Bend, WI 53095
To order with a check or money order, please first contact Customer Service for an order total.
Mail your payment along with a letter stating the model or catalog number of your appliance,
which can be found on the bottom or back of the unit, a description of the part or parts you are
ordering, and the quantity you would like. Your check should be made payable to Focus
Electrics, LLC.
Your state/province’s sales tax and a shipping fee will be added to your total charge. Please
allow two weeks for processing and delivery.
This manual contains important and helpful information regarding the safe use and care of your
new Focus Electrics product. For future reference, attach dated sales receipt for warranty proof
of purchase and record the following information:
Date purchased or received as gift: _______________________________________________
Where purchased and price, if known: _____________________________________________
Item number and Date Code (shown bottom/back of product):___________________________

N
OTES

2009 West Bend®, une Marque de Focus Electrics, LLC.
www.focuselectrics.com
M
IJOTEUSE
V
ERSATILITY
™
6
Q
T
.
(5.7L
T
.)
Mode d’emploi
Enregistrez ce produit et les autres produits Focus Electrics sur notre site Internet :
www.registerfocus.com
Précautions Importantes .......................................................................................... 2
Avant la Première Utilisation .................................................................................... 3
Utilisation de votre Mijoteuse Versatility™ 6 Qt. (5.7Lt.) .......................................... 4
Astuces .................................................................................................................... 6
Nettoyage de votre Mijoteuse Versatility™ 6 Qt. (5.7Lt.).......................................... 8
Recettes................................................................................................................... 9
Garantie ................................................................................................................. 14
CONSERVEZ CE MANUEL D’INSTRUCTIONS POUR RÉFÉRENCE FUTURE

2
PRECAUTIONS IMPORTANTES
Pour empêcher toute blessure physique ou tout dommage matériel, lisez et
suivez toutes les consignes et mises en garde.
Lorsque vous utilisez des appareils électriques, les précautions de sécurité
élémentaires devraient toujours être respectées, notamment :
•Lisez toutes les instructions, notamment les présentes précautions importantes,
ainsi que les consignes pour l’entretien de ce manuel.
•Ne touchez pas les surfaces à haute température. Utilisez les poignées carrées
ou rondes et des maniques ou des gants de cuisine.
•Débranchez toujours l’appareil du secteur lorsque vous ne l’utilisez pas et avant
de le nettoyer. Laissez refroidir avant de mettre en place ou de retirer des pièces
ainsi qu’avant de procéder au nettoyage.
•Une surveillance rapprochée est nécessaire en cas d’utilisation d’un appareil par
des enfants ou en présence d’enfants.
•N’utilisez aucun appareil dont le cordon ou la fiche sont endommagés, si
l’appareil a dysfonctionné ou s’il a été détérioré de quelque manière que ce soit.
Pour des renseignements sur les réparations, voir la page de garantie.
•L'utilisation des accessoires non recommandés par Focus Electrics risque de
provoquer le feu, la décharge électrique ou la blessure.
•N’utilisez pas cet appareil à l’extérieur.
•Ne laissez pas le cordon pendre depuis l’extrémité de la table ou du plan de
travail, ou ne le laissez pas entrer en contact avec une surface à haute
température.
•Ne placez pas l’appareil sur ou à proximité d’une gazinière chaude ou d’un
brûleur électrique, ou dans un four chaud.
•Vous devez faire preuve d’une extrême prudence lorsque vous déplacez un
appareil contenant de l’huile ou d’autres liquides à haute température.
•Fixez toujours la fiche à l’appareil en premier, avant de brancher la fiche dans la
prise secteur. Pour débrancher l’appareil, tournez toute commande sur « OFF »
puis retirez la fiche de la prise murale.
•N’utilisez pas l’appareil pour un usage autre que celui pour lequel il a été conçu.
•Pour vous protéger contre tout choc électrique, n’immergez pas le cordon, les
fiches ni aucune autre pièce électrique dans l’eau ni dans tout autre liquide.
•Ne tentez pas de réparer cet appareil vous-même.
•Le cordon d’alimentation fourni est court pour réduire les risques qu’une
personne se prenne les pieds ou trébuche sur un cordon plus long.
•Des cordons de rallonge plus longs sont disponibles, mais vous devez faire
preuve de prudence lors de leur utilisation. Bien que l’utilisation d’un cordon de
rallonge ne soit pas recommandée, si vous devez en utiliser un, assurez-vous
que la puissance nominale indiquée pour le cordon de rallonge est égale ou
supérieure à celle de l’appareil. Si la fiche est raccordée à la terre, le cordon de
rallonge doit lui aussi proposer un raccordement à la terre. Pour éviter de tirer
sur le cordon, de trébucher ou de s’emmêler dedans, positionnez le cordon de
rallonge de sorte qu’il ne pende pas depuis l’extrémité du plan de travail, de la
table ou de toute zone où des enfants pourraient tirer dessus ou trébucher.

3
•Cet appareil est pourvu d’une fiche polarisée (une lame est plus large que
l’autre). Pour réduire le risque d’électrocution, cette fiche est conçue pour
s’encastrer dans une prise secteur polarisée dans un sens uniquement. Si la
fiche ne s’insère pas complètement dans la prise secteur, retournez la fiche. Si
elle ne s’encastre toujours pas, contactez un électricien qualifié. Ne tentez pas
de modifier la fiche de quelque manière que ce soit.
•N’utilisez pas une prise secteur ou un cordon de rallonge si la fiche s’adapte
avec un jeu ou si la prise secteur ou le cordon de rallonge vous semblent
chauds.
•Pour une utilisation domestique uniquement.
CONSERVEZ CES CONSIGNES
A
VANT LA
P
REMIÈRE
U
TILISATION
Veuillez vérifier la totalité de l’emballage attentivement avant de le jeter. Il est
possible que l’emballage contienne des accessoires.
Avant la première utilisation, lavez la marmite, le couvercle et la grille à rôtir en
suivant les instructions de la section « Nettoyage de votre Mijoter Versatility™ 6 Qt.
(5.7Lt.) » de ce manuel. Essuyez la finition antiadhésive du socle chauffant de la
cocotte mijoteuse avant un chiffon humide puis séchez. À l’aide d’une serviette en
papier, enduisez l’intérieur antiadhésif de la marmite avec le contenu d’une cuiller à
café d’huile végétale. Ceci va conditionner la finition antiadhésive pour l’empêcher
de coller. REMARQUE : Veuillez ne PAS utiliser de matière grasse ou de beurre
pour conditionner la finition. Laissez une fine pellicule d’huile sur la finition.
L’intérieur antiadhésif de la marmite aura besoin d’être reconditionné à chaque fois
que 1) la marmite sera nettoyée u lave-vaisselle; 2) la finition sera traitée avec un
nettoyant spécial; 3) la finition sera nettoyée avec du jus de citron ou du vinaigre
pour éliminer une pellicule minérale; ou 4) lorsque l’adhérence des aliments à la
finition posera problème pendant l’utilisation. NE CONDITIONNEZ PAS LA
SURFACE ANTIADHÉSIVE DU SOCLE CHAUFFANT AVANT D’UTILISER
L’APPAREIL EN TANT QUE COCOTTE MIJOTEUSE. La finition antiadhésive du
socle chauffant devrait être conditionnée uniquement avant son utilisation en tant
que grille de cuisson.
Couvercle
Grille à Rôtir
Marmite
Socle Chauffant

4
U
TILISATION DE VOTRE
M
IJOTEUSE
V
ERSATILITY
™
6
Q
T
.
(5.7L
T
.)
Pour une Utilisation en tant que Mijoteuse :
1. Placez le socle chauffant sur une surface résistante à la chaleur plane et sèche,
à l’écart de toute extrémité.
2. Placez les aliments dans la marmite, couvrez-la et placez la marmite sur le socle
chauffant. Si vous souhaitez dorer ou précuire des aliments avant de les faire
mijoter, placez la cocotte mijoteuse directement sur la gazinière à feu moyen. Une
fois que les aliments ont doré ou cuit, transférez la marmite sur le socle chauffant.
REMARQUE : Utilisez uniquement des ustensiles de cuisine en plastique, en
caoutchouc, en bois ou des ustensiles non métalliques dans la marmite.
L’utilisation d’ustensiles métalliques risque de rayer la surface antiadhésive.
3. Fixez le cordon d’alimentation au socle, puis branchez le cordon sur une prise
secteur 120 volts AC uniquement. Le socle chauffant va émettre une sonnerie
une fois branché. Rien ne s’affiche à l’écran tant que le bouton « POWER »
(Marche) n’a pas été enfoncé.
4. Appuyez sur le bouton « POWER » (Marche). « SEL » s’affiche et le réglage de
température « LO » (Faible) est indiqué par une lumière clignotante. Si vous ne
sélectionnez aucun réglage au bout de 5 secondes, la cocotte mijoteuse passe
au réglage par défaut « LO » (Faible), 9 heures.
5. Appuyez sur « TEMP » (Température) pour sélectionner le réglage « HI »
(Élevé), « LO » (Faible), maintien au chaud « WM » ou « GRIDDLE » (Grille).
Remarque : Seuls les réglages « HI » (Élevé) ou « LO » (Faible) sont
disponibles pour les temps de cuisson programmés. À chaque fois que vous
appuyez sur le bouton « TEMP » (Température), la température revient au
réglage par défaut ; « LO » (Faible), 9 heures et « HI » (Élevé), 5 heures.
6. Appuyez sur le bouton « TIME » (Temps) pour faire défiler les propositions
jusqu’au temps de cuisson souhaité. Vous ne pouvez pas programmer la
Cocotte mijoteuse Versatility™ pour une cuisson de plus de 12 heures.
Remarque : La durée peut faire un cycle de 1-12 heures. L’horloge démarre à
la durée par défaut ; appuyez sur le bouton « TIME » (Temps) après 12 heures
pour revenir à 1 heure.
•Le minuteur, une fois réglé, commencera à décompter les minutes. Si
vous appuyez sur le bouton « TIME » (Temps), quel que soit le moment,
le décompte du temps reprendra jusqu’à la prochaine heure complète,
puis augmentera par incrémentations d’une heure.
7. Appuyez sur « COOK » (Cuisson) pour démarrer le cycle de cuisson. Si vous
n’appuyez pas sur le bouton « COOK » (Cuisson) au bout d’une durée de 5
secondes, le socle émet 5 bips, indiquant que le cycle de cuisson a commencé.
Une fois le cycle de cuisson terminé, le programme passe au réglage de
maintien au chaud « WM » et le minuteur commence un décompte à partir de
zéro pour indiquer le temps écoulé dans la fonction de maintien au chaud.
Remarque: La fonction de maintien au chaud « WM » se désactive
automatiquement après 24 heures de chauffe.
8. Appuyez sur le bouton « POWER » (Marche) pour mettre l’appareil hors
tension. Le fait d’appuyer sur « POWER » (Marche) à tout moment pendant le

5
cycle de cuisson, ou sur le bouton de maintien au chaud « WM », mettra
l’appareil hors tension. Tous les paramètres seront alors réinitialisés aux
paramètres par défaut lorsque l’appareil sera remis sous tension. Aucun
paramètre antérieur ne sera conservé lorsque la Mijoteuse Versatility™ 6 Qt.
(5.7Lt.) sera mise hors tension.
9. Le socle de la cocotte mijoteuse propose des réglages de température qui sont
le maintien au chaud « WM », « LO » (Faible), « HI » (Élevé) et « GRIDDLE »
(Grille). Le réglage « WM » devrait être utilisé uniquement pour maintenir au
chaud des aliments cuits prêts pour le service, tandis que « LO » (Faible) et
« HI » (Élevé) sont censés être utilisés pour véritablement cuire des aliments.
REMARQUE : N’UTILISEZ PAS LA FONCTION DE MAINTIEN AU CHAUD
« WM » POUR CUIRE DES ALIMENTS CRUS CAR LA COCOTTE
MIJOTEUSE NE VA PAS ATTEINDRE UNE TEMPÉRATURE
SUFFISAMMENT ÉLEVÉE POUR CUIRE LES ALIMENTS. N’UTILISEZ PAS
LE RÉGLAGE GRILLE POUR MIJOTER DES ALIMENTS CAR CEUX-CI
SERAIENT TROP CUITS.
10. Sélectionnez le réglage de température puis cuisez les aliments pendant la
durée recommandée comme indiqué dans la recette. En règle générale, la
plupart des combinaisons de viandes and de légumes ont besoin de 7 à 10
heures de cuisson sur « LO » (Faible), ou de 4 à 6 heures de cuisson sur « HI »
(Élevé). Les viandes deviendront très tendres lorsque vous les cuisinerez
pendant la durée la plus longue sur le réglage de température le plus faible.
Évitez de retirer le couvercle pendant que les aliments mijotent car cela
allongera la durée de cuisson en raison de la déperdition de chaleur. Retirez le
couvercle uniquement lorsque cela se révèle nécessaire pour mélanger de
temps en temps ou lorsque vous ajoutez des ingrédients.
Pour une utilisation en tant que Grille de cuisson :
Le socle chauffant peut être utilisé comme grille de cuisson pour des cuissons légères.
1. Avant d’utiliser le socle chauffant comme une grille de cuisson,
conditionnez la surface antiadhésive avec de l’huile végétale.
2. Appuyez sur le bouton « TEMP » (Température) jusqu’à ce que vous ayez
sélectionné « GRIDDLE » (Grille). Appuyez sur le bouton « COOK »
(Cuisson) pour lancer la cuisson sur la grille, ou patientez 5 secondes, et le
socle va émettre 5 bips, indiquant que le réglage « GRIDDLE » (Grille) a
été sélectionné et que la grille a commencé à chauffer. Pour un résultat
optimal, laissez le socle préchauffer pendant 8 à 10 minutes, puis cuisez
les aliments jusqu’au niveau de cuisson souhaité. Veuillez consulter le
« GUIDE DES TEMPÉRATURES » ci-dessous. Le socle chauffant se
comportera uniquement comme une grille de cuisson pour des usages
légers. Le réglage « GRIDDLE » (Grille) ne devrait jamais être utilisé
comme un réglage pour faire mijoter des aliments.
3. Lorsque la cuisson des aliments est terminée, appuyez sur « POWER »
(Marche) pour mettre l’appareil hors tension. Débranchez le cordon de la
prise secteur, et laissez l’appareil refroidir complètement. Suivez les
instructions pour le nettoyage fournies dans la section “Nettoyage de votre
Mijoteuse Versatility™ 6 Qt. (5.7Lt.)” de ce manuel.
Remarque : Le minuteur ne peut pas être utilisé avec ce réglage, et il ne
passera à aucun moment à la fonction de maintien au chaud « WM ». La
grille demeurera en marche indéfiniment jusqu’à ce que vous appuyez
sur « POWER » (Marche) ou que vous débranchiez l’appareil.
Ne frappez pas des ustensiles contre la marmite ou sur l’extrémité du
couvercle. Le couvercle de verre risque de se briser en conséquence.

6
•Il est possible qu’un peu de fumée et une légère odeur se dégagent
pendant le chauffage en raison de la diffusion des huiles de fabrication :
c’est tout à fait normal.
•
De petits bruits d’expansion/contraction peuvent être produits pendant le
chauffage et le refroidissement : c’est out à fait normal.
G
UIDE DE
T
EMPERATURE
Assurez-vous de cuire les aliments aux températures recommandées pour une
cuisson sans danger. Vérifiez toujours à l’aide d’un thermomètre à viande pour vous
assurer que le centre est complètement cuit.
VIANDE
TEMPÉRATURES
INTERNES
Bœuf Saignant 140°F/60°C
A Point 160°F/71°C
Bien Cuit 170°F/76°C
Porc Frais 170°F/76°C
Fumé 160°F/71°C
En Conserve 140°F/60°C
Agneau 170°F à 180°F/76°C à 82°C
Veau 170°F/76°C
Volaille 180°F/82°C
A
STUCES
•Un grand nombre de vos recettes favorites au four et sur le feu peuvent être
adaptées à une cuisson lente moyennant quelques modifications mineures. Voici
quelques points importants à ne pas oublier.
Volume de Liquide: Comme peu de vapeur s’évapore durant une cuisson lente,
réduisez de moitié le volume de liquide indiqué dans votre recette (1 tasse de
liquide suffit à la plupart des recettes). Pour les recettes de soupe, placez tous les
ingrédients sauf l’eau ou le bouillon dans le récipient de cuisson ; ajoutez juste
assez de liquide pour couvrir les ingrédients.
Assaisonnement: Réduisez la quantité d’assaisonnement proportionnellement à
la réduction du volume de liquide. Utilisez des épices et des fines herbes fraîches
entières plutôt que sous forme moulue ou hachée.
Cuisson Lente des Viandes: Les morceaux de viande moins tendres et moins
chers sont mieux adaptés à une cuisson lente que les morceaux de choix. Retirez
préalablement l’excédent de gras, au besoin. La viande peut être dorée dans le
récipient de cuisson sur la cuisinière, avant de mijoter.
Cuisson Lente des Légumes: Ajoutez les légumes partiellement surgelés, les
légumes chinois et les champignons frais au cours de la dernière heure de
cuisson. Les légumes au goût prononcé comme les épinards, l’aubergine, l’okra et
les feuilles de chou vert doivent être précuits avant d’être placés dans la
mijoteuse. La quantité d’oignon normalement utilisée dans votre recette doit être
réduite, car son goût se renforce en cours de cuisson. Dans la plupart des cas, les
légumes frais mettent plus longtemps à cuire que les viandes, car le liquide frémit
au lieu de bouillir.
Cuisson Lente des Viandes Crues et des Légumes: La plupart des
combinaisons viandes crues/légumes nécessitent au moins 4 à 6 heures de
cuisson sur « HI » (Élevé) ou 7 à 10 heures sur « LO » (Faible).
This manual suits for next models
1
Table of contents
Languages:
Other West Bend Slow Cooker manuals

West Bend
West Bend 6 QT User manual

West Bend
West Bend 5 QT User manual

West Bend
West Bend L5357 Manual

West Bend
West Bend Quart Crockery 3-4 Quart Crockery Cooker User manual

West Bend
West Bend 6-QUART ELECTRONIC CROCKERYTM COOKER User manual

West Bend
West Bend 5 QT User manual

West Bend
West Bend L5260 Manual

West Bend
West Bend 5-6 QUART SLOW COOKERS User manual

West Bend
West Bend 84905 User manual

West Bend
West Bend Crockery L5661A User manual