manuals.online logo
Brands
  1. Home
  2. •
  3. Brands
  4. •
  5. Whirlpool
  6. •
  7. Refrigerator
  8. •
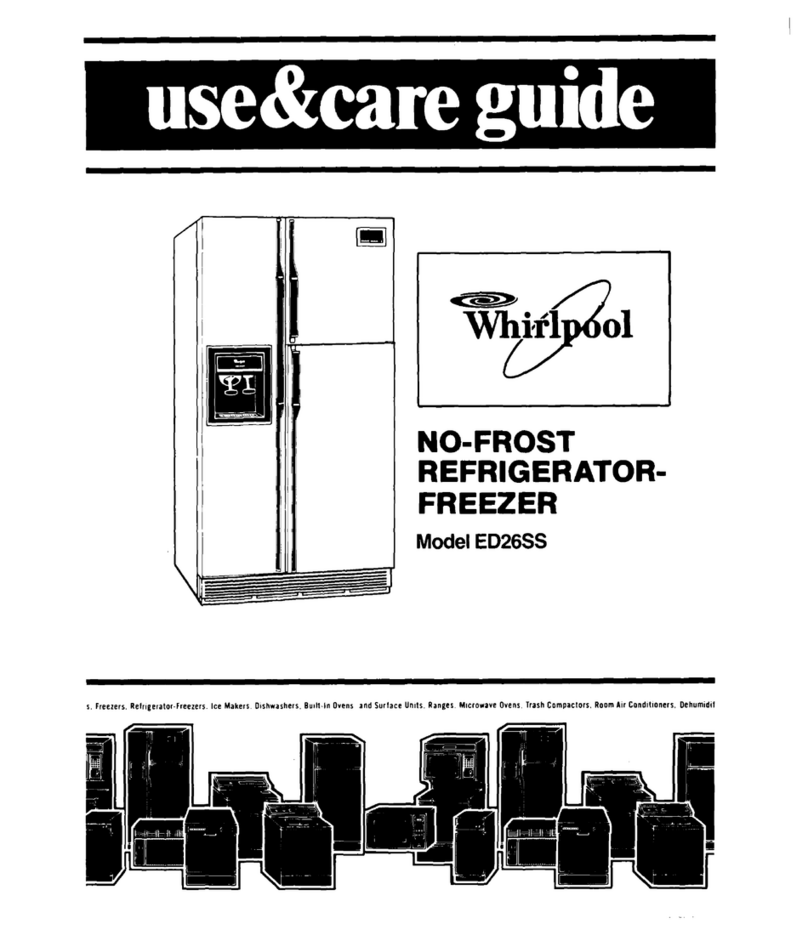
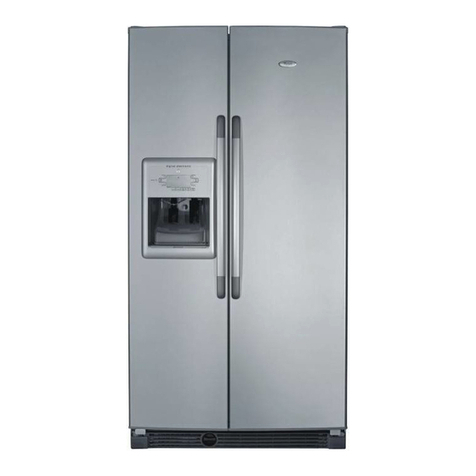
  9. Whirlpool ED22ZM User manual

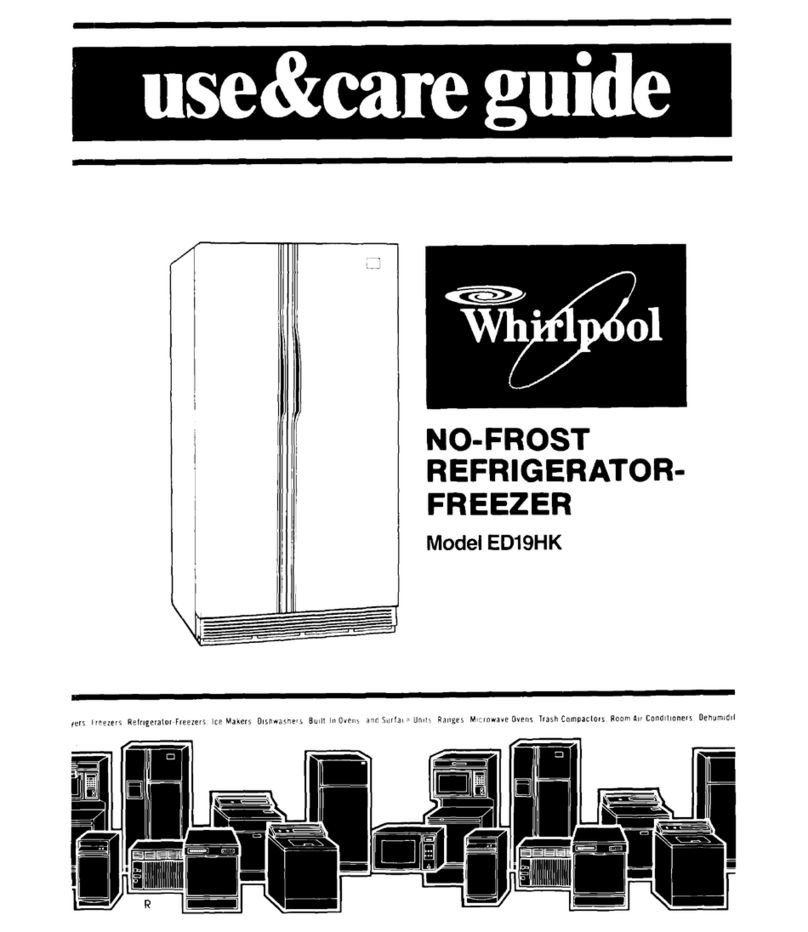
Whirlpool ED22ZM User manual

1 NO-FROST
REFRIGERATOR-
FREEZER
k/i].. Model ED22ZM. 1
ers Freezers Relrigerator~Freezers. Ice Makers DIshwashers Built-In Ovens and Surtare Units Ranger. Microwave Ovens Trash Compactors. Room Air Condltloners Oehumldll
Please read this
Use and Care Guide
before you do anything else.. .
This booklet tells you how to start your refrig-
erator, clean it, move shelves and adjust con-
trols. It even tells you what new sounds to expect
horn your refrigerator.
Treat your new refrigerator with care. Use it
only to do what home refrigerators are de-
signed to do
Parts and features
Air Control
Control
Glass
Shelves
Freezer
Storage Bln
Model and Serial -
Number Label
Base Grille
Utlllty
Compartment
Door Shelves
Meat Pan
Meat Pan wlth
Cold Control
Copy your Model and Serial Numbers here...
When you need service or call with a question,
have this informatlon ready:
1. Complete Model and Serial Numbers (from the
Model Number
label located as shown).
2. Purchase date from sales slip.
Serial Number
Copy this InformatIon in these spaces Keep this
book, your warranty and sales slip together In a
handy place.
Purchase Date
Please complete and mail the Owner Regis-
tration card furnished with this product.
Service Company and Telephone Number
2
Contents
SAFETY FIRST
BEFORE YOU PLUG IT IN
Install Properly
Level Refrrgerator-Freezer
Remove Sales Labels
Clean It
Plug It In
USING YOUR REFRIGERATOR
Setiing the Controls
Changrng the Control Settings
Power Savrng Control
Adjusting the Shelves
Adjusting Meat Pun Temperature
Removing the Crisper, Meat Pun
and Covers
Removing the ?eezer Shelves
Pnntj
Page7
7
7
8
8
8
9
9
10
10
11
14
15
15
15
15
15
-a-
.!
Removing the Freezer BIG
.{ Changing the Light Bulbs
L: iemoving the Base Grille
Automatic Ice Maker
l3
; Sounds You May Hear
Energy Saving Tips
.l
CLEANING YOUR REFRIGERATOR
3
Cleaning Chart
5
FOOD STORAGE GUIDE
.\ Storing Fresh Food
:
Freezing and Storing Frozen Foods
VACATION AND MOVING CARE
5 IF YOU NEED SERVICE OR ASSISTANCE
1 Before Callrng for Assistance
* ; If You Need Assistance
n_ :’ If You Need Service
L If bou Hove a Problem
IMPORTz4NT
Before using Youf refrigerator. You are per<- .ilc ,
-esponslole for ‘nak “‘9 sure that t
l
IS Installed and leveled on a floor that tisll “ICIC~
the weight and or an area suitable for its 81;~~~
and use
l
s connected ohlb +c the right klrd of ou‘let v&h WC>
right electrIca! supply and grounalry [Refer t,-~
your Electrical Kequlrements and Ground,rn<l
Instructions :
l
1s used only for sobs expected ct home ‘6~
frlgerators
.
’ LX*r>ear an ever radlotDr or ‘ether heat source
l
11properI) rrcintoined
l
I:
Out of the weather
l
I:
used
IP
ar area where the room temperature WIII
r :t fall below 55 F (13 C1
l
15ro: used DY those who may hot understand how
I?sboucl be used
l
s not ,oaded witi- food before
I?
has time to get
properlv cold
Install properIS!. ..
1 Allow inch (125 err; space on each k)cue cr ,11 :’
the top of the refrigerator for ease of
IPS*~~I~C?
or
2 If the refrigerator
IS
to be against a wall ,VOU711gP*
want to leave extra space so ‘he door car bt
opened wider
3 The refrigerator back can be flust- cga;>rt thf~>‘wc’
Level refrigerator-freezer.. .
Levelling Screw AI
Front Roller
J Right to Raise.
Left to Lower
1 Remove base grille [see page 7 j
2 To rclse front, turn each screw to the rig’-’
3 To lower front, turn each screw tc the e“
4 Check with level
Remove sales labels.. .
Remove the Consumer Buy Guide lcbe rape ard
cry
inside
labels before usng the refrigerator
To remove any remaining glue:
1 ?uP briskly with thumb +o make a bcl the, reF>o:e
OR
:I
%Ck
area with dlshwcshlng deterger’ solu+:or ‘1
:ecspoon detergent In i a~cri wcrrn flclerj before
removing glue as described in step ’
DO NOT USE rubbing alcohol or flammable or
toxic solvents, such as acetone, gasoline, car-
bon tetrachloride, etc. These can damage the
material.
NOTE: DO NOT REMOVE ANY PERMANENT IN-
STRUCTION LABELS INSIDE YOUR REFRIGERATOR.
Do not remove the Tech Sheet fastened under
the refrigerator at the front.
.A
Clean it... : ;.
Ilear ~/oL’ refr gerctor w. iplV ~~,,
:c
Plug it in...
3-prong grounding
type wall receptacle
1)
grounding plug
Refrigerator
Power Cord
RECOMMENDEDGROUNDING METHOD
A ‘“5 /I’ 20 “2 ,&c :,r:i) If, ;,‘iL! Q?[;&?re rJSea
‘2 c r?rcl;erlr gr3,lncez elect:i’zcN sL,r~pS~ IS re
I.~;~,r+~tli I c reccmmertard ‘ha a se~c;rc~Te t.arcJlt
‘r~r~v~:Iy ‘,nl\i this coplIcrIce be prc;idec
Do not use an exiension cord. Use a recep-
tacle which cannot be turned off with a switch
or pull chain. See
lrd ,viduO eiec+rlccl reaLIre
rr;er:‘s and yrourding l?structl.3r sbet;+ #r va,r :lter
:‘dre ccc-uage
Usin
%h 01
ip”
Air Outlet
Setting the controls.. .
The Temperature Control IS in the refrigerator and
the Air Control IS In the freezer section When the
refrrgerator ISplugged In for the frrst time
54@2’
,g5
3
1 Set the TEMPERA-
TURE CONTROL to 3 2 Set the AIR CON-
TROL to 3
Power Saving Control
Give the refrigerator time to cool down corn
pletely before adding food.
(This may take sev
ercl hours )
These settings should be about right for
normal household refrigerator usage. I
The controls ~111 be set about rtght when milk c
turce IS OS cold as you IIke and when Ice crean
ISfirm
Do not block the air outlet on the control panel I
Blocking It con slow the air movement needed tc
keep temperatures at the level you set I
Changing the control settings...
If you need to adjust temperatures in the refrrger~
l
Adjust the Temperature Control frrst
ator or freezer, use the settings lIsted In the chart
l
Wart at least 24 hours between adjustments
below
l
Then adjust the Air Control, if needed
CONDITION :
If Refrigerator
Section is
TOO WARM
If Freezer
Section is
TOO WARM
QUESTIONS?
.call your If Refrigerator
COOL-LINE@ Section is
REASONS:
Door opened often
Large amount of food added
Room temperature too worm
Door opened often
Large amount of food added
Very cold room temperature
[can’t cycle often enough]
Controls not set correctly
for vour conditions
RECOMMENDED SETTINGS:
Temperature Control 4
Air Control 3
..~.
Temper&re‘Control 3
Air Control 4
Temperature Control
Air Control
service TOO COLD
assistance
telephone If ICE isn’t Heavy ice usage Temperature Control 3
number MADE FAST ENOUGH Very cold room temperature Air Control 4
(page 15). (can’t cycle often enough)
li ..i ^ ,.r
If BOTH SECTIONS boor opened often Temper&% ‘Control 3
are TOO WARM Large amount of food added Air Control 2
Very warm or very cold
room temperatures
Power Saving Control.. .
The Power Savina Control
on the Control Con
sole operates electric heaters around the door 1 Use the ‘OFF set- 2 Use the ON setting
openings. These heaters help keep moisture from tlng when humidity if moisture forms
forming on the outsrae of the refrigerator ISlow on the outsrde of the
.,.‘..-,..-+-.
Adjusting shelves...
Shelves can be adjusted to mater the ;yav you ~st:
To remove glass shelves:
your refrigerator. Glass shelves ore strong enough to 1 71’ tip at front
hold bottles, milk and other heavy food Items 2 i ft up at back
3 h shelf stra#gPT out
To replace:
1 Gcllde the rear nooks rlto tne slots r *he s?elf
supports
2 Tl’ Jp
fror * of shell
Jrt
~qooks drop lrtc slot Lower
‘VY+ of shelf to le?iel posit on
Adjusting meat pan temperature.. .
C sld a r flov*s ago nst the
~vat par iVough on opening
oetn;eer the freezer and ‘he
refrigerator This helps keep the
rreat parI colaer than the rest
:I +ne refrlgerotor
Set the control to let more 0
ess cold air through
/
Use Control to Adtust
Meot Pon Temperatures
Removing the crisper, meat pan and covers...
Removing:
~-,d t’wo retched tabs r‘ frx’
1 Jress front tabs out cf the .YCI\~
l * cover fror’t
! _ c back off the oeg;
4 ~?eplace or reiierse 3aer
Removing:
’ 5 lde crisper CIM
rticl’ KxIr
L L
ft the fron’
! ; de ?he rest caf the ACID c I:
4 Replace or reverse clrder
Push the lab
to Clear the Cover.
Snap Back Into Place.
Removing freezer shelves.. .
1 Loft front slightly
; LIH back off supports
3 Replace 117reverse order Lift the Front
Then the Back
Removing freezer bin.. .
For proper air movement, keep the freezer or8 I’,
pace when the refrigerator ISoperatlrg
To remove the bin: To replace the bln:
l
Slrde out to the stop
l
Place bin on t-e slides
l
Lift the front to clear +he stop
l
Slide out the rest of the ~vov
l
Make sure th’e stops clear
the front of the slides
Changing the light bulbs...
WARNING: Before removing a light shield for
cleaning or for replacing the bulb,
either unplug refrigerator or discon-
nect electricity leading to refrig-
erator at the main power supply.
Shock and injury can occur if elec-
tricity remains connected.
light bulbs behind refrigerator and freezer
trol consoles:
’ -‘dl ccrtrol krGD
straight off
i /~/ul bo+tcm cf control panel straight ou’
: h.- -i; 3‘ panel otf supporrs
I
-. iep ace b*VlthIa 40-watt oppllance Dulb
; eplcce panel In reverse order
Pull Off the Dial:
Pull Out at the Bottom
Removing the base grille...
’ ‘&en ‘he doors
. :‘u 1gr:lle outwards OS shc#&r
Do not remove Tech sheet ios*erec: :+ Ip ; J &.
light bulb behind crisper:
’ ;&move crisper and crisper cover
L
s~‘b
ISor back ~h/aI~of refrigerator
?~DICICE-
tilth a CO-~vatt appilance D~ID
: ‘i~place crisper and crisper ccver
%jg or ‘he refrigeratcr
Automatic ice maker.. .
There are a few things you will want to know about
your automatic tee maker
On
Lower Slgnal Rouse SIgnal
Arm to Start II Arm to Stop Ice Maker
0 If S rlormal for :e crescerlts tc be otto~r%a r i ::
corner They ~111breoK apart eas~~v
l
Vsu ~111 hear water runr,lng &hen ice ‘l?akt I.
boork ng You II hear Ice fall nto tne bl’, Dir * it-.
‘?ese sands bother , OL
Sounds you may hear...
3
P
‘5
’ ,\6
Possible Sounds:
l
Slight Hum, Soft Hiss:
l
Clicking or Snapping
Sounds:
l
Water Sounds:
l
Ice Maker Sounds:
-trickling water
-thud (clatter of ice]
l
Running Sounds:
l
The Ice maker WI/I not operate until the freezer IS
cold enough to make Ice This can take overnight
l
Because of new plumbing connections, the first
Ice may be discolored or off-flavored Discard the
first few batches of Ice
l
Y3ur Ice maker ~111work faster when tne freezer IS
~‘~laer If you want rnofe tee turn the Temperature
Cci-Strol to CI higher number or turn the ktr Control
t( a higher rlumber
l
If i/au remove the Ice bin. raise the signal arm t0
shut off the Ice maker When you return the bin,
plush #tall the way In and lower the arm to the
ON
pmtloP
l
I! cubes are stored too iong, they may develop On
off -flavor like stale water Throw them away They
v~I/I be replaced Cubes In the ice bin can also
become smaller by evaporation
l
Good water quality is important for good ice quality
It ISnot recommended that the Ice maker be conk
netted to a softened water supply Water softener
c’Nemtcals such as salt from a malfunctlonlng soft-
erer car damage the ice maker mold and lead to
poor quality ice If a softened water supply cannot
be avoided, then It ISImportant that the water soft-
er:er be well maIntaIned and operating properly
vaur neh ref,lgerat’_?, -a~ Torte sounds fhat your 314 one didn t
Because the sounds arr ne,v +o you, you might be concerned about
TheF Dor +be Most at +?e qew sounds are normal Hard surfaces Iike
the f’oor V~alts or:d ;aL nets con make the sounds seem louder
The follorling chart Zrscrlbes ‘he kirds of sounds that might be pe\h!
to v XA a’)d tihat may t-e making then?
Probable Causes:
You may clear the refrigp ~rai~r s tan motor and moving air
The defros? timer makes a aeflnlte click when the refrigerator stops running It
also makes a sound tiher :Qe refrigerator starts
‘Wher. the refrigerator stoos rclnring, you may hear gurgling in the tubing for 0
few mlncrtes after it s+oc’s ‘YOU n?ay also hear defrost water running Into the
defrost aa?er ~)a-#
Vou may hear buzzing [from the water valve], trickling Water
and the clatier of Ice dumped Into the bin
your refrigerator has o blgh-efficiency compressor and motor It WIII run longer
thar older desigrls I+may ever) seem to rur- most of the time
Energy saving tips...
*OL car, help your refr’gerator LX? less elm -I t.
l
Check door gasKets for a +lgh* sea ~evei ‘% :
JL
ne+ to be sure of a good seal
l
Clear ?he conaenser COI regdiar y
l
Open the door as feb# rimes as poss ble -I r h OLCJ’
u?at you need before VOL. oper the :2&r iel
everything out a+ one tote Keep foods UJor ;ec:
so you wor’t have tc searchl for nlhar rX:U tiar’t
C cse door as soon as food IS removed
l
C;c ahead and fill up tb,e refrigerator, bu’ 0:‘. r’ her
cvrwa It so air mcvement IS t3ockea
d’ ~
I ~astt: 3f e ec’r’cltq to set the refrigerator and
fr-,e?er to temperatures colder than they need to
L” if Ice cream ISfirm in the freezer and drinks ore
as cv~d as vour family lakes them, that’s cold enough
l
Kcec the power Saving Control on OFF unless
-1:jisture forms on the refrigerator exterior
9 Vake sure syour refrigerator IS not next to
o
heat
source such as a range water heater, furnace, rodi-
u’c)r .Y or direct sdnllght
Cleaning your refrigerator
Both the refrigerator and freezer sectrons defrost Tr;, j- eon your refrigerator, turn th
rl~jtomatrcally But both should be cleaned abou’ Iontrc i to OFF. unplug It, take out
%ce a month to help prevent odors from bu ldlna oo’ts, and clear. it accordrna to
-1~’ Of course, spills shculd be w
Cleaning chart...
Part
Removable parts
Ishelves, crisper mea-
pan etc )
.Iutsrde
m?side walls [Freezer Sponge so* cloth or
should be allowed ti paper +o’tiel bak r g
&arm up SC cloth work soda, war?? watLe* -- ::
,tlck I le+erger *
J::or I ners ana gaskets
Dark plastrcs
covers ana panels
Defrost pan
Condenser Co11
Floor under refrrgerator
e Temperature
all removable
the followrng
liped up rrght awar 1 rectlons
What to use
Sponge or cloth mild
detergent and warv
water
Sponge c oth 3r pcuer
+owel 7‘1 a deterger *
apolrarce wax cr j ~8’ :
au% paste wax
How to clean
l
Wash removable parts with warm water
and a mild detergent
l
%nse and dry
l
Wash wrth warm water and a mrld de-
tergent
Do not use abrasive or harsh
cleansers.
9 Rrnse and dry
l
Wax parnted metal surfaces at least
titce a year wrth applrance wax or a
good auto paste wax Apply wax with
a clean, soft cloth
Do not use wax
on plastic parts.
Waxing painted metal surfaces provides rust protection.
l
Wash wrth warm water and
m Id de+ergert or
bck ng soda ;2 tablespoons 126 g Ito
1 mart 195 1~arrr dater
l
lilnse and dry
Sporlge sc,P cl,‘?- ,r
l
WISP with TII d detergert and warm
paper tc \\e -1 ~2 water
deterger / war-- .*,s.:lem . iAm: 3r’d d’)
DO NOT USE Cleaning waxes, concentrated detergents,
bleaches or cleansers containing petroleum on plastic parts.
pJ11ldaetergent or a
l
Wash Vvrth a soft grrt-free cloth or
war-r ‘ware’ sir c rat spor ge
spirlge Cr.3 5,? : 60,
l
p,nse and dry with, a damp grit-free
) ;ti- cloth or chamcrs
DO NOT USE paper towels, window sprays, scouring cleansers,
or flammable or toxic solvents like acetone, gasoline, carbon
tetrachloride, etc. These can scratch or damage the material.
Sponge or cloth m’ld
detergent and Narr
water
l
Remove base grrlle. (See page 7 1
l
To remove defrost pan, lift pan over wire
brace (remove tape If any)
l
Wash defrost pan wth warm water and
mild detergent
l
Rinse and dry
l
Replace wrth notcned corner to the rear
l
Push It all the way In
l
Make sure defrost drain tube
IS
pointing
into pan
l
Replace base grille
Vacuum cleaner usiny
the extended narrow
attachment
l
Remove base grille
l
Clear dust and lint from condenser at
least every other month
l
Replace base grrlle
Usual floor cleaners
l
Roll refrrgerator out onlv OS far as water
supply line allows
l
Wash floor
l
Roll refrigerator back.
l
Check to see if the refrrgerator
IS
level 9
Food storage guide
STORING FRESHFOOD
-nere 1so ‘Ngh. wa, to package aria s.,)re ,efrlg
erated or frozen fooas -0 keep foods fresher ioriger
take the time to study these recommended steps
Leafy Vegetables Rerr>zde
st’:re ~:~CIUD rg CIR:
tr 71 or tear off Dru’sed ana :llscolored areas ‘Wash I
cold ‘water and dra n Place lr, plartlc bag ;r p~as+ic
cc~rtaner ard st3re I crrsper Co12 m7;)lst 01’ help,
keep eafv vegetable: rresh and c’ sp
Vegetables with Skins
(carrots pepr- Y: I/ >v.
Cured or Smoked Meat and Cold Cuts.
Ham,
Doccn. sausage, cold cuts, etc keep best ir2 origl-
nai wrappIngs C)nce opened, tIghtI) re-wrap in
prostIc wrap or alumrnum foil
Canned Ham.
Store In refrlgerotor
Jnless
the Ia-
bel says Its okay to store on the shelf Do not freeze
Fresh Poultry
Wrap In plastic wrap The plastic
wrap on poultry. as purchased. may be used for
#torage
STORAGECHARTFORFRESHAN0 CUREDMEAT*
WPe Approximate lime
Variety Meats . . . . . . . . . . . . . . . . . . . . 1 to 2
Chlcken .......................... 1 to 2
GroundBeef ...................... 1 to2
Steaks and Roasts ................ 3 to 5
CuredMeats ..................... 7 to10
Bacqn ............................ Sto7
ColdCUt ........................ 3 to5
*If meat is to be stored longer than the times given,
follow the directions for freezing.
L
-8
crrsper. plastic bags 3r p astIc c,2nta:rIe,
Fruits
Wash let drv or-d store r, refr gera*,>’
, ia-le da\ as nllrchosecl
NOTE: Fresh fish and shellfIsh should be used the
Meat. Met’
IS
yerlshcble a’, 1 exper i “e ,: ‘.
w3r; t want to ‘waste or, ourIce of
I+
througr carele:,,
handling The followrn~
+s:
and cncrt give , ou pack
cgi?g hints and time llmltc Store meat r~ ‘he ‘?ea’
par
Fresh, Prepackaged Meat.
S’ore fres- -8~ai
trle store wrapp#ng \L’aculi- packageC1 rmeat _I:’
tie ‘rozer for 3s lorg as ore mar+- #Ith,? ,ea 157 +
b-oker of ‘,oc; hont ‘c‘ keep * !r:,-er 0-,ge* , ,
sr cula wrap It 4tn speelai freezer ~rapp f i;
T,c’pri:~,
Fresh Meat, Not Prepackaged.
?ernc&,e ‘he
market wrapprng paper and re-wrap
IF
alurnlnL,- fc;
for storing it unfrozen
Cooked Meat.
Wrap or cover tokea ‘->ea+ 4, ib
piastrc wrap or alumlrl~~m ‘13 Store lm-nec atei;
Eggs
St’ore wthout washrng In the origrnol car-
‘or or use the Utrllty Bin that came with your
efrigerator
Milk
tV;~pt:
mlik cartor,s For best storcge place
I#I’~: or nteri’or shelf or bottom door shelf
Beverages
Wipe bottles and cars St,re x a
1c’3r shelf or rsae +ne refrigerator
Butter
Keep opened butter n covered 31sn or in
‘he Ut 1+y Ccmpartment When stor ng an extra
SJP-
:: v ti’ap
I?
freezer pockag!cg and freeze
Cheese
Store ,n tine orrginal wrappIng until
d~u are ready to use It Once opened re-wrag
.lghtlv Jr prastrc wrap or alumrnum foil
Condlments
Store small jars and bottles (cat-
>up mustard, ;elly. olives] or the door shelves where
*qev are in easy reacn
leftovers
Cover eftovers
witi-
p,astl: hjrap or
I~bTlrl~J~
fo to keep focxd from dryirg out ana
‘ar sferr r,g food cdors Plas:~c containers wrtn tight
?: 3re fine t::?
FREEZING & STORING FROZEN
FOODS
The freezer sectIon ISdeslgnea for storage of corn-
merc~oll~ frozen foods or#d for freezIng icods a*
Clome
Packaging
-The secret of successful freezing ISin
the packaging The wrap you use musi be air,
moisture and vapor proof. The way you close and seal
the package must not allow air, moisture or vapor In or
out. Packaging done in any other way could cause
food odor and taste transfer throughout the rem
frigerator and dryng of frozen food.
Rigid polyethylene (plastic) containers with tightW
ting lids, straight-sided canning/freezing jars. heavy-
duty aluminum foil, plastic wraps (made from a Saran
film] are not recommended
NOTE:
Heat-sealed boll-
ing bags ore easy to use and can be used by them-
selves or as carton liners
Sealing -
Wher, sealing foods in bags
squeeze
out the air !
lqulas need he&space to allow for
exponslon ) LAS+ the top ant turp I+bock Foster tie
securely around t”le doubled-over tail Put the label
lrslde transparent bags Jse selfVadhesive label orI
xtslde of opaque ones
,Ar-tight wrapping tolls for “drugstore wrap cut
the sheet about one-thtrd longer than the distance
around the food Bring the ends together and fold In
(toward the focx3d) at least twice to seal out air Crease
ends close to food, press atr from package Fold tips
over twice Fl-lsh package ana tape closed hOTE
With8
tinboned meats, pad snorp edges with extrc
wrap or else stockinette to protect the wrap froir
punctures
DO NOT USE:
l
Bread wrappers
l
Non-polyethylene plastic containers
l
Containers without tight lids
l
Waxed paper
l
Waxed-coated freezer wrap
l
Thin, semi-permeable wrap
None of these are totally moisture, air or vapor
proof.
The use of these wmpplngs could
cause food odor and taste transfer and
drying of frozen food.
Freezing Fruits
- Select ripe. blemish-free fruits
Be sure they taste as good OS they look Wash 2 to
3 quarts (Ilters) at a time and drain Fruit that stands
in water may lose food value and become. soggy
Sort, peel, tram, pit and slice as needed
Pack in rigid wide-mouthed contaners or other
recommended material Leave head space to al-
low llqulds to expand during freezlng
Freezing Vegetables
- Freeze only fresh hrgh-
qualrty vegetables picked when barely mature
For best results, freeze no more than 2 to 3 hours
after pickrng. Wash In cold water, sort and cut Into
approprrate sizes Blanch or scald Pack In reconl-
mended contarner and freeze
Do not freeze lettuce, celery, carrot sticks. pota-
toes or fresh tomatoes. All WIII become limp or
mushy Tomatoes WIII collapse when thawed
Freezing Meats-The
meat you thaw can only
be as good as the meat you freeze “Drugstore”
wrap In meal-size packages. Flat cuts or patties
should be wrapped rndivrdually or in layers sepa-
rated by a double thickness of freezer wrap
Make sure store wrapptngs are moisture and va-
por proof If not, re-wrap meats with one of the
wraps recommended under “Packaging”
Freezing Cooked Food
- Prepare cooked
foods as you would for the table, shorten cooklng
t~melOto15mrnutestoallowforaddrtronal cooking
during reheating. Omit seasonrngs and part of the
Irqurd. Plan to add them at reheating time Pota-
toes should also be added to soup and stew at
heating time Add crumb and cheese toppings at
heating time
Cool as rapidly as possible and freeze at once
Liquid or semr-lrqurd dashes may be frozen in rec-
ommended containers with heod~spoce Casser-
oles and other more solid foods may be frozen In
the baking container If you don’t want to leave
your casserole dish In the freezer, line it with foil
Bake, cool, freeze, lift out the foil package, bag it
and return to freezer
Freezing Baked Goods-Wrap
baked breads
in recommended material Thaw In wrapping Un
baked yeast breads can be frozen after the frrst
rising. Punch down, wrap and freeze
Bake cookies as usual. Cool and freeze on trays,
then pack in recommended freezer bags or car-
tons. Unbaked cookres may be dropped, molded
or rolled and frozen on cookie trays Store in bag or
carton, bake without thawing Refrigerator-type
cookres can be wrapped and frozen in roll form
Thaw only enough to slice when ready to bake
Fruit pies are best frozen unbaked Bake without
thawing Bake pecan and srmrlar pies before
freeing .rrch frllrngs do not freeze solid Cut steam
vents In top crusts when ready to bake
IMPORTANT: Do not expect your freezer to quick-
freeze any large quantity of food. Put no more
unfrozen food into the freezer than will freeze
within 24 hours. (No more than 2 to 3 pounds of
food per cubic foot of freezer space.)
leave
enough
space
for air to circulate around pack-
ages. Be careful to leave enough room at the
front so the door can close tightly.
FOODSTORAGECHART
Storage times* will vary according to the
quality of the food, the type of packaging or
wrap used (moisture and vapor-proof), and
the storage temperature which should be
0” F (-17.8”C).
Food Storage lime
FRUITS
Fruit juice concentmte ........ 12
months
Commercially frozen fruit ...... 12 months
Cftrus fruit and juices ....... 4 to 6 months
Others .................... 8tol2months
VEGETABLES
Commercially frozen ........... 8 months
Home frozen .............. 8 to 12 months
MEAT
Bacon .................... 4 weeks or less
Corned beef .............. 4 weeks or less
(Salting meat shortens freezer life)
Fmnkfurters ..................... 1 month
Ground beef, lamb, veal .... 2 to 3 months
Roasts:
Beef .................... 6to 12months
lamb and veal ........... 6 to 9 months
Pork ...................... 4 to 8 months
Sausage, fresh ............. 1 to 2 months
Steaks and chops:
Beef .................... 8 to 12 months
lamb, veal, pork ......... 3 to 4 months
FISH
Cod, flounder, haddock
sole .......................... 6 months
Blue fish, salmon ........... 2 to 3 months
Mackerel, perch ............ 2 to 3 months
Breaded fish (purchased] ...... 3 months
Clams, oysters, cooked
fish, cmb, scallops ....... 3 to 4 months
Alaskan king crab ............ IO months
Shrimp, uncooked ............. 12 months
POULTRY
Whole chicken or turkey ....... 12 months
Duck ........................... 6 months
Giblets ..................... 2 to 3 months
Cooked poultry w/gravy ....... 6 months
Slices (no gravy) ................ 1 month
MAIN DISHES
Stews: meat, poultry
and fish casserole ........ 2 to 3 months
TV dinners .................. 3 to 6 months
Food Stomge Time
DAIRY PRODUCTS
Butter ...................... 6to9monfhs
Margarine ..................... 12 months
Cheese:
Camembert, Mozzarella,
farmer’s .................... 3 months
Creamed cottage ...... DO NOT FREEZE
Cheddar, Edam, Gouda,
Swiss, brick, etc. ........ 6 to 8 weeks
Freezing can change texture of
cheese.
Ice cream, ice milk, sherbet ..... 2 months
EGGS
Whole (mixed) ................. 12 months
Whites ......................... 12 months
Yolks ........................... 12 months
(Add sugar or salt to yolks or whole mixed eggs]
BAKED GOODS
Yeast breads and rolls .......... 3 months
Baked Brown ‘N Serve rolls ...... 3 months
Unbaked breads ................ 1 month
Quick breads .............. 2 to 3 months
Cakes, unfrosted ........... 2 to 4 months
Cakes,frosted ............ 8 to 12 months
Fruit cakes .................... 12 months
Cookle dough .................. 3 months
Baked cookies ............ 8 to 12 months
Baked pies ................. 1 to 2 months
Pie dough only ............. 4 to 6 months
‘Based on U.S.D.A. and Michigan Cooperative
Extension Service suggested storage times.
If electricity goes off
Call the power company Ask how long power
dill
be off
1.
If servrce ISto be Interrupted 24 hours or less,
keep both doors ciosed This WIII help frozen
foods to stay frozen
2. If servrce
IS
to be Interrupted longer than 24
hours
(a) Remove all frozen food and store In a
frozen food locker Or.
[b) Place 2 Ibs (0 9 kg) of dry ice in freezer for
every cu ft of freezer space. This will keep
frozen foods for 2 to 4 days Wear gloves to
protect your hands from dry ice burns.
(c; If neither food locker storage nor dry Ice
IS
available, use or can perishable food
at once
3. A full freezer ~111stay cold longer than a partly
filled one A freezer full of meat
will
stay cold
longer +han a freezer full of baked goods. If
food contains ce crystals, It may be safely
refrozen, although the qualrty and flavor may
De affected Use refrozen foods quickly. If the
csndltior gf the food
IS
poor or you have any
suspicrons it 1swise to dispose of it
hzation
and
Short vacations. . .
No need to shut off the refrrgerator if you w;II be
away for only a few weeks. Use up the perrshables
freeze other items. Turn off your ice maker, shut off
the water supply, empty the ice brn and make sure
all Ice cubes ore dispensed out of the mechansm
Long
vacations. . .
Remove all the food If you are going for a month1
o( more. At least a day ahead, turn off the water
supply to the ice maker When the last load of ice
drops, turn off the ice maker
Unplug the refrigerator and clean I+ rinse weI1
and dry Tape rubber or
wood
blocks to both 3oors
keeping them open far enough for arr ?o get lr
Thus will keep c&x and mold from burldrng up
WARNING: Tape blocks out of a child’s
reach...do not allow children near
the refrigerator when the doors are
blocked open. They may become
injured or trapped.
‘o restart refrigerator see Usng Your Retrigero’o:
Moving...
She .ff the Ice maker water supply a day ahead of
time Disconnect the water line Afterthe last supply of
IX
drops, lrfr the signal arm to turn off the ice maker
i?emove al’ food Pock frozen foods or dry ice Un-
plug the refrigerator and clean it thoroughly
?emove everything that comes out Wrap all parts
dell ard tape them together so they don’t shift and
ratHe
Screw In the levelllng rollers, tape the doors shut
tape tne electric cord to the cabinet When
you
get
to ‘your new home, put everything back. and refer to
page 4 Don t forget to reconnect the dater sup~lv
hre
QUESTIONS?
call your
300L-LINE *
iervlce
xsrstance
telephone
number
page 15)
If you need service or
assistance, we suggest
you follow these four steps:
1. Before calling for assistance...
Performance problems often result from lIttIe things
you con find and fix yourself wlthout tools of any kind
If your refrigerator will not operate:
l
Is the power supply cord piugged Into o live clrcult
with the proper voltage7 [See page 4 )
l
Hove you checked your home’s main fuses or clrcult
breaker box7
l
Is the Temperature Control turned ON’
If there is a ruftling or jingling noise, or other un-
familiar sounds:
l
Is something on top or behind the refrigerator mak-
ing no/se when the refrrgerator IS runnrng’
l
New features on your new refrigerator make new
sounds You may be hearing air flowing from the
fans, timer clicks for the defrosting cycle, defrost
water draining into the defrost pan
If your ice maker will not operate:
l
Has the freezer hod enough time to get cold7 With a
new refrigerator, this might take overnight
l
Is the signal arm ON in the down position7
l
Is the water valve turned on7 Is water getting to the
ice maker’
If there is water in the defrost pan:
l
In hot, muggy weather, this IS normal The pan con
even be half full Make sure the refrigerator
IS
level so
the pan doesn’t overflow
If the lights are not working:
l
Hove you checked your home’s main fuses or clrcult
breaker box?
l
Is the power supply cord plugged Into a live circuit
with the proper voltage? [See page 4 )
If a bulb is burned out:
l
See instructlons for changing light bulbs on page 7
Use appliance bulbs only.
If the motor seems to run too much:
l
Is the condenser, behlnd the base gnlle, free of dust
and lint?
l
On hot days, or if the room ISworm, the motor natu-
rally runs longer.
l
If the door has been opened a lo?, or If a large
amount of food has been put in, the motor will run
longer to cool down the interior
Remember:
Motor running time depends on dlf-
ferent things: number of door openings, amount of
food stored, temperature of the room, setting of the
controls.
And, your new refrigerator may be larger than your
old one so it has more space to be cooled It also has
a regular freezer instead of a frozen food compati-
ment All this means better refrigeration and may re-
quire more running time than your old one
2. If you need assistance*...
Call Whirlpool COOL-LINE pservice assistance
telephone number. Dial tree from:
Continental U.S. . . . . . . . . . . . . . (600) 2534301
Michigan . . . . . . . . . . . . . . . . . . . . ( _
Alaska & Hawaii . . . . . . . . . . . . (800) 253-1121
and talk with one of our trained Consultants. The Con-
sultant can instruct you tn how to obtain satisfactory
operation from your appliance or, if selvice is neces-
sary, recommend a qualified service company In
your area
3.
If you need service*...
1 FRANCHISED SERVICE 1
Whirlpool has a no-
tionwide network of
franchised TECH-CARE @
Service Companies.
TECH-CARE service
technicians ore trained
to fulfill the product
warranty and provide
after-warranty service,
anywhere In the United
States 70 locate TECH-
CARE service in your area, call our COOL-LINE service
assistance telephone number [see Step 2) or look rn
your telephone directory Yellow Pages under,
APPLIANCES-HOUSEHOLD- ELECTRICAL APPLIANCES-
MAJOR- SERVICE A REPAIR MAJOR- REPAIRING 6 PARTS
OR
WHIRLPOOL APPLIANCES WHIRLPOOL APPLIANCES
FRANCHISEDTECH-CARESERVICE FRANCHISEDTECH-CARESERVICE
SERVICE C’OMPA.\~IES SEHL’ICE co.MP~.vlEs
XYZ SERVICECO XVZ SERVICECO
123 MAPLE 999.9999 123 MAPLE 999.9999
OR
WASHING MACHINES, DRYERS
(L IRONERS-SERVICING
WHIRLPOOL APPLIANCES
FRANCHISEDTECH-CARESERVICE
SERVICE COMPANIES
XYZ SERVICECO
123 MAPLE 999-9999
4. If you have a problem*...
Call our COOL-LINE sewIce assistance telephone
number [see Step 2) and talk with one of our Consul-
tonts, or If you prefer, write to:
Mr Robert Stanley
Dlvlslon Vice President
Whirlpool Corporation
2000 US-33, North
Benton Harbor, Ml 49022
.If you must call or write. please provide. model
number, seria number, dote of purchase. and a com-
plete description of the problem This InformatIon IS
needed In order to better respond to your request for
assistance
A
FSP IS a regIstered trademark of Whirlpool
Corporotfon for qiloi~ly parls took for lhls symbol
. of qual~ly whenever you need a replacement pari
Jr d
for your Whirlpool appl~once FSP replacement
D&S WIII 111rlaht and WO’k rlahl because they ore
made to the some exoct,ng;peclflcotlons used
lo build every new WhIrlpoOl appliance
T%rlpool
Home A /Appliances
Making your world a httle easier.
Part No. 11117A2
c1986 Whirlpool Corporation Printed in U.S.A.
e M.lhers Olshwashers Bu~ltbln Ovens and Surlace Units Ranges Microwave Ovens Trash Compactors. Room Air Condltloners. Oehumldlflers. Automatic Washers Clothes Or)

Other Whirlpool Refrigerator manuals

Whirlpool WRT318FZDM User manual

Whirlpool

Whirlpool WRT318FZDM User manual

Whirlpool WF2T161 Installation guide

Whirlpool

Whirlpool WF2T161 Installation guide

Whirlpool WRT108TFYB User manual

Whirlpool

Whirlpool WRT108TFYB User manual

Whirlpool GC3SHAXVS - 23.1 cu. ft Assembly instructions

Whirlpool

Whirlpool GC3SHAXVS - 23.1 cu. ft Assembly instructions

Whirlpool ES2FHAXSA00 User manual

Whirlpool

Whirlpool ES2FHAXSA00 User manual

Whirlpool ER2MHKXPL User manual

Whirlpool

Whirlpool ER2MHKXPL User manual

Whirlpool ET18DK User manual

Whirlpool

Whirlpool ET18DK User manual

Whirlpool W4TXNWFW User instructions

Whirlpool

Whirlpool W4TXNWFW User instructions

Whirlpool TT21AKXKQ02 User manual

Whirlpool

Whirlpool TT21AKXKQ02 User manual

Whirlpool ET14AK User manual

Whirlpool

Whirlpool ET14AK User manual

Whirlpool WB70I 953 X User manual

Whirlpool

Whirlpool WB70I 953 X User manual

Whirlpool ER2MHKXPL03 User manual

Whirlpool

Whirlpool ER2MHKXPL03 User manual

Whirlpool W8TXEWFY Parts list manual

Whirlpool

Whirlpool W8TXEWFY Parts list manual

Whirlpool EB21DKXDB01 User manual

Whirlpool

Whirlpool EB21DKXDB01 User manual

Whirlpool ED5FHAXVY - 25.3 cu. ft. Refrigerator User manual

Whirlpool

Whirlpool ED5FHAXVY - 25.3 cu. ft. Refrigerator User manual

Whirlpool ET25DM User manual

Whirlpool

Whirlpool ET25DM User manual

Whirlpool G2IXEFMW - 4-10 User manual

Whirlpool

Whirlpool G2IXEFMW - 4-10 User manual

Whirlpool ET18AK User manual

Whirlpool

Whirlpool ET18AK User manual

Whirlpool ET12PC User manual

Whirlpool

Whirlpool ET12PC User manual

Whirlpool ED5DHEXW Parts list manual

Whirlpool

Whirlpool ED5DHEXW Parts list manual

Whirlpool ES5LHAXSB00 User manual

Whirlpool

Whirlpool ES5LHAXSB00 User manual

Whirlpool 6WRI 24 User manual

Whirlpool

Whirlpool 6WRI 24 User manual

Whirlpool W10193164A User manual

Whirlpool

Whirlpool W10193164A User manual

Whirlpool Top Mount Refrigerator User manual

Whirlpool

Whirlpool Top Mount Refrigerator User manual

Popular Refrigerator manuals by other brands

Sharp SJ-SC451V Operation manual

Sharp

Sharp SJ-SC451V Operation manual

Panasonic NRC387BI user manual

Panasonic

Panasonic NRC387BI user manual

Smeg FL104AP Instructions for use

Smeg

Smeg FL104AP Instructions for use

Miele KF 1801 SF OPERATING AND INSTALLATION Manual

Miele

Miele KF 1801 SF OPERATING AND INSTALLATION Manual

Beko BSSA210K3SN Instructions of use

Beko

Beko BSSA210K3SN Instructions of use

ZANKER KNLK14FS user manual

ZANKER

ZANKER KNLK14FS user manual

GE GSHF5KGX Dimensions and installation information

GE

GE GSHF5KGX Dimensions and installation information

Summit CT67 Series instruction manual

Summit

Summit CT67 Series instruction manual

Siemens KDN Series User instruction

Siemens

Siemens KDN Series User instruction

RCA RFR441-D user manual

RCA

RCA RFR441-D user manual

Marvel MARE124 owner's guide

Marvel

Marvel MARE124 owner's guide

Zanussi ZXAN15FW0 user manual

Zanussi

Zanussi ZXAN15FW0 user manual

Samsung RS20BR Series User manual and installation instructions

Samsung

Samsung RS20BR Series User manual and installation instructions

Design CAFE CSB42 Owner's Manual & Installation Instructions

Design

Design CAFE CSB42 Owner's Manual & Installation Instructions

LG LFXS30786 Series Service manual

LG

LG LFXS30786 Series Service manual

White-Westinghouse Double Door Refrigerator WD238B manual

White-Westinghouse

White-Westinghouse Double Door Refrigerator WD238B manual

Brandt CE3321X Operating and installation instruction

Brandt

Brandt CE3321X Operating and installation instruction

Kenmore 596.73502201 Use and care guide

Kenmore

Kenmore 596.73502201 Use and care guide

manuals.online logo
manuals.online logoBrands
  • About & Mission
  • Contact us
  • Privacy Policy
  • Terms and Conditions

Copyright 2025 Manuals.Online. All Rights Reserved.