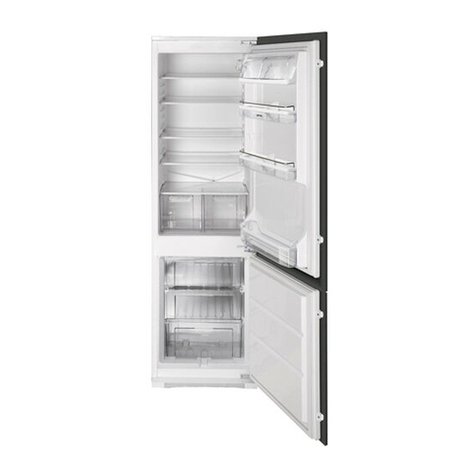
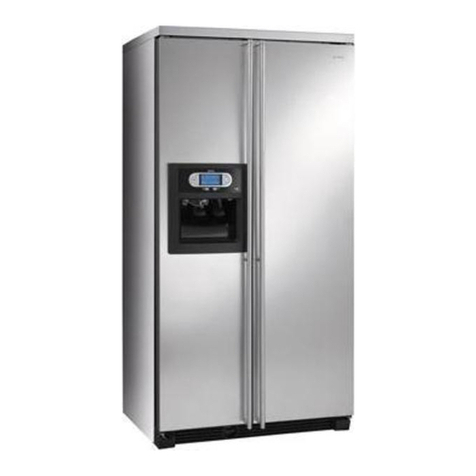
Smeg FL104AP User manual

Instructions for Use30
Refrigerator - Freezer EN
Thank you for your trust and for buying this appliance. We hope it will
successfully serve the purpose for many years.
Refrigerator with freezer is for domestic use
only.
The lower part of the appliance is
refrigerator and is used for storing fresh foods
at the temperature of 0°C and higher.
The upper part is freezer and is used for
freezing fresh foods and storing frozen foods
for longer periods of time (up to one year,
depending on the kind of foods you store). The
compartment is marked with four stars.
Before Putting Into Use.......................30
Instructions for Use
Mounting Instructions
We Care for the Environment
Tips for Energy Savings
Important .............................................31
Disposing of the Worn Out Appliance
Placing and Installation ......................31
Choosing the Right Place
Connection to Power Supply
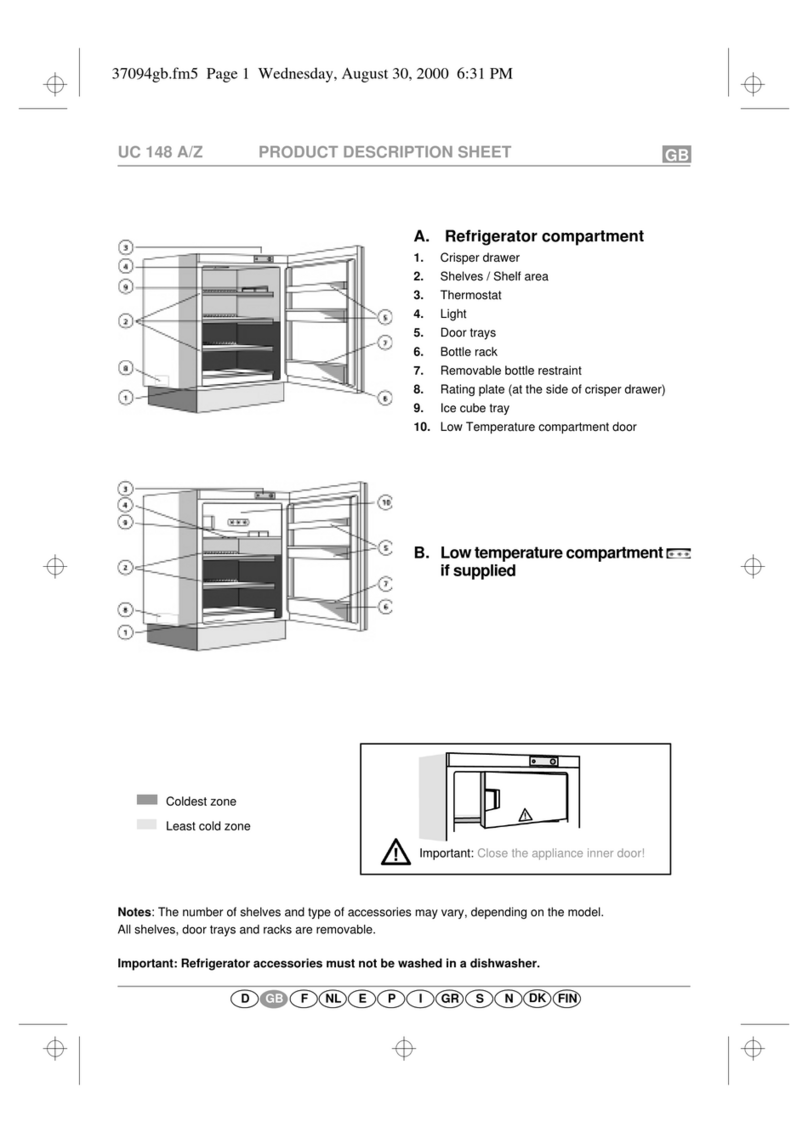
Description of the Appliance ..............32
Refrigerator (A)
Freezer (B)
Opening the freezer door
Operation Control...............................33
Temperature Selection
Use.........................................................34
Storing Fresh Foods
Freezing Fresh Foods
Storing Frozen Foods
How to make ice cubes
Maintenance and Cleaning.................36
Automatic Defrosting of the Refrigerator
Manual Defrosting of the Frezing
Compartment
Cleaning the Appliance
Switch Off the Appliance When Not In Use
Trouble-Shooting Guide......................37
Before Putting Into Use
• Before connecting the appliance to the mains
supply, place it on the location where it will
later on be installed and leave it for about 2
hours, which will reduce a possibility of
malfunctions in the cooling system due to
transport handling.
• Clean the appliance, and be thorough,
especially in the interior (See Cleaning and
Maintenance).
• In case the interior accessories are not
correctly placed, rearrange them as
described in chapter Description of the
Appliance.
Instructions for Use
These instructions for use are intended for the
user. They describe the appliance and its
correct and safe use. They were prepared for
various types of refrigerators therefore you
might find in it some functions that do not apply
to your appliance and description of the
accesories that your appliance does not
include.
Mounting Instructions
Integrated appliances are equipped with
instructions for mounting the appliance into the
kitchen unit. The appliance should be mounted
by qualified technician and instructions are for
his use only.
We Care for the Environment
• Our products use environmentally friendly
packaging, which can be either recycled or
disposed of in an environmentally friendly
manner. To this end, individual packaging
materials are clearly marked.
• These instructions are printed either on
recycled paper or chlorine free bleached
paper.
• When your appliance finally wears out,
please try not to burden the environment with

Instructions for Use 31
it; call your nearest authorised service agent.
(See Disposing of the Worn Out Appliance)
Tips for Energy Savings
• Try not to open the door too often, especially
when the weather is wet and hot. Once you
open the door, mind to close it as soon as
possible. This is especially important if you
have an upright model.
• Every now and then check if the appliance is
sufficiently ventilated (adequate air
circulation behind the appliance).
• Use higher thermostat settings only when
required or recommended.
• Before loading the appliance with packages
of fresh foods, make sure they are cooled to
ambient temperature.
• Ice and frost layer increase energy
consumption, so do clean the appliance as
soon as the layer is 3-5 mm thick.
• If the gasket is damaged or if it turns out that
the sealing is poor, the energy consumption
is substantially higher. To restore efficiency,
replace the gasket.
• The condenser on the rear wall should be
always clean, free of dust or any impurities.
• Always consider instructions stated in
sections Positioning and Energy Saving Tips,
otherwise the energy consumption is
substantially higher.
Important
• If you have bought this appliance to replace
an old one equipped with a lock that cannot
be opened from inside (lock, bolt), make sure
that the lock is broken. This will make
it impossible for children to lock themselves
inside the appliance and suffocate.
• The appliance must be correctly connected
to the mains supply. (see: Connecting to the
Mains Supply).
• Do not touch the cooled surfaces while the
appliance operates, especially not with wet
hands, because the skin may stick to the
cold surfaces.
• Do not freeze bottles containing liquid,
especially not soft drinks, such as mineral
water, sparkling wine, beer, cola etc.,
because liquid expands during freezing and
the glass bottle is very likely to blow up.
• Do not eat frozen food (bread, fruit,
vegetables), because you can get frostbites.
• If the food has strange smell or color, throw it
away, because it is very likely that it is
spoiled and therefore dangerous to eat.
• Disconnect the appliance from the power
supply before repairing it (only a qualified
technician should repair it), before cleaning
and before replacing the light bulb.
• Do not defrost the appliance with other
electric appliances (as for example with hair
dryer) and never scrape the frost layer with
sharp objects. Use only enclosed tools or
tools recommended by the manufacturer.
• For the sake of environment protection - be
careful not to damage the rear wall of the
appliance (the condenser unit or the tubes -
for example when moving the appliance) or
any part of the refrigerating system inside the
appliance.
• The refrigerating system of the appliance is
filled with refrigerant and oil, so when the
appliance is damaged, handle it with care
and dispose it of in compliance with
environmental protecting precautions. (See
We Care for the Environment).
• If the supply cord is damaged, it must be
replaced by the manufacturer or his service
agent or a qualified person in order to avoid
hazard.
• The rating plate is inside the appliance or
outside on the rear wall.
Disposing of the Worn Out Appliance
• When your appliance finally wears out,
dispose it of. If the appliance has a lock,
break it, in order to prevent eventual
accidents (danger of children get locked
inside the appliance).
• The refrigerating system of the appliance is
filled with refrigerant and insulating
substances which should be separately
treated and processed. Call your nearest
authorised service agent or specialised
servicing centre. If you don't find one, contact
your local authorities or your distributor. Be
careful not to damage the tubes on the rear
wall of the appliance (danger of pollution).
Instructions for Use32
Placing and Installation
Choosing the Right Place
Place the appliance in dry and regularly
ventilated room. Allowed ambient temperature
depends on the model (class) of the appliance
and is stated on the rating plate of the
appliance. Never place the appliance near heat
emitting devices (e.g. cooker, radiator, water
heater or similar devices) and do not expose it
to direct sunlight. The appliance should be
positioned at least 3 cm away from the electric
or gas cooker and at least 30 cm away from the
oil or coal stove. If this is not possible, use an
appropriate insulation. Behind the appliance
there should be free space at least 200 cm2
wide and above the appliance the high kitchen
units should be at least 5 cm away from the
appliance in order to assure adequate
ventilation of the condenser unit.
Class Ambient temparature
SN (sub-normal) from + 10°C to + 32°C
N (normal) from + 16°C to + 32°C
ST (sub-tropical) from + 16°C to + 38°C
T (tropical) from + 16°C to + 43°C
Connection to Power Supply
Connect the appliance with the cable and plug
to the power supply socket outlet with a ground
terminal (safety socket). Required nominal
voltage and frequency are indicated on the
rating plate. The connection to the mains
supply and earthing have to be made
according to current standards and regulations.
The appliance resists temporary voltage
tolerance up to -6 to +6 %.
Description of the Appliance
Refrigerator (A)
Refrigerator is used for storing fresh foods for
few days.
Freezer (B)
Freezer is used for freezing fresh foods and for
storing already frozen foods.
Opening the freezer door

Instructions for Use 33
Shelf (1)
(number depends on the model)
Shelf can be optionally placed on the guides
inside the appliance. It is protected against
pulling out. If you want to remove it, slightly lift
up the back part and pull it out.
Glass shelves (some models only have them)
are protected with plastic spacers. Before
pulling the shelf out, spacers must be moved
towards you. Spacers can be also removed,
however, it is better to keep them for any later
transport.
Quickly perishable food should be stored on the
back i.e. the coldest part of the shelves.
Bottle rack
(in some models only)
Bottle rack (number depends on model) is
intended for storing the bottles. There are two
installation positions available (horizontal or
lifted in the front) thus enabling the positioning
of bottles on the stopper as well. It is protected
against pulling out. If you want to pull it out,
simply lift its rear part and pull it towards you.
Warning!
If the door contains storing shelves, install the
rack in such position that the length of the
bottles will not hinder the closing of the door.
The rack may carry 9 bottles of 0,75 l or more
at the maximum (total weight max. 13 kg) –
note the label underneath the thermostat box
inside the appliance.
Defrost Water Outlet (2)
Regularly check the defrost water outlet and the
channel, because they should never be clogged
(as for example with food rests). If clogged, use
a plastic straw and clean it.
Fruit and Vegetable Container (3)
The container is on the bottom under the glass
shelf and is used mainly for storing fruits and
vegetables. It provides adequate humidity
which has favourable effect on food stored.
Door Liner
The door liner consists of various shelves or
holders used for storing eggs, cheese, butter
and yogurt as well as other smaller packages,
tubes, cans etc. The lower shelf is used for
storing bottles.
Illumination in the Interior of the
Refrigerator
The light for illuminating the interior of the
appliance is on, when the door is opened. The
operation of the light does not depend on the
position of the thermostat knob.
NOTE:
• The appliance can be equipped with various
accesories, depending on the model of the
appliance.
• Various accesories (spice container, tube
holder or additional shelves and drawer
partitions) can be bought in authorized
centres.
Operation Control
The appliance is controlled with thermostat
knob, situated in the right upper part inside the
appliance. Turn the knob clockwise from STOP
(0) position towards 7and backwards.
Temperature Selection
• Higher settings on the knob (towards 7)
mean lower temperatures (colder) in all three
compartments of the appliance. At higher
settings temperature in the interior of the
appliance may even drop below 0°C. When
the ambient temperature is normal, we
recommend medium setting.
• Changes of the ambient temprature affect
temperature in the interior of the appliance
(choose correct setting of the thermostat
knob).
• In STOP (0) position the appliance does not
operate (the cooling system is switched off),
yet power supply is not interrupted (the light
is on, when you open the refrigerator door).

Instructions for Use34
• Temperature in the refrigerator and in
freezing compartment depends on the
frequency of opening the door as well.
Use
Storing Fresh Foods
Proper use of the appliance, adequately packed
food, correct temperature and taking into
account hygienic precautions will substantially
influence the quality of the food stored.
• Foods to be stored in the refrigerator should
be properly packed as to prevent mixing
various moisture degrees and odors (in
polyethylene bags or sheet, aluminium foil,
wax paper, or stored in covered containers or
bottles).
• Before storing food in the refrigerator,
remove the excessive packaging (like
yoghurt in multi-package).
• Pack systematically and make sure that
foodstuffs do not touch each other (various
odours may mix). Assure adequate air
circulation around packages.
• Never store inflammable, volatile or explosive
substances.
• Beverages with high alcohol percentage shall
be stored in tightly sealed bottles in vertical
position.
• Food should not touch the rear wall of the
refrigerator!
• Some organic solutions like volatile oils in
lemon and orange peel, acid in butter etc.
can cause damages when in contact with
plastic surfaces or gaskets for longer period
of time.
• Foods should be cooled down before storing.
• Crispy and delicate foods should be stored in
the coldest parts of the refrigerator.
• Try not to open the door too often.
• Set the thermostat to the setting where lower
temperatures are reached. Set the
thermostat gradually as to avoid freezing of
the foods. Use a thermometer and measure
the temperature in the individual
compartments. Place the thermostat in a
glass vessel filled with water. Temperature
readings are most reliable few hour after
steady state is reached.
• Unpleasant odor inside the refrigerator is a
sign that something is wrong with foods or
that your refrigerator needs cleaning.
Unpleasant odor can be eliminated or
reduced by washing the interior of the
refrigerator with a mild solution of water and
vinegar. We also recommend using activated
carbon filters to clean the air or to neutralize
odors.
• If you plan a longer journey, make sure to
remove quickly perishable articles of food out
of the appliance before you leave.

Instructions for Use 35
Fresh Food Storage Time in the Refrigerator
Article of food Storage time (days)
1234567891011121314
Butter +++++++=====
Eggs ++++++++++=== =
Meat: fresh uncut + + =
chopped + =
smoked ++++++++++=== =
Fish + =
Marinade ++++++++++=== =
Root ++++++++===== =
Cheese ++++========= =
Sweets ++====
Fruit ++========
Prepared dishes ++==
Legend: + reccomended storage time = possible storage time
Freezing Fresh Foods
• Carefully select food you intend to freeze; it
should be of adequate quality and suitable
for freezing.
• Use correct packaging and wrap it right.
− The packaging should be air tight and
shouldn't leak since this could cause
substantial vitamin loss and dehydration
of foods.
− Foils and bags should be soft enough to
tightly wrap around the foods.
• Mark packages with following data: kind and
amount of foods and the date of loading.
• It is most important that the food is frozen as
quickly as possible. Therefore we
recommend the size of the package not to be
too large and to be cooled before loading into
the freezer.
• The amount of fresh foods that can be
loaded in the freezer within 24 hours is
indicated on the rating plate (freezing
capacity). If the loaded amount is too large,
the quality of freezing is reduced which
affects the quality of frozen foods.
Freezing Procedure
• Before it starts freezing, set the thermostat to
the position 3-6 for 24 hours. If you have a
model with integrated switch for intensive
cooling, turn ON the switch. After 24 hours
load the appliance with fresh load packages.
24 hours from the time when fresh food was
put in the appliance turn the thermostat dial
to the operating temperature (see
temperature selection). At the above
mentioned model it is necessary to turn OFF
the switch, which has previously been
engaged.
The switch is ON when the marking
(I)or colour marking is visible, and OFF
when the marking (0) is visible or colour
marking is not visible (depending on
model).
• The next time you want to freeze fresh foods,
repeat the freezing procedure and be careful
that packages with fresh foods do not touch
frozen packages.
• For freezing smaller amount of foods (up to 1
kg) there is no need to change the
thermostat setting (see Temperature
Selection).
Storing Frozen Foods
Frozen foods can be stored on the bottom of
the appliance or on the shelf.
Commercially Frozen Foods
The storage time and the recommended
temperature for storing commercially frozen
foods are indicated on the packaging. For
storing and using consider the manufacturer's
instruction. When shopping, be careful and
choose only adequately packed foods provided
with complete data and stored in freezers

Instructions for Use36
where the temperature is not higher than -18°C.
Do not buy packages of food covered with frost
layer. This indicates that the package was
thawed before at least once. Be careful that
packages don't start to thaw, as the
temperature raise reduces the quality of foods.
Approximate Storage Time for Frozen Foods
Food Storage time (in months)
123456789101112
Vegetable + + +
Fruit ++ +
Braed, Pastries +
Milk +
Redy-made meals +
Meat: Beef ++ +
Veal + + +
Pork +++
Poultry + + +
Game + + +
Minced meat +
Smoked sausages +
Fish: lean +
fat +
Offal +
Defrosting Frozen Food
Partially thawed or defrosted foods should be
used as soon as possible. Cold air preserves
the food but it does not destroy microorganisms
which rapidly activate after defrosting and make
foods perishable. Partial defrosting reduces the
nutritional value of foods, especially of fruits,
vegetables and ready-made meals.
How to make ice cubes
Recommended thermostat position for ice
making is on the middle setting. Fill two thirds
of the ice tray with cold water or any other liquid
convenient for freezing. Insert the ice tray into
the guides or on the cooling plate.Time
required for the ice to form, largely depends on
ambient temperature, thermostat setting and on
how often you open the door. It usually takes 2-
6 hours (depends on which model of
refrigerator you have). With smaller
refrigerators we recommend you make a stock
of ice cubes (store them in a separate plastic
box). The easiest way to empty the ice tray is to
turn the tray around, pour it with cold water and
slightly twist it (bend it).
Maintenance and Cleaning
Automatic Defrosting of the
Refrigerator
There is no need to defrost the refrigerator,
because ice depositing on the inner back wall is
defrosted automatically. Ice is depositing on the
inner back wall during the compressor
operation; later on, when the compressor is not
operating ice is defrosting and water drops
collect and drain through the outlet in the inner
back wall into the drain pan situated above the
compressor, from where it evaporates.
Manual Defrosting of the Frezing
Compartment
When the frost and ice layer in the frezing
compartment is 3-5 mm thick, you should clean
the freezer.
• Turn the thermostat knob to STOP (0)
position, and disconnect the power supply.
Empty the compartment and take care that
the packages remain frozen.

Instructions for Use 37
• Put a suitable vessel under the frezing
compartment to collect the defrost water.
Leave the door of the compartment open to
accelerate defrosting.
• Avoid using defrosting sprays, as they may
cause damage to the plastic parts and may
be hazardous to health.
Cleaning the Appliance
Disconnect the power supply before
cleaning the appliance.
Do not use coarse or aggressive cleaning
agents as you can damage the surface.
Be careful to remove any cleanser agent
remaining after cleaning.
• Clean the exterior with water and detergent.
Varnished surfaces are cleaned with soft
cloth and an alcohol based cleaning agent
(for example glass cleaners). You may also
use alcohol (ethanol or isoprophylic alcohol).
The application of abrasive and specially
aggressive cleaners, such as the stainless
steel cleaners, is not appropriate for the
cleaning of plastic and coated parts.
• Remove the detachable accesories in the
interior of the appliance and clean it with
water and liquid detergent. Plastic parts
cannot be washed in washing machine.
• Wash the interior of the appliance with
lukewarm water, in which you added one or
two spoonfuls of vinegar.
• Every now and then wipe the condenser on
the rear wall. Use soft non-metal brush or
vacuum cleaner.
• Do not forget to clean also the defrost water
receptacle above the refrigerator
compressor (do not remove the receptacle).
After cleaning, connect the appliance to power
supply and reload the packages.
Switch Off the Appliance When Not In
Use
If you do not intend to use the appliance for a
longer period, set the thermostat knob to the
STOP (0) position, disconnect the power
supply, take out the foods and defrost and
clean the appliance. Leave the door slightly
open.
Trouble-Shooting Guide
During the service, you can come across some
troubles that in most cases result from
improper handling of the appliance and can
easy be eliminated.
The Appliance Fails to Operate After
connecting to the Mains Supply
• Check the supply in the outlet socket and
make sure the appliance is switched on
(thermostat in operating position).
Continuous Operation of the Refrigerating
System
• the door was frequently opened or it was left
opened for too long;
• the door is not properly closed (the door may
sag, the gasket may be polluted or
damaged);
• perhaps you have overloaded the appliance
with fresh foods;
• The reason may be inadequate ventilation of
the compressor and condenser (assure
adequate air circulation and wipe off the
condenser);
• Continuous operation button activated (see
section Freezing of Food).
Ice Formation on the Inner Rear Wall
As long as the defrost water runs to the
channel and through the opening to the drain

Instructions for Use38
pan on the compressor, automatic defrosting of
the appliance is assured.
In case the ice formation on the inner back wall
is increased (3-5 mm), ice should be manually
defrosted.
Set the thermostat knob to STOP (0) position
and leave the door open. Never use electric
devices for defrosting and do not scrape the ice
or frost layer with sharp objects.
After completed defrosting, turn the knob to
desired position and close the refrigerator door.
The cause of increased ice formation may be
one of the following:
− the door does not seal well (clean the
gasket if it is contaminated, or replace it
if it is damaged);
− the door was frequently opened or it was
left opened for too long;
− the food stored in the refrigerator was
warm;
− the food or dish is touching the inner
back wall.
Water is Leaking From the Refrigerator
In case the discharge water outlet is clogged,
or the defrost water drips over the channel,
water leaks from the refrigerator.
• Clean the clogged opening, for example with
a plastic straw.
• Manually defrost the increased ice layer. See
Ice Formation on the Inner Back Wall.
Noise
Cooling in refrigerating-freezing appliances is
enabled by the refrigerating system with
compressor, which produces noise. How noisy
the appliance is depends on where it is placed,
how it is used and how old the appliance is.
• During the operation of the compressor the
noise of liquid is heard and when the
compressor is not operating, the refrigerant
flow is heard. This is a normal condition and
it has no influence whatsoever on the lifetime
of the appliance.
• After starting the appliance, the operation
of the compressor and the refrigerant flow
may be louder, which does not mean that
something is wrong with the appliance and it
has no influence on the lifetime of the
appliance. Gradually the noise is reduced.
• Sometimes unusual and stronger noise is
heard, which is rather unusual for the
appliance. This noise is often a consequence
of inadequate placing.
− The appliance shall be placed and
levelled firmly on solid base.
− It should not touch the wall or kitchen
units standing next to it.
− Check the accesories in the interior of
the appliance, they should be placed
correctly in their positions; also check
the bottles, tins and other vessels that
might touch each other and rattle.
Bulb Replacement
Before replacing the light bulb, disconnect the
appliance form the power supply.
Press the cover at the rear side (in the arrow 1
direction) and remove the plastic cover (in the
arrow 2 direction). Replace the bulb with a new
one (E14, max. 15 W).
Don't forget: the old bulb does not belong to
organic waste.
Light bulb is consuming good therefore our
in-guarantee service does not relate to it.
WE RESERVE THE RIGHT TO ALTER THE SPECIFICATIONS WITH NO
INFLUENCE ON THE OPERATION OF THE APPLIANCE.

Einbauanweisung
Instrucciones para empotrar
Notice d’installation
Mounting Instructions
Instrucciones para empotrar
Instruções para o encaixe
Inbouw-handleiding
Navodila za vgradnjo
Upute za ugradnju
ȁȝȎȠȟȠȐȎ ȕȎ ȐȑȞȎȒȡȐȎȷȓ
Uputstva za ugradnju
Udhëzime për instalimin
ǶțȟȠȞȡȘȤȖȖ ȕȎ ȚȜțȠȎȔ
InstrucĦiuni de instalare
Beépítési útmutató
Návod k vestavďní
Návod pre zabudovanie
Instrukcja montaİu aparatów w obudowie meblowej
ǾȡȘȜȐȜȒȟȠȐȜ ȝȜ ȚȜțȠȎȔȡ
ǥțȟȠȞȡȘȤȳȭ Ȓșȭ ȚȜțȠȡȐȎțțȭ
Montereringsanvisning
Monteringsanvisning
Monteringsanvisning
Asennusohje

12
34
56
2
III.
I.
II.

3
Die Anweisung zum Einbau von Kühl-Gefriergeräten ist für den Fachmann bestimmt.
Der Einbau und Anschluß müssen gemäß den Anweisungen und gültigen Normen und Vorschriften du-
rchgeführt werden. Die Einbauanweisung ist für verschiedene Gerätetypen/Modelle bestimmt, deswegen
kann sie Hinweise beinhalten, die für Ihr Gerät nicht zutreffen.
Einbauabmessungen und Kühlung des Gerätes
Die Luft hinter dem Gerät muß ungestört zirkulieren, da sich die Rückseite des Gerätes während des
Betriebes erwärmt und aus dem Behälter am Kompressor das Wasser verdunstet.
Im Untergestell des Möbelelementes, das zum Einbau des integrierten Gerätes bestimmt ist, muß
mindestens 200 cm² große Öffnung vorhanden sein, damit das Eintreten von Kühlluft ermöglicht wird.
Oben am Element tritt die Luft aus, deswegen müssen Sie aufpassen, daß die obere Öffnung des
Belüftungskanals frei bleibt.
Wechsel des Türanschlages
Bei Bedarf kann der Türanschlag auf die andere Seite umgestellt werden. Dafür benötigte Löcher an der
Gegenseite des Geräterahmens sind schon gemacht und mit Stöpseln bedeckt.
Die Blende des oberen Scharniers abnehmen, das Scharnier abschrauben und die Gerätetür aushän-
gen (sie ist auf das untere Scharnier nur aufgesteckt).
Die obere Leiste abschrauben, an die gegenüberliegende Seite des Geräterahmens verstellen und
zuschrauben.
Die Unterlegscheibe vom unteren Scharnier entfernen und (durch Drehen in der Uhrzeigerrichtung)
den Zapfen des unteren Scharniers abschrauben.
Den Zapfen und die Unterlegscheibe in der umgekehrten Reihenfolge in die Öffnung des unteren
Scharniers an anderer Seite des Gerätes einbringen.
Nehmen Sie die Eckstücke an der Tür ab, und wechseln Sie sie gegenseitig (an der Stelle des Eck-
stückes mit dem Loch das Eckstück ohne Loch anbringen, und umgekehrt).
Auf das untere Scharnier die Gerätetür aufstecken.
Schrauben Sie das obere Scharnier zu und bedecken Sie es mit der Blende.
Die Schieberführungen an die Gegenseite der Tür befestigen.
Verschließen Sie die Löcher, die nach dem Anschlagwechsel an den vorherigen Stellen geblieben sind,
mit den Stöpseln.
Schließlich überprüfen Sie das Anlegen der Magnetdichtungen (die Dichtung darf nicht gequetscht sein
und muß überall gut abdichten). Im Falle, dass sie falsch liegt, muß sie herausgenommen und um 180°
umgedreht werden. Bei bestimmten Modellen kann die Türdichtung nicht ausgetauscht werden. Da die
Dichtung nicht am Gehäuse des Geräts anliegt, erwärmen Sie diese aus einer entsprechenden Entfer-
nung (z.B. mit einem Haartrockner) und dehnen Sie sie sanft auf die richtige Größe aus.
Türanschlagwechsel beim Tiefkühlraum
Den Schnapper und das Türscharnier des Tiefkühlraumes abschrauben und die Tür aushängen.
Die Löcher mit beigelegten Stöpseln verschließen.
Stellen Sie die Sicherheitsfeder auf den unteren Teil der Tür um. (nur bei einigen Modellen)
•
•
•
•
•
•
•
•
•
•
•
•
•
•
•
Integrierte Kühl - Gefriergeräte DE
I.
II.

4
Die Tür um 180° drehen, an die gegenüberliegende Seite des Tiefkühlraumes anbringen und das
Schranier und den Türschnapper an neuen Stellen zuschrauben (die Befestigungslöcher sind schon
angezeigt).
1Blende des oberen Scharniers
2Oberes Scharnier
3Obere Leiste
4Schieberführung
5Unterlegscheibe des unteren Scharniers
6Zapfen des unteren Scharniers
7Unteres Scharnier
8Eckstück ohne Loch
9Eckstück mit Loch
10 Tiefkühlraumtür
11 Türschnapper
12 Türscharnier
Einbau des Gerätes
Drücken Sie das Gerät ungefähr 38 mm tief ins Möbelelement, dabei muß der Abstand zwischen dem
Gerät und der Seitenwand des Möbelelementes an der Gegenseite des Türscharniers auf der ganzen
Höhe 4 mm betragen (Bild 1).
Machen Sie die beiden Gerätetüren weit auf und verbinden Sie sie mit der oberen und unteren Tür des
Möbelelementes nach folgendem Verfahren:
Machen Sie die beiden Gerätetüren weit auf und verbinden Sie sie mit der oberen und unteren Tür des
Möbelelementes nach folgendem Verfahren:
Schieberführungen (zusammen mit Schrauben ST 4,2 x 9,5 im Beutel beigelegt) auf den Gerätetürrand
befestigen. Die beigelegten Stifte in offene Löcher einsetzen.
Drücken Sie die Gerätetür an die Tür des Möbelelementes (Bild 2).
Setzen Sie die Schieber in die Schieberführungen ein und befestigen Sie sie mit den Schrauben A 4 x
12 15 mm vom Rand der Möbelelementtür (Bild 3).
Entfernen Sie die Schieberführungen und trennen Sie die Gerätetür von der Tür des Möbelelementes.
Befestigen Sie die Schieber noch mit den anderen Schrauben und achten Sie darauf, daß die Schieber
dabei nicht versetzt werden (Bild 4).
Befestigen Sie die Schieberführungen zurück an die Originalstelle.
Schließen Sie die Tür zu und überprüfen Sie die Qualität des Schließens und Abdichtens (die Türdich-
tung darf an keiner Stelle gequetscht sein).
ANMERKUNG:
Die Geräte mit der Höhe von 575 mm haben nur einen Schieber und eine Schieberführung.
Schließlich befestigen Sie das Gerät ins Möbelelement. Schrauben Sie es an die Decke mit drei
Schrauben A 4 x 12 durch die obere Leiste und in den Boden mit zwei Schrauben A 4 x 16 durch die
unteren Scharniere. Für die Schrauben sind Löcher ø 3 x 5 auszubohren (Bild 5).
Der Spalt an der Gegenseite des Türscharniers ist mit der beigelegten Dichtung abzudichten (Bild 6).
HINWEIS!
Während des Einbaus ins Möbelelement darf das Gerät nicht an das Stromnetz angeschlossen sein, der
Thermostatknopf muß sich in der Stellung STOP (0) befinden bzw. der EIN/AUS-Schalter muß ausge-
schaltet sein.
•
•
•
•
•
•
•
•
•
•
•
•
•
III.

5
Mounting instructions for refrigerating and freezing appliances are for qualified technicians only.
Appliance should be mounted and installed in compliance with these instructions, current standards and
regulations. Mounting instructions were prepared for various types/models of appliances, therefore they
may describe some procedures that do not apply to your appliance.
Mounting Dimensions and Required Air Circulation
The rear wall of the appliance is getting warm during the operation of the appliance and water is evapo-
rating from the drain pan on the compressor. You must therefore provide for adequate air circulation on
the rear of the appliance.
At the base of the kitchen unit intended for building in the integrated appliance, there should be at least
200 cm² free space, for adequate air circulation.
On the upper part of the appliance the air is coming out, so try not to cover the opening for the outflow
air.
Changing the Direction of Opening the Door
If you find the direction of opening the door on your appliance inconvenient, you can change it. Holes on
the opposite side have already been prepared in the factory and are now plugged.
Remove the cover of the upper hinge, unscrew the hinge and take off the door (the door is not fixed on
the lower hinge).
Unscrew the upper rail, replace it to the opposite side of the appliance and fix it.
Remove the washer from the lower hinge and unscrew (rotate it in clockwise) the fastener on the lower
hinge.
Replace the fastener and the washer in reverse order into the opening of the lower hinge on the op-
posite side of the appliance.
Take off all door corners and interchange them (instead of the corner with a hole insert the one without
the hole and vice versa).
Put the door of the appliance on the lower hinge.
Fix the upper hinge and cover it.
Replace the slide guides to the opposite side of the door.
Plug the remaining holes with decorative caps.
Check the gasket, it shouldn’t be creased and it should seal well. In case it does not fit perfectly, pull it
out and rotate for 180°. In certain models it is not possible to replace the door gasket.Should the seal
not adhere to the casing of the appliance perfectly, it will have to be heated from a suitable distance (by
means of hair drier, for example) and lightly stretched to the required height.
Changing the Direction of Opening the Door on the Low Temperature Compartment
Unscrew the blocking element and the hinge of the low temperature compartment and take off the door.
Plug the holes with plastic caps provided.
Shift safety spring to the lower side of the door. (certain models only)
Turn the door for 180° and replace it on the opposite side of the low temperature compartment. Fix the hinge
and the blocking element of the door (position of holes already provided).
•
•
•
•
•
•
•
•
•
•
•
•
•
•
•
•
I.
II.
Integrated Refrigerating and Freezing Appliances EN

6
1Cover for the upper hinge
2Upper hinge
3Upper rail
4Slide guide
5Lower hinge washer
6Lower hinge fastener
7Lower hinge
8Corner without a hole
9Corner with a hole
10 Low temperature compartment
11 Blocking element
12 Door hinger
Mounting the Appliance
Push the appliance for some 38 mm into the kitchen unit and allow at least 4 mm free space on both
sides between the appliance and the side walls of the kitchen unit (Fig. 1).
Widely open both the doors and put them together with the door of the kitchen unit. The procedure is
as follows:
Fix the slide guides (attached in a plastic bag along with the screws ST 4,2 x 9,5) to the edge of the
door. Cover the open holes with the attached cap.
Put together the appliance door and the door of the kitchen unit (Fig. 2).
Insert the slides into the guides and fix them on the kitchen unit door some 15 mm from the edge, using
the A 4 x 12 screws (Fig. 3).
Remove the slide guides and separate the appliance door from the door of the kitchen unit.
Fix the slides and be careful not to move them while fixing (Fig. 4).
Fix the slide guides to the original position.
Close the door and check the gasket (it should not be creased). The door should open and close
smoothly.
NOTE:
Appliance with the height of 575 mm have only one slide and one slide guide.
Fix the appliance into the kitchen unit. On the upper side, fix the three screws A 4 x 12 through the rail
and on the lower side with two screws A 4 x 16, through the lower hinges. Drill holes, ø 3 x 5 (Fig. 5).
Seal the gap on the opposite side of the hinge with the enclosed seal (Fig. 6).
WARNING
Before mounting the appliance into the kitchen unit, disconnect the power supply and set the thermostat
knob to STOP (0) position or switch off the ON/OFF switch.
L’istruzioni per l’installazione degli apparecchi frigoriferi - congelatori sono scritte per i tecnici.
L’installazione e collegamento dell’apparecchio devono essere eseguiti in conformità alle norme e pre-
scrizioni vigenti. L’istruzioni si possono usare per diversi tipi/modelli degli apparecchi perciò è possibile
che descrivono i procedimenti non necessari per il vostro apparecchio.
Misure d’ingombro e raffreddamento apparecchio
L’apparecchio deve essere installato al modo di permettere la circolazione libera dell’aria. La parte poste-
riore si riscalda durante il funzionamento e l’acqua del contenitore sul compressore evapora.
•
•
•
•
•
•
•
•
•
•
•
III.
I.
Apparecchi frigoriferi-congelatori integrati IT

7
Lo zoccolo del mobile nel quale viene installato l’apparecchio integrato deve avere l’apertura di almeno
200 cm² che permette libero passaggio d’aria di raffreddamento.
Fare attenzione di non coprire la apertura del canale d’uscita aria in alto.
Porte reversibili
Se il senso d’apertura porta non corrisponde alle necessità del utente è possibile cambiarlo. I fori neces-
sari alla parte opposta del fasciame apparecchio sono già preparati e coperti con i tappi.
Togliere il coperchietto della cerniera superiore, svitare la cerniera e togliere la porta dell’apparecchio
(la cerniera media serve solo d’appoggio).
Svitare il listello superiore e spostarlo alla parte opposta del fasciame apparecchio e avvitare.
Toglire la rondella dalla cerniera inferiore e (girando in senso orario) svitare il perno della cerniera
inferiore.
Posizionare il perno e la rondella nel senso contrario nel foro della cerniera inferiore alla parte opposta
dell’apparecchio.
Togliere gli elementi angolari della porta ed intercambiargli tra di loro (al posto dell’elemento angolare
con foro posizionare l’elemento angolare senza il foro e vice versa).
Mettere la porta apparecchio sulla cerniera inferiore.
Avvitare la cerniera superiore e rimettere il coperchietto.
Spostare le guide degli scivoli alla parte opposta della porta.
Tappare i fori alla parte opposta con i tappi.
Controllare infine la tenuta delle guarnizioni magnetiche (la guarnizione non deve essere schiac-
ciata e deve assicurare una tenuta buona). Nel caso di non aderenza, estrarlo e girarlo per 180°. In
alcuni modelli le guarnizioni della porta non possono essere sostituite. Quando la guarnizione posta
sull’apparecchio non appoggia bene, bisogna scaldarla dalla giusta distanza (p.e. con il phon per i
capelli) e »tirarla« fino all’altezza necessaria.
Sportello reversibile dello scomparto a bassa temperatura
Svitare il gancio e la cerniera dello sportello scomparto a bassa temperatura e togliere lo sportello.
Tappare i fori con i tappi in dotazione.
Spostare la molla di sicurezza nella parte inferiore della porta. (possiedono solo alcuni modelli)
Ruotare lo sportello per 180° e rimetterlo alla parte opposta dello scomparto a bassa temperatura e av-
vitare la cerniera e il gancio dello sportello ai posti nuovi (i fori per il fissaggio sono gia indicati).
1Coperchietto cerniera superiore
2Cerniera superiore
3Listello superiore
4Guida scivolo
5Rondella cerniera inferiore
6Perno cerniera inferiore
7Cerniera inferiore
8Elemento angolare senza foro
9Elemento angolare con foro
10 Sportello scomparto a bassa temperatura
11 Gancio sportello
12 Cerniera sportello
Installazione
Inserire l’apparecchio nel mobile per cca 38 mm. La distanza tra l’apparecchio e lato mobile opposto
alla parte con le cerniere deve essere almeno 4 mm per tutta l’altezza (disegno 1).
Aprire quanto possibile tutt’e due le porte dell’apparecchio e unirle con la porta inferiore e porta superi-
ore del mobile quanto segue :
•
•
•
•
•
•
•
•
•
•
•
•
•
•
•
•
•
•
III.
II.

8
Guide dei scorrevoli (in dotazione nella busta insieme con le viti ST 4,2 x 9,5) fissare sui lati
dell’apparecchio. Coprire i buchi scoperti con i tappi in dotazione.
Stringere la porta apparecchio con la porta mobile (disegno 2).
Inserire gli scivoli nelle apposite guide e fissargli 15 mm dal bordo porta del mobile con le viti A 4 x 12
(disegno 3).
Togliere le guide degli scivoli e separare la porta dell’apparecchio da quella del mobile.
Fissare gli scivoli con altri viti e fare attenzione di non muovere gli scivoli (disegno 4).
Riavvitare le guide scivoli alla posizione precedente.
Chiudere la porta e controllare la chiusura e la tenuta (la guarnizione non deve avere le parti schiacci-
ate).
NOTA:
Gli apparecchi dell’altezza 575 mm sono dotati di uno scivolo e guida scivolo
Fissare poi l’apparecchio nel mobile. Al lato superiore viene fissato attraverso il listello superiore con
tre viti A 4 x 12 e al fondo attraverso le cerniere inferiori con due viti A 4 x 16. Per le viti forare i fori ø 3
x 5 (disegno 5).
Chiudere la fessurra alla parte opposta della cerniera apparecchio con la guranizione in dotazione
(disegno 6).
ATTENZIONE!
Durante l’installazione nel mobile l’apparecchio non deve essere collegato alla rete e la manopola ter-
mostato deve essere in posizione STOP (0) o il pulsante innesto/disinnesto disinserito
Les notices d’installation des appareils de réfrigération et de congélation sont destinées a l’installateur.
L’installation et le raccordement de l’appareil doivent étre réalisés en conformité avec les notices ainsi
que les normes et règles en viguer.
Ces notices d’installation sont conçues pour l’installation de différents types/modéles des appareils et
donnent les descriptions des procédés qui peut-être ne sont pas nécessaires pour votre appareil.
Dimensions d’encastrement et ventilation de l’appareil
Il est indispensable que l’air derrière l’appareil toujours circule librement, parce que le dos de l’appareil
s’échauffe pendant son fonctionnement et l’eau s’évapore du récipient au- dessus du compresseur.
La plinthe du meuble prévu pour l’installation de votre appa reil intégrable doit avoir une découpe de
200 cm² au minimum pour l’entrée de l’air à réfroidir l’appareil.
L’air sort au dessus du meuble. Veillez à ne pas couvrir la ventilation.
Ouverture de la porte inversible
Si le sens d’ouverture de la porte n’est pas convenable, vous le pouvez changer. A cet effet on a préformé
et couvert avec les capots les trous aussi à la côté inverse de la carrosserie des appareils.
Otez le couvercle de la charnière supérieure, dévissez la charnière et enlevez la porte de l’appareil
•
•
•
•
•
•
•
•
•
•
•
•
I.
II.
Réfrigérateur-congélateur integrable FR

9
(elle n’est qu’appuyée sur le pivot inférieur).
Dévissez la plaquette supérieure, déplacez-la à la côté inverse de la carrosserie de l’appareil et
vissezla.
Otez la bague du pivot inférieur (en la turnant dans le sens d’une aiquille d’une montre) et dévissez l’
axe du pivot inférieur.
Placez l’axe et la bague à l’ordre inverse dans le trou prévu pour le pivot inférieur à la côté inverse de
l’appareil.
Enlevez les pièces angulaires et échangez-les (à la place d’une pièce angulaire avec le trou mettez
une pièce anhulaire sans trou et vice versa).
Mettez la porte de l’appareil sur le pivot inférieur.
Vissez la charnière supérieure et couvrez-la avec le couvercle.
Déplacez les guidons des glissières à côté inverse de la porte.
Couvrez les trous restant après le déplacement avec les bouche- trou.
A la fin vérifiez la position des joints magnétiques (le joint ne doit pas être froissé et doit partout se
resserer bien). S’il n’est pas étanche, enlevez-le et tournez-le de 180°.
Sur certains modèles, il est impossible de remplacer le joint de la porte.
Partout où le joint n’est pas bien fixé à la carrosserie de l’appareil, chauffez-le (à l’aide d’un sèche-
cheveux, par exemple) à une distance appropriée pour qu’il se dilate légèrement et atteigne les dimen-
sions nécessaires.
Changement du sens d’ouverture du portillon du compartiment basse température
Dévissez le loqueteau et le pivot du portillon du compartiment à basse température et enlevez le
portillon.
Couvrez les trous avec des bouche-trou ajoutés.
Déplacez le ressort de sécurité sur le côté inférieur de la porte. (sur certains modþles uniquement)
Tournez le portillon de 180°, placez-la à côté inverse du compartiment et vissez le pivot et le loqueteau
à leur nouvelle place (les trous de fixation sont déjà marqués).
1Couvercle de la charnière supérieure
2Charnière supérieure
3Plaquette supérieure
4Guidon de la glissière
5Pague du pivot inférieur
6Axe du pivot inférieur
7Pivot inférieur
8Pièce angulaire sans trou
9Pièce angulaire avec le trou
10 Portillon du compartiment à basse température
11 Loqueteau du portillon
12 Pivot du portillon
Encastrement de l’appareil
Poussez l’appareil environ 30 mm dans le meuble en laissant une distance de 4 mm (Figure 1) sur
toute la hauteur entre la paroi latérale du meuble et l’appareil à côté opposée à la charnière de la porte.
Ouvrez largement les deux portes de l’appareil et joignez-les avec les deux portes du meuble comme
il suit:
Fixez les pattes coulissantes (se trouvant dans le sachet plastique avec les vis ST 4,2 x 9,5) sur le bord
de la porte. Mettez les caches dans les renfoncements inutilisés.
Serrez ensemble la porte de l’appareil avec la porte du meuble (Figure 2).
Insérez les glissières dans les guidons des glissières et fixez-les avec les vis A 4 x 12 à distance de 15
•
•
•
•
•
•
•
•
•
•
•
•
•
•
•
•
•
•
•
•
III.

10
mm du bord de la porte du meuble (Figure 3).
Enlevez les guidons des glissières et séparez la porte de l’appareil de la porte du meuble.
Fixez les glissières aussi avec d’autres vis et veillez à ce que les glissières ne se déplacent pas
(Figure 4).
Fixez ensuite les guidons des glissières à leur place originale.
Fermez la porte et vérifiez la qualité de la fermeture et étanchéité (le joint de la porte ne doit pas être
froissé).
REMARQUE:
Les appareils dont la hauteur est 575 mm ont seulement une glissière et un guidon de la glissière.
A la fin, fixez l’appareil dans le meuble. Vissez l’appareil à la partie haute du meuble avec trois vis A 4 x
12 par la plaquette du haut et au fond du meuble avec deux vis A 4 x 16 par les pivots inférieurs. Forez
les trous de ø 3 x 5 pour les vis (Figure 5).
Couvrez la fente à côté opposée de la porte avec le joint ajouté (Figure 6).
IMPORTANT!
En encastrant l’appareil dans le meuble, il ne doit pas être branché au réseau électrique. La manette du
thermostat doit être sur la position STOP (0) ou bien l’interrupteur MARCHE/ARRET mis en arrêt.
Estas instrucciones para empotrar están destinadas para una persona calificada. El aparato debe em-
potrar e instalarse en confprmidad con las instrucciones y normas vigentes. Estas instrucciones sirven
para empotrar varios tipos/modelos de aparatos y pueden incluir también los procedimientos que no son
necesarios para su aparato.
Dimensiones de empotrar y enfriamiento del aparato
La colocación del aparato debe permitir una circulación libre del aire porque durante la operación del
aparato la parte trasera se calenta y el agua en el recipiente colocada encima del compresor se evapora.
En el zócalo del mueble de cocina hay que prever una abertura de no menos de 200 cm² para la
entrada del aire de enfriamiento.
No cubra la abertura superior del canal de aireación porque el aire sale en la parte superior del mueble
de cocina.
Cambio del sentido de la abertura de la puerta
Si no le corresponde a Ud. el sendito de la abertura de la puerta, puede cambiarlo. Para ello el aparato
va provisto de las aberturas situadas en la parte opuesta de la caja del aparato y cubiertas con los
tapones.
Quite la tapa de la bisagra superior, desatornille la bisagra y quite la puerta del aparato (la puerta está
sólo colgada sobre la bisagra inferior).
Desatornille el torno superior, colóquelo en la parte opuesta de la caja del aparato y atornille.
Quite la arandela de la bisagra inferior y (girándola en sentido de las agujas del reloj) desatornille el
•
•
•
•
•
•
•
•
•
•
•
I.
II.
Frigoríficos y congeladores integrables ES

11
tapón de la bisagra inferior.
Coloque el tapón y la arandela, en el orden opuesto, dentro de la abertura de la bisagra inferior en la
parte opuesta del aparato.
Quite los elementos angulares en la puerta y cambie sus posiciones (coloque elemento angular sin
agujero en el lugar del elemento angular con agujero y viceversa).
Coloque la puerta del aparato sobre la bisagra inferior.
Atornille la bisagra superior y cúbrala con la tapa.
Traslade las guías de los distribuidores a la parte opuesta de la puerta.
Cubra las aberturas con los tapones.
Después de haber cambiado el sentido de la apertura de la puerta, compruebe la posición de la junta
de la puerta. (La junta no debe estar torcida y debe cerrar bien en todas partes.) Si no está bien puesta
debe sacarla y girarla por 180°.
En algunos modelos no se puede cambiar la junta de la puerta.
Donde la junta no adhiere bien a la carrocería del aparato, hay que calentarla (con un secador de
pelo, por ejemplo) a una distancia apropiada y dilatarla ligeramente hasta que tenga dimensiones
necesarias.
Cambio del sentido de la apertura de la puerta del compartimento de baja temperatura
Desatornille el pestillo y la bisagra de la puerta del compartimento de baja temperatura y quite la
puerta.
Cubra los agujeros con los tapones que van suministrados.
Coloque el resorte de seguridad en la parte inferior de la puerta. (disponible sólo con algunos modelos)
Gire la puerta por 180°, colóquela en la parte opuesta del compartimento de baja temperatura y ator-
nille la bisagra y el pestillo de la puerta a lugares nuevos (los agujero están ya marcadas).
1Tapa de la bisagra superior
2Bisagra superior
3Torno superior
4Guía del distribuidor
5Arandela de la bisagra inferior
6Tapón de la bisagra inferior
7Bisagra inferior
8Elemento angular sin agujero
9Elemento angular con agujero
10 Puerta del compartimento de baja temperatura
11 Pestillo de la puerta
12 Bisagra de la puerta
Cómo empotrar el aparato
Empuje el aparato unos 38 mm dentro del mueble de cocina. La distancia entre el aparato y el lado del
mueble en la parte opuesta de la bisagra de la puerta debe ser 4 mm por toda altura (ilustración 1).
Abra ambas puertas del aparato de par en par y júntelas con la puerta superior e inferior del mueble de
la siguiente manera:
Fije los carriles de las correderas (están en la bolsa de plástico junto con los tornillos ST 4,2 x 9,5) en
el borde de la puerta del aparato. Insierte los tapones en los agujeros.
Aprete la puerta del aparato junto con la puerta del mueble de cocina (ilustración 2).
Coloque los distribuidores dentro de las guías de los distribuidores y atorníllelos a 15 mm del borde del
mueble de cocina por medio de los tornillos A 4 x 12 (ilustración 3).
Quite las guías de los distribuidores y separe la puerta del aparato y la puerta del mueble de cocina.
Fije las guías de los distribuidores también con otros tornillos y procure que los distribuidores no cam-
•
•
•
•
•
•
•
•
•
•
•
•
•
•
•
•
•
•
•
•
III.
Table of contents
Other Smeg Refrigerator manuals