White-Westinghouse WFC1310EW0 User manual

White-Westinghouse
OWNER'SGUIDE
READ AND SAVE THESE INSTRUCTIONS
Record the ModeU No. and SefiaU No. of this freezer in the space provided beUow.
ModeU No.
SefiaU No.
Keep these numbers for future reference.
iMPORTANT: Keep a copy of your bill of saUe. The date on the bill establishes
the warranty period shouUd service be required, tf service is performed, it is in your
best interest to obtain and keep aUlreceipts.
Contents
2important Safety instructions
3First Steps
4 Setting the Temperature Control
4-5 Freezer Optional Features
5-6 Care and Cmeaning
7 Power Failure/Freezer Failure
7 Energy Saving ideas
8-9 Avoid Service Checklist
10 Warranty in the United States
This Owner's Guide provides specific operating instructions for your model Use
the freezer only as instructed in this Owner's Guide.
Versi6n en espaSo_
si desea obtener una copia en espa_ol de este Manual del Usuario, sirvase escribir la
direcci6n que se induye a continuaci6n. Solicite la P/N 297003700.
Spanish OwneCsGuides
Electrolux Home Products, Inc.
P. O. Box 212378
Augusta, GA 30917
FREEZER
Product and feature specifications as described or iflustrated are subject to change without notice.
P/N 297003600 (July 04)

important Safety
instructions F! Wkr_v/±'_;t_?Ih,_[€
Proper Disposal of Your
r!Vivf_qfl_ll_[I
Risk of child entrap-
ment. Child entrapment and
suffocation are not problems of the past.
Junked or abandoned refrigerators or
freezer are still dangerous--even ifthey
wil! sit for "just a few days." If you are
getting rid of your old refrigerator or
freezer, please follow the instructions
below to help prevent accidents.
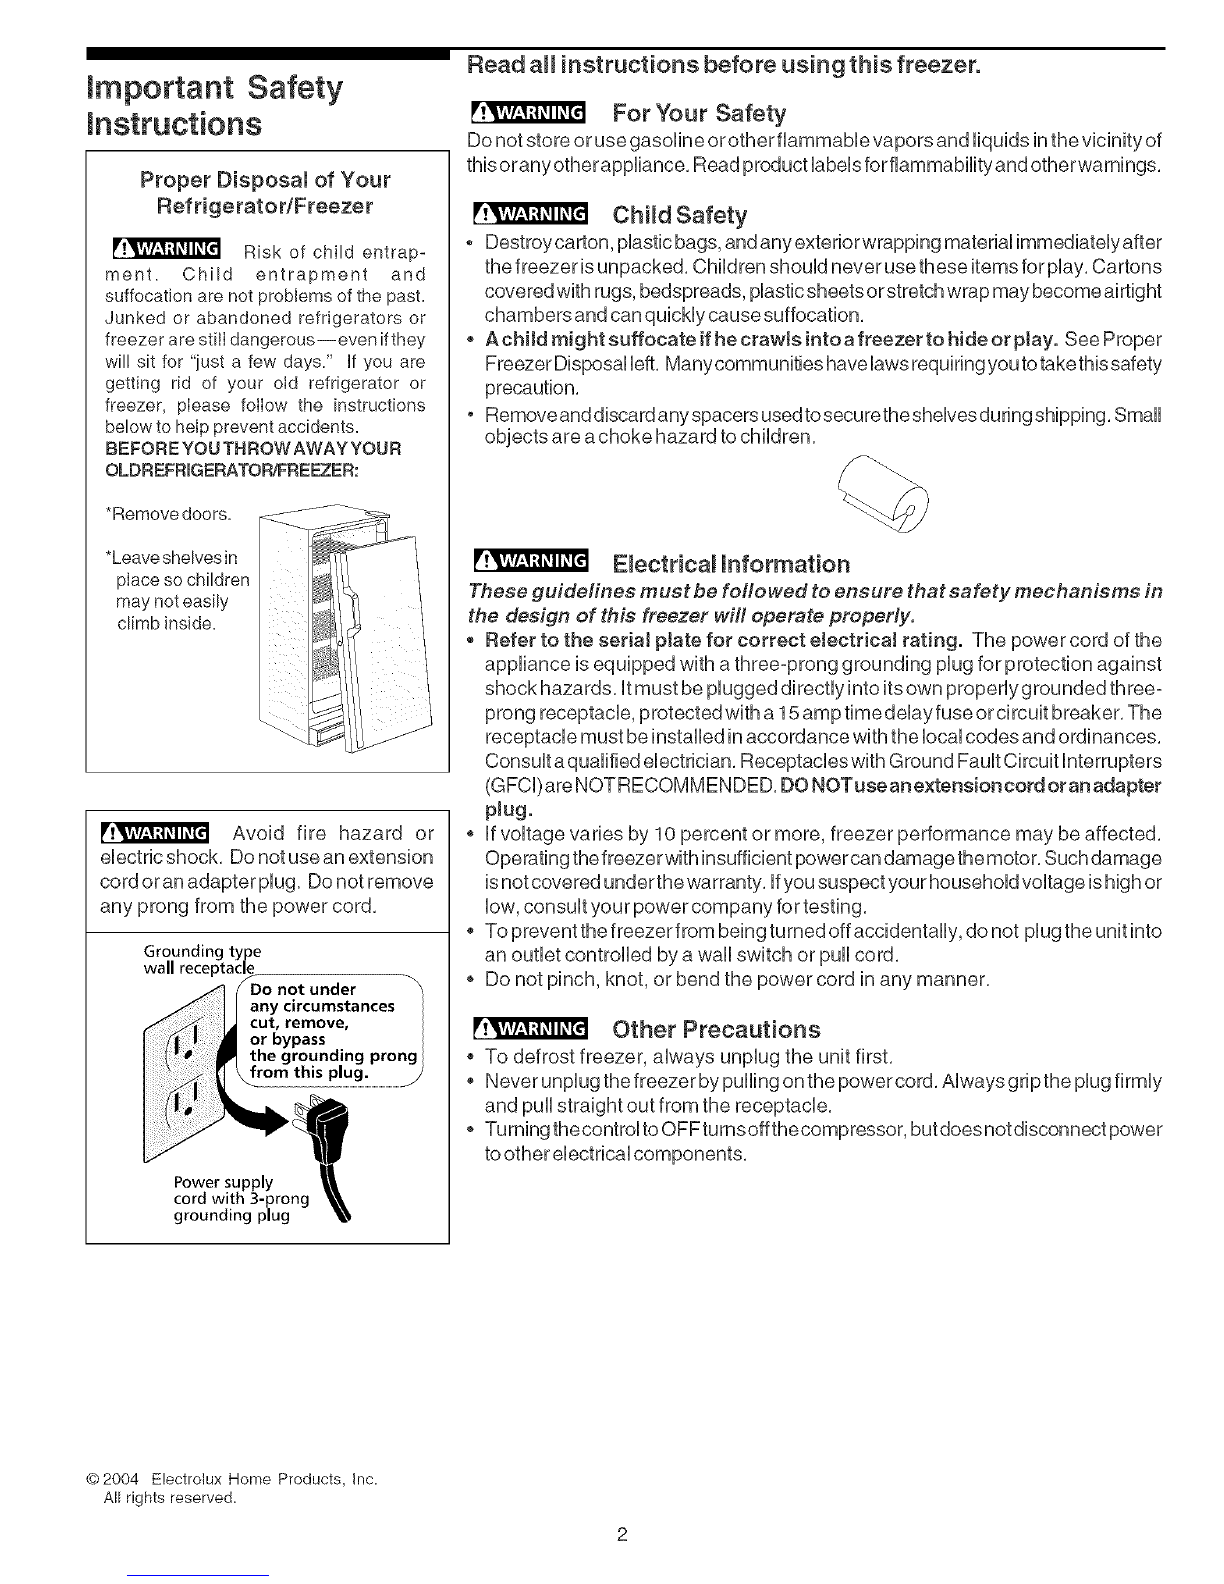
BEFORE YOU THROW AWAY YOUR
OLDREFRIGERATOR/FREEZER:
*Remove doors.
F!,v, vh_wR_1I_1_
*Leave shelves in
place so children
may not easily
climb inside=
r! IkrAV_*1:t_l I_[€ Avoid fire hazard or
electric shock, Do notuse an extension
cord oran adapter plug. Do not remove
any prong from the power cord,
Grounding type
wall receptacle Do not under
any circumstances
cut, remove,
or bypass
the grounding prong
............................1/
Power supply I
cord with 3-prong
grounding plug
Read aH instructions before using this freezer.
For Your Safety
Do not store or use gasoline or other fiammabb vapors and liquids in the vicinity of
this orany other appliance, Read product labels for flammability and otherwamings,
Child Safety
Destroy carton, plastic bags, and any exterior wrapping material immediately after
the freezer isunpacked, Children should never use these items for play, Cartons
covered with rugs, bedspreads, plastic sheets or stretch wrap may become airtight
chambers and can quickly cause suffocation.
AchHdmightsuffocateifhec_awlsintoafreezertohideorplay. See Proper
Freezer Disposal bft, Manycommunities havelaws requiring you totakethissafety
precaution,
Remove and discard any spacers used tosecure theshelves du ringshipping, Small
objects are a choke hazard to children,
Electrical mnformation
These guideiines must be followed to ensure that safety mechanisms in
the design of this freezer will operate properly.
oRefer to the seriaJ pJate for correct etectricaJ rating. The power cord of the
appliance is equipped with a three-prong grounding plug for protection against
shock hazards, it must be plugged directly into its own properlygrounded three-
prong receptacle, protected with a 15 amptimedelayfuse orcircuit breaker, The
receptacle must be installed in accordance with the local codes and ordinances,
Consult aqualified electrician, Receptacles with Ground Fault Circuit interrupters
(GFCi)are NOTRECOMMENDED, DONOTusean extensioncord oran adapter
p!ug,
o if voltage varies by 10 percent or more, freezer performance may be affected,
Operating thefreezer with insufficient power can damage the motor, Such damage
isnot covered under thewarranty, ifyou suspect your household voltage is high or
low, consult your power company for testing,
To prevent the freezer from being tumed off accidentally, do not plug the unit into
an outlet controlled by a wall switch or pull cord,
o Do not pinch, knot, or bend the power cord in any manner,
r!VAr/__I:t_qI_[i Other Precautions
To defrost freezer, always unplug the unit first,
Never unplug the freezer bypulling on the power cord, Always grip the plug firmly
and pull straight out from the receptacle,
o Turning thecontrol toOFFtumsoffthecompressor, but does notdisconnect power
toother electrical components,
©2004 Electrolux Home Products, Inc.
All rights reserved.

FirstSteps
!,
Hnstallation
DISCARD T_E (4) CRATIN(,
SCREWSAND (2) WOOD BASES
Unpacking and Leveling - Upright Freezers
Base
Base Panel Screws
Figure 1
_To allow door to
choseand seamproperly, DO NOT let
food packages extend past the front
of sheBves.
SheHfFront
Before starting the freezer, follow these important first steps:
Installation
*Choose a pHacethat is neara grounded eHectricaHoutHet.
*Forthe most efficient operation, the freezershouHd be Hocatedwhere surround-
ing temperatures wHHnot exceed 110°F (43°C). Temperatures of 32°F (O°C) and
beHowwHHNOTaffect freezeroperation. AdditionaHcompressorheatersare not
recommended.
*Aflow space around the unit for good air cimulation. Leave a 3 inch (75 mm)
space
on aHHsides of the freezer for adequate drcuHation.
Leveling
The freezer must have aHHbottom corners resting firmHyon a sofid floor, The floor
must be strong enough to support a fuHHyHoadedfreezer, Check the cabinet with
a HeveHfrom side to side. After discarding the crating screws and wood base, HeveH
the cabinet.
To Level Upright Unit:
Once HeveHed,sHightHyraise adjustment of front feet so the door cHoseseasiHywhen
opened about haHfway.
To LeveJ Chest Unit:
Hfneeded, add metaHor wood shims between feet pads and floor.
C_eaning
*Wash any removabHeparts, the freezerinterior, and exteriorwith miHddetergent
and warm water. Wipe dr},. DO NOT USE HARSH CLEANERS ON THESE
SURFACES.
Do not use razor bHades or other sharp instruments, which can scratch the
appHiancesurface when removing adhesive HabeHs,Any gHueHeftfrom the tape
can be removed with a mixture of warm water and miHddetergent, or touch the
residue with the sticky side of tape aHreadyremoved, DO NOT REMOVE THE
SERIAL PLATE.
Door Remova_ (upright modeJs)
If door must be removed to fit through narrow doorways:
1. GentHyHayfreezer on its back, on a throw rug or bHanket.
2. Remove base paneH(some modeHs)by unscrewing two screws from front of
base panel (Figure 1)
3. At top of cabinet, remove pHastictop hinge cover.
4. Remove screws from top hinge.
5. Remove top hinge from cabinet. Lift door off Howerhinge pin.
6. After door is removed, remove the two screws from bottom hinge.
7. To repHacedoor, reverse above order, and secureHytighten aHHscrews to prevent
hingesHippage.

Setting the
Temperature Control
Cold Control
Coo( Down Period
For safe food storage, aUow 4 hours for the freezer to coo( down compbteiy. The
freezer wU( run continuously for the first several hours. Foods that are already
frozen may be placed in the freezerafter the first few hours of operation. Unfrozen
foods should NOT be baded into the freezer untUthe freezer has operated for 4
hours.
When loading the freezer, freeze only 3 pounds of fresh food per cubic foot of
freezer space atone time. Distribute packages to be frozen evenly throughout the
freezer, itis not necessary to turn the control knob to a colder setting while freezing
food.
Temperature Control
The temperatu recontrol islocated inside the freezer on upright models, and on the
left outside wall on chest models. The temperature is factory preset to provide
satisfactory food storage temperatures. However, the temperature control is
adjustable to provide a range of temperatures for your personal satisfaction, if a
colder temperature isdesired, turn the temperature control knob tocoldest and allow
several hours fortemperatures to stabilize between adjustments.
Freezer Opt(onal
Power Defrost Plunger- Chest Freezers
\\ \
Power Defrost - Upright Freezers
Defrost Drain
NOTE: Your freezer may have some, or a!l of the features )isted betow.
Become famitiar with these features, and their use and care.
Power On L(ght
The Power On Light indicates that the freezer is propedy connected to electrical
power, The light glows even when the temperature control isturned to OFF. If the
light goes out, refer to "Freezer does not run" in the Avoid Service Checklist,
Juice Can Rack(upright modets)
The Juice Can Rack on the freezer door isspecially ridged to store juice cans and
prevent them from rolling out of the shelf.
Security Lock with Pop-Out Key
This securitylock fastens the doorsnugiy, ensuring stored food issecure. To lock or
unlock the freezer, push the key into the lock and turn. The key pops out of the lock
after it has been turned.
Power Defrost
The Power Defrost feature will defrost freezer in a fraction of the time usually
required. To defrost, remove all food, and follow these steps.
1. Pull out Power Defrost Plunger. Leave dooropen while defrosting. (Closing
freezer door wii( push in plunger and power defrost wii( be turned off.)
2. Push Power Defrost Plunger in to restart freezer after defrosting iscompleted.
Defrost Drain
The Defrost drainprovides a method ofdraining water during defrosting and cleaning.
See "Defrosting" in Care and Cleaning Section,
(nterior Light
The light comes on automatically when the door isopened. To replace the light bulb,
turn the temperature control to OFF and unplug the electrical cord, Replace the old
bulb with a bulb of the same wattage,
SHale-Out Basket (upright models)
The slide-out basket atthe bottom ofthe freezer provides separate storage space for
items that are difficult tostore on freezer shelves. To remove the basket, pull out and
lift up.

Freezer Optiona
Features (co tioued)
Slide-Aside Basket
Slide-Aside Basket (chest models}
This basket heUpsorganize odd=shaped items, To reachother packages inthefreezer,
slide the basket aside or Hftout,
Fast Freezing She_ves (upright models)
These sheUves contain cooling coils to freeze foods quicHy and allow coUdair to
constantUycircuUatethroughout the freezer, Do not use sharp metaUobjects such as
ice picks orscrapers todean the sheUves,This couUddamage the sheUvesand reduce
their cooling ability, These sheUvesare notadjustabUe,
Drop Front Sheff (upright models}
The Drop Front Sheff, Uocatedat the bottom of the freezer, provides a separate
compartment for small irregular shaped items or large, bulky items, Lift the shelf front
up and out to remove,
Care and C eaning
Damp objects stick to
cold metal surfaces, Do not touch interior
metal surfaces with wet or damp hands,
Figure la
U09 Models OnIy
Pan
Figure 1b
Some upright freezers are frost-free and defrost automatically, but should be
cleaned occasionally, Before cleaning ordefrosting, unplug the power cord from the
electrical outlet,
Between Defrostings
To avoid frequent defrosting, occasionally use a plastic scraper to remove frost,
Scrape with a pulling motion, Never use a metal instrument to remove frost,
Defrosting
It is important to defrost and clean the freezer when 1/4 to 1/2 inch of frost has
accumulated, Frest may tend to accumulate faster on the upper part ofthe freezer
due towarm, moist air entering the freezer when the door is opened, Remove food
and leave the door open when defrosting the freezer,
On upright models with a defrost drain (Figure 1), remove the drain plug on the
inside floor of the freezer by pulling straight out, To access the external drain
tube on models with a base panel, first remove the two screws from the base
panel, Locate the drain tube near the left center under the freezer, Place a
shallow pan under the drain tube, Defrost water will drain out, Check pan
occasionally sowaterdoes notoverflow, Replace the drain plug when defrosting
and cleaning are completed, If the drain is left open, warm air may enter the
freezer,
On chest models with a defrost drain, place a shallow pan beneath the drain
outlet (Figure 2), A one half inch garden hose adapter can be used to drain the
freezer directly into a floor drain (Figure 3), Ifyour model is not equipped with an
adapter, one can be purchased at most hardware stores, Pull out the drain plug
inside the freezer, and pull off the outside defrost drain plug (Figure 4 on following
page), Defrost water will drain out, Check pan occasionally so water does not
overflow, Replace the drain plugs when defrosting iscompleted,
Figure2
5
Figure 3

Care and C eaning
(continued)
Figure4
If Jeaving the freezer I
door open wHle on vacation, make I
certain that children cannot get into
the freezer and become entrapped.
o On models without a defrost drain, pUacetoweB or newspaperson the freezer
bottom to catch the frost, The frost wHUbosen and fall, Remove toweb and/or
newspapers,
o ifthe frost issoft, remove by using a plastic scraper, iffrost is glazed and hard, fill
deep pans with hotwaterand place them on the freezer bottom, Close the freezer
door, Frost should soften in about 15 minutes, Repeat this procedure ifnecessary,
C_eaning the hside
After defrosting, wash inside surfaces of the freezer with a soUution of two
tabbspoons of baking soda in one quart (1,136 Htres)warm water, Rinse and dry,
Wring excess water out of the sponge or cloth when cbaning in the area of the
controUs,or any eUectricaUparts,
Wash the removable parts and door gasket with the baking soda solution
mentioned above, or mild detergent and warm water, Rinse and dry, Never use
metallic scouring pads, brushes, abrasive cleaners, or alkaline solutions on any
surface, Do not wash removable parts in a dishwasher,
C_eaning the Outside
Wash the cabinet with warm water and mild liquid detergent, Rinse well and wipe
dry with a clean soft cloth, Replace parts and food,
Vacation and Moving Tips
Short Vacations: Leave the freezeroperating during vacations of bss than three
weeks,
Long Vacations: if the freezer wiii not be used for several months, remove aii
food and unplug the power cord, Clean and drythe interior thoroughly, To prevent
odor and mold growth, leave the freezer door open slightly, blocking it open if
necessary,
Moving: Disconnect the powercord plug from the wall outlet, Remove foods, then
defrost, and clean the freezer, Secure all loose items such as base panel, baskets,
and shelves by taping them securely in place to prevent damage, in the moving
vehicle, secure freezer in an upright position, and secure to prevent movement,
Abe protect outside of freezer with a blanket, or similar item,

Power Failure/
Freezer Failure
Do not open freezer door
unnecessarily if freezer is
off for severa! hours.
if a power failure occurs, frozen foods wiii stay frozen for at bast 24 hours if the
freezer is kept closed, if the power failure continues, pack seven or eight pounds
of dry ice into the freezer every 24 hours, Look in the Yellow Pages under" Dry Ice,"
"Dairies," or "ice Cream Manufacturers" for local dry ice suppliers, Always wear
gloves and use caution when handling dry ice,
If the freezer has stopped operating, see "Freezer does not run" in the Avoid
Service Checklist Section of this manuak if you cannot soUvethe probbm, carl an
authorized servicer immediateUy,
if the freezer remains off for several hours, follow the directions above for the use
of dry ice during a power failure, if necessary, take the food to a local locker plant
until the freezer is ready to operate, Look inthe Yellow Pages under "Frozen Food
Locker Plants,"
Energy Saving mdeas The freezer should be located in the coolest area of the room, away from heat
producing appliances or heating ducts, and out of direct sunlight,
Let hot foods cool to room temperature before placing in the freezer,
Overloading the freeze rforces the compressor to run longer, Foods that freeze
too slowly may lose quality, or spoil,
o Be sure to wrap foods properly, and wipe containers dry before placing them in
the freezer, This cuts down on frost build-up inside the freezer,
Freezer shelves should not be fined with aluminum foil, wax paper, or paper
toweling, Liners interfere with cold air circulation, making the freezer less
efficient,
Organize and label food to reduce door openings and extended searches,
Remove as many items as needed at one time, and close the door as soon as
possible,

Avoid Service Checklist
OCCURRENCE
FREEZER DOES NOT RUN
Before calling for service, review this Hst. tt may save you both time and
expense. This list includes common occurrences that are not the resuUt of
defective workmanship or matedaUs in this appliance.
SOLUTION
Check to be sure freezer is not plugged into a circuit that has ground fault interrupt, if you
are unsure about the outlet, have it checked by a certified technician.
Temperature control is in the OFF position. See Setting the Temperature Control Section.
Freezer may not be plugged in, or plug may be loose. Be sure plug is tightly pushed into
electrical outlet.
House fuse has blown, or circuit breaker has tripped. Check/reset circuit breaker, orreplace
fuse with 15 amp. time delay fuse.
Power outage. Check house lights. Call local electric company.
Freezer runs too much or too long, Room or outside weather is hot. It is normal for the freezer to work harder under these
conditions.
Freezer had recently been disconnected fora period of time. Freezer requires 4 hours to cool
down completely.
Large amounts of warm or hot food have been stored recently. Warm food will cause the
freezer to run more until the desired temperature is reached.
Door is kept open too long or too frequently. Warm air enters the freezer every time the door
is opened. Open the door Iess often.
Freezer door may be slightly open. See Occurrence "Door Problems."
Temperature control is set too cold. Turn the control knob to a warmer setting. Allowseverai
hours for the temperature to stabilize.
Freezer gasket is dirty, worn, cracked, or poorly fitted. Clean or change gasket. Leaks in the
door seaI will cause freezer to run longer in order to maintain desired temperature.
Temperatures inside the freezer are Temperature control is set too cold. Turn the control to a warmer setting. Allow several hours
too cored, for the temperature to stabilize.
Temperatures inside the freezer are too Temperature control is set too warm. Turn the control to a colder setting. Allow several hours
warm. for the temperature to stabilize.
Door is kept open too long or is opened too frequently. Warm air enters the freezer every time
the door is opened. Open the door less often.
Door may be open slightly. See Occurrence section "Door Problems."
Large amounts of warm or hot food might have been stored recently. Wait until the freezer
has had achance to reach its selected temperature.
Freezer has recently been disconnected for a period oftime. Freezer requires 4 hours to cool
down completely.
Temperature of external freezer The exterior freezer walls can be as much as 30°F warmer than room temperature. This is
surface is warm, normal while the compressor works to transfer heat from inside the freezer cabinet.
SOUNDANDNOISE
Louder sound levemswhenever Modern freezers have increased storage capacity and more even temperatures_ They require
freezer is on. a high efficiency compressor. When the surrounding noise level is low, you might hear the
compressor runninq while it cools the interior.
Louder sound mevemswhen compressor Freezer operates at higher pressures during the start of the ON cycle. This is normal. Sound
comeson, will level off or disappear as freezer continues to run.
Popping or cracking sound when
compressor comes on.
Metal parts undergo expansion and contraction, as in hot water pipes. This isnormal. Sound
will level off or disappear as freezer continues to run.

OCCURRENCE SOLUTION
SOUND AND NOISE Icont'dl
Bubbling or gurgling sound, mikewater Refrigerant (used to cool freezer) is circulating throughout the system. This is normal.
boiling,
Vibrating or rattmingnoise. Freezer is not Ievel. It rocks on the floor when it is moved slightIy. Level the unit. Refer to
"Leveling" in the First Steps Section.
FIooris uneven orweak. Freezer rocks on the floor when it ismoved slightly. Be sure floor can
adequately support freezer. Level the freezer by putting wood or metaI shims under part of
the freezer.
Freezeristouching thewall. Relevelthe freezer or move freezerslightly. Refer to"Leveling"
in the First Steps Section.
WATER/MOISTURE/FROST
tNSIDEFREEZER
Moisture forms on inside freezer walls. Weather is hot and humid, which increases internaI rate of frost buiId-up. This is normal.
Door is slightIy open. See Occurrence "Door Problems."
WATER/MOISTURE/FROST
OUTSJDEFREEZER
Moisture forms on outside of
freezer.
Door is kept open too long, or is opened too frequently. Open the door less often.
Door is stightly open, causing the cold air from inside the freezer to meet warm moist air from
outside. See "Door Problems" in the Occurrence Section.
ODOR JNFREEZER
interior needs to be cleaned. Clean interior with sponge, warm water, and baking soda.
DOOR PROBLEMS
Door will not close.
Foods with strong odors are in the freezer. Cover the food tightly.
Freezer is not level. It rocks on the floor when it is moved slightly. This condition can force the
cabinet out of square and misaiign the door. Refer to "Leveling" in the First Steps Section.
LIGHT BULB JSNOTON
Floor is uneven orweak. Freezer rocks on the floor when it is moved slightly. Level the floor
by using metal or wood shims under the freezer or brace floor supporting the freezer.
Light bulb is burned out. Follow directions under "Interior Light" in the Freezer Features
Section.
No electric cu trent is reaching the freezer. See Occurrence "Freezer Does Not Run/'

FREEZER WARRANTY
Your freezer is protected by this warranty
WARRANTY THROUGH OUR AUTHORIZED SERVICERS, THE CONSUMER WILL BE RESPONSIBLE FOR:
PERIOD WE WILL:
FULL ONE-YEAR One year from original Pay all costs for repairing or replacing any parts of this Costs of service calls that are listed under NORMAL
WARRANTY purchase date appliance which prove to be defective in materials or RESPONSIBILITIES OF THE CONSUMER. *
workmanship,
In the U=S=A. your appliance is warranted by Electrolux Home Products, Inc= We authorize no person to change or add to any of our obligations
under this warranty. Our obligations for service and parts under this warranty must be performed by us or an authorized Electrolux Home Products,
Inc=sewicer= In Canada, your appliance is warranted by Electrolux Canada Corp=
*NORMAL
BESPONSIBILmES
OF THE CONSUMER
EXCLUSIONS
IF YOU NEED
SERVICE
This warranty applies only to products in ordinary househoRd use, and the consumer is responsible for the
items listed beBow:
1= Proper use of the appliance in accordance with instructions provided with the product.
2= Proper installation by an authorized servicer in accordance with instructions provided with the appliance and in
accordance with all local plumbing, electrical and/or gas codes.
3= Proper connection to a grounded power supply of sufficient voltage, replacement of blown fuses, repair of loose
connections or defects in house wiring=
4= Expenses for making the appliance accessible for servicing, such as removal of trim, cupboards, shelves,etc.
which are not a part of the appliance when it was shipped from the factory.
5= Damages to finish after installation=
6= Replacement of light bulbs and/or fluorescent tubes (on models with these features).
This warranty does not cover the following:
1= CONSEQUENTIAL OR INCIDENTAL DAMAGES SUCH AS PROPERTY DAMAGE AND iNCiDENTAL
EXPENSES RESULTING FROM ANY BREACH OF THIS WRITTEN OR ANY IMPLIED WARRANTY.
NOTE: Some states do not allow the exclusion or limitation of incidental or consequential damages, so this
limitation or exclusion may not apply to you.
2. Service calls which do not involve malfunction or defects in workmanship or material, or for appliances not in
ordinary household use= The consumer shall pay for such service calls=
3= Damages caused by services performed by servicers other than Electrolux Home Products, Inc= or its authorized
servicers; use of parts other than genuine Eiectrolux Home Products, Inc= parts; obtained from persons other
than such servicers; or external causes such as abuse, misuse, inadequate power supply or acts of God=
4= Products with original serial numbers that have been removed or altered and cannot be readily determined=
Keep your bill of sale, delivery slip, or some other appropriate payment record. The date on the bill establishes the
warranty period should service be required= If service is performed, it is in your best interest to obtain and keep all
receipts. This written warranty gives you specific legal rights. You may also have other rights that vary from state to
state. Service under this warranty must be obtained by contacting Electrolux Home Products, Inc=:
This warranty only applies in the 50 states of the U.S.A. Puerto Rico, and Canada. Product features or specifications as described or illustrated
are subject to change without notice. All warranties are made by Electrolux Home Products, Inc. In Canada, your appliance is warranted by
Electrolux Canada Corp. 01-U-FR-02 (Rev. 01/2002)
USA
800.944_9044
Electrolux Home Products, Inc=
RO. Box 212378
Augusta, GA 30917
Canada
888_213_9397
Electrolux Canada Corp=
8180 McLaughlin Road
Mississauga, Ontario
LSR 4C2
10
This manual suits for next models
2
Table of contents
Other White-Westinghouse Freezer manuals

White-Westinghouse
White-Westinghouse WCFH 183 BW Specification sheet

White-Westinghouse
White-Westinghouse WFC15M4BW4 User manual

White-Westinghouse
White-Westinghouse WCV100A User manual

White-Westinghouse
White-Westinghouse WFU14FC2CW6 User manual

White-Westinghouse
White-Westinghouse FC258 User manual

White-Westinghouse
White-Westinghouse WCV210A User manual

White-Westinghouse
White-Westinghouse WWFC18M4RC Owner's manual