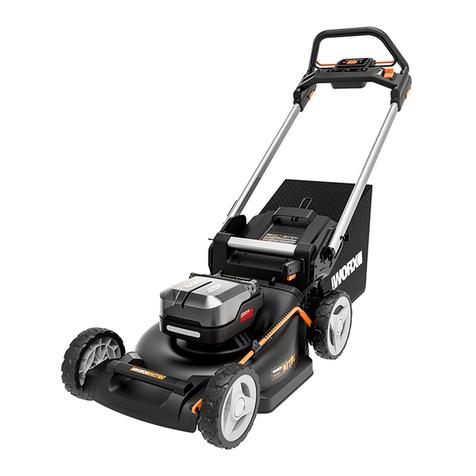
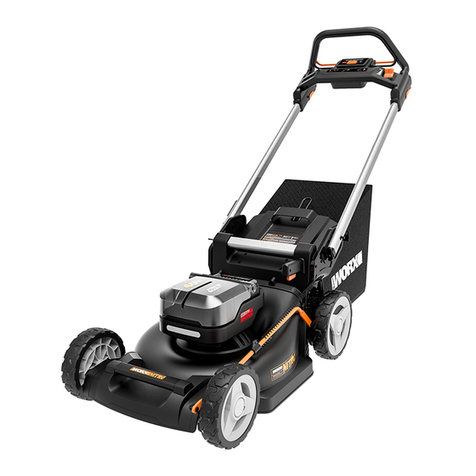
Worx Nitro WG761E User manual

WG761E WG761E.9
Cordless lawn
Mower
Аккумуляторная газонокосилка
EN
RU
P08
P15

15
16
17
1
2
3
4
5
6
7
8
9
10
11
12
13
14
18
19

A
C1 C2
C3 D1
B
2
1
SIDE-DISCHARGE
SIDE-DISCHARGE

D2 E1
E2 E3
E4 F1
1
221
20
2
22
23
1

F2 G
HI
J1 J2
1
2
100%
0%

KL
MN1
N2 O1
7 — 80mm
6 — 70mm
5 — 60mm
4 — 50mm
3 — 40mm
2 — 30mm
1 — 20mm
2
1
2
3
1

O2 P
QR1
R2 S
Q-1
Q-2
Q-3
25
26
24

8
Cordless Lawn mower EN
GENERAL SAFETY WARNINGS
WARNING Read all safety warnings and all
instructions. Failure to follow the warnings and
instructions may result in electric shock, fire
and/or serious injury.
Carefully read the instructions for the safe
operation of the machine.
Save all warnings and instructions for future
reference.
- This appliance is not intended for use by persons
(including children) with reduced physical, sensory
or mental capabilities, or lack of experience and
knowledge, unless they have been given supervision
or instruction concerning use of the appliance by a
person responsible for their safety.
- Children should be supervised to ensure that they
do not play with the appliance.
- The appliance is only to be used with the power
supply unit provided with the appliance.
Training
a) read the instructions carefully. Be familiar with the
controls and the proper use of the equipment;
b) never allow children or people unfamiliar with
these instructions to use the lawnmower. Local
regulations can restrict the age of the operator;
c) never mow while people, especially children, or pets
are nearby;
d) keep in mind that the operator or user is responsible
for accidents or hazards occurring to other people
or their property
Preparation
a) While mowing, always wear substantial footwear
and long trousers. Do not operate the equipment
when barefoot or wearing open sandals;
b) thoroughly inspect the area where the equipment
is to be used and remove all objects which can be
thrown by the machine;
c) Before using, always visually inspect to see that
the blades, blade bolts and cutter assembly are not
worn or damaged. Replace worn or damaged blades
and bolts in sets to preserve balance;
d) On multi-bladed machines, take care as rotating one
blade can cause other blades to rotate.
Operation
a) mow only in daylight or in good artificial light;
b) avoid operating the equipment in wet grass, where
feasible;
c) always be sure of your footing on slopes;
d) walk, never run;
e) for wheeled rotary machines, mow across the face
of slopes, never up and down;
f) exercise extreme caution when changing direction
on slopes;
g) do not mow excessively steep slopes;
h) use extreme caution when reversing or pulling the
lawn mower towards you;
i) stop the blade(s) if the lawn mower has to be tilted
for transportation when crossing surfaces other
than grass, and when transporting the lawn mower
to and from the area to be mowed;
j) never operate the lawn mower with defective
guards, or without safety devices, for example
deflectors and/or grass catchers, in place;
k) switch on the motor carefully according to
instructions and with feet well away from the
blade(s);
l) do not tilt the lawn mower when switching on the
motor, except if the lawnmower has to be tilted
for starting In this case, do not tilt it more than
absolutely necessary and lift only the part which is
away from the operator;
m) do not put hands or feet near or under rotating
parts. Keep clear of the discharge opening at all
times;
n) never pick up or carry a lawn mower while the
motor is running;
o) not to touch the blades before the disabling device
has been removed and the blades have come to a
complete stop;
p) to remove the disabling device
– whenever you leave the machine;
– before clearing a blockage;
– before checking, cleaning or working on the
machine;
– after striking a foreign object, Inspect the lawn
mower for damage and make repairs as necessary;
– if the lawnmower start to vibrate abnormally(check
immediately);
Maintenance and storage
a) keep all nuts, bolts and screws tight to be sure the
equipment is in safe working condition;
b) check the grass catcher frequently for wear or
deterioration;
c) replace worn or damaged parts for safety;
d) ensure that only replacrment cutting means of the
right type are used;
SAFETY WARNINGS FOR
BATTERY PACK
a) Do not dismantle, open or shred cells or
battery pack.
b) Do not short-circuit a battery pack. Do not
store battery packs haphazardly in a box or
drawer where they may short-circuit each
other or be short-circuited by conductive
materials. When battery pack is not in use, keep
it away from other metal objects, like paper clips,
coins, keys, nails, screws or other small metal
objects, that can make a connection from one
terminal to another. Shorting the battery terminals
together may cause burns or a fire.
c) Do not expose battery pack to heat or fire.
Avoid storage in direct sunlight.
d) Do not subject battery pack to mechanical
shock.
e) In the event of battery leaking, do not allow
the liquid to come into contact with the skin

9
Cordless Lawn mower EN
or eyes. If contact has been made, wash the
affected area with copious amounts of water
and seek medical advice.
f) Keep battery pack clean and dry.
g) Wipe the battery pack terminals with a clean
dry cloth if they become dirty.
h) Battery pack needs to be charged before use.
Always refer to this instruction and use the
correct charging procedure.
i) Do not maintain battery pack on charge when
not in use.
j) After extended periods of storage, it may
be necessary to charge and discharge the
battery pack several times to obtain maximum
performance.
k) Recharge only with the charger specified by
WorxNITRO. Do not use any charger other than
that specifically provided for use with the
equipment.
l) Do not use any battery pack which is not
designed for use with the equipment.
m) Keep battery pack out of the reach of children.
n) Retain the original product literature for future
reference.
o) Remove the battery from the equipment when
not in use.
p) Dispose of properly.
q) Do not mix cells of different manufacture,
capacity, size or type within a device.
r) Keep the battery away from microwaves and
high pressure.
SYMBOLS
Read instruction handbook before
operation this machine
Keep bystanders away.
Beware of sharp blades. Blades
continue to rotate after the motor
is switched off- Remove disabling
device before maintenance
Batteries may enter water cycle if
disposed improperly, which can
be hazardous for ecosystem. Do
not dispose of waste batteries as
unsorted municipal waste.
Do not burn
Li-Ion battery This product has been
marked with a symbol relating to
‘separate collection’ for all battery
packs and battery pack. It will
then be recycled or dismantled in
order to reduce the impact on the
environment. Battery packs can be
hazardous for the environment and
for human health since they contain
hazardous substances.
Wear protective gloves.
Remove battery from the socket
before carrying out any adjustment,
servicing or maintenance.
Remove the key
Blade continues to rotate after
the machine is switched off. Wait
until all machine components have
completely stopped before touching
them
COMPONENT LIST
1. SELFPROPEL SPEEDCONTROL LEVER
2. OPERATING BAIL HANDLE
3. HANDLE BAR
4. MULCHINGBAG SWITCH LEVER
5. LED HEADLIGHT
6. FRONT CARRYHANDLE
7. CUTTING HEIGHT ADJUSTMENT POINTER
8. BASECAMP 80V POWER SOURCE & CHARGER

10
Cordless Lawn mower EN
9. BASECAMP PLUG CONNECTION
10. CUTTINGHEIGHT ADJUSTMENT LEVER
11. REAR CARRYHANDLE
12. SAFETY FLAP
13. GRASS COLLECTION BAG
14. CHARGE CORD
15. QUICKRELEASE BUTTON
16. SAFETY LOCKOUT BUTTON
17. SWITCH BUTTON FOR LED HEADLIGHT
18. CHARGE CORD INPUT
19. BATTERY INDICATOR BUTTON
20. SIDEDISCHARGE COVER SEE FIG. D2
21. SIDE DISCHARGECHUTE SEE FIG. D2
22. BATTERY PACK SEE FIG. F1
23. SAFETY KEY SEE FIG. F1
24. BLADE BOLT SEE FIG. R1
25. BLADE SEE FIG. R1
26. SPACER SEE FIG. R1
*Not all the accessories illustrated or described are
included in standard delivery.
TECHNICAL DATA
Type WG761E WG761E.9 (7- designation of ma-
chinery, representative of Cordless Lawn Mower)
WG761E WG761E.9
Voltage 80V Max. (4x20V Max.)**
No load speed 2800 /min
Deck width 53 cm
Cutting width 51 cm
Front wheel diameter
200 mm
Rear wheel diameter
250 mm
Cutting height 20 – 80 mm
Cutting height positions
7
Grass collection capacity
70 L
Battery capacity 4.0 Ah (WA3014) /
Battery type Lithium-Ion
Charger Model WA3974 /
Charger rating Input: AC
220-240 V~50 Hz
Output: 20 V , 1 A
(each battery slot)
/
Charging time for a
single battery pack
(approx.)
4.0 Ah 4-5 hrs
/
Machine Weight 35 kg 32.4 kg
** Voltage measured without workload. Initial battery
voltage reaches maximum of 80 volts. Nominal voltage is
72 volts.
Each charging port is independent. The charging time for
four battery packs of the same capacity is equal to the
time for a single battery pack.
ACCESSORIES
WG761E WG761E .9
Battery pack (WA3014) 4 /
Basecamp (WA3974)
(80V Power Source &
Charger) 1 1
Grass collection bag 1 1
Side-discharge kit 1 1
We recommend that you purchase your accessories from
the same store that sold you the tool. Choose the type
according to the work you intend to undertake. Refer
to the accessory packaging for further details. Store
personnel can assist you and offer advice.
NOISE DATA
A weighted sound pressure LpA = 80.9 dB(A)
KpA 3.0 dB (A)
A weighted sound power LwA = 94.1 dB(A)
KwA 2.0 dB (A)
Wear ear protection.
VIBRATION INFORMATION

11
Cordless Lawn mower EN
Typical weighted vibration ah< 2.5 m/s²
Uncertainty K = 1.5 m/s²
WARNING The vibration emission value during actual
use of the power tool can differ from the declared
value depending on the ways in which the tool is used
dependant on the following examples and other variations
on how the tool is used:
How the tool is used and the materials being cut or drilled.
The tool being in good condition and well maintained.
Using the correct accessory for the tool and ensuring it is
sharp and in good condition.
The tightness of the grip on the handles and if any anti
vibration accessories are used.
And the tool is being used as intended by its design and
these instructions.
This tool may cause hand-arm vibration syndrome if
its use is not adequately managed.
WARNING To be accurate, an estimation of exposure
level in the actual conditions of use should also take
account of all parts of the operating cycle such as the times
when the tool is switched off and when it is running idle but
not actually doing the job. This may significantly reduce the
exposure level over the total working period.
Helping to minimise your vibration exposure risk.
ALWAYS use sharp chisels, drills and blades.
Maintain this tool in accordance with these instructions and
keep well lubricated (where appropriate).
If the tool is to be used regularly then invest in anti vibration
accessories.
Plan your work schedule to spread any high vibration tool
use across a number of days.
OPERATION INSTRUCTION
NOTE: Read instruction handbook before
operation this machine.
INTENDED USE
This product is intended for domestic lawn mowing.
ASSEMBLY & OPERATION
ACTION FIGURE
ASSEMBLY
Lifting the handle bar
NOTE: Press and hold Quick-release
button during operation.
See Fig. A
Assembling the grass collection bag See Fig. B
Attaching the grass collection bag to
the lawn mower
NOTE: Depress the grass collection
bag slightly to ensure that it is
completely installed.
NOTE: Push the mulching-bag switch
lever to open the mulching outlet
before fitting the grass collection
bag.
See Fig.
C1-C3
Assembling the side-discharge chute
NOTE: Remember to remove the
grass collection bag firstly and then
push the mulching-bag switch lever
to close the mulching outlet before
assembly.
See Fig. D1,D2
Removing /fitting the basecamp
NOTE: When fitting, gently pull the
basecamp to ensure that it is securely
installed.
NOTE: After fitting, tighten the
basecamp power output and the
mower with a cable tie to ensure
a reliable connection. It is not
recommended to remove the cable
tie.
See Fig. E1-E4
Fitting/removing the battery pack
Insert the safety key before installing
the battery pack.
NOTE: This machine will only run
when sp-batteries are installed. It is
recommended to use the same Ah
batteries and charge the 4 batteries
at the same time.
When you use 4 batteries with
different Ah, the machine will only run
to the lower common denominator.
See Fig. F1, F2
Checking the battery charge
condition
NOTE: Fig. G only applies for the
battery pack with battery indicator
light.
See Fig. G
Charging the battery pack
NOTE: The batteries are shipped
uncharged. Each battery must be fully
charged before the first usage.
Always fully charge the 4 batteries at
same time. More details can be found
in charger’s manual.
NOTE: Always charge the battery pack
with the basecamp on the mower.
See Fig. H
Power indicator light
See details in BATTERY STATUS part
Press the battery indicator button, the
light will be on to indicate the lower
common denominator, after 3s, status
of each battery pack will be shown on.
See Fig. I

12
Cordless Lawn mower EN
OPERATION
Starting and Stopping
NOTE: Place the Mulching-Bag Switch
Lever in the bag position after each
use. (See Fig. C1)
See Fig. J1, J2
Operating the self-propel system See Fig. K
Adjusting the cutting height
WARNING! Stop, release
Operating Bail and wait until the
motor stops before adjusting height.
The blades continue to rotate after
the machine is switched off, a rotating
blade can cause injury. Do not touch
rotating blades.
See Fig. L
Opening the LED headlight See Fig. M
Removing/emptying grass collection
bag WARNING! Always check the
safety flap close the discharge
outlet before using. Never lift the
safety flap when the lawn mower
is being used without fitted grass
collection bag.
See Fig. N1,
N2
Storage See Fig. O1,
O2
BATTERY STATUS (See Fig. I)
Light ON/ Flash Status
One Red on
Two LED-lights
off
Defective Battery
One Red flash
Two LED-lights
off
----------
Battery Temperature
Protection
The temperature of battery
pack is less than 00C or
more than 450C
Three Green on Fully Charged
Three Green
flash
---------- Charging
MULCHING MOWING TIPS
While mulching, your new mower is designed to cut the
grass clippings into small pieces and distribute them
back into the lawn. Under normal conditions, the mulched
grass will biodegrade quickly and deliver nutrients to the
lawn. Please review the following recommendations for
optimum mulching performance.
1) Avoid mowing when the grass is wet from rain or dew.
Wet grass may form clumps which interfere with the
mulching action and reduce the runtime. The best
time to mow the grass is in the late afternoon when the
grass is dry and the newly cut area will not be exposed
to direct sunlight.
2) For the best mulching performance, set the cutting
height to remove about one third of the grass blade
length, ideally no more than 40mm at one time. If the
lawn is overgrown, it may be necessary to increase the
cutting height to reduce the pushing effort and prevent
overloading the motor. For extremely heavy mulching,
it is advisable to first cut at a high cut height setting,
and then re-cut to the final cut height. Otherwise, make
narrower cuts and mow slowly.
3) For the best performance, keep the mower housing
free of built-up grass. From time to time turn off
mower and wait for the blades to come to a complete
stop. Then Remove the safety key and turn mower
on its side. Using an object such as a stick, wipe out
any accumulation of grass around the blade area. Be
careful of the sharp edges of the blade. Ensure to clean
the blade area often when cutting wet or new grass and
every time after the machine is used.
4) Certain types of grass or grass conditions may require
that an area be mulched a second time to fully disperse
the grass throughout the lawn. If cutting a second time,
it is advisable to cut perpendicular (across) the first cut
pattern. DO NOT CHANGE CUT PATTERN IN ANY WAY
THAT WOULD CAUSE MOWING DOWN A HILL.
5) Change your cutting pattern from week to week. This
will help prevent matting and graining of the lawn.
6) Do not mow on a slope that has an angle of greater
than 150.
CUTTING AREA
The cutting area can be affected by several factors, such
as cutting height, lawn humidity, grass length and density.
Besides, starting and stopping the mower too many times
during operation will reduce the cutting area.
The table below gives the relationship between cutting
conditions and cutting area.
Cutting Height Recommend lot size
(maximum)
Cutting off 8cm to 6cm With 4*20V / 4.0Ah batteries
up to 1000m
2
*
* Use with 4 fully charged battery packs. If batteries of
differing amp hours are used together, the product will
operate to the lowest common denominator.
TIPS:
1) It is recommended to mow your lawn more frequently,
walk at normal pace, and not to start/stop the mower
too often during operation.

13
Cordless Lawn mower EN
2) For best performance, please ensure use 4 fully
charged battery packs at the same time and always cut
off 1/3 or less of the grass height.
3) Walk slowly when cutting long grass, so as to have more
effective cutting and properly discharge the clippings.
4) Avoid cutting wet grass, otherwise it will stick to the
underside of the deck and the clippings cannot be
collected or discharged properly.
5) A higher cutting height shall be applied to new or thick
grass and it will extend the battery duration.
STORAGE SEE FIG. O1, O2
Stop the mower, and always remove the Safety Key and bat-
teries. Clean the exterior of the machine thoroughly using a
soft brush and cloth. Do not use water, solvents or polishes.
Remove all grass and debris, especially from the ventilation
slots.
Turn the machine on its side and clean the blade area. If
grass cuttings are compacted in the blade area, remove with
a wooden or plastic implement.
Store the machine in a dry place. Do not place other objects
on top of the machine.
To aid storage, Press and hold Quick-release button, and fold
the Handle bar.
MAINTENANCE
WARNING: Stop the mower, remove the safety
key and batteries before removing the grass
collection bag.
NOTE To ensure long and reliable service, perform the fol-
lowing maintenance procedures regularly. Check for obvious
defects such as a loose, dislodged or a damaged blade, loose
fittings, and worn or damaged components. Check that
the covers and guards are all undamaged and are correctly
attached to mower. Carry out any necessary maintenance or
repairs before operating mower. If the mower should happen
to fail despite regular maintenance, please call our customer
helpline for advice.
BLADE SHARPENING
KEEP BLADE SHARP FOR BEST MOWER PERFORMANCE. A
DULL BLADE DOES NOT CUT GRASS CLEANLY OR MULCH
PROPERLY.
WEAR PROPER EYE PROTECTION WHILE REMOVING, SHARP-
ENING, AND INSTALLING BLADE. ENSURE THAT SAFETY KEY
AND BATTERIES ARE REMOVED.
Sharpening the blade twice during a mowing season is
usually sufficient under normal circumstances. Sand causes
the blade to dull quickly. If your lawn has sandy soil, more
frequent sharpening may be required.
REPLACE BENT OR DAMAGED BLADE IMMEDIATELY.
WHEN SHARPENING THE BLADE (See Fig. P)
1. Make sure blade remains balanced.
2. Sharpen blade at the original cutting angle.
3. Sharpen cutting edges on both ends of blade to keep it
balanced, removing equal amounts of material from both
ends.
NOTE
1. Be sure the mower is turned off . Remove the key and
batteries.
2. Place the mower in stand up storage mode.
BLADE BALANCING (See Fig. Q)
Check balance of blade by placing center hole in blade Q-1
over a screwdriver shank Q-2, clamped horizontally in a vise
Q-3. If either end of the blade rotates downward, file that end.
Blade is properly balanced when neither end drops.
BLADE MAINTENANCE (See Fig. R1, R2)
Replace yourMower Blade after 50 hours mowing or 2 years,
which ever is the sooner-regardless of condition.
Follow these procedures to remove and replace the Blade.
You will need garden gloves (not provided) and a spanner
wrench (not provided) to remove the Blade. Make sure safety
key and batteries are not installed. Wedge a block of wood
between the blade and the mower deck to prevent the blade
from turning and unscrew the Blade Bolt counter-clockwise
using a spanner wrench, and then remove the Blade.
To re-assemble, position the Blade with the cutting edges
towards the ground. Then securely tighten the Blade Bolt.
ENVIRONMENTAL
PROTECTION
Disposal
The machine, its accessories and packaging
materials should be sorted for environmentally friendly
recycling. The plastic components are labeled for
categorized recycling.
TROUBLESHOOTING
PROBLEM SOLUTION
1. Mower doesn’t
run when
Operating Bail is
activated.
A. Check to make sure safety key has
been installed and is fully seated
and that Safety lock-out button is
completely pushed.
B. Release Operating Bail to turn
mower off. Remove safety key and
batteries, turn mower over and check
that blade is free to turn. If not free,
return to an authorized servicer.
Blade should turn freely.
C. Has battery been fully charged?
Plug in charger and wait for green
light to come on.

14
Cordless Lawn mower EN
2. Motor stops
while mowing. A. Release Operating Bail to turn
mower off. Remove safety key and
batteries,turn mower over and check
that blade is free to turn. If not free,
return to an authorized servicer.
Blade should turn freely.
B. Raise cutting height of wheels to
highest position and start mower.
C. Has battery been fully charged?
Plug in charger and wait for green
light to come on.
D. Avoid overloading the mower. Slow
down the cutting pace by pushing
mower slower or raise the cut height.
Or both.
3. Mower runs
but cutting
performance is
unsatisfactory,
or does not cut
entire lawn.
A. Has battery been fully charged? Plug
in charger and wait for green light to
come on.”
B. Release Operating Bail to turn mower
off. Remove safety key and batteries.
Turn mower over and check: Blade for
sharpness - Keep blade sharp. Deck and
discharge chute for clogging.
C. Wheel height adjustment may be set
too low for grass condition. Raise cutting
height.
4. Mower is too
hard to push. A. Raise cutting height to reduce
deck drag on grass. Check each
wheel for free rotation.
5. Mower is
abnormally
noisy and
vibrates.
A. Release Operating Bail to turn
mower off. Remove safety key
and batteries. Turn mower on
side and check blade to ensure it
has not been bent or damaged. If
blade is damaged, replace with a
replacement blade. If the underside
of the deck is damaged, contact
service agent.
B. If there is no visible damage to the
blade and the mower still vibrates:
Release Operating Bail to turn mower
off, Remove safety key and batteries,
and remove blade. Rotate blade 180
degrees and retighten. If mower still
vibrates, contact service agent.
6. Vibration
sensation and/
or swooshing
sound
coming from
underneath
deck.
A. Wet grass and/or debris has
collected to the inner wall of the
deck, creating unbalanced airflow.
Remove batteries and remove debris
from inner deck wall.
7. Battery
charger LED’s
not on.
A. Check plug connection.
B. Replace charger.
8. Battery
charger LED
does not flip to
green.
A. Battery needs to be diagnosed.
Take to authorized service center.
9. Mower not
picking up
clippings with
the Grass
Collection Bag.
A. Remove mulch plate when
bagging.
B. Chute clogged. Release Operating
Bail to turn mower off. Remove safety
key and batteries. Clear chute of
grass clippings.
C. Too much cut grass. Raise cutting
height of wheels to shorten length
of the cut.
D. Bag full. Empty bag more often.
10. When
mulching there
are clippings
visible.
A. Too much cut grass. Raise cutting
height of wheels to shorten length of
the cut. Do not cut off more than 1/3
of total length.
B. Check blade for sharpness. Always
keep blade sharp.
11. Low or
diminished run-
time after many
uses
A. Return to Authorized Service
location - may need new battery.
12. The battery
charger LED
flashes red and
the battery can’t
be charged.
A. The battery overheats after
continuous use. Remove battery
from the charger and allow it to cool
to 42°C or less.
13. If the
Mulching-Bag
Switch Lever will
not move.
A. Remove battery packs.
B. Place the mower in the upright
storage position.
C. Clean grass off of the mulching
plate. (See Fig. S)

15
Аккумуляторная газонокосилка RU
ОБЩИЕ ПРАВИЛА ТЕНИКИ
БЕЗОПАСНОСТИ
ПРЕДУПРЕЖДЕНИЕ! ВНИМАТЕЛЬНО
ОЗНАКОМЬТЕСЬ С ИНСТРУКЦИЯМИ.
Невыполнение всех нижеприведенных
инструкций и рекомендаций может привести к
поражению электрическим током, пожару и
серьезным травмам.
Внимательно прочитайте инструкцию, что
позволит обеспечить безопасную работу
косилки.
СОРАНИТЕ ЭТИ ИНСТРУКЦИИ!
- Данный аппарат не предназначен для
использования людьми (включая детей) с
недостаточными физическими, психическими
или умственными способностями,
необученными или неосведомленными лицами.
В случае использования аппарата упомянутыми
лицами необходим надзор за ними (или прямые
указания по применению) со стороны лица,
отвечающего за их безопасность.
- Дети в таких случаях должны находиться под
наблюдением во избежание баловства или игр с
данным аппаратом.
- Прибор следуетиспользовать толькос блоком
питания,поставляемым с машиной.
ОБУЧЕНИЕ
а) Внимательно прочитайте инструкции.
Ознакомьтесь с регуляторами и правильным
использованием оборудования;
б) Никогда не позволяйте детям или лицам,
не ознакомленными с этими инструкциями,
работать с газонокосилкой. Местные нормы
могут ограничивать возраст оператора;
в) Никогда не выполняйте скашивание вблизи
людей и, в особенности, детей или домашних
животных;
г) Помните, что оператор или пользователь
несет ответственность за несчастные случаи
или опасность для других людей или их
собственности.
ПОДГОТОВКА
а) При скашивании, всегда носите надежную
обувь и длинные брюки. Не работайте с
оборудованием босиком или в открытых
сандалиях;
б) Тщательно проверьте место, где предполагается
использование оборудования, и удалите
все объекты, которые могут отбрасываться
машиной;
в) Перед использованием всегда проводите
осмотр, чтобы убедиться, что лезвие, болты
лезвия и режущий узел не изношены или
повреждены. Заменяйте изношенные или
поврежденные лезвия и болты в комплектах для
сохранения балансировки;
d) При работе с косилкой, имеющей несколько
ножей, соблюдайте осторожность, так как
вращение одного ножа может привести к
вращению остальных ножей.
ЭКСПЛУАТАЦИЯ
a) Косите только в дневное время или при хорошем
искусственном освещении;
b) Избегайте работы с оборудованием в мокрой
траве там, где возможно;
c) Всегда проверяйте свою точку опоры на
склонах;
d) Ходите, никогда не бегайте;
e) В случае колесных роторных машин скашивайте
поперек лица склонов, но никогда не
скашивайте вверх и вниз;
f) Проявляйте исключительную осторожность при
смене направления на склонах;
g) Не проводите скашивание на слишком крутых
склонах;
h) Будьте предельно осторожны при
реверсировании направления или подтягивании
газонокосилки к себе;
i) Остановите лезвие(я), если газонокосилку
необходимо наклонить для транспортировки
при пересечении поверхностей, отличных
от травы, а также при транспортировке
газонокосилки в и из зоны, которую необходимо
окосить;
j) Никогда не управляйте газонокосилкой с
неисправным защитным кожухом или без
установленных устройств безопасности,
например отражателей и/или уловителей;
k) включайте двигательв соответствии
синструкциями, держа ногивдали от лезвий;
l) Не наклоняйте газонокосилку при включении
мотора, за исключением случаев, когда она
должна быть наклонена для пуска. В этом
случае не наклоняйте её больше, чем абсолютно
необходимо, и поднимайте только ту часть,
которая удалена от оператора;
m) Не ставьте руки или ноги вблизи вращающихся
деталей или под ними. Всегда держитесь вдали
от выпускного отверстия;
n) Не поднимайте и не переносите газонокосилку,
когда ее двигатель работает;
o) Не касайтесь лезвия до съема блокирующего
устройства. А лезвия не остановятся полностью;
p) снимайте блокирующее устройство:
– каждый раз, когда вы оставляете машину без
присмотра;
– перед очисткой засорения;
– перед проверкой, чисткой или работой на
машине;
– после удара о посторонний объект; Iосмотрите
газонокосилку на предмет повреждений и при
необходимости выполните ремонт;
– если газонокосилка начинает ненормально
вибрировать (немедленно проверьте);
ОБСЛУЖИВАНИЕ И РАНЕНИЕ
a) Следите за затяжкой всех гаек, болтов и винтов
для того, чтобы быть уверенным в том, что
устройство находится в безопасном рабочем

16
Аккумуляторная газонокосилка RU
состоянии.
b) Для уменьшения опасности воспламенения,
очищайте аккумуляторный отсек от травы,
листьев или избытка смазки;
c) Периодически проверяйте улавливатель травы
на износ или повреждение.
d) Убедитесь в том, что используются только
сменные режущие приспособления
подходящего типа;
ПРАВИЛА ТЕНИКИ
БЕЗОПАСНОСТИ ДЛЯ
АККУМУЛЯТОРНОЙ БАТАРЕИ
a) Не допускается разбирать, вскрывать,
измельчать элементы питания и
аккумуляторную батарею.
b) Не допускается накоротко замыкать
элементы питания или аккумулятор.
Не допускается беспорядочно ранить
элементы питания или аккумулятор в
коробке или ящике, где они могут замкнуть
друг друга или могут быть замкнуты
другими металлическими предметами.
Если аккумуляторная батарея не используется,
держите ее подальше от металлических
предметов, таких как зажимы, монеты, гвозди,
винты и прочие металлические предметы
небольшого размера, которые могут соединить
клеммы друг с другом. Короткое замыкание
клемм батареи может стать причиной ожогов
или пожара.
c )Не допускается подвергать аккумуляторную
батарею воздействию высоки температур
или пламени. Избегайте ранения
аккумуляторной батареи в места,
подверженны воздействию прямого
солнечного света.
d) Не допускается подвергать аккумуляторную
батарею меаническим ударам
e) В случае протечки аккумуляторной батареи,
не допускайте контакта электролита с
кожей или глазами. В случае такого контакта
неободимо промыть пораженный участок
обильным количеством воды и обратиться за
медицинской помощью.
f) Аккумуляторную батарею неободимо
содержать в чистоте и суости.
g) В случае загрязнения контактов
аккумуляторной батареи и неободимо
протереть чистой суой тканью.
h) Аккумуляторную батарею неободимо
заряжать перед использованием. Всегда
следуйте данной инструкции и используйте
правильный порядок зарядки.
i) Не допускается оставлять аккумулятор
на зарядном устройстве, если он не
используется.
j) После продолжительного ранения может
потребоваться несколько раз зарядить и
разрядить аккумуляторную батарею для
достижения максимальной эффективности
ее работы.
k) Используйте только зарядные устройства,
указанные WorxNITRO. Не допускается
использовать какие-либо зарядные
устройства, за исключением специально
предназначенны для данного
оборудования.
l) Не допускается использовать какие-
либо аккумуляторные батареи, не
предназначенные для использования с
данным оборудованием.
m) раните аккумуляторную батарею в места,
недоступны для детей.
n) Следует соранить оригинальную
документацию на изделие для будущего
использования.
o) По возможности извлекайте аккумуляторную
батарею из изделия, если она не
используется.
p) Утилизируйте аккумуляторную батарею
должным образом.
q) Не используйте с устройством элементы
разного производства, емкости, размера или
типа.
r) раните аккумуляторы вдали от
воздействия микроволнового излучения и
высокого давления.
УСЛОВНЫЕ ОБОЗНАЧЕНИЯ
Прочтите инструкцию
поэксплуатации перед
началомэксплуатации этой
машины
Держите посторонних людей
набезопасном расстоянии.
Держите посторонних людей
набезопасном расстоянии.

17
Аккумуляторная газонокосилка RU
Литий-ионный аккумулятор Этот
продукт был отмечен символом,
связанным с «раздельным
сбором» для всех батарейных
блоков и батареи. Затем он
утилизируется или раскреплен,
чтобы уменьшить воздействие на
окружающую среду. Батарейный
блок могут быть вредны для
окружающей среды и здоровья
человека, поскольку они
содержат вредные вещества.
Не поджигать
При неправильной утилизации
батареи могут попасть в водный
цикл, что может быть опасным для
экосистемы. Не выбрасывайте
использованные батареи в
несортированные бытовые
отходы.
Надевайте защитные рукавицы
Перед выполнением
любойрегулировки или
техническогообслуживания
извлеките
аккумулятор из устройства
Вытащите ключ зажигания
Лезвия продолжают
вращатьсяпосле выключения
машины.Подождите, пока все
компоненты машины
полностьюне остановятся,
прежде чемприкасаться к ним.
СПИСОК КОМПОНЕНТОВ
1. РУКОЯТКА РЕГУЛИРОВКИ СКОРОСТИ ОДА
2. РАБОЧАЯ ДУГА
3. РУКОЯТЬ
4. РЫЧАГ ПЕРЕКЛЮЧАТЕЛЯ "ПЕРЕГНОЙ
МЕШОК"
5. СВЕТОДИОДНАЯ ФАРА
6. ПЕРЕДНЯЯ РУКОЯТКА
7. УКАЗАТЕЛЬ РЕГУЛИРОВКИ ВЫСОТЫ
СКАШИВАНИЯ
8. ИСТОЧНИК ПИТАНИЯ И ЗАРЯДНОЕ
УСТРОЙСТВО 80 В, BASECAMP
9. ВИЛОЧНОЕ СОЕДИНЕНИЕ BASECAMP
10. РЫЧАГ РЕГУЛИРОВКИ ВЫСОТЫ
СКАШИВАНИЯ
11. ЗАДНЯЯ РУКОЯТКА
12. ПРЕДОРАНИТЕЛЬНЫЙ ЩИТОК
13. МЕШОК ДЛЯ СБОРА ТРАВЫ
14. ШНУР ЗАРЯДКИ
15. КНОПКА БЫСТРОЙ РАЗБЛОКИРОВКИ
16. КНОПКА ПРЕДОРАНИТЕЛЬНОЙ
БЛОКИРОВКИ
17. КНОПОЧНЫЙ ВЫКЛЮЧАТЕЛЬ
СВЕТОДИОДНОЙ ФАРЫ
18. ВОД ЗАРЯДНОГО ШНУРА
19. ИНДИКАТОРНАЯ КНОПКА АККУМУЛЯТОРА
20. КРЫШКА БОКОВОГО ВЫБРОСА СМ. РИС.
D2
21. СКАТ БОКОВОГО ВЫБРОСА СМ. РИС. D2
22. АККУМУЛЯТОР СМ. РИС. F1
23. ПРЕДОРАНИТЕЛЬНЫЙ КЛЮЧСМ. РИС. F1
24. БОЛТ ЛЕЗВИЯ СМ. РИС. R1
25. ЛЕЗВИЕ СМ. РИС. R1
26. РАСПОРНАЯ ВТУЛКА СМ. РИС. R1
*Не все принадлежности, иллюстрированные
или описанные включены в стандартную
поставку.

18
Аккумуляторная газонокосилка RU
ТЕНИЧЕСКИЕ
АРАКТЕРИСТИКИ
Тип WG761E WG761E.9 (7 - обозначение
оборудования, типового для беспроводны
газонокосилок)
WG761E WG761E.9
Напряжение 80V Max. (4x20V Max.)**
Скорость без
нагрузки 2800 /min
Ширина платформы 53 cm
Ширина скашивания 51 cm
Диаметр переднего
колеса
200 mm
Диаметр заднего
колеса 250 mm
Высота кошения 20 – 80 mm
Положения высоты
кошения 7
Емкость
травосборника 70 L
Модель батареи 4.0 Ah (WA3014) /
Тип батареи Ионно-литиевая
Модель зарядного
устройства WA3974 /
Мощность
зарядного
устройства
IВходная: AC
220-240 V~50 Hz
Выходная: 20 V
, 1 A
(каждый слот
аккумулятора)
/
Время зарядки
для одного
аккумуляторного
комплекта
(примерно)
4.0 Ah 4-5 hrs
/
Вес машины 35 kg 32.4 kg
** Напряжение измеряется без нагрузки.
Начальное напряжение батареи достигает 80 вольт.
Номинальное напряжение составляет 72 вольт.
Зарядные порты независимые. Время зарядки для
четырех аккумуляторных комплектов той же самой
емкости равно времени для одного аккумуляторного
комплекта.
ПРИНАДЛЕЖНОСТИ
WG761E WG761E .9
Аккумуляторная
батарея (WA3014) 4 /
Basecamp (WA3974)
(источник питания и
зарядное устройство
80 В)
1 1
Травосборник 1 1
Комплект бокового
выброса 1 1
Рекомендуется приобретать все принадлежности в
том же магазине, где был приобретен инструмент.
Обратитесь к вспомогательной упаковки для
получения более подробной информации. Помощь и
консультацию можно также получить у продавца.
ДАННЫЕ ШУМА
Условное звуковое давление LpA = 80.9 dB(A)
KpA 3.0 dB (A)
Удельная мощность звука LwA = 94.1 dB(A)
KwA 2.0 dB (A)
Наденьте защиту для ушей.
ИНФОРМАЦИЯ О ВИБРАЦИИ
Вибрация ah<2.5 m/s²
Погрешность K = 1.5 m/s²
ПРЕДУПРЕЖДЕНИЕ. Значение вибрации
при фактическом использовании
электроинструмента может отличаться от
заявленного значения в зависимости от следующего:
-Как используется инструмент
-Инструмент находится в хорошем состоянии и
ухожен
-Используйте правильный аксессуар для инструмента
и убедитесь, что он острый и в хорошем состоянии.
-Плотность захвата на ручках при использовании
любых антивибрационных аксессуаров.
-Инструмент используется в соответствии с его
конструкцией и этими инструкциями
ПРЕДУПРЕЖДЕНИЕ. Чтобы быть точным,
оценка уровня воздействия в реальных
условиях использования должна также учитывать все

19
Аккумуляторная газонокосилка RU
части рабочего цикла, такие как время, когда
инструмент выключен и когда он работает на
холостом ходу, но не выполняет работу , Это может
значительно снизить уровень воздействия за весь
рабочий период и помогает минимизировать риск
вибрации.
Для минимализации вибрации:
ВСЕГДА используйте острые лезвия
Обслуживайте этот инструмент в соответствии с
этими инструкциями и хорошо смазывайте (при
необходимости)
Если инструмент следует использовать регулярно, то
приобретите антивибрационные аксессуары.
ИНСТРУКЦИЯ
ПОЭКСПЛУАТАЦИИ
ПРИМЕЧАНИЕ : Перед началом работы сэтим
аппаратом прочитайте инструкцию по
эксплуатации.
ПРЕДПОЛАГАЕМОЕ ИСПОЛЬЗОВАНИЕ
Этот продукт предназначен для покоса травы.
СБОРКА ИЭКСПЛУАТАЦИЯ
Действие Рисунок
Сборка
Установка рукоятки
ПРИМЕЧАНИЕ. По время работы
нажмите и удерживайте нажатой
кнопку быстрой разблокировки.
См. Рис. A
Сборка травосборника См. Рис. B
Установка травосборника на
газонокосилку
ПРИМЕЧАНИЕ: Слегка нажмите
на травосборник, чтобы убедиться
в том, что он полностью установлен
ПРИМЕЧАНИЕ: нажмите рычаг
переключателя “перегной-мешок”
в положение открытого выброса
перегноя до установки мешка
сбора травы.
См. Рис.
C1-C3
Сборка ската бокового выброса
ПРИМЕЧАНИЕ: помните, что перед
сборкой нужно сначала снять
мешок сбора травы, а затем нажать
рычаг переключателя “перегной-
мешок” в положение закрытого
выброса перегноя.
См. Рис. D1,
D2
Снятие/установка basecamp
ПРИМЕЧАНИЕ: при монтаже
аккуратно потяните basecamp,
чтобы гарантировать надежную
установку.
ПРИМЕЧАНИЕ: при монтаже
прикрепите кабельной стяжкой
сетевой выход basecamp к косилке,
чтобы обеспечить надежное
соединение. Не рекомендуется
снимать кабельную стяжку.
См. Рис.
E1-E4
Извлечение / установка
аккумуляторной батареи
Перед установкой аккумулятора
вставьте защитный ключ.
ПРИМЕЧАНИЕ:
Эта машина будет работать
только тогда, когда установлены
4 батареи. Пожалуйста, всегда
используйте две батареи
одинаковой емкости и полностью
заряжайте обе батареи.
Когда вы используете 4 батареи с
разной мощностью, машина будет
работать только в соответствии с
мощностью менее емкой батареи.
См. Рис.
F1, F2
Проверка состояния заряда
аккумуляторной батареи
ПРИМЕЧАНИЕ
: Рис. G относится
только к аккумуляторной батарее со
световым индикатором батареи.
См. Рис. G
Зарядка аккумуляторной батареи
ПРИМЕЧАНИЕ: Аккумуляторные
батареи поставляются
незаряженными. Каждая батарея
должна быть полностью заряжена
перед первой эксплуатацией
газонокосилки.
Всегда полностью заряжайте
4 батареи одновременно.
Более подробная информация
приведена в соответствующей
главе руководства к зарядному
устройству.
ПРИМЕЧАНИЕ: всегда заряжайте
аккумуляторный комплект, когда
basecamp находится на косилке.
См. Рис. H
Индикатор заряда батареи на агрегате
Подробности смотрите в разделе
СОСТОЯНИЕ БАТАРЕИ.
Нажмите индикаторную кнопку
аккумулятора – лампочка
загорится, показывая наименьшую
общую величину, затем через 3 с
будет показано состояние каждого
аккумуляторного комплекта.
См. Рис. I
ЭКСПЛУАТАЦИЯ

20
Аккумуляторная газонокосилка RU
Запуск и выключение
ПРИМЕЧАНИЕ: после каждого
применения переместите рычаг
переключателя “перегной-мешок”
в положение мешка сбора травы
(см. рис. C1).
См. Рис.
J1, J2
Система хода См. Рис. K
Регулировка высоты кошения
ПРЕДУПРЕЖДЕНИЕ! Перед
регулировкой высоты
остановитесь, отпустите рабочую
дугу и дождитесь, пока двигатель
остановится. После выключения
газонокосилки ножи продолжают
вращаться и могут стать причиной
травмы. Запрещается касаться
вращающися ножей
См. Рис. L
Открытие светодиодной фары См. Рис. M
Извлечение / опорожнение
травосборника
ПРЕДОСТЕРЕЖЕНИЕ!
Необходимо убедиться в том,
что предохранительный клапан
закрывает выпускной патрубок перед
использованием машины. Никогда
не поднимайте предохранительный
клапан, когда газонокосилка
используется без установленного
травосборника.
См. Рис. N1,
N2
Хранение См. Рис. O1,
O2
СОСТОЯНИЕ БАТАРЕИ (См. Рис. I)
Индикатор Вкл/
Мигание Статус
Горит один
красный
Два
светодиода
выключены
Дефектная батарея
Мигает один
красный
Два
светодиода
выключены
----------
Температурная защита
батареи
Температура батареи
меньше 0oCили больше
45oC.
Горит один
зеленый
Полностью заряжен
Мигает один
зеленый
---------- Заряжается
СОВЕТЫ ПО
МУЛЬЧИРОВАНИЮ
Во время мульчирования газонокосилка мелко
измельчает траву и разбрасывает ее по газону.
В нормальных условиях мульча из травы быстро
разлагается и доставляет в почву питательные
вещества. Просмотрите следующие рекомендации
по оптимальному мульчированию.
1) Избегайте скашивания влажной травы после
дождя или росы. При скашивании влажной травы
возможно образование липки комков, которые
препятствуют мульчированию и сокращают
срок службы ножей. Лучшее время для кошения
травы — вторая половина дня, когда трава сухая
и на скошенные области не попадает прямой
солнечный свет.
2) Для максимально эффективного мульчирования
установите такую высоту скашивания, чтобы
срезалась примерно одна треть от длины травы,
но не более 40 мм за один проход. В случае
запущенного газона, возможно, потребуется
увеличить высоту скашивания, чтобы уменьшить
усилие толкания и предотвратить перегрузку
двигателя. Для крайне сложного мульчирования
рекомендуется сначала косить траву с большой
высотой скашивания, а затем с заключительной
высотой. Или же уменьшите ширину реза
скорость скашивания.
3) Для получения лучшего результата следите
за тем, чтобы в корпусе газонокосилки не
скапливалась трава. Периодически выключайте
газонокосилку и дождитесь, пока ножи
полностью не остановятся. Затем снимите
защитный ключ и установите газонокосилку
на бок. С помощью подходящего предмета,
например, прутка, удалите траву вокруг области
ножа. Соблюдайте осторожность, кромки ножа
очень острые. При скашивании влажной или
новой выросшей травы чистите область ножей
чаще. Также чистите эту область после каждого
использования газонокосилки.
4) Для некоторых типов травы или в некоторых
условиях, возможно, потребуется второе
мульчирование для равномерного
распределения травы по газону. При
втором скашивании рекомендуется косить
траву перпендикулярно (поперек) первого
скашивания. НЕ ИЗМЕНЯЙТЕ НАПРАВЛЕНИЕ
СКАШИВАНИЯ ТАК, ЧТОБЫ ГАЗОНОКОСИЛКИ
ПЕРЕМЕЩАЛАСЬ ВНИЗ ПО СКЛОНУ.
5) Изменяйте направление скашивания каждую
неделю. Это помогает предотвратить
формирование слоя скошенной травы и
гранулирование газона.
This manual suits for next models
1
Table of contents
Languages:
Other Worx Nitro Lawn Mower manuals