11Wave Technology WaveBuddy EWP-813WA1 User manual

WaveBuddy
WLAN PC Card/PCI/USB Adapter
User Guide
EWP-813WA1
EWU-531WA1
EWC-351WA1
Version 1.0
11Wave Technology Inc.

11Wave Technology Inc.
I
INFORMATION TO USER
Federal Communications Commission Statement
This product has been tested and complies with the specifications for a Class B digital device,
pursuant to Part 15 of the FCC Rules. These limits are designed to provide reasonable protection
against harmful interference in a residential installation. The antenna used for this transmitter
must be installed to provide a separation distance of least 20 centimeters from all persons and
must operate in conjunction with other antenna or transmitters. This equipment generates, uses,
and can radiate radio frequency energy and, if not installed and used according to the instructions,
may cause harmful interference to radio communications. However, there is no guarantee that
interference will not occur in a particular installation. If this equipment does cause harmful
interference to radio or television reception, which is found by turning the equipment off and on,
the user is encouraged to try to correct the interference by one or more of the following measures:
◇Reorient or relocate the receiving antenna
◇Increase the separation between the equipment or device
◇Connect the equipment to an outlet other than receiver’s
◇Consult a dealer or an experienced radio/TV technician for assistance
Notice: The Part 15 radio device operates on a non-interference basis with other devices operating
at this frequency. Any change or modification not expressly approved by the party responsible
could void the user’s authority to operate the device.
Regulatory
The wireless LAN Card must be installed and used in strict accordance with the manufacturer’s
instructions. This device complies with the following radio frequency and safety standards.
USA - Federal Communications Commission (FCC)
This device complies with Part 15 of FCC Rules. Operation is subject to the following two
conditions:
1. This device may not cause harmful interference.
2. This device must accept any interference that may cause undesired operation.
Europe - R&TTE Directive
This device complies with the specifications listed below:
⌧ETS 300-826 General EMC requirements for Radio equipment.
⌧ETS 300-328 Technical requirements for Radio equipment.
⌧EN60950 Safety requirements for Radio equipment.
EU Countries not intended for use
The ETSI version of this device is intended for home and office use in Austria, Belgium,
Denmark, Finland, France (with Frequency channel restrictions). Germany, Greece, Ireland, Italy,
Luxembourg, Netherlands, Portugal, Spain, Sweden and United Kingdom.
The ETSI version of this device is also authorized for use in EFTA member states Iceland,
Liechtenstein, Norway and Switzerland.

11Wave Technology Inc.
II
Table of Contents
1. INTRODUCTION ..................................................................................................... 1
1.1 THE WAV E BUDDY WIRELESS LAN NIC............................................................... 1
1.2 FEATURES ............................................................................................................. 1
1.3 PACKAGE CONTENTS ............................................................................................ 1
1.4 SYSTEM REQUIREMENTS ...................................................................................... 2
2. NETWORK CONFIGURATION AND PLANNING ............................................ 3
2.1 WIRELESS LAN BASIC ......................................................................................... 3
3. INSTALLATION FOR WINDOWS 9X/ME/2000/XP........................................... 4
3.1 WHAT YOU NEED TO KNOW ABOUT WINDOWS 9X/ME/2000/XP ........................ 4
3.2 WHAT YOU WILL NEED........................................................................................ 4
3.3 INSTALL PCI ADAPTER DRIVER............................................................................ 4
3.4 INSTALL PCI ADAPTER UTILITY ........................................................................... 5
3.5 INSTALL PC CARD/USB ADAPTER DRIVER AND UTILITY .................................... 9
3.6 UNINSTALL PROCEDURE UNDER WINDOWS 9X/ME............................................ 13
3.7 UNINSTALL PROCEDURE UNDER WINDOWS 2000/XP ........................................ 13
4. INSTALLATION FOR WINDOWS NT 4.0 ......................................................... 15
4.1 WHAT YOU NEED TO KNOW ABOUT WINDOWS NT 4.0 ..................................... 15
4.2 WHAT YOU WILL NEED...................................................................................... 15
4.3 INSTALL PCI ADAPTER ....................................................................................... 15
4.4 INSTALL PC CARD .............................................................................................. 16
4.5 INSTALL UTILITY ................................................................................................ 17
4.6 UNINSTALL PROCEDURE UNDER WINDOWS NT 4.0 ........................................... 17
5. WLAN CONFIGURATION & MONITOR UTILITY........................................ 18
5.1 HOW TO ACCESS THE WLAN CONFIGURATION &MONITOR UTILITY................ 18
5.2 USING THE WLAN CONFIGURATION &MONITOR UTILITY ................................ 18
5.3 COLLABORATING WITH WINDOWS XP................................................................ 23
APPENDIX A................................................................................................................... 25
APPENDIX B : GLOSSARY.......................................................................................... 27

11Wave Technology Inc.
1
1. Introduction
1.1 The WaveBuddy Wireless LAN NIC
Thank you for purchasing the WaveBuddy Wireless LAN product. The WaveBuddy WLAN
Network Interface Card (NIC) family includes:
•WLAN PCI Adapter/56K Modem Combo
•WLAN PC Card
•WLAN USB Adapter
The WLAN NIC provides access to Wireless Local Networks (WLANs) using the IEEE 802.11b
Standard.
The product is compatible with Windows 98/ME/2000/XP with Plug-and-Play capability. For
Windows NT, the installation follows typical hardware installation procedures. Once the driver
and utility software is installed, you can use the Configuration Utility to set up the device.
1.2 Features
•IEEE 802.11b Direct Sequence high rate compatible
•High data rate, 11/5.5/2/1 Mbps
•Auto Rate fallback
•IPX, NetBEUI, TCP/IP protocols supported.
•Wired Equivalent Privacy Algorithm (WEP) (64 bits/128 bits)
•802.11 Power save in infrastructure mode
•Passive/Active scan. Long/Short preamble
•RTS/CTS handshake
•Site Survey
•Roaming
•Dynamic configuration
•Beacon and Probe response generation in an IBSS.
•Plug-and-Play and easy setup
1.3 Package Contents
Please make sure that your received the following with
•One WaveBuddy WLAN card/adapter
•One Software Tools CD (Drivers and User Guide on CD)
•Quick Installation Guide
•One USB cable for the USB Adapter

11Wave Technology Inc.
2
1.4 System Requirements
•Operating System: MS Windows 9x/ME/2000, Windows NT 4.0 with Service Pack 4 or
later, Windows XP
•Desktop PC or notebook PC with CD-ROM drive
•10M bytes free disk space for utility and driver installation.

11Wave Technology Inc.
3
2. Network Configuration and Planning
2.1 Wireless LAN Basic
A Wireless LAN is an implementation or extension of regular LAN using radio wave as the
transmission medium instead of cables. A computer equipped with a WLAN NIC is called a
WLAN Station.
A WLAN can be configured in following modes:
•Infrastructure Mode: A device called Access Point acts as the base station for WLAN
Stations. The AP is connected to a wired LAN to extend network services to WLAN
Stations. The combination of an AP and its WLAN Stations is called a Basic Service Set
(BSS). Every BSS should have a unique ID, called SSID, that is shared by the AP and its
WLAN Stations.
•Ad-Hoc (Point-to-Point) Mode: A set of WLAN Stations can talk to each other in this
configuration. There is no need for an AP in this case. Unlike Infrastructure mode that
uses SSID to establish connections, Ad-Hoc WLAN Stations need to share the same
Channel among them. The Channel in this context is actually the radio frequency used by
the WLAN NIC.
In general, when a WLAN Station is working in Infrastructure Mode, it will scan the
neighborhood looking for an AP with the same SSID. It will then automatically switch to the
Channel used by that AP. As a result, there is no need to select the Channel on the WLAN Station
in this mode.
On the other hand, in Ad-Hoc Mode, all WLAN Stations must select a common Channel before
making the connections. SSID is irrelevant in this case.

11Wave Technology Inc.
4
3. Installation for Windows 9x/Me/2000/XP
Use the procedures described in this section to install and configure the WLAN NIC under
Windows 9x/Me/2000/XP. If you are using Windows NT, please go to the next section.
3.1 What You Need to Know About Windows 9x/Me/2000/XP
Although similar in appearance, Windows 9x/Me/2000/XP and Windows NT 4.0 use different
procedures when installing a new hardware.
Throughout this section it is assumed that you have a basic working knowledge of Windows
95/98/Me/2000/XP and of how to install new network devices on them.
Windows 9x/Me/2000/XP operating system supports the “Plug-and-Play” feature. This means
that the first you install a new hardware, the operating system will detect the hardware and
automatically search and install the driver.
3.2 What You Will Need
During the installation, you may be prompted to load operating system files from the Windows
installation disk. Please keep this disk handy.
You will need the Software Tools CD provided with your package.
Note:With Windows 2000/XP, you need to log in as the “Administrator” or with the privilege to
install the WLAN NIC.
3.3 Install PCI Adapter Driver
The WaveBuddy WLAN PCI Adapter is a WLAN/56K Modem combo. If you do not need
the modem capability, please skip its installation process.
1. Turn off the PC and remove the power cord. Plug the WLAN PCI Adapter into a free slot.
2. Restart the PC, Windows will detect the WLAN PCI Adapter and start driver installation.
3. Select “Search for a suitable driver for my device (recommended)”.
4. Click “Next”.
5. Select “Specify a location” as shown in the following.
6. Please insert the CD as given into CD-ROM.
7. Browse to your CD-ROM drive (assuming it is the D: drive). Go to
D:\WaveBuddy\WLAN Card & Adapter\Drivers \PCI-miniPCI\OS\ and click on
“OK”. Please select the correct OS you are using.

11Wave Technology Inc.
5
8. Click on “Next”.
9. Window will automatically look for the proper driver itself.
10. Click on “Next”.
11. Please click on “Yes” to continue the installation.
12. Windows has finished installing the WLAN software. Please click on “Finish”.
For Smart Link 56K Modem card, follow the same steps. Its driver can be found in
D:\WaveBuddy\WLAN Card & Adapter\Drivers\ PCI-miniPCI\Modem\OS\.
Please refer to readme.txt (D:\WaveBuddy\WLAN Card & Adapter\Drivers
\PCI-miniPCI\Modem\OS\readme.txt) for more details on the Smart Link 56K Modem.
3.4 Install PCI Adapter Utility
1. Insert the given Installation CD into your CD-ROM driver. Unless you have deactivated the
autorun feature of Windows, the screen shown below should appear automatically. If this
screen doesn’t appear automatically, you can access the installation by clicking the Autorun
button and choosing Run. In the drop-down box provided type D:\Autorun.exe (where D: is
the letter of your CD-ROM drive). Alternately, double-click My Computer and double-click
the Autorun.exe icon in the folder that appears or browse to your CD-ROM drive and go to
\WaveBuddy\WLAN Card & Adapter\ WLAN Monitor Utility\ and click on the
Setup.exe.
2. Click the “Install WLAN Monitor” button to start the application installation process.
3. Follow the installation instructions from the InstallShield Wizard by pressing the “Next”
button.

11Wave Technology Inc.
6
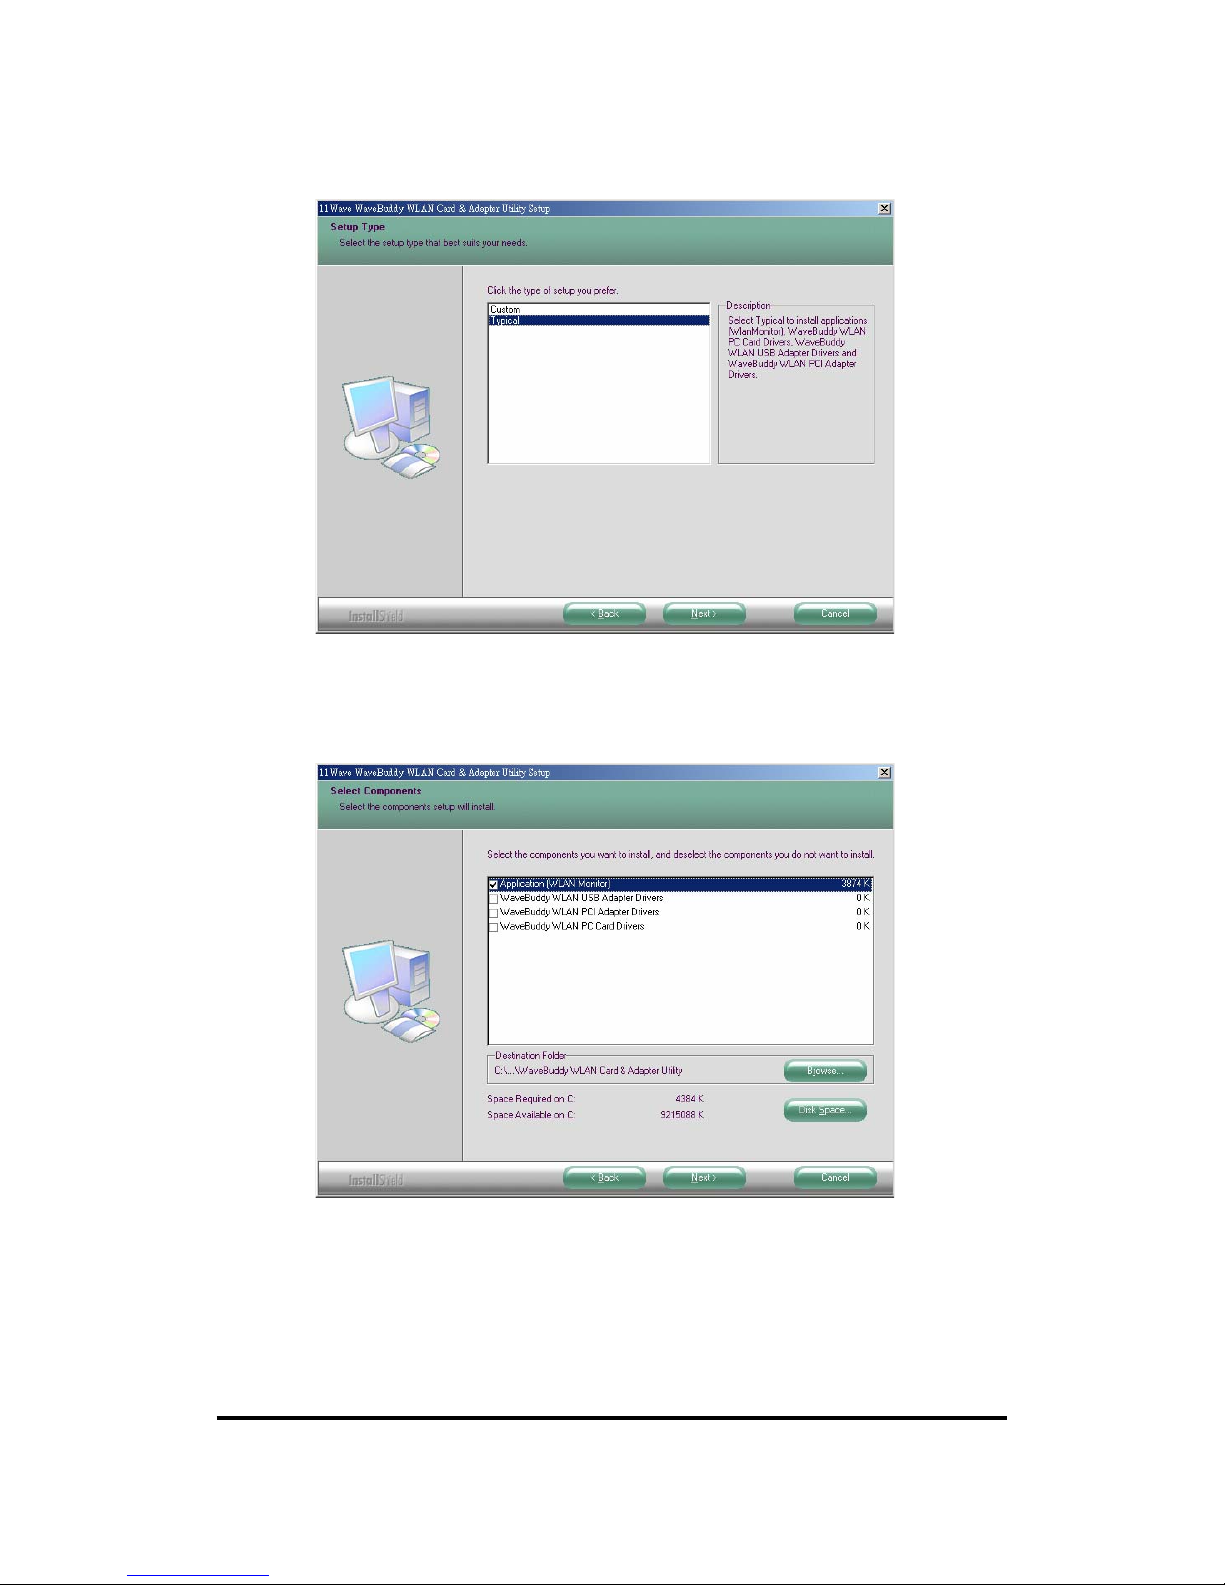
4. You will be asked which Setup Type to use.
11Wave Technology Inc.
7
5. Choose the “Custom” installation. You need only select “Application (WLAN Monitor)”
components in this case. Click ”Next” to continue.
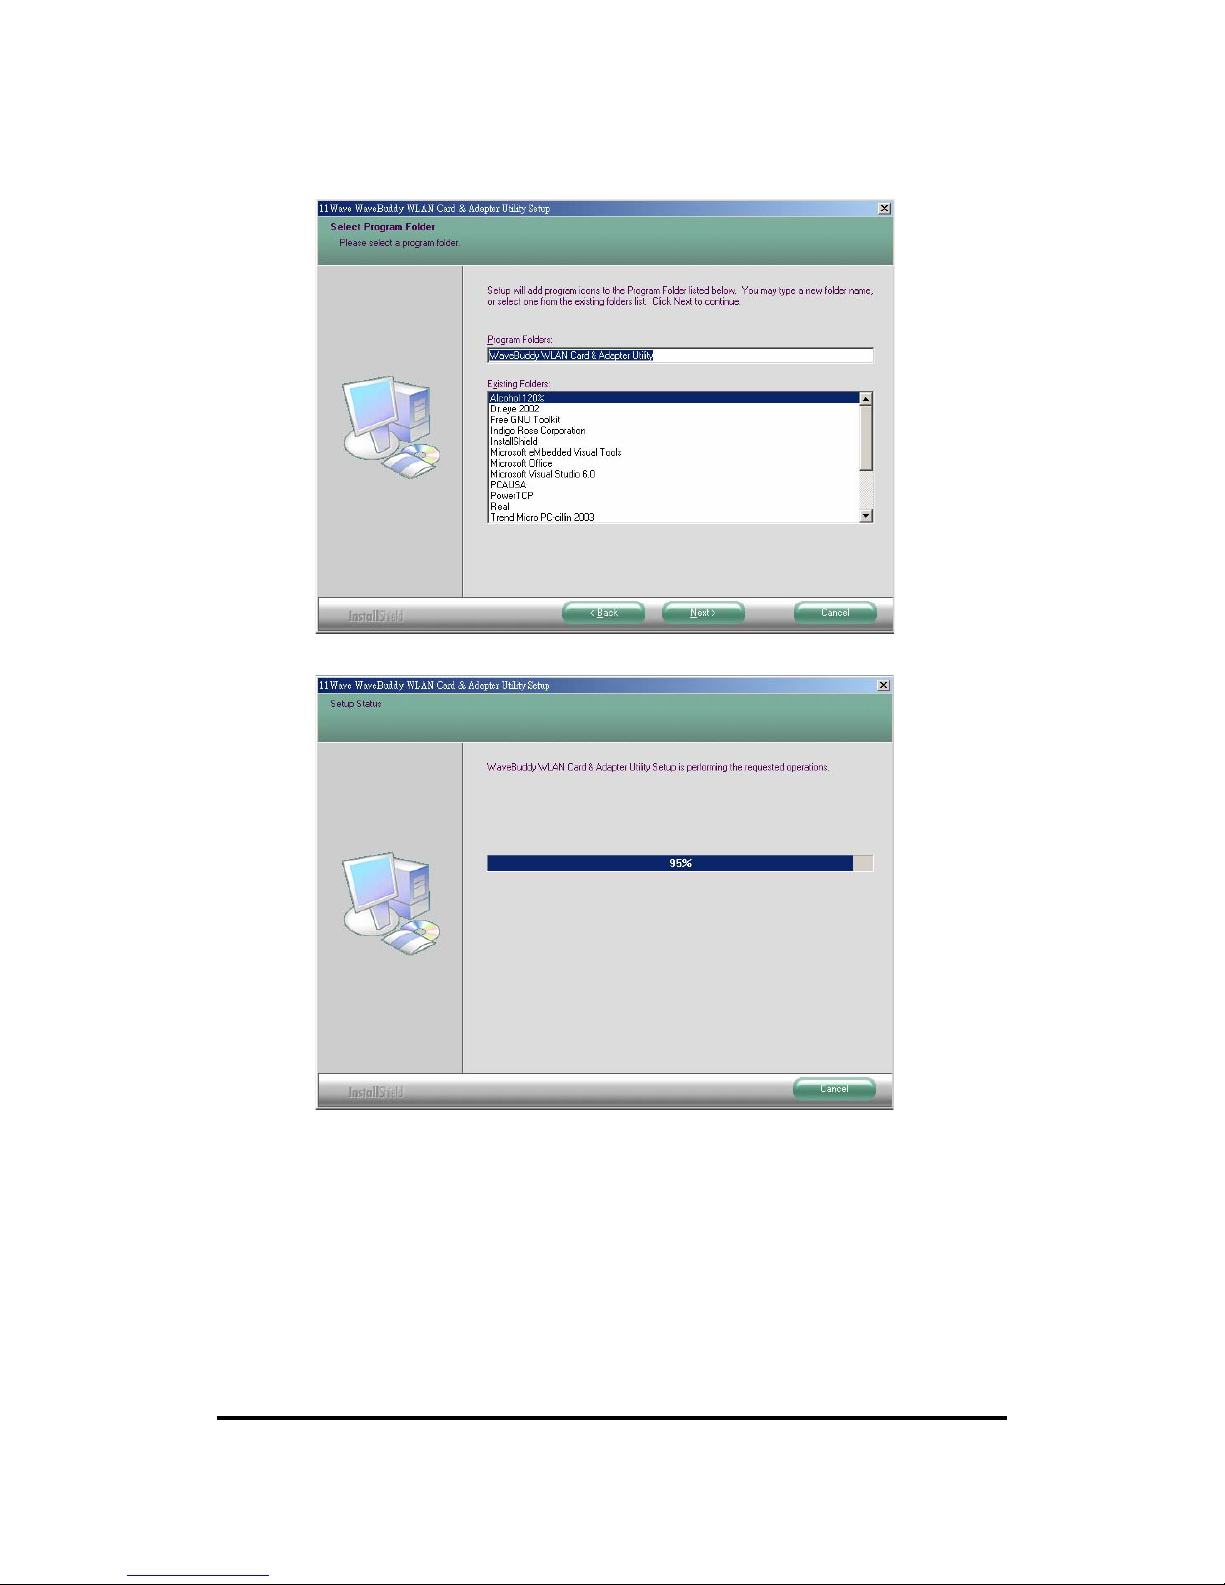
6. Windows will prompt you to add program icons to Program Folder. Click “Next” to continue.

11Wave Technology Inc.
8

11Wave Technology Inc.
9
7. Click “Finish” the installation.
3.5 Install PC Card/USB Adapter Driver and Utility
1. Power on the computer. Do not insert the PC Card or connect the USB Adapter just yet.
The setup procedure described below will install both the drivers and the utility software.
2. Insert the given Installation CD into your CD-ROM driver. Unless you have deactivated the
autorun feature of Windows, the screen shown below should appear automatically. If this
screen doesn’t appear automatically, you can access the installation by clicking the Autorun
button and choosing Run. In the drop-down box provided type D:\Autorun.exe (where D: is
the letter of your CD-ROM drive). Alternately, double-click My Computer and double-click
the Autorun.exe icon in the folder that appears or browse to your CD-ROM drive and go to
\WaveBuddy\WLAN Card & Adapter\ WLAN Monitor Utility\ and click on the
Setup.exe.

11Wave Technology Inc.
10
3. Click the “Install WLAN Monitor” button to start the driver and utility installation process.
4. Follow the installation instructions from the InstallShield Wizard by clicking the “Next”
button.

11Wave Technology Inc.
11
5. You will be asked with the Setup Type to use. Select Custom and choose the type of
hardware being installed. Make sure the “Application(WLAN Monitor)” is also selected.
6. Windows will prompt you to add program icons to Program Folder. Click “Next” to continue.
11Wave Technology Inc.
12

11Wave Technology Inc.
13
7. Click “Finish” to complete installation.
8. Now you may insert the PC Card or connect the USB Adapter.
3.6 Uninstall Procedure Under Windows 9x/Me
In order to uninstall the WLAN Configuration & Monitor Utility from Windows 9x/Me, you must
press the “Change/Remove” button under the Control Panel (Start -> Settings -> Control Panel ->
Add/Remove Programs -> WaveBuddy WLAN Card & Adapter Utility).
Note: It is recommended to stop the WLAN device and exit the utility prior to starting the
uninstallation procedure.
The above procedure uninstalls the WLAN Configuration & Monitor Utility, but not the driver
for the device. In order to uninstall the WaveBuddy WLAN card/adapter driver from Windows
9x/Me, you must double click on the “Network” option in the “Control Panel” (Start -> Settings
-> Control Panel). Select the “WaveBuddy WLAN PC/PCI/USB Card/Adapter” from the list and
press the “Remove” button. The system will prompt you to re-boot. Click "Yes" to re-boot.
3.7 Uninstall Procedure Under Windows 2000/XP
Follow the same “Add/Remote Programs” procedure to remove the WLAN Monitor Utility as
described in the last section.
In order to uninstall the WaveBuddy WLAN card/adapter driver from Windows 2000/XP you
must select it in the Device Manager of Windows 2000/XP and press “Uninstall”.
If for any reason you cannot apply this procedure, you can uninstall the device using the

11Wave Technology Inc.
14
following procedure:
1. Open “Control Panel”
2. Double click “Add/Remove Hardware” icon to start the wizard
3. When the Add/Remove Hardware wizard starts click “Next”
4. Select “Uninstall/Unplug a device” and click “Next”
5. Select “Uninstall a device” and click “Next”
6. Check the “Show hidden devices” checkbox and locate the device in the device list
7. Select the device and click “Next”
8. Select “Yes, I want to uninstall the device” and click “Next”
9. Click “Finish”
10. The device is removed from your system configuration
Note:It is recommended to stop the WLAN device and exit the WLAN Monitor prior to starting
the uninstallation procedure.

11Wave Technology Inc.
15
4. Installation for Windows NT 4.0
4.1 What You Need to Know About Windows NT 4.0
Although Windows NT 4.0 is similar in appearance with Windows 95/98/Me, and Windows 2000,
they have different philosophy when installing a new hardware.
Throughout this section it is assumed that you have a basic working knowledge of Windows NT
4.0 and of how to install new network cards on them. However, in this paragraph, some specific
features of Windows NT 4.0 are briefly explained.
Unlike Windows 95/98/Me, and Windows 2000, Windows NT 4.0 does not support the “Plug &
Play” and “Hot Swapping” features.
In Windows NT 4.0 you need to inform the operating system about the existence of the new card
in order to start installing the driver. Also, if you want to swap cards, you need to restart the PC in
order to recognize the card.
Another difference between Windows 95/98/Me and Windows NT 4.0 is how these operating
systems handle the “User Profiles” feature. Windows 2000 handle “User Profiles” in the same
way as Windows NT 4.0.
In Windows 95/98/Me, the “User Profiles” are used only in order to customize the appearance of
the desktop between the different users. However, in Windows NT 4.0, “User Profiles” play the
role of accounts and are associated with certain privileges on the machine. Therefore, we have
different “User Profiles” (and privileges) for simple users, power users, and administrators. The
privilege settings for each user are set in the “User Manager” program of Windows NT 4.0.
4.2 What You Will Need
During the installation, you may be prompted to load operating system files from the Windows
installation disk. Please have this disk handy.
You will need the Software Tools CD provided with your package.
Note:With Windows NT, you will need to log in as the “Administrator” or with the privilege to
install the WLAN NIC. Also you will need to have at least NT Service Pack 4 installed.
4.3 Install PCI Adapter
1) Click Start->Settings->Control Panel.
2) Double-click the “Network” icon.
3) In the “Network Settings” window you will be prompted to install Windows NT Networking
in case no network has been installed yet. Click “Yes” and follow the instruction on the
screen. If networking had been already installed, you will see a dialog with several tabs. In
the “Adapters” tab click the “Add” button. Windows NT Networking Setup will determine

11Wave Technology Inc.
16
the type of network adapter card that you are going to use.
4) When prompted to select a driver, locate the driver provided with your Drivers, and Software
Tools CD.
5) Next Windows will start copying the files. In case there is a version conflict between one or
more of the files being copied and the files in your system, you should normally keep the
latest version.
6) Finally, when the installation has been completed, you will need to restart your computer.
Note:If the card is not working properly, after a restart procedure, you should make sure that
your system has free resources ever it may shows them as being available.
4.4 Install PC Card
Since Windows NT 4.0 do not support “Plug & Play”, you must enable the detection of PC cards
by the operating system by following the following procedure:
1. Click Start->Settings->Control Panel.
2. Double-click the “Devices” icon
3. Select “PCMCIA” from the list and click the “Startup” button.
4. Set the Startup type to “Boot” and click “OK”.
5. Click “Close” on the “Devices” window.
In order to let the operating system know about your new card, you must enable the Network
support:
1. Click Start->Settings->Control Panel.
2. Double-click the “Network” icon.
3. In the “Network Settings” window you will be prompted to install Windows NT Networking
in case no network has been installed yet. Click “Yes” and follow the instruction on the
screen. If networking had been already installed, you will see a dialog with several tabs. In
the “Adapters” tab click the “Add” button. Windows NT Networking Setup will determine
the type of network adapter card that you are going to use.
4. When prompted to select a driver, locate the driver provided with your Drivers, and Software
Tools CD.
5. During the installation, a dialog box appears asking for the I/O Base and IRQ resource
information. In order to find out which values to use, go to Start -> Programs ->
Administrative Tools -> Windows NT Diagnostics -> select the “Resources” tab -> press the
“IRQ” button. Select one free IRQ from the list. Next, press the button “I/O Port” and choose
an 0x20 free I/O space. Add these values into the dialog box. If at any point after the
installation you want to change these values, go to the Control Panel -> Network, select the
Adapters tab, press the Properties button, and fill in the new values.
6. Next Windows will start copying the files. In case there is a version conflict between one or
more of the files being copied and the files in your system, you should normally keep the
latest version.

11Wave Technology Inc.
17
7. Finally, when the installation has been completed, you will need to restart your computer.
4.5 Install Utility
Regardless which type of hardware you are installing under Windows NT 4.0, you can use
procedures described in Section 3.4 “Install PCI Adapter Utility” to install the WLAN Monitor
utility.
4.6 Uninstall Procedure Under Windows NT 4.0
In order to uninstall the WaveBuddy WLAN card from Windows NT 4.0, you must double click
on the “Network” option in the “Control Panel” (Start -> Settings -> Control Panel). Select the
“WaveBuddy WLAN PC Card/PCI Adapter” from the list and press the “Remove” button.
Note: It is recommended to stop the wireless LAN card/adapter and exit the WLAN Monitor prior
to starting the uninstallation procedure.
This manual suits for next models
2
Table of contents


