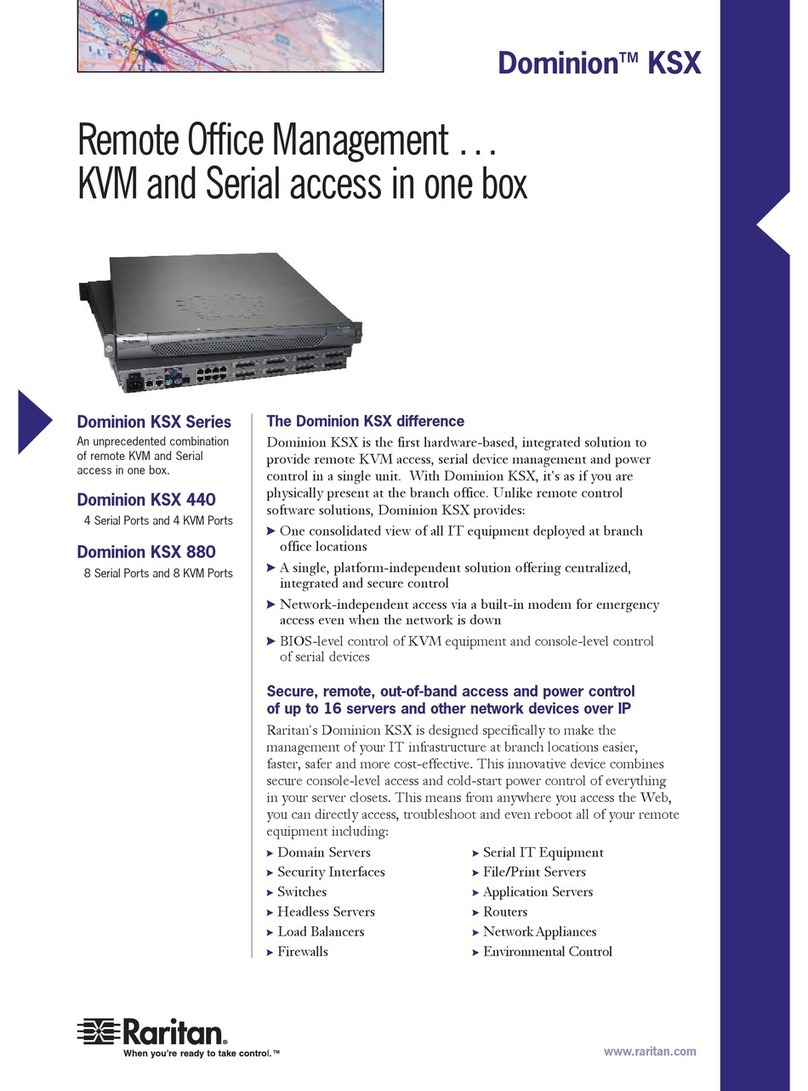
3Ware 3W-6800 - Escalade 6800 RAID Controller User manual

Storage Switch
Supports the 6000 and 7000 series
PN 720-0034-02, Revision C
March 8, 2002
EscaladeTM

Copyright
©2002 3ware, Inc. All rights reserved. No part of this publication may be
reproduced, stored in a retrieval system, or transmitted in any form by any
means, electronic, mechanical, photocopying, recording or otherwise,
without the proper written consent of 3ware, Inc., 701 East Middlefield
Road, Suite 300, Mountain View CA 94043.
Trademarks
3ware, the 3ware logo, Palisade, Escalade, StorSwitch, TwinStor, R5
Fusion and 3DM are all registered trademarks of 3ware, Inc. All other
trademarks herein are property of their respective owners.
Disclaimer
3ware, Inc. assumes no responsibility for errors or omissions in this docu-
ment, nor does 3ware, Inc. make any commitment to update the informa-
tion contained herein.

iii
Before You Begin . . . . . . . . . . . . . . . . . . . . . . . . . . . . . . . . . . . . 1
Features . . . . . . . . . . . . . . . . . . . . . . . . . . . . . . . . . . . . . . . . . . . .1
Escalade 6000 Family (includes 6800, 6400, 6410, 6200) . . .1
Escalade 7000 Family (includes 7210, 7810, 7410, 7850,
7450) . . . . . . . . . . . . . . . . . . . . . . . . . . . . . . . . . . . . . . . . . . . .2
Package contents . . . . . . . . . . . . . . . . . . . . . . . . . . . . . . . . . . . . . 2
Tools required . . . . . . . . . . . . . . . . . . . . . . . . . . . . . . . . . . . . . . .3
System requirements . . . . . . . . . . . . . . . . . . . . . . . . . . . . . . . . . .3
Personal safety . . . . . . . . . . . . . . . . . . . . . . . . . . . . . . . . . . . . . . 3
Protecting equipment and data . . . . . . . . . . . . . . . . . . . . . . . . . .4
ESD precautions . . . . . . . . . . . . . . . . . . . . . . . . . . . . . . . . . . . . . 4
Mechanical concerns . . . . . . . . . . . . . . . . . . . . . . . . . . . . . . . . . .4
Introduction . . . . . . . . . . . . . . . . . . . . . . . . . . . . . . . . . . . . . . . . . 7
Quick Installation Guide . . . . . . . . . . . . . . . . . . . . . . . . . . . . . . 13
Step 1. Install the Escalade Storage Switch . . . . . . . . . . . . . . .14
Step 2. Create Arrays . . . . . . . . . . . . . . . . . . . . . . . . . . . . . . . .14
Step 3. Install System Drivers . . . . . . . . . . . . . . . . . . . . . . . . . .14
Step 4. RAID Array Background Initialization Process . . . . . .15
Step 5. Install 3DM . . . . . . . . . . . . . . . . . . . . . . . . . . . . . . . . . .15
Hardware Installation . . . . . . . . . . . . . . . . . . . . . . . . . . . . . . . . 17
To remove an existing Escalade Storage Switch . . . . . . . . . . .18
Connect the interface cables to the Escalade Storage Switch . .18
Install the Escalade Storage Switch in the computer . . . . . . . . 19
Connect the drives to the interface cables . . . . . . . . . . . . . . . .20
Check your installation and close the case . . . . . . . . . . . . . . . .20
Check motherboard boot sequence . . . . . . . . . . . . . . . . . . . . . .21
3ware Disk Array Configuration Utility . . . . . . . . . . . . . . . . . . 23
Hot Spare and Hot Swap . . . . . . . . . . . . . . . . . . . . . . . . . . . . . .23
BIOS Screen . . . . . . . . . . . . . . . . . . . . . . . . . . . . . . . . . . . . .23
3DM Configure Page . . . . . . . . . . . . . . . . . . . . . . . . . . . . . . .24
Invoking the 3ware BIOS tool . . . . . . . . . . . . . . . . . . . . . . . . . 24
Exiting the 3ware BIOS tool . . . . . . . . . . . . . . . . . . . . . . . . . . .25
Determining your configuration . . . . . . . . . . . . . . . . . . . . . . . .26
Displaying advance details . . . . . . . . . . . . . . . . . . . . . . . . . . . .27
Creating a disk array . . . . . . . . . . . . . . . . . . . . . . . . . . . . . . . . .28
Determining your configuration . . . . . . . . . . . . . . . . . . . . . . . .29
Contents

3ware Escalade Storage Switch User Guide
iv
Specifying a hot spare . . . . . . . . . . . . . . . . . . . . . . . . . . . . . . . 34
Changing an existing configuration . . . . . . . . . . . . . . . . . . . . . 34
Modifying a disk array . . . . . . . . . . . . . . . . . . . . . . . . . . . . . . . 34
Deleting a disk array . . . . . . . . . . . . . . . . . . . . . . . . . . . . . . . . 35
How to maintain or verify a disk array . . . . . . . . . . . . . . . . . . 36
Rebuilding a mirrored disk array . . . . . . . . . . . . . . . . . . . . . . . 37
Rebuilding a RAID 5 disk array . . . . . . . . . . . . . . . . . . . . . . . 39
Windows Installation . . . . . . . . . . . . . . . . . . . . . . . . . . . . . . . . 45
Windows NT®4.0 Installation . . . . . . . . . . . . . . . . . . . . . . . . . 46
Adding drives to an existing storage switch . . . . . . . . . . . . . . 47
Boot the machine . . . . . . . . . . . . . . . . . . . . . . . . . . . . . . . . . 47
Installing the storage switch and Windows NT 4.0 . . . . . . . . . 48
Create disk arrays . . . . . . . . . . . . . . . . . . . . . . . . . . . . . . . . . 48
Has your boot drive been partitioned? . . . . . . . . . . . . . . . . . 48
Boot the system . . . . . . . . . . . . . . . . . . . . . . . . . . . . . . . . . . . 48
Continue with Windows NT 4.0 installation . . . . . . . . . . . . 49
Install the driver using the 3ware diskette . . . . . . . . . . . . . . 49
Partition device 0 to create a boot area . . . . . . . . . . . . . . . . . 49
Follow display instructions to complete Windows NT 4.0
installation . . . . . . . . . . . . . . . . . . . . . . . . . . . . . . . . . . . . . . . 50
RAID array initialization . . . . . . . . . . . . . . . . . . . . . . . . . . . 51
Install the 3DM disk management utility . . . . . . . . . . . . . . . 51
Installing the storage switch on systems that boot from a
different device . . . . . . . . . . . . . . . . . . . . . . . . . . . . . . . . . . . . 52
Create disk arrays . . . . . . . . . . . . . . . . . . . . . . . . . . . . . . . . . 52
Install the 3ware driver . . . . . . . . . . . . . . . . . . . . . . . . . . . . . 52
Reboot the machine . . . . . . . . . . . . . . . . . . . . . . . . . . . . . . . . 52
RAID array initialization . . . . . . . . . . . . . . . . . . . . . . . . . . . 53
Install the 3DM disk management utility . . . . . . . . . . . . . . . 53
Replacing an existing storage switch with a new version of the
switch . . . . . . . . . . . . . . . . . . . . . . . . . . . . . . . . . . . . . . . . . . . . 54
Update the 3ware driver . . . . . . . . . . . . . . . . . . . . . . . . . . . . 54
Install/Update the 3ware driver . . . . . . . . . . . . . . . . . . . . . . . 55
Remove the existing Escalade Storage Switch and install the
new Escalade Storage Switch . . . . . . . . . . . . . . . . . . . . . . . . 58
Reboot the machine . . . . . . . . . . . . . . . . . . . . . . . . . . . . . . . . 58

v
RAID array initialization . . . . . . . . . . . . . . . . . . . . . . . . . . . .59
Install the 3DM disk management utility . . . . . . . . . . . . . . .59
Windows® 98/ME Installation . . . . . . . . . . . . . . . . . . . . . . . . . 60
Adding a drive to an existing storage switch . . . . . . . . . . . . . .62
Partition and format new drive . . . . . . . . . . . . . . . . . . . . . . .62
Installing the storage switch while installing Windows 98/ME 63
Create disk arrays . . . . . . . . . . . . . . . . . . . . . . . . . . . . . . . . .63
Boot the system from the Windows 98/ME diskette . . . . . . .63
Partition the boot device using fdisk . . . . . . . . . . . . . . . . . . .63
Restart the machine and format the boot device . . . . . . . . . .64
Continue the standard Windows 98/ME installation . . . . . . .64
Partition and format other devices . . . . . . . . . . . . . . . . . . . . .65
RAID array initialization . . . . . . . . . . . . . . . . . . . . . . . . . . . .65
Install the 3DM Disk Management Utility. . . . . . . . . . . . . . .65
Installing the storage switch on systems that boot from a
different device . . . . . . . . . . . . . . . . . . . . . . . . . . . . . . . . . . . . .66
Create disk arrays . . . . . . . . . . . . . . . . . . . . . . . . . . . . . . . . .66
Install the 3ware driver . . . . . . . . . . . . . . . . . . . . . . . . . . . . .66
Partition and format units on storage switch . . . . . . . . . . . . .67
RAID array initialization . . . . . . . . . . . . . . . . . . . . . . . . . . . .68
Install the 3DM disk management utility . . . . . . . . . . . . . . .68
Replacing an existing storage switch with a new version of the
switch . . . . . . . . . . . . . . . . . . . . . . . . . . . . . . . . . . . . . . . . . . . .69
Update the 3ware driver . . . . . . . . . . . . . . . . . . . . . . . . . . . . .69
Install/Update the 3ware driver . . . . . . . . . . . . . . . . . . . . . . .71
Remove the existing Escalade Storage Switch and install the
new Escalade Storage Switch . . . . . . . . . . . . . . . . . . . . . . . .75
Reboot the machine . . . . . . . . . . . . . . . . . . . . . . . . . . . . . . . .75
Windows® 2000 or Windows XP Installation . . . . . . . . . . . . . 76
Installing a drive to an existing storage switch . . . . . . . . . . . . . 78
Boot the machine . . . . . . . . . . . . . . . . . . . . . . . . . . . . . . . . . .78
Installing the storage switch while installing Windows 2000 or
Windows XP . . . . . . . . . . . . . . . . . . . . . . . . . . . . . . . . . . . . . . . 79
Create disk arrays . . . . . . . . . . . . . . . . . . . . . . . . . . . . . . . . .79
Installing with the Initial Operating System Build . . . . . . . .79
Continue with Windows 2000 or XP installation . . . . . . . . .79

3ware Escalade Storage Switch User Guide
vi
Reboot the machine . . . . . . . . . . . . . . . . . . . . . . . . . . . . . . . . 80
RAID array initialization . . . . . . . . . . . . . . . . . . . . . . . . . . . 81
Install the 3DM disk management utility . . . . . . . . . . . . . . . 81
Installing the storage switch on systems that boot from a
different device . . . . . . . . . . . . . . . . . . . . . . . . . . . . . . . . . . . . 82
Create disk arrays . . . . . . . . . . . . . . . . . . . . . . . . . . . . . . . . . 82
Install the 3ware driver . . . . . . . . . . . . . . . . . . . . . . . . . . . . . 82
Reboot the machine . . . . . . . . . . . . . . . . . . . . . . . . . . . . . . . . 83
RAID array initialization . . . . . . . . . . . . . . . . . . . . . . . . . . . 84
Install the 3DM disk management utility . . . . . . . . . . . . . . . 84
Replacing an existing storage switch with a new version of the
switch . . . . . . . . . . . . . . . . . . . . . . . . . . . . . . . . . . . . . . . . . . . . 85
Updating the 3ware driver . . . . . . . . . . . . . . . . . . . . . . . . . . 85
Installing/Updating the 3ware driver . . . . . . . . . . . . . . . . . . 88
Remove the existing Escalade Storage Switch and install the
new Escalade Storage Switch . . . . . . . . . . . . . . . . . . . . . . . . 94
Reboot the machine . . . . . . . . . . . . . . . . . . . . . . . . . . . . . . . . 94
RAID array initialization . . . . . . . . . . . . . . . . . . . . . . . . . . . 95
Install the 3DM disk management utility . . . . . . . . . . . . . . . 95
Linux Installation . . . . . . . . . . . . . . . . . . . . . . . . . . . . . . . . . . . 97
Red Hat® Linux Installation . . . . . . . . . . . . . . . . . . . . . . . . . . 98
Installing the storage switch while installing Red Hat Linux . 99
Create disk arrays . . . . . . . . . . . . . . . . . . . . . . . . . . . . . . . . . 99
Boot with the Red Hat CD-ROM or diskette . . . . . . . . . . . . 99
Install the driver . . . . . . . . . . . . . . . . . . . . . . . . . . . . . . . . . 100
Complete the normal Red Hat installation . . . . . . . . . . . . . 101
RAID array initialization . . . . . . . . . . . . . . . . . . . . . . . . . . 101
Install and run 3DM disk management utility . . . . . . . . . . 101
Installing the storage switch on systems that boot from a
different device . . . . . . . . . . . . . . . . . . . . . . . . . . . . . . . . . . . 102
Create disk arrays . . . . . . . . . . . . . . . . . . . . . . . . . . . . . . . . 102
Install the 3ware driver . . . . . . . . . . . . . . . . . . . . . . . . . . . . 102
RAID array initialization . . . . . . . . . . . . . . . . . . . . . . . . . . 106
Install and run 3DM disk management utility . . . . . . . . . . 106
SuSE® Linux Installation . . . . . . . . . . . . . . . . . . . . . . . . . . . . 107
Installing the storage switch while installing SuSE Linux with

vii
YaST1 . . . . . . . . . . . . . . . . . . . . . . . . . . . . . . . . . . . . . . . . . . . 108
Materials required . . . . . . . . . . . . . . . . . . . . . . . . . . . . . . . .108
Create disk arrays . . . . . . . . . . . . . . . . . . . . . . . . . . . . . . . .108
Boot with the SuSE CD/DVD or diskette . . . . . . . . . . . . . .108
Install the driver via a command shell . . . . . . . . . . . . . . . . .109
Set up the system so driver will load on boot . . . . . . . . . . .110
Edit the lilo.conf file . . . . . . . . . . . . . . . . . . . . . . . . . . . . . .110
RAID array initialization . . . . . . . . . . . . . . . . . . . . . . . . . . .111
Install and run 3DM disk management utility . . . . . . . . . . .111
Installing the storage switch on systems that boot from a
different device . . . . . . . . . . . . . . . . . . . . . . . . . . . . . . . . . . . . 112
Create disk arrays . . . . . . . . . . . . . . . . . . . . . . . . . . . . . . . .112
Install the 3ware driver . . . . . . . . . . . . . . . . . . . . . . . . . . . .112
RAID array initialization . . . . . . . . . . . . . . . . . . . . . . . . . . .114
Install and run 3DM disk management utility . . . . . . . . . . .115
3DM Disk Management Utility . . . . . . . . . . . . . . . . . . . . . . . . 117
Windows Installation . . . . . . . . . . . . . . . . . . . . . . . . . . . . . . . 118
Installing 3DM for Windows NT, Windows 98/ME, Windows
2000, Windows XP . . . . . . . . . . . . . . . . . . . . . . . . . . . . . . . . . 118
Linux Installation . . . . . . . . . . . . . . . . . . . . . . . . . . . . . . . . . . 121
Installing 3DM for Red Hat Linux or SuSE Linux . . . . . . . . 121
Starting 3DM . . . . . . . . . . . . . . . . . . . . . . . . . . . . . . . . . . . . . 123
Uninstalling 3DM . . . . . . . . . . . . . . . . . . . . . . . . . . . . . . . . . . 123
Checking Array Status . . . . . . . . . . . . . . . . . . . . . . . . . . . . . . 125
View status using your standard browser . . . . . . . . . . . . . . . .125
Password Setup . . . . . . . . . . . . . . . . . . . . . . . . . . . . . . . . . . . .131
Enable/Disable Password Protection . . . . . . . . . . . . . . . . . . . 133
Selecting Rebuild Rate . . . . . . . . . . . . . . . . . . . . . . . . . . . . . . 134
Selecting Cache Options . . . . . . . . . . . . . . . . . . . . . . . . . . . . . 134
Event notification via e-mail . . . . . . . . . . . . . . . . . . . . . . . . . . 134
Mirrored Array Maintenance . . . . . . . . . . . . . . . . . . . . . . . . . 135
Specifying a hot spare . . . . . . . . . . . . . . . . . . . . . . . . . . . . . . .137
Auto rebuild of a mirrored array . . . . . . . . . . . . . . . . . . . . .137
Rebuilding a redundant array with a hot swap drive . . . . . . . 137
Selecting Force Continue . . . . . . . . . . . . . . . . . . . . . . . . . . .138
Scheduling rebuilds and media scans . . . . . . . . . . . . . . . . . . .138

3ware Escalade Storage Switch User Guide
viii
Troubleshooting: Problems and Solutions . . . . . . . . . . . . . 141
Hardware Installation . . . . . . . . . . . . . . . . . . . . . . . . . . . . . . . 141
Software Installation . . . . . . . . . . . . . . . . . . . . . . . . . . . . . . . 142
Screen Display Messages . . . . . . . . . . . . . . . . . . . . . . . . . . . . 145
AEN Messages . . . . . . . . . . . . . . . . . . . . . . . . . . . . . . . . . . 148
Appendix A
Compliance and Conformity Statements . . . . . . . . . . . . . . . 157
Federal Communications Commission Radio Frequency Interfer-
ence Statement . . . . . . . . . . . . . . . . . . . . . . . . . . . . . . . . . . . . 157
Microsoft Windows Hardware Quality Lab (WHQL) . . . . . . 158
European Community Conformity Statement . . . . . . . . . . . . 158
Appendix B
Warranty, Technical Support and Service . . . . . . . . . . . . . . 159
Limited Warranty . . . . . . . . . . . . . . . . . . . . . . . . . . . . . . . . . . 159
Exclusions . . . . . . . . . . . . . . . . . . . . . . . . . . . . . . . . . . . . . . . 159
State Law Provisions . . . . . . . . . . . . . . . . . . . . . . . . . . . . . . . 160
Obtaining Warranty Protection . . . . . . . . . . . . . . . . . . . . . . . 160
3ware Technical Support and Services . . . . . . . . . . . . . . . . . 160
Sales and ordering information . . . . . . . . . . . . . . . . . . . . . . . 161
Feedback on this manual . . . . . . . . . . . . . . . . . . . . . . . . . . . . 161

ix
Figure 1. RAID 0 Configuration Example 8
Figure 2. RAID 1 Configuration Example . . . . . . . . . . . . . . . . . 8
Figure 3. RAID 10 Configuration Example . . . . . . . . . . . . . . . . 9
Figure 4. RAID 5 Configuration Example . . . . . . . . . . . . . . . . 10
Figure 5. 8-Port Escalade 7850 Storage Switch Layout . . . . . .17
Figure 6. 3ware BIOS Tool . . . . . . . . . . . . . . . . . . . . . . . . . . . 25
Figure 7. Disk Array Configuration Main Display, RAID 1
Example 27
Figure 8. Disk Array Advance Details Screen . . . . . . . . . . . . . 28
Figure 9. Selecting Drives for a Mirrored Array . . . . . . . . . . . 29
Figure 10. Create Disk Array Display, RAID 0 Example . . . . . 30
Figure 11. Create Disk Array Display, RAID 5 Example . . . . . 31
Figure 12. BIOS Initialization Screen for RAID 5 . . . . . . . . . . 32
Figure 13. Delete Disk Array Display . . . . . . . . . . . . . . . . . . . . 35
Figure 14. Maintain Disk Array Display . . . . . . . . . . . . . . . . . . 36
Figure 15. Degraded RAID 1 Array Drive When Not in Use . . 37
Figure 16. Degraded RAID 10 Array Drive When Not in Use . 38
Figure 17. Degraded RAID 5 Array Drive When Not in Use . . 39
Figure 18. Select Available Drive to Replace Faulted Drive,
RAID 1 Example . . . . . . . . . . . . . . . . . . . . . . . . . . . . 41
Figure 19. Rebuild Array Status Display, RAID 1 Example . . . 42
Figure 20. Rebuild Confirmation Display . . . . . . . . . . . . . . . . . 43
Figure 21. Storage Switch Quick-Splash Screen . . . . . . . . . . . . 50
Figure 22. Installation Complete Notification . . . . . . . . . . . . . . 50
Figure 23. Remove Current Driver . . . . . . . . . . . . . . . . . . . . . . . 55
Figure 24. Install Driver . . . . . . . . . . . . . . . . . . . . . . . . . . . . . . . 56
Figure 25. Install from Disk . . . . . . . . . . . . . . . . . . . . . . . . . . . . 57
Figure 26. Install Driver . . . . . . . . . . . . . . . . . . . . . . . . . . . . . . . 58
Figure 27. Add New Hardware Wizard . . . . . . . . . . . . . . . . . . . 67
Figure 28. 3ware Storage Switch Properties Display . . . . . . . . .70
Figure 29. Install Hardware Device Drivers . . . . . . . . . . . . . . . 71
Figure 30. Select a Device Driver Display . . . . . . . . . . . . . . . . . 72
Figure 31. Install from Disk . . . . . . . . . . . . . . . . . . . . . . . . . . . . 73
Figure 32. Update driver . . . . . . . . . . . . . . . . . . . . . . . . . . . . . . 73
Figure 33. Final driver installation screen . . . . . . . . . . . . . . . . . 74
Figure 34. Storage Switch Quick-Splash Screen . . . . . . . . . . . . 74
List of Figures

3ware Escalade Storage Switch User Guide
x
Figure 35. Installation Complete Notification . . . . . . . . . . . . . . 75
Figure 36. Storage Switch Quick-Splash Screen . . . . . . . . . . . . 80
Figure 37. Installation Complete Notification. . . . . . . . . . . . . . 80
Figure 38. Found New Hardware Wizard. . . . . . . . . . . . . . . . . . 83
Figure 39. 3ware Storage Switch Properties Display . . . . . . . . 86
Figure 40. Upgrade driver welcome screen . . . . . . . . . . . . . . . . 87
Figure 41. Update/Install device driver . . . . . . . . . . . . . . . . . . 88
Figure 42. Select a Device Driver . . . . . . . . . . . . . . . . . . . . . . . 89
Figure 43. Install From Disk . . . . . . . . . . . . . . . . . . . . . . . . . . . 90
Figure 44. Select a Device Driver . . . . . . . . . . . . . . . . . . . . . . . 91
Figure 45. Start Device Driver Installation . . . . . . . . . . . . . . . . 92
Figure 46. Digital Signature Not Found . . . . . . . . . . . . . . . . . . 93
Figure 47. Final driver installation screen . . . . . . . . . . . . . . . . . 94
Figure 48. 3DM Remote Monitoring Configuration Display . 119
Figure 49. 3DM E-mail Notification Preferences . . . . . . . . . . 120
Figure 50. 3DM Home Display . . . . . . . . . . . . . . . . . . . . . . . . 127
Figure 51. 3DM Details Display . . . . . . . . . . . . . . . . . . . . . . . 128
Figure 52. 3DM Monitor Display . . . . . . . . . . . . . . . . . . . . . . 129
Figure 53. 3DM Alarm Display . . . . . . . . . . . . . . . . . . . . . . . . 130
Figure 54. 3DM Settings Display . . . . . . . . . . . . . . . . . . . . . . 131
Figure 55. 3DM Login Display . . . . . . . . . . . . . . . . . . . . . . . . 133
Figure 56. 3DM Configure Display . . . . . . . . . . . . . . . . . . . . 136
Figure 57. 3DM Help Display . . . . . . . . . . . . . . . . . . . . . . . . . 139
Figure 58. Installation or Removal Dialog Box . . . . . . . . . . . . 146
Figure 59. A Warning for All Software Removal Requests . . 146
Figure 60. Confirmation of Successful Software Removal . . . 146
Figure 61. Administrator Privileges Required Warning . . . . . 147
Figure 62. Firmware Upgrade Requirement Warning . . . . . . . 147
Figure 63. System Reboot Request . . . . . . . . . . . . . . . . . . . . . 147

Before you Begin
www.3ware.com 1
Before You Begin
Congratulations on selecting the Escalade Storage Switch as your
RAID data storage and management system. This user guide
gives simple, step-by-step instructions for installing and configur-
ing your Escalade Storage Switch. To ensure your personal safety
and protect your equipment and data, carefully read the informa-
tion that follows the Features list before you begin installing.
Features
Escalade 6000 Family (includes 6800, 6400, 6410, 6200)
•True Hardware RAID. Low CPU utilization
•RAID Support. RAID 0, 1, 5, 10 and JBOD
•Bus Type. PCI 32 bit / 33 Mhz
•Management. 3DM Disk Management Utility and e-mail event
notification
•BIOS. PC99, PnP, BBS Compliant
•Windows Support. W98, WME, WinNT, Win2k, WinXP
•Linux Support. Redhat, SuSE. (Drivers available in Open
Source.)
•Performance. Twinstor, Command Queuing, Elevator Seeking,
Ultra DMA66
•Field Upgrades. Field Upgradeable Firmware, BIOS, 3DM and
Drivers
•Data Integrity. ATA Command Readback, SMART Monitor-
ing, Dynamic Sector Repair, Rebuild Pacing, Rebuild Schedul-
ing, Background Scrubbing, Scheduled Scrubbing, Hot Swap,
Hot Spare, Hardware Health Monitoring

3ware Escalade Storage Switch User Guide
2www.3ware.com
Escalade 7000 Family (includes 7210, 7810, 7410, 7850,
7450)
•True Hardware RAID. Low CPU Utilization
•RAID Support. RAID 0, 1, 5, 10 and JBOD
•Bus Type. PCI 64 bit / 33 Mhz
•Management. 3DM Disk Management Utility
•BIOS. PC99, PnP, BBS Compliant
•Windows Support. W98, WME, WinNT, Win2k, WinXP
•Linux Support. Redhat, SuSE. (Drivers available in Open
Source.)
•Performance. Twinstor, Command Queuing, Elevator Seeking,
R5Fusion, UltraDMA100
•Field Upgrades. Field Upgradeable Firmware, BIOS, 3DM and
Drivers
•DataIntegrity. ATA Command Readback, SMART Monitoring,
Dynamic Sector Repair, Rebuild Pacing, Rebuild Scheduling,
Background Scrubbing, Scheduled Scrubbing, Hot Swap, Hot
Spare, Hardware Health Monitoring
Package contents
If your package is missing any of the items listed below, contact
3ware before proceeding with installation (disk drives and disk
mounting brackets are not included):
• Escalade Storage Switch in an ESD-protective bag
• 3ware driver installation media
• 3ware 3DM installation media
• ATA interface cables (one per port)
• Y-splitter cables for connecting additional drives to the power
source (not provided for 2-port models)
•Escalade Installation Guide and Escalade User Guide (.pdf for-
mat)

Before you Begin
www.3ware.com 3
Tools required
• An ESD grounding strap or mat
• Standard hand tools to open your system’s case and install the
Escalade Storage Switch into an available PCI expansion slot.
System requirements
The Escalade Storage Switch requires a workstation-class or
server-class CPU whose bus complies with PCI 2.1 standards,
and a PCI slot that meets the Plug and Play and PC99 specifica-
tions. The storage switch requires one full-size PCI-bus slot. It
may be connected to up to two, four or eight IDE/ATA drives by
the supplied 40-pin, 80-conductor ribbon interface cables.
Note: The blue end of the ribbon interface cable plugs into
the Escalade Storage Switch and the black end plugs into
the drive.
Drives must meet UltraATA-100, UltraATA-66 or UltraATA-33
standards, but may be of any capacity or physical form factor.
Length of unshielded interface cables may not exceed 18” (45.7
cm).
Personal safety
Warning! High voltages may be found inside computer
equipment. Before installing any of the hardware in this
package or removing the protective covers of any com-
puter equipment, turn off power switches and disconnect
power cords. Do not reconnect the power cords until you
have replaced the covers.

3ware Escalade Storage Switch User Guide
4www.3ware.com
Protecting equipment and data
Back up your data! Creating or deleting disk arrays
destroys existing files on the member drives. If your
drives contain valuable data, back them up and save data
elsewhere before changing your array configuration.
ESD precautions
Standard electrostatic discharge (ESD) precautions must be fol-
lowed to avoid damaging computer components and accessories
when installing or removing the Escalade Storage Switch.
• When the case of your computer is open and its internal parts are
exposed, don’t touch any internal part unnecessarily.
• Always wear a grounded strap or work on an ESD-protective
mat.
• Don’t remove the storage switch from its protective bag until
you are properly grounded.
• Handle the storage switch by its edges or by the black rail and
metal bracket at its two ends.
• Don’t touch any pin, contact, lead or component on the storage
switch.
Mechanical concerns
Be careful when installing the Escalade Storage Switch into your
system. Excessive force can damage the board, the cables, your
drives or your system.
• Be sure the board is aligned with its slot on the motherboard
before installing. Do not flex the board excessively.
• Interface cable connectors must be mated carefully without
bending any pins. The connectors provided are keyed to prevent
you from inserting them upside-down.

5
• The blue end of the interface cable plugs into the board and the
black end plugs into the drive.
• Interface cables are fragile and must not be crimped or pinched.
Ensure that they do not impede the flow of cooling air from fans
or heat sinks in the system case.

3ware Escalade Storage Switch User Guide
6www.3ware.com

Introduction
www.3ware.com 7
Introduction
Escalade Storage Switches allow you to use low-cost IDE/ATA
drives in your storage system and still achieve performance levels
and fault tolerance capabilities typically found in more expensive
SCSI systems. Escalade Storage Switches are available as two, four
or eight port configurations, as well as a shortened four or eight port
versions designed for higher density rack-mounted applications.
StorSwitcharchitecture for scalable performance
The StorSwitch Architecture, found only in 3ware products, accel-
erates your storage system’s performance by speeding data into sys-
tem memory. Each drive has its own dedicated AccelerATA data
IDE port, maximizing drive and system throughput.
RAID increases performance and adds redundancy
Escalade Storage Switches use Redundant Array of Inexpensive
Disks (RAID) to increase your storage system’s performance and
provide fault tolerance. The storage switches offer RAID 0 variable
striped arrays for performance; RAID 1 mirrored arrays for fault
tolerance; variable striped mirrored RAID 10 arrays for fault toler-
ance and performance; and RAID 5 arrays for fault tolerance, high
capacity and storage efficiency.
RAID 0 arrays maximize performance and capacity
When drives are configured in a striped disk array (see Figure 1),
the Escalade Storage Switch distributes large files across the multi-
ple disks using RAID 0 techniques. Striped disk arrays achieve high
transfer rates because they can read or write data on more than one
drive simultaneously. Striped disk arrays give exceptional perfor-
mance, particularly for data intensive applications such as video
editing, computer aided design and geographical information sys-
tems. Striping your disk array concatenates each drive’s capacity

3ware Escalade Storage Switch User Guide
8www.3ware.com
into one large volume. The stripe size is user configurable at 64K,
128K, 256K, 512K or 1M.
Figure 1. RAID 0 Configuration Example
RAID 1 arrays offer fault tolerance
Mirrored disk arrays write data to two drives using RAID 1 algo-
rithms (see Figure 2). This gives your system fault tolerance by pre-
serving the data on one drive if the other drive fails. Fault tolerance
is a basic requirement for mission critical systems like web and
database servers.
Figure 2. RAID 1 Configuration Example
TwinStorTM Technology adds performance to 3ware’s mirrored
disk arrays
Traditional mirroring techniques do little to improve performance.
The adaptive algorithms found in 3ware’s TwinStor technology
boost performance by distinguishing between random and sequen-
RAID -1 RAID -1

Introduction
www.3ware.com 9
tial read requests. For the sequential requests generated when
accessing large files, both drives are used, with the heads simulta-
neously reading alternating sections of the file. For the smaller ran-
dom transactions, the data is read from a single optimal drive head.
Drives can be dynamically profiled, specifically for your brand of
drive, during installation to customize the stripe size (for RAID
configurations offering variable striping) and seek algorithms.
RAID 10 arrays maximize performance and fault
tolerance
When drives are configured as a striped mirrored array, the disks
are configured using both RAID 0 and RAID 1 techniques, thus the
name RAID 10 (see Figure 3). A minimum of four drives are
required to use this technique. The first two drives are mirrored as a
fault tolerant array using RAID 1. The third and fourth drives are
mirrored as a second fault tolerant array using RAID 1. The two
mirrored arrays are then grouped as a striped RAID 0 array using a
two tier structure. Higher data transfer rates are achieved by lever-
aging TwinStor and striping (64K, 128K, 256K, 512K or 1M) the
arrays. RAID 10 is available on the four and eight port Escalade
Storage Switches.
Figure 3. RAID 10 Configuration Example

3ware Escalade Storage Switch User Guide
10 www.3ware.com
RAID 5 arrays optimize performance, fault tolerance,
high capacity and storage efficiency
The RAID 5 configuration features the data striping of RAID 0
combined with the parity of RAID 4. Using a simple parity (exclu-
sive OR) function, RAID 5 can tolerate the loss of one drive. Parity
information is distributed across all drives rather than being con-
centrated on a single disk (see Figure 4). This avoids throughput
loss due to contention for the parity drive. You can use hot spares to
rebuild a failed drive “on-the-fly”.
RAID 5 capacity = size of smallest drive ×(number of drives - 1).
In addition, the array’s storage efficiency increases with the number
of disks; from 66.7 % for 3 drives to 87.5 % for 8 drives: storage
efficiency = (number of drives -1) ÷(number of drives).
Unlike all other RAID configurations that offer data striping, except
for RAID 1, RAID 5 stripe size is limited to 64k.
Note: BIOS will reject the creation of a RAID 5 array
having less than 3 drives.
Figure 4. RAID 5 Configuration Example
RAID 5
A Blocks
0 parity
A4
A3
A2
A1 1 parity
B4
B3
B2 2 parity
C4
C3
C1
3 parity
D4
D2
D1
4 parity
E3
E2
E1
B0 C0 D0 E0
B Blocks C Blocks D Blocks E Blocks
This manual suits for next models
12
Table of contents
