65 AMPS Empire User manual

Users Manual
Empire Guitar Amplier
Congratulations on your purchase of the new Empire!
The Empire is the culmination, thus far, of all the
desires and knowledge that 65amps has collected.
Since the inception of 65amps, Peter and Dan have
fantasized about an amp that is hyper-functional
and delivers PROPER classic British tones; not just
a good imitation. The Empire represents over four
years of attention and ultra-detailed research into
the subtleties of several eras of EL34 based Brit-
ish amps ranging from the mid-sixties up through
the ‘90s. Taking the best from each, 65amps has
put together the Empire, which can deliver three
distinct, useful and rich British tones that you will
instantly recognize and have dreamt about.
***READ BEFORE USING AMP FOR THE FIRST TIME***
CAUTION - FOR U.S. OPERATION, SET AC VOLTAGE SELECTOR FOR 120 VOLTS ONLY!

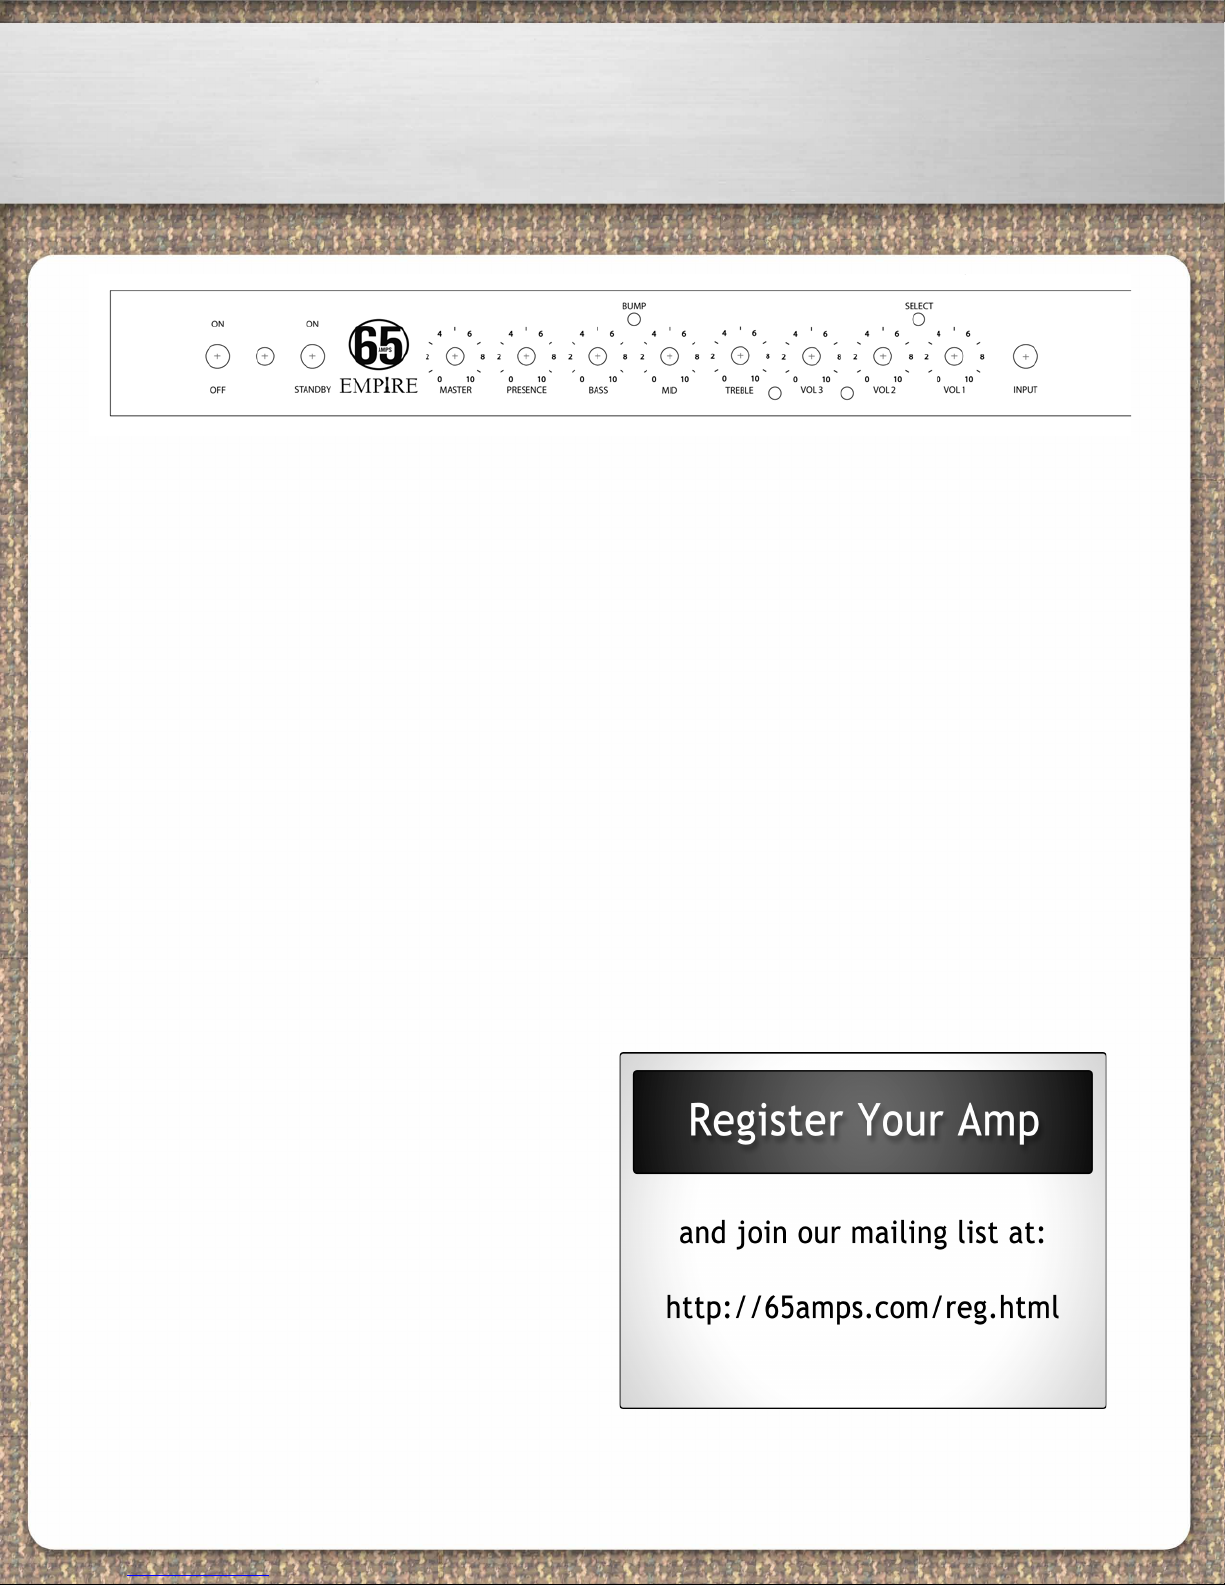
65amps EMPIRE FRONT PANEL
Tubes:
The Empire tube compliment consists of 2 6V6s and
a 12AX7 preamp. Peter, Dan and crew have success-
fully pulled off the hat-trick of making 6V6s sound
exactly like vintage EL34s. Peter and Dan have been
pursuing this effect since the late ‘80s when they
used to mod small old American amps to sound like
big British amps. With over 20 years of pursuit, they
have found the exact formula! For decades guitar
players about having all those classic British sounds
at their ngertips at volumes that meet modern re-
quirements.
Channels:
The Empire is as versatile as it is toneful. It’s set up
to offer you three of our favorite voice congura-
tions that you can choose from using a foot pedal or
the select switch. The rst voice is derived from that
cleaner early ’60s Townsend-like tone; the second
is from the classic, fat and dirty ’68-’72 era; and the
third is a higher-gain, hot-rodded ’80s tone.
ON/Standby - Best to turn the POWER switch on
rst before the Standby and wait about 10 seconds
before turning Standby on. This will prolong tube
life. When turning the amp off, turn POWER switch
off rst. This allows the power to drain out of the
amp circuit. You can turn off the Standby switch later
before turning the amp back on.
Tone controls:
Bass, Mid and Treble tone controls for each channel
are passive cut-style. We recommend starting at “10”
and backing off. With brighter single-coil guitars, the
mid’s will focus really well with the TONE set back
around “5 to 8”. A presence control Boosts the upper
frequencies above the normal treble control range
for added high-end.
Master Voltage
Our master voltage emulates the tonal response of
a big amp only at low volumes. The “Master Volt-
age”™ knob reduces the B+ voltage and output in
the amp in a unique way that keeps the internal tube
relationships perfect while keeping the lament volt-
age up. After seeing all other power schemes’ short-
comings, we’ve come at this from a different angle
and we’re very pleased with the results. You can dial
this amp down to 3 watts output WITHOUT losing
tone, feel, vocabulary, authority, etc.
Bump Control
The Bump™ control is a much more effective alter-
native to traditional channel switching. The Bump™
allows the user gain-up and re-slope the amp’s tone
stack allowing much more midrange to ow through
the circuit; thereby gaining up the entire amp natu-
rally and not inducing false preamp gain that creates
zz and buzz. The end result is the effect of having
two amps in one.

65amps EMPIRE REAR PANEL
CHANNEL FTSW - This is allows you to change
channels.
SPEAKER OUTPUTS - Two speaker outputs in
parallel.
IMPEDANCE - All 65 212-Combos and Extension
Cabinets are wired for 16-ohms (two 8-ohm speak-
ers in series). If using two 16-ohm cabinets, set
IMPEDANCE to 8-ohms. Always be sure to match the
impedance of this amplier with the impedance of
the speaker cabinet you are using.
H.T. (High Tension) FUSE - (500mA Slo-Blo) This
fuse is in line with the DC voltage in the amp. When
the H.T. FUSE blows, it is typically a sign of a bad
power tube.
A.C. FUSE - (2A/250V Slo Blo) This fuse is connect-
ed to the AC primary side of the Power Transformer.
CAUTION - Never use a fuse with a higher amper-
age rating.
Specications:
Output: 22 Watts
Tubes: Power – 2 6V6s, Preamp - 12AX7
Panel controls: On, Off, Standby, Master, Presence, Bass, Mid,
Treble, Bump,
Select, Volume 1, 2, 3
Extrs: Footswitch input jack, dual speaker outs, switch for 8Ω
& 16Ω impedance
Cabinet: Finger-jointed Baltic birch
Dimensions: Head: 25” L x 9” D x 11” H / 26.4 lbs.
Weight in box: Head: 35 lbs.
Accessories: Footswitch included
Pair with cabinet:
Speakers: 4x12’ 2 x Celestion G12H30 plus 2 x Celestion
AlNiCo Blues or Golds;
or 2x12’ Celestion G12H30 + AlNiCo blue (our recommend-
ed conguration) or
Celestion G12H30 + AlNiCo gold
IMPORTANT: We recommend a qualied technician
for retubing. All tubes use the same size socket, but
have very different wiring congurations and volt-
ages. Placing the wrong tube in the wrong socket
can cause damage
to the amplier and tube.
PLEASE READ THE FOLLOWING WARNINGS AND
USER ADVICE!
• Always make sure the AC Voltage Selector is set for
the proper voltage (120 volts in the U.S.) before turn-
ing on the amplier!
• Always make sure the amplier is grounded!
(3-prong connector - no ground lifts).
• Use only a high quality grounded 3-prong AC
power cable with this unit. Always look for breaks or
exposed wire and replace if defective.
• Never remove the chassis from the cabinet! The
amplier will store high voltages long after the amp
has been turned off and disconnected from the AC.
Changing tubes does not require any internal adjust-
ments. Refer all service to a qualied technician.
• Do not expose to excessive humidity, direct sun-
light or extreme high or low temperatures. Be certain
there is adequate ventilation around the amplier.
Never expose to liquids or excessive dust.
More info at www.65amps.com
Other 65 AMPS Musical Instrument Amplifier manuals