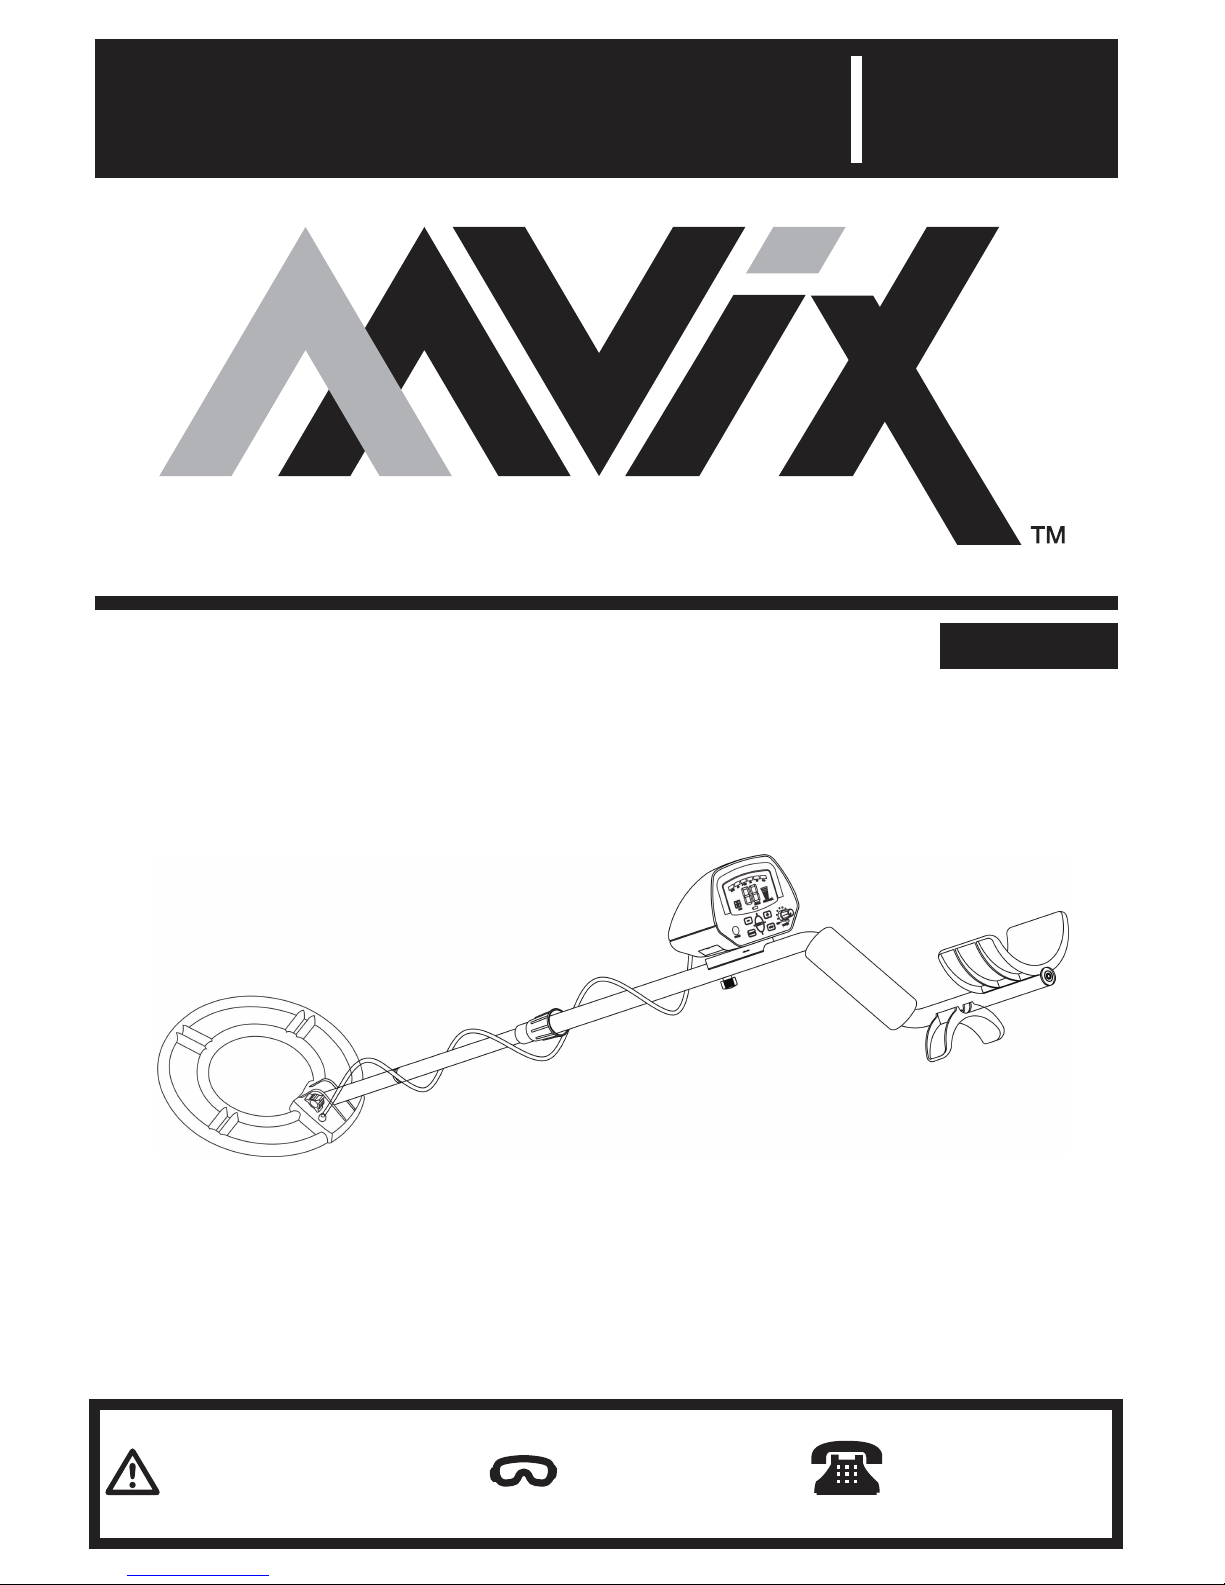
AAVIX AGT310 User manual

Read this manual carefully. Learn how to operate and maintain your product properly to avoid
injury and product damage. You are responsible for operating the product properly & safely.
OWNER’S MANUAL
WARNING: FOR SAFE OPERATION, READ
OWNER’S MANUAL PRIOR TO USE.
WORK SAFELY WITH TOOLS BY
WEARING SAFETY GLASSES!
FOR SERVICE OR SUPPORT
PLEASE CALL TOLL FREE:
1-866-591-8921
AGT310
SMART METAL DETECTOR 2 X 9 V
A A V IX DETECTORS

2
With your AGT310 metal detector, you can hunt for coins, relics,
jewelry, gold, and silver just about anywhere. The detector
comes with high sensivity and strong ability of discriminaon.
It is versale and easy to use. The detector’s features include:
LCD
FEATURES
Display: Show the probable type of metal, the depth of the
target, range of DISC&NOTCH, the level of SENS, and baery
condion . It also has numeric display for DISC and TARGRT.
Three Tone Audio Discriminaon: Sound three disncve tones
(high, medium and low) for different types of metal.
Notch: Ignores junk metal and finds valuable items by seng
the notch range.
DISC: Discriminates the target selected.
Super Slow Sweep Idenficaon: With a very slow sweep of
the search coil to discriminate different types of metal.
Headphone Jack: Lets you connect headphones of 3.5mm and
operate without trouble.
240mm Waterproof Search coil: Lets you use the detector even
if you must put it under shallow water.
Note: The detector cannot be used in the rain.
Adjustable Sha:Lets you adjust the length of sha for
comfortable use.
Power: Your metal detector requires two 9-volt alkaline
baeries (not supplied).

3
ASSEMBLING THE DETECTOR
Assembling your detector is easy and requires no special tools.
Just follow these steps.
1. Insert the latch on the top of the handle into the assembly
hole on the boom of the control box. Then slightly push
the control box in the direcon of IN marked on the handle
to fix the latch in place. Secure the control box with fixing
screw properly.
2. Unscrew the knob on the search coil and remove the knob
connector. Insert the stem and align the holes on the search
coil bracket and the stem. Push the connector through the
holes and ghten the knob.
3. Press the silver buon on the upper end of the lower stem,
and slide the lower stem into the upper stem. Adjust the
stem to a length that you feel comfortable when you stand
Fixing screw
Latch
Control box
Assembly hole
PREPARATION

4
upright with the detector in your hand, and the search coil is
level with the ground with your arm relaxed at your side.
Then counter-clockwise rotate to ghten the lock nut.
4. Wind the search coil cable around the stem. Insert the
search coil’s plug into the search coil jack on the detector’s
control housing.
Cauon:
Do not over-ghten the search coil or use tools such as pliers
to ghten it.
The search coil’s plug fits into the connector only in one way.
Do not force the plug and also do not pull on the cable or
you could damage it.
5. Stand and stretch your arm, holding the metal detector to
make the search coil above the ground for about 0.4~2inch.
Rotate the stem’s lock nut counterclockwise to ghten it.
INSTALLING THE BATTERIES
Your metal detector is powered by two 9V baeries (not
included).
1. Turn off the power before installing the baeries.
2. Slide the leand right baery covers off in the direcon of
the arrow.
3. Place a 9V baery into the baery compartment matching
the polarity symbols (+ and -) marked inside.
Warning:

5
Dispose of old baeries promptly and properly. Never bury
or burn them.
Cauons:
Use only fresh alkaline baeries of required size.
Do not mix old and new baeries or different types of
baeries.
Do not mix alkaline, standard (carbon-zinc), or rechargeable
(nickel-cadmium) baeries.
If you don’t plan to use the unit for a week or more me,
remove the baeries. Baeries can leak chemicals that can
destroy electronic parts.
Change the baeries if the baery indicator on the LCD
lights.
USING HEADPHONES
1. It is recommended to choose the headphones with volume
control.
2. Insert the headphones’ 0.14inch plug into the PHONE jack.
At this me the internal speaker disconnects.
3. Set the VOLUME to the desired seng.
Listening Safely
To protect your hearing, set the volume to the lowest
seng
Before you begin listening, adjust the volume to a
OPEN

6
comfortable level.
Do not listen at extremely high volume levels. Extended
high volume listening can lead to permanent hearing loss.
Do not wear headphones while operang your detector
near high-traffic areas. Pay aenon to traffic safety.
INSTRUCTIONS FOR CONTROL PANEL
1. VOLUME/POWER switch
Rotate the VOLUNE switch clockwise away from OFF to
power on the detector. Rotate it fully counter-clockwise to
power offthe detector. To increase the volume level, rotate
the switch clockwise.
2. PHONE jack: You can insert the headphones’ plug of 3.5mm
into the PHONE jack and operate without trouble. At this
me the internal speaker is disconnected.
3. LCD DISPLAY
Volume /
Power switch
Headphone jack Control buttons

7
4. CONTROL BUTTONS
SENS:
Press SENS then + or – to increase or decrease the sensivity.
LCD will display the current seng of sensivity. If the target
depth is beyond the max. sensivity of the detector, the
target will not be found.
DISC numeric range(0-80):
Press DISC then + or – to select the desired DISC number. If
the target material is beyond the DISC range, it can’t be
discriminated.
Note: The highest DISC numeric seng is 80. If you set the
DISC number to 80, all targets less than this number will
not be detected.
NOTCH:
Press NOTCH, then + or – to select the target to be notched.
The cursor above the selected target will flash. Press NOTCH
again, the target name below the cursor will disappear.
OPERATION
1. TURNING ON THE DETECTOR
Rotate the VOLUME switch clockwise away from OFF to power
on the detector. LCD will display all symbols .Meanwhile the
Target Indicator
DISC /NOTCH
Indicator
SENS/DEPTH
Indicator
Tar
g
et Numeric IndicatorDISC Numeric Indicator Low BATT Indicator

8
detector sounds low , medium, high tones respecvely. Aer
about 2 seconds the detector enters into stand-by state. At
this me the default mode is DISC. LCD displays DISC of 00
and SENS of 6 bars.
2. TESTING AND USING THE DETECTOR
To learn how the detector reacts to different metals, you
should test it before you use it the first me. You can test the
detector indoors and
outdoors.
INDOOR TESTING AND USE
1. Rotate the VOLUME switch clockwise away from OFF to
power on the detector.
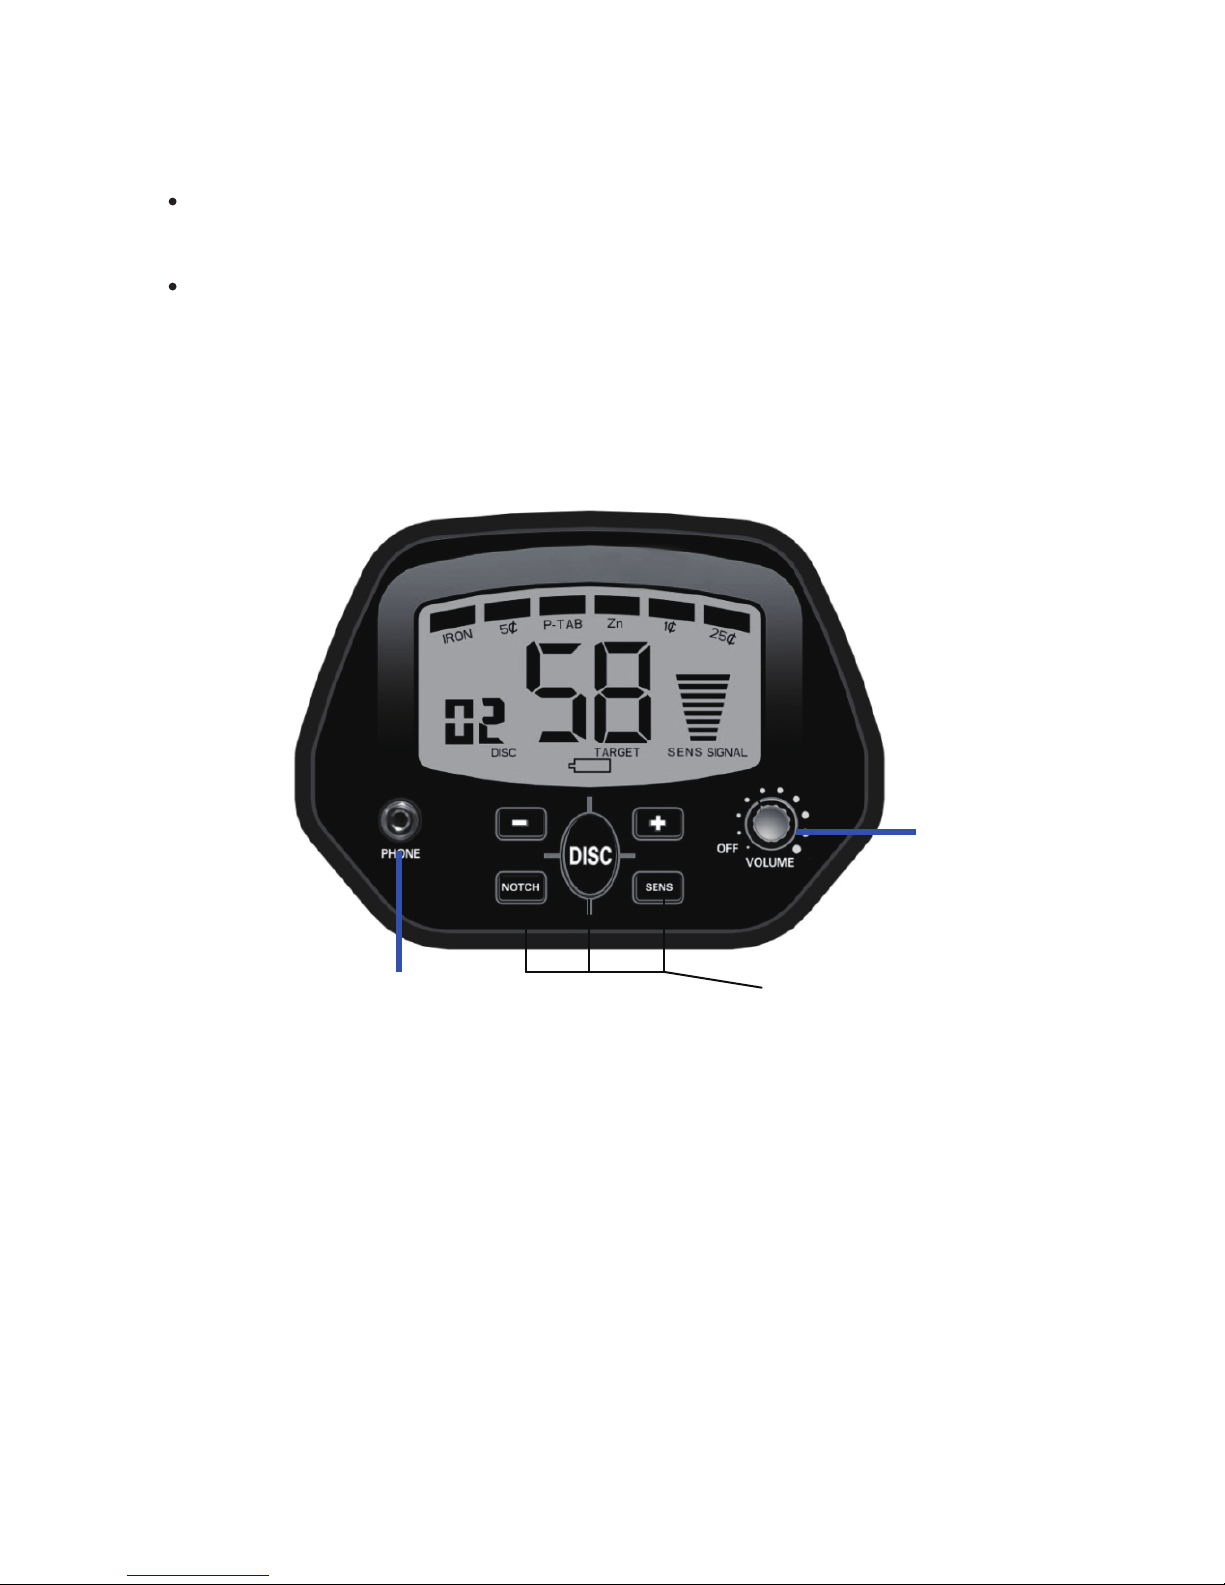
2. Seng the operang mode:
(1) DISC: Press DISC, then + or – to set the DISC numeric
value. If the DISC value is set to 00, the detector can
detect all metals. If you want to find one of the target
material listed on the LCD, you can set the relave
numeric range of DISC by pressing DISC then + or -. For
example, the numeric range for 5¢ is 6-17, you can
simply press DISC, then set the DISC number to 7 or 10
by pressing + or -. If the detector finds a coin of 5¢, the
cursor above 5¢ will light.
Note:
1. It is recommended to select the lower or medium
value of the numeric range. Because if you select a
top value, you might miss the target below the
selected value.
2. If you don’t press the buons (DISC,+,-) within
about 2 seconds, the detector will enter the
standby state.
(2) NOTCH: Press NOTCH, then + or – to select the target to

9
be notched. The cursor above the selected target will
flash. Press NOTCH again, the target name below the
cursor will disappear. It means this target will be notched
during the detecon and the detector will have no
reacon to the notched target. If you want to pick up the
target notched, simply press NOTCH again. Press + or -,
the cursor will move from leand right. If NOTCH is not
pressed within about 3 seconds, the detector will enter
standby state.
Note:
1. It is not recommended to notch all targets listed on
the LCD. Because if you notch everything, you can’t
find anything.
2. If you want to select the seng of DISC or SENS
aer pressing NOTCH, you have to wait for about 3
seconds unl the cursor above the target goes out.
3. Press SENS then + or – to set the sensivity. The default level
is of 6 bars.
Note: If you don’t press the buons (SENS,+,-) within
about 2 seconds, the detector will enter the standby state.
4. Place the detector on a wooden or plasc table, then
remove any watches, rings, or metal jewelry you are
wearing.
5. Adjust the search coil so the flat part points towards the
ceiling.
Note: Never test the detector on a floor inside a building. Most
buildings have metal of some kind in the floor, which might
interfere with the objects you’re tesng or mask the signal
completely.

10
6. Slowly sweep a sample of the material you want the
detector to find (such as a gold ring or a coin) 2-3 inches or
more above the face of the search coil. When the detector
detects any metal, it sounds a tone and the cursor above the
target name will light. Also LCD displays the numeric value of
target as well as the depth (signal strength) of it. Please note
that the depth (signal strength) is only a reference, not the
exact depth of the target.
Note: If you are using a coin, the detector will detect it more
easily if you hold it so a flat side is parallel with the flat side of
the search coil. A sweep with the side of coin over search coil
might cause false indicaon and unstable display of target.
TARGET INDICATIONS
1. Numeric ranges of target:
- IRON 00-05
- 5¢ 06-17
-P-TAB 18-26
-ZN 27-38
-1¢ 39-62
-25¢63-99
Note: There are a wide variety of metals and no target can be
idenfied for certain unl unearthed. This table is for general

11
reference only.
2. Types of target
-IRON: It indicates that the target is probably iron.
-5¢: It indicates that the target is probably 5¢ or a nickel.
Some small gold rings might register within this range.
-P-TAB: It indicates that the target is probably a pull tab
of an aluminum can. Some small gold rings might
register within this range.
-ZN: It is indicated that the target is probably a type of
metal of zinc alloy or copper coin. Some medium sized
gold rings might register within this category.
-1¢: It indicates that the target might be a zinc penny.
Some large rough gold items might register within this
category.
-25¢: It indicates that the target is probably 25¢ or a
silver coin.
3. Tones
The detector comes with three tones for different types of
metal. But the built in audio idenficaon system sounds a
unique tone for each of three categories of metal. This
makes it easier to idenfy the metal being detected.
A low tone is for IRON, 5¢, same as for foil, bole cap or
nickels. A medium tone is for P-TAB, ZN, 1¢ (aluminum pull
tabs, zinc or copper items). A high tone is for 25¢, same as
for brass or silver items.
Notes:
When you set the detector to DISC or NOTCH mode,
the detector sounds a medium or high tone when it
detects highly oxidized iron.
Depending on the purity, about 15 percent of gold rings
cause the detector to sound a medium tone.

12
OUTDOOR TESTING AND USE
1. Rotate the VOLUME switch clockwise away from OFF to
power on the detector.
2. Follow the steps of 2 described in secon of Indoor Tesng
and Useto set the operang mode.
3. Find an area on the ground outside where there is no metal.
4. Place a sample of the material you want the detector to find
(such as a gold ring or a coin) on the ground.
Note:
If you are using valuable metal such as gold to test the detector,
mark the area where you place the item, to help you find it later.
Do not place it in tall grass or weeds).
5. Hold the search coil level to the ground about 1~2 inches
above the surface, slowly move the search coil over the area
where you placed the sample, sweeping the search coil in a
side-to-side moon.
Search coil Sweeping Hints:
Never sweep the search coil as if it were a pendulum.
Raising the search coil while sweepingor at the end of a
sweep will cause false readings.
Sweep slowly, hurrying will cause you to miss targets.
It’s beer you sweep the search coil from side to side in an
arc line of 3 inches moon and keep the search coil parallel

13
with the ground
If the detector detects the item, it sounds a tone, and the cursor
above the target name will light. Also LCD displays the numeric
range of target as well as the depth (signal strength).
If the detector does not detect the item, make sure that the
mode is set correctly for the type of metal you’re searching for.
Also make sure that you’re moving the search coil correctly.
Notes:
The detector responds with a signal when it detects most
valuable metal objects. If a signal does not repeat aer you
sweep the search coil over the target a few mes, the
target is probably junk metal.
False signals can be caused by trashy ground, electrical
interference, or large irregular piece of junk metal.
False signals are usually broken or non-repeatable.
Adjusng SENSITIVITY
Aer you become familiar with how your detector works, it’s
important to fine tune the sensivity to get a good effect.
Press the touch buon SENS on the panel. Then press + or – to
increase or decrease the sensivity. The level will be displayed
on the LCD.
Note:
In order to detect the target deeply buried, you can adjust the
SENS to a high posion. But not to set the level of SENS to Max

14
posion, or the detector will receive interference and false
signal from broadcast antenna and other electronic lines. The
detector will have unstable and irregular indicaons.
Pinpoinng The Target
Accurately pinpoinng a target makes digging it up easier. But it
takes pracce. We suggest you pracce finding sample on your
own property before you search other locaons. Follow these
steps to pinpoint a target.
1. When the detector detects a buried target, connue
sweeping the search coil over the target in a narrowing
side-to-side moon.
2. Make a visual note of exact spot on the ground where the
detector beeps.
3. Stop the search coil directly over this point on the ground.
Then move the search coil straight forward away from you
and straight back towards you a couple of mes.
4. Repeat steps 1~3 at a right angle to the original search line,
Make a mark of “X”. The target will be directly below the “X”
at the point of the beep response.
Factors That Affect The Detecng
It’s difficult to have an accurate detecng result. Somemes
the detecng may be restricted by some factors:
The angle of the target buried in the soil.

15
The depth of the target.
The level of oxidizaon of the target.
The size of the target.
Electro-magnec and electrical interference surrounding
the target.
Inarea of highly mineralized ground or wet sand, the detector
will sound even if there is no metal. Inthis case,you can
lower the sensivity or increase the DISC numeric value.
Meanme enhance the distance betweenthe search coil and
the ground.
Inarea with trashy metal, you can set DISC numeric value to
50. Inthis case most nails and small pieces of ironwill be
eliminated.
Metallic digging tools will also affect the deteconif they are
near the search coil. So it’s beer place them a lile far away.
CARE AND MAINTENANCE
Your metal detector is an example of superior design and
crasmanship. The following suggesons will help you care
for your metal detector so you can enjoy it for years.
Handle the detector gently and carefully. Dropping it
candamage circuit boards and cases and can cause
the detector to work improperly.
Use the detector only in normal temperature
environments. Temperature extremes can shorten
the life of electronic devices, damage the cases of the
detector.

16
Keep the detector away from dust and dirt, which can
cause
premature wear of parts.
Wipe the detector with a damp cloth occasionally to
keep it looking new. Do not use harsh chemicals,
cleaning solvents, or strong detergents to clean the
detector.
Selecve collecon of household electric and
electronic waste
WARRANTY
AAVIX product carries a limited one (1) year warranty against
defects in workmanship and materials from date of purchase
under normal household use. If product is to be used for
commercial, industrial or rental use, a 30 days limited warranty
will apply. Warranty does not apply to defects due to direct or
indirect abuse, negligence, misuse, accidents, repairs or
alteraons and lack of maintenance. Please keep your
receipt/packing list as proof of purchase. This warranty gives
you specific legal rights, and you may have other rights, which
vary from state to state. Do not return to retailer! For product
service call the toll-free Customer Service at 1-866-591-8921.
You will be informed of the nearest authorized service centre.
We will prearrange the repair with the center.
Items not covered by warranty:
1. Any part that has become inoperave due to misuse,
maintenance, or alteraon.
2. The unit, if it has not been operated and or maintained in
accordance with the owner’s manual
3. Roune maintenance items such as clean, ghtening.
4. Normal wear and deterioraon of the exterior finish due to
use or exposure.
commercial use, abuse, neglect, accident, improper
Table of contents
Other AAVIX Metal Detector manuals
Popular Metal Detector manuals by other brands

AQUASCAN INTERNATIONAL
AQUASCAN INTERNATIONAL AQUAPULSE 1B operating instructions

Radio Shack
Radio Shack 63-3011 owner's manual

Connexus
Connexus P-4000 manual

Bosch
Bosch PMD 10 Original instructions

GOLDEN MASK
GOLDEN MASK Golden Mask Deep Hunter Mobile ST instruction manual

GOLDEN MASK
GOLDEN MASK GM 1 Instructions for use