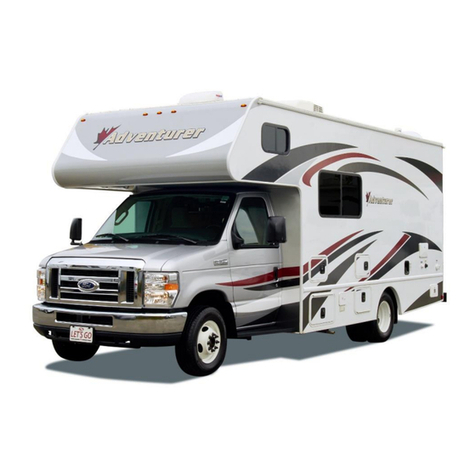
Aberdeen Zefiro 685 User manual

Zefiro
685
Reg number: ST21 BYN
MANUAL

TECHNICAL DETAILS
Seat Belts 5
Berths 4/5
Overall Body Length 7.45m / 23.4"
Overall Cab Width (mirrors folded) 2.35m / 7.4"
Overall Height 2.95m / 9'3"
MTPLM 3500kg / 68.9cwt
Rear 2 x single beds that can be converted into one king size Double
1.98m x 800mm 2 x singles
Drop Down Double
1.9m x 1.3m Measured from the widest point / Drop down double bed has a maximum load
capacity of 200kg
Front single bed

The Command Panel allows you to control the Following
ZEFIRO 696 COMMAND CONTROL PANEL
The command panel powers the Motorhome, on entering the Motorhome push the main Button,
The Water Pump is the Tap sign on the panel. Press this and you will hear the pump running. The pump is
required for running the water and the shower.

TRAUMA HEATING AND WATER CONTROLS
On entering the motorhome Turn on the power by pushing the main button on the command Panel
In the Swift Motorhomes the LED panel will light up.
BEFORE OPERATING THE TRUMA PANEL select GAS or Electric and power up the Motorhome
The Trauma controls the power source to the Motorhome, the heating and water temperature
Motorhome Heating will work off the 240 v Electric or the Gas (YOU DO NOT NEED THE WATER PUMP ON FOR
THE HEATING)
Decide first if you are running the heating off Gas or Electric (if in a campsite preferably use the 240v supply)
If Gast Turn on the Gas Bottle If Electric plug in the 240V supply
With the Gas or Electric now on, you can Turn on the Trauma panel by pushing the main button until the
panel lights up
The first screen you will see is this ➡
Scroll to the third icon (GAS Bottle or
Electric) push the button and scroll to the
icon you are running the heating on. If
running on Gas scroll to the gas bottle and
push the button the gas bottle will appear
above the line.
If running on Electric 240V select EL2 and
push the button the electric sign will appear
above the line.
These are the only two choices you will
Require
NOW
Scroll back to the motorhome icon, this controls the heating in the motorhome, push the button and the icon
flashes, turn the dial to the desired temperature, then push the button again.
The heating sign will appear above the line and will flash until the motorhome has reached the desired
temperature.
NEXT
Scroll to the next icon: this is for the water temperature, on the icon push the button the icon flashes, turn the
button you have the option of ECO, HOT and BOOST select one and push the Button the Temp icon will flash
above the line until the water has reached the temperature required.
The 4th Icon is the fan scroll to this push the button and select fan speed push the button again.
These are the only controls you will require on the Trauma Panel
Before you decide to move, turn off the heating and the Gas on the Trauma panel by
scrolling to the motorhome and temperature icons push the button and turn until you
see OFF and push the button then leave the system to cool down for 5 minutes before
switching off the Gas or disconnecting the 240v supply

OPERATING INSTRUCTIONS
Display and operating elements
1. Display
2. Status line
3. Menu line (top)
4. Menu line (bottom)
5. Power supply display
120 VAC (mains
supply)
Rotary push button
The rotary push button (8) is used to select and
change set points and parameters; it is then
tapped to save the values. Selected menu items
flash.
Turn clockwise
•The menu is scrolled through
from left to right
•Increase values (+)
Turn counterclockwise
•The menu is scrolled through
from right to left
•Reduce values (-)
Tap
•Save a selected value
•Select a menu item, go to the
setting level
Press (3 seconds)
•Main switching function -
control panel on/off
Description
•A rotary push button(8) is used to select menu items in
the menu lines (3 + 4) and to adjust settings.
•Information is shown on a backlit display (1).
•The Back button (9) is used to go back to a previous
menu.
6. Time switch display
7. Settings/values
8. Rotary push button
9. Back button
Back button
Press the Back button (9) to go back to a previous
menu and cancel settings. This means that the
previous values remain unchanged.
Instructions for use
•If there is an interruption to the power sup- ply, the clock has to be reset.
•If a new furnace is connected to the bus sys- tem of the control panel, repeat the proce dure described in
"Initial start-up".

Start-up
Start/Stand-by screen
When the control panel is connected to the power supply,
after a few seconds a start screen is displayed.
Select setting level
•
Tap the rotary push button (8).
The display shows the setting level. The first icon flashes.
•
Use the rotary push button (8) to select the icon in the
menu line (3).
•
Tap the button to go to the setting level.
•
Select the desired temperature with the rotary push
button (8).
•
Tap the rotary push button (8) to confirm the value.
Change room temperature
Change hot water level
•
Use the rotary push button (8) to select the icon in the
menu line (3).
•
Tap the button to go to the setting level.
•
Select the desired hot water level with the rotary push
button (8).
•
Tap the rotary push button (8) to confirm the value.
•
Use the rotary push button to select the icon in the
menu line
•
Tap the button to go to the setting level.
•
Select the desired energy mode with the rotary push
button
•
Tap the rotary push button to confirm the value.
•
Only 2 Options will ever be used (a) GAS €Ele2
Select energy mode

EXTERNAL EQUIPMENT
Diesel filler and add Blue (Use ignition Key)
If no gas supply to the Motorhome make sure Main
Valve Is Open
Toilet chemical for toilet Cassette
Fresh Water Hose
The bucket contains eletrical hook up cable, fresh water
hose, key for changing gas bottle, toilet chemical for
cassette
Bicycle rack
The rear Camera has two modes a Reversing Camera and
a rear driver view when driving.

240v electric hook up point
Toilet cassette
Turn the Grey pipe and remove the blue cap to empty,
once cleaned add one cap of the toilet chemical and 2L of
water
Replace the cap and re fit the cassette.
Fresh Water filling point
Before removing the toilet, Cassette make sure the lever
on the toilet is in the closed position. Do not try to force
the cassette out if the lever is in the correct position it will
slide out
Waste drain, under the gas bottle compartment

All external locks are worked by the same key.
Rear Garage for storage.

INTERNAL EQUIPMENT
Front Seating area
This converts to 5th single bed double bed
Front Bed Make Up

Slide from both sides
Electric drop-down double bed above the dining
area.

Rear bedroom with 2 x single beds this can be converted
into a king size double, there is storage under the bed
.

Separate Shower
Before using the toilet, Slide the lever to the right to open
the cassette flap, slide the lever to the left when finished.
Do not move Lever while sitting on the toilet.
Before using the toilet, Slide the lever to the right to open
Toilet
Button to Flush toilet

Kitchen area is fully equipped with plates cups pots and pans a kettle and cutlery
various cooking utensils.

MOTORHOME FRIDGE OPERATION
The fridge will Operate in 3 modes
•Engine Battery: this is used to keep the fridge cool while traveling if the gas is turned off
•Gas: The fridge will run in gas mode while traveling and while wild camping or at sites
with no 240v electric supply
•Electric 240v mains supply: when plugged into campsite power supply
Thefridge has a digital push button control
panel that can be used to select a source
automatically or manually.
Battery if driving, Gas , Electric if plugged in to
a 240v supply.
To select the source, push the arrow to the
required source.
Push the button to set fridge Temperature.
The fridge will ignite when the power button is
pushed.


Door blinds closed
TV and DVD
Pull to close windscreen blinds
Slide from both sides
Close all other window blinds

Below is a list of Miscellaneous charges that may be charged if the Motorhome is
not returned in accordance with the returns Policy.
Smoking in the Motorhome £300.00
Unauthorised Pets in the Motorhome £150.00
Pet hair left in the Motorhome £100.00.
Unclean Bathroom £100.00
Unclean Toilet £100.00
Unclean habitation Area (Hob /Oven etc) £100 - £150
Unemptied / Dirty, Toilet cassette £50.00
Fridge / Cupboards, not emptied £50.00
Late Return £50/ hr or part thereof for first 3
hours, then balance of the security
deposit together with any additional
costs incurred by AMR
Any Damages/breakages found during the Vehicles return Inspection and
cleaning will be charged accordingly, with an admin fee of £25.00
This manual suits for next models
1
Table of contents
Other Aberdeen Motorhome manuals
Popular Motorhome manuals by other brands

Jayco
Jayco MELBOURNE 2023 owner's manual

Winnebago
Winnebago Minnie Winnie Spirit Basic operation guide

Airstream
Airstream LAND YACHT 202 user manual

SunnyBrook
SunnyBrook 2011 EdgeWater owner's manual

Airstream
Airstream 28' Ambassador Double 1966 owner's manual

Winnebago
Winnebago Suncruiser owner's manual