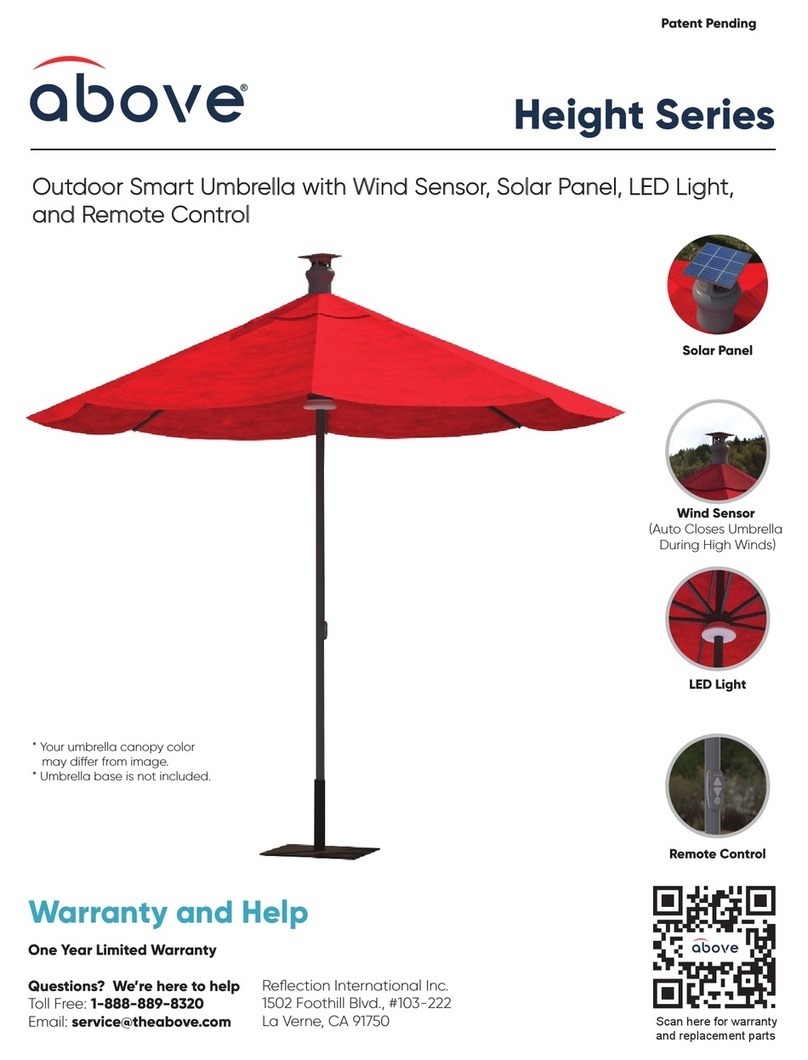
above Height Series User manual

Height Series / Serie Altura /Série Hauteur
Smart Umbrella with Solar LED Light
Sombrilla Inteligente con Luz LED Solar
User Manual/Manual de Usuario/
Patent Pending

English

Safety Information
Please read and understand this entire manual before
attempting to assemble, operate or install the product.
Keep away from open ames or heat.
Avoid allowing metal or foreign objects (such as dust) into the device’s USB charging port
or any other slot. If a metal object or other foreign object enters the port. Remove the debris
before using the USB port.
Only authorized service workers can perform service operations on the device.
Do not attempt to disassemble or repair the equipment yourself. Failure to do so may result
in equipment damage or personal injury.
DO NOT strike, throw, step on, apply excessive pressure, or subject the device to severe
physical shock.
DO NOT disassemble the device as this may puncture the battery and cause personal injury
or damage to the device.
This product (including accessories) has magnets. Swallowing the magnet could cause
serious injuries such as choking or intestinal damage. If a magnet is accidentally swallowed,
seek immediate medical attention. Keep this product out of the reach of children and other
people who need to be watched to avoid accidental ingestion.
You may use the equipment in certain humid or dusty environments but be aware of its
IP rating limits, and regular use limits should be met when in use.
Conditions that exceed the IP rating limits include excessive humidity, hurricane winds,
and dusty environments.
DO NOT expose it to extreme temperatures. Do not use the equipment in temperatures
below 32°F or above +113°F.
DO NOT remove the LED light cover when in use. It may harm your vision.
When charging your device with a USB cable, make sure it is not stepped on or tripped over.
It may be damaged or severely strained.
DO NOT attempt to replace the battery yourself; you may risk damaging it, which could lead
to overheating, explosion, re, property damage, or personal injury.
Batteries in your device must be repaired and recycled by an Above authorized service
partner.
Please charge the battery at least once every three months. A long period of not charging
will reduce battery life.

FCC Statement
This device complies with part 15 of the FCC Rules.
Operation is subject to the following two conditions: (1) this device may not cause harmful
interference, and (2) this device must accept any interference received, including interference
that may cause undesired operation.
Note: This equipment has been tested and found to comply with the limits for a Class B digital
device, pursuant to part 15 of the FCC Rules. These limits are designed to provide
reasonable protection against harmful interference in a residential installation.
This equipment generates, uses and can radiate radio frequency energy and, if not installed
and used in accordance with the instructions, may cause harmful interference to radio
communications. However, there is no guarantee that interference will not occur in a
particular installation
If this equipment does cause harmful interference to radio or television reception, which can
be determined by turning the equipment off and on, the user is encouraged to try to correct
the interference by one or more of the following
measures:
Reorient or relocate the receiving antenna.
Increase the separation between the equipment and receiver.
Connect the equipment to an outlet on a circuit different from that to which the receiver is
connected.
Consult the dealer or an experienced radio/TV technician for help. To ensure continued
compliance, any changes or modications not expressly approved by any party.
Responsible for compliance could void the user’s authority to operate the equipment.
(Example - use only shielded interface cables when connecting to computer or peripheral
devices.)
This equipment complies with Part 15 of FCC Rules. Operation is subject to the following 2
conditions:
This device may not cause harmful interference, and this device must accept any interference
received, including interference that may cause undesired operation.
FCC Radiation Exposure Statement
The equipment complies with FCC Radiation exposure limits set forth for uncontrolled
environment. This equipment should be installed and operated with minimum distances
of 20cm between the radiator and your body.
FCC Compliance

Choking Hazard Warning
Battery Recycling Warning
!
WARNING : This product contains a Button or Coin Cell Battery. A
swallowed Button or Coin Cell Battery can cause internal chemical burns in as little
as two hours and lead to death. Dispose of used batteries immediately. Keep new
and used batteries away from children. If you think batteries might have been
swallowed or placed inside any part of the body, seek immediate medical attention.
Do NOT throw away the battery in a re
DO NOT throw away the battery into a household
garbage or recycling bins.
Lithium-ion (Li-ion) batteries are used in this
product. To recycle it, please contact your local waste
authority for information on available recycling and/or
disposal options.

Table of Content
1. What’s in the Box................................................................................................................ 1
2. Symbol Indicators............................................................................................................. 2
3. Assembly ................................................................................................................................ 3
3.1 Connect the Solar Panel and Wind Sensor.....................................................................3
3.2 Turn on the Power on the Control Board ...........................................................................4
3.3 Connect the Wind Sensor to the Control Board ..........................................................4
3.4 Installing the LED Light ..................................................................................................................5
3.5 Attach The Pole to A Base ...........................................................................................................6
3.6 Recommend Base Weight for Above Umbrellas........................................................6
3.7 Assemble Upper Pole to Bottom Pole.................................................................................7
4. Remote Control .................................................................................................................. 8
4.1 How to Use Remote Control.......................................................................................................8
4.2 Pairing Your Remote.........................................................................................................................9
4.3 Pairing Your Remote Control to Multiple Umbrellas .................................................9
4.4 Replacing Remote Battery.....................................................................................................10
5. How to Charge the Umbrella................................................................................ 11
5.1 Solar Charging ...............................................................................................................................11
5.2 USB Charging .................................................................................................................................11
5.3 Low Battery Alert: .........................................................................................................................12
6. Emergency Release Latch..................................................................................... 12
7. Setting Wind Sensor Sensitivity........................................................................... 13
8. Care and Maintenance ............................................................................................ 15
9. FAQ.......................................................................................................................................... 17
10. Warranty........................................................................................................................... 18
11. Contact Us...................................................................................................................... 21

1
Before beginning to assemble this product, make sure all parts
are present. If any parts are missing or damaged, do not attempt
to assemble this product. Please contact our customer service
department at 1-888-889-8320.
1. What’s in the Box
1
2
3
4
5
6
7
8
9
Part Descripon
1 Solar Panel
2 Wind Sensor
3Control Board/ Baery
4 Motor
5Upper Frame with Canopy
6 LED Light/ USB Port
7 Adjustable Remote Controller Holder
8Remote Control (Baery Included)
9Boom Pole
10 Addional CR2032 Coin Cell Baery
10
CR2032

2
2. Symbol Indicators
Control Board
LED Light
Symbol Description
Turn on/off the power
Wind Speed Settings
Micro USB Charging Port
Unlocked Position
Locked
Symbol Description
Micro USB Charging Port

3
3. Assembly
Fully Assembled Parts
3.1 Connect the Solar Panel and Wind Sensor
*Motor should come pre-attached to the umbrella
1. Align the “ ” on the lower side of the “Solar Panel” with the “ ” on the
upper side of the “Wind Sensor”. Turn the solar panel clockwise until “ ” on the
solar panel is aligned with “ ” on the wind sensor.

4
1. Align the “ ” on the lower side of the “Wind Sensor” with the “ ” on the upper side
of the “ Control Board ”. Turn the wind sensor clockwise until the“ ” on the win sen-
sor aligns with “ ” on the control board.
3. Assembly
3.2 Turn on the Power on the Control Board
3.3 Connect the Wind Sensor to the Control Board
Control Board
1. Locate the control board.
2. Pull off the silicone cover in the center of the top of the Control Board.
Turn the power switch on the right side in the red box from off to on.
3. Push the silicone plug back into place.
ON
OFF
*Control board should come pre-attached
to the motor (top part of umbrella)

5
3.4 Installing the LED Light
1. Insert the LED xture through the pole with the umbrella. Align “ ” on the lower side
the runner hub with “ ” on the upper side of the LED Light. Turn the LED light
clockwise until “ ” is aligned with “ ”.
3. Assembly

6
3.5 Attach The Pole to A Base
3.6 Recommend Base Weight for Above Umbrellas
• Put the bottom pole in to the base.
• Screw and lock the bottom pole to the base. (Umbrella bases may vary.)
*Please make sure to set the base on a at surface
TIP : A heavier weight is better for keeping an umbrella steady in windy conditions.
*Base Not Included.
Locks
Umbrella Size Base Weight
9/10 90 LBS
11 120 LBS
3. Assembly

7
3.7 Assemble Upper Pole to Bottom Pole
1. Press and hold the button located at the end of upper pole.
2. Insert the upper pole to the bottom pole until the button clips into the hole.
Button
Hole
1
2
3. Assembly

8
Open
Close
LED Light
4.1 How to Use Remote Control
The remote control by default should already be paired with your
Height umbrella. If you need to re-pair or pair to multiple umbrellas,
refer to steps 4.2 and 4.3.
• Press the “Open” button to open the umbrella
• Press the “Close” button to close the umbrella
• Press the “LED Light” button to turn on the LED light
Remote Control Range
98 ft/30 m
4. Remote Control

9
4. Remote Control
4.2 Pairing Your Remote
4.3 Pairing Your Remote Control to Multiple Umbrellas
1. Pull out the silicone plug in the center of the top of the Control Board.
Turn the power switch to on.
NOTE :If the switch is already turned on, please turn it off and then back on.
The umbrella will be in pairing mode for 30 seconds after turning the switch to on.
2. Press and hold the UP button ”▲“ on the remote control until the control board beeps.
This will indicate that the remote has successfully paired with the control board.
3. Gently press the silicone cover back into place.
1. A remote control can pair with multiple control boards (umbrellas) at the same time.
However, an umbrella can only pair with one remote control. If you pair your umbrella
with a new remote control, the previous remote will automatically be unpaired.
2. Select a remote that you would like to pair all the umbrellas with.
Control Board
ON
OFF

10
1. Unscrew the back cover of the remote control.
2. Remove the silicone button cover.
3. Unscrew the screws from the board and remove it from the cover.
4. Remove battery.
(TIP : Lift the gold clip holding the battery before removing.)
5. Replace with a new battery, make sure the plus sign (+) is facing up.
6. Put the screws and covers back in place.
4.4 Replacing Remote Battery
4. Remote Control
3. Pull off the silicone cover in the center on the top of each Control Board. Turn the
power switches to on. (If the switches are already turned on, please turn it off and
then back on. The control board will be in pairing mode for 30 seconds after turning
the switch from off to on.)
4. Press and hold the Open button ”▲“ on the remote control until the control boards beep.
This will indicate that the remote has successfully paired with the control boards.
5. Gently press the silicone covers back into place.
A CR2032 3 Volt Lithium Coin Cell Battery x 1
( Included in the remote )

11
5. How to Charge the Umbrella
1. Charge using the micro-USB charging port on the LED light or control board and
connect the other end to a power outlet. It may take up to 4 hours to fully charge.
5.1 Solar Charging
5.2 USB Charging
The Height series umbrella has two charging options available:
solar or the USB charging ports.
1. With the solar panel and control board installed, put the umbrella in direct sunlight. It
takes about 12 hours to fully charge depending on the sunlight intensity.
NOTE: the solar panel and control board must both be fully connected as the solar
panel will charge the battery in the control board.

12
5. How to Charge the Umbrella
When the umbrella cannot be closed due to a dead battery or for any other reason,
you can use the emergency release latch to close the umbrella.
However, you must attach the latch back on to open the umbrella.
1. Close the umbrella by turning the latch counterclockwise.
6. Emergency Release Latch
5.3 Low Battery Alert:
When the battery level is less than 15%, the control board will beep 4 times twice every 30
minutes, and the LED will no longer be available. When this occurs, charge the control board
using the solar panel or via the micro-USB charging ports on the control board or LED Light.

13
It is not recommended to change the wind sensor settings
unless necessary. Changing this setting will cause the
umbrella to close when the wind sensor detects that wind
speed.
7. Setting Wind Sensor Sensitivity
2. Rotate the wind sensor 60°counterclockwise to align the “ “ on the lower side of the
wind sensor with the “ “ on the upper side of the control board. Remove the wind
sensor form the control board.
1. Remove the control board by rotating the control broad 60°counterclockwise from the
motor until “ “ on the lower side of the control broad until it is aligned with “ “ on
the upper side of the motor. Remove the control board from the motor.

14
7. Setting Wind Sensor Sensitivity
Level 1:
13MPH
Level 2:
17MPH
Level 3:
21MPH
OFF
3. Remove the silicon cover at the top of the
control board and switch the power to off. Look for the symbol at the top of the
control board. The switches below will indicate the level the wind sensitivity is on.
1 = 13MPH (default), 2 = 17MPH, 3= 21MPH. Follow the diagram above to adjust to
your preferred wind sensitivity. When the wind reaches the wind speed you’ve set, the
umbrella will automatically close. Once nished put the silicon cover back on.
1 2 3
OFF
1 2 3
OFF
1 2 3
OFF
1 2 3
OFF
Other manuals for Height Series
1
This manual suits for next models
2
Table of contents
Languages:
Other above Patio Furniture manuals
Popular Patio Furniture manuals by other brands

kingsley-bate
kingsley-bate CL-18 Assembly instructions

Alice's Garden
Alice's Garden HARDELOT BU3X3 Directions for use

Backyard Creations
Backyard Creations 272-1982 Assembly instructions

Coolaroo
Coolaroo Banksia Assembly guide

Kitchen & Bath Authority
Kitchen & Bath Authority 15PDB-HUDS00-000BR Assembly instructions

Agio
Agio 94855 Assembly instructions