Level
1
3
2
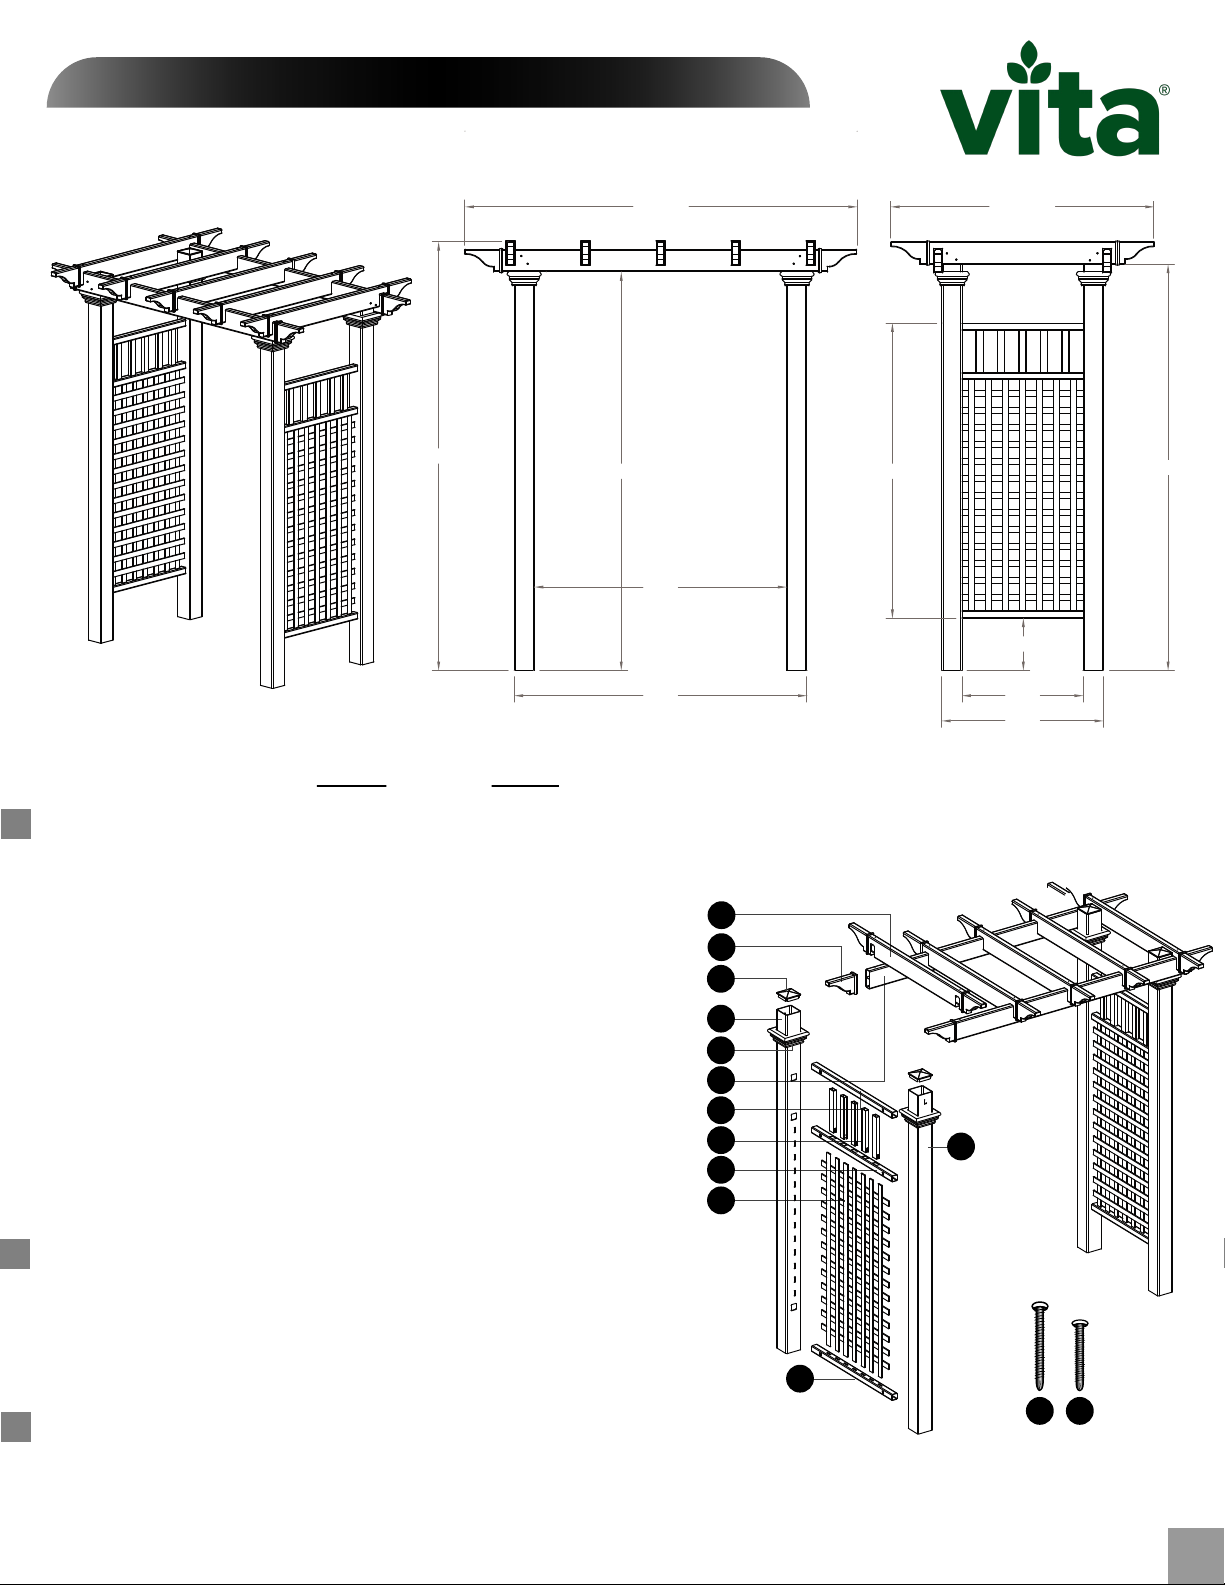
(Measurements shown are approximate)
38 in.
96.5 cm.
10 in.
25.4 cm.
50 in.
127 cm.
24 in.
61 cm.
5
Toll Free Phone: 1 800 282 9346 Toll Free Fax: 1 877 464 9286
www.wearevita.com
S T E P S I X
Install the Arbor into the Ground
6
Insert the four 4”x4”x4’ pressure treated wood posts into the
bottom of the vinyl posts until they bottom out against the
horizontal rail. Fasten with two 2 1/2" long screws per post –
on the side of the post (centered) approximately 10" from
the bottom. Note that there are no pre-drilled holes.
Move the arbor to it's final location (you will need a helper).
When you have identified the location of each post, mark the
positions on the ground and then move the arbor aside.
Excavate four holes approx 38 in. (96.5cm.) deep. The location
and excavation of these four holes is the most critical step and
should be completed with care.
Carefully move the arbor back into position and level both
horizontally and vertically.
Check your measurements to confirm that arbor is secured
and placed correctly.
Backfill the holes with cement.
1
2
3
4
5
Into Earth with Concrete Footing
(Option One)
Arch mustbe well secured to prevent tipping over from
windload, etc.
6
You have Two Optionsto Complete this Step.
(*purchased separately)
OPTION ONE -If Your Arch:
• is going to be installed with fencing or a gate
• is located in a highwind or hurricane area
• is located in ground conditions that are not level
Consider Using:
*4"x 4" x 4’ Long Wood Post(4)
1
2
2 1/2" Stainless Steel Screws (8)
•Purchase separate from your local lumberyard
•Recommended to be installed in concrete footing
O PTI ON T WO - If Your Arch:
• is intended to be used as a stand alone garden accent or pathway
• is located on level ground
*
4” EZ Mount Post (Kit of 4)
• Purchase from Vita, www.wearevita.com
• Instructions are included with the kit
Consider Using:
15
7