Access Motor TE 250-U User manual

ACCESS MOTO
R
T
E-250/300U
250/300 2x4
Operator’s Manual

Dear Customers,
Thank you for purchasing TE-250/300U.
You will find it easier to start your engine with actuation of the manual
choke for 20-30 seconds after you receive your new ATV. That is because
we have drained out the fuel in the carburetor when we finished assembling
the ATV. This will ensure ATV performance and safety.
This manual describes detailed instructions of correct operation,
maintenance and adjustment of TE-250/300 U to ensure durable, safe and
comfortable riding.
In order for you to ride more safely and more comfortably, please read this
manual thoroughly before riding it. Have a nice time riding!
If data and relevant pictures contained in this manual
differ from the real ATV, the data of the real ATV shall
supersede data contained herein.

1. Important Message ...................................................................................... 1
Riding Precautions ...................................................................................... 3
Attire; Check before Riding ........................................................................ 4
Particular Attention on Parts That May Cause Burn; Load Weight Limit . 5
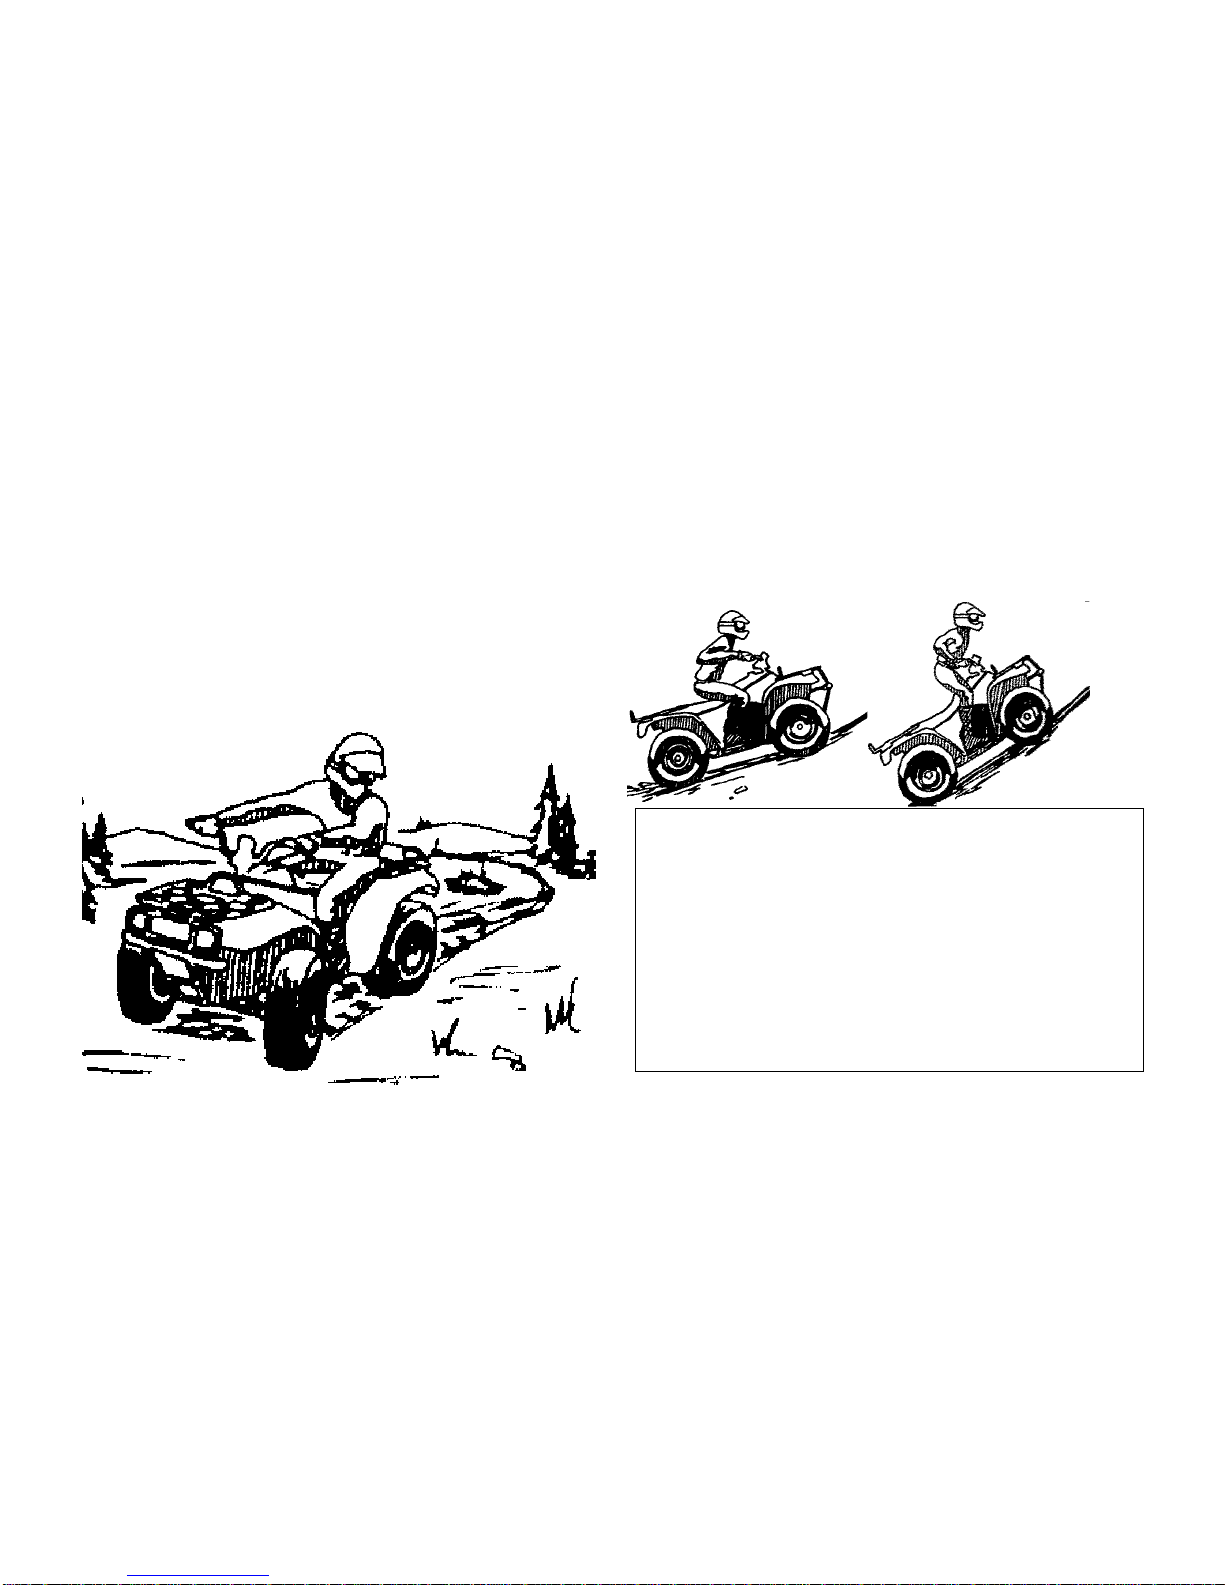
Looking at The Terrain ............................................................................... 6
Making Turns; Going Uphill ....................................................................... 7
2. Going Downhill; Riding through Water ..................................................... 8
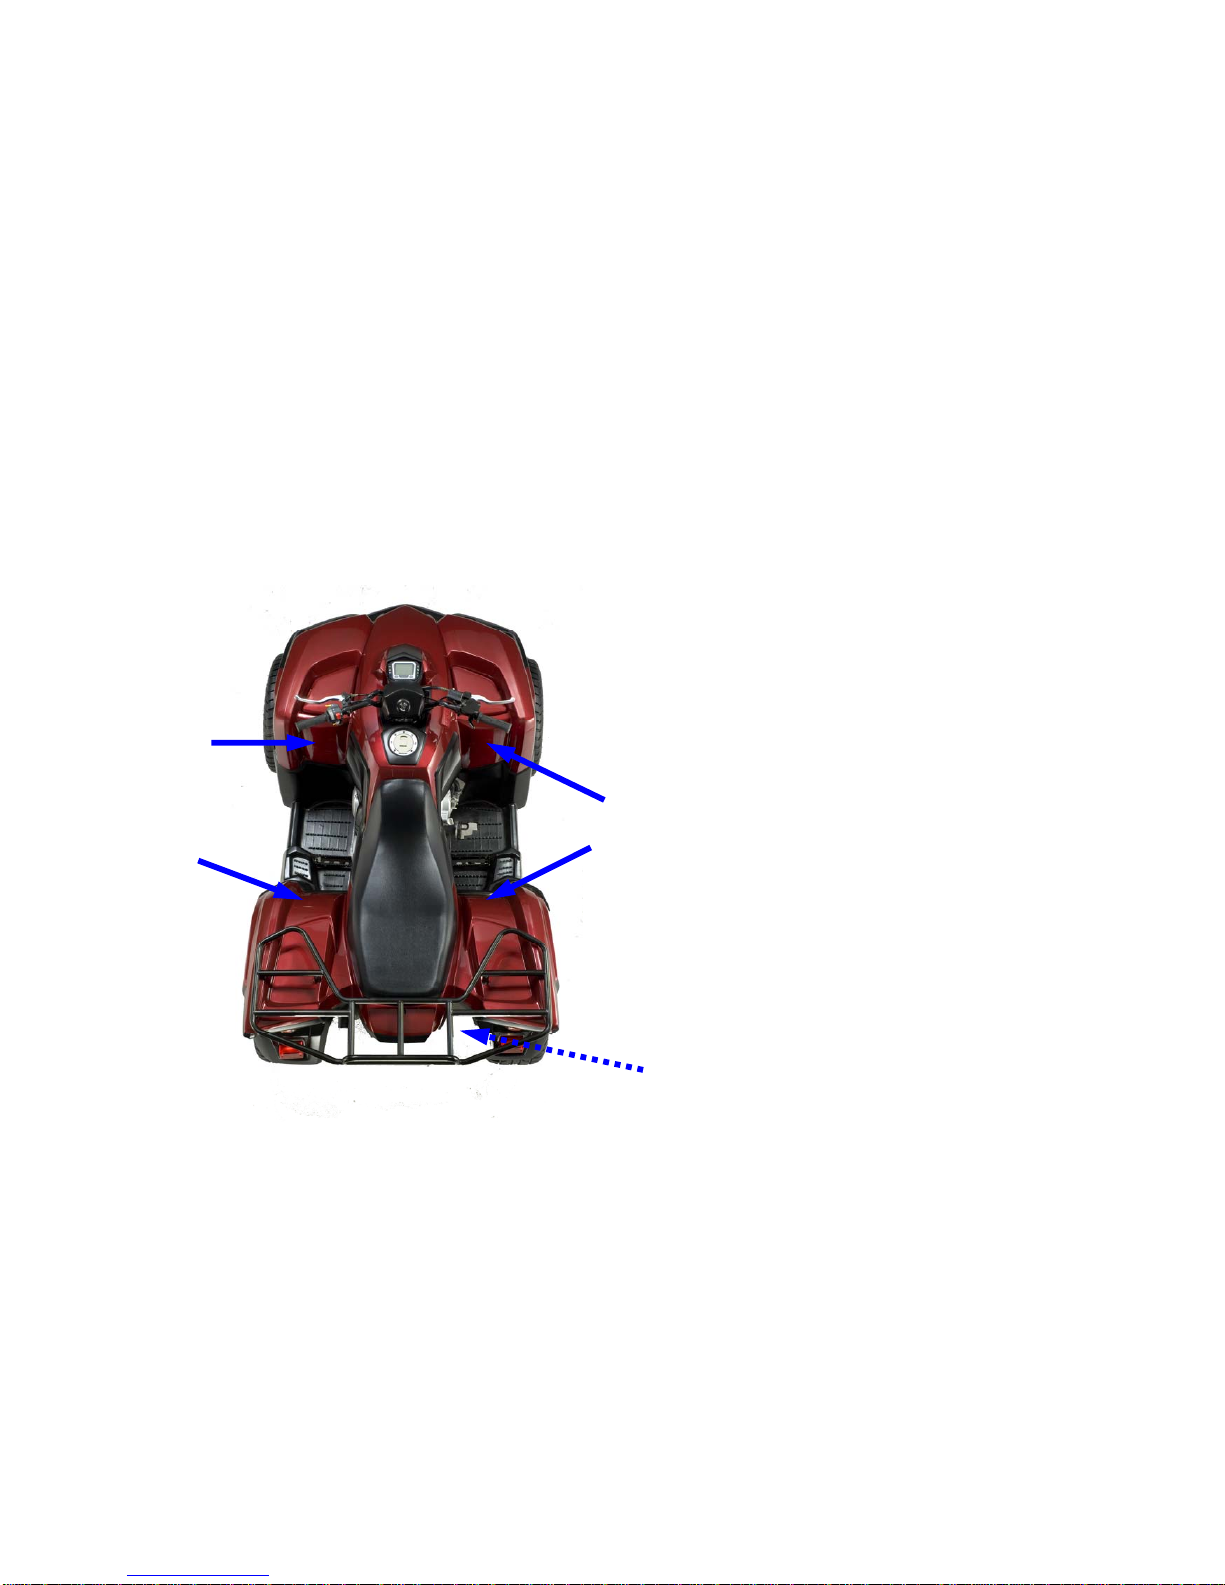
3. Naming of Each Component ....................................................................... 10
Operation of Each Component .................................................................... 14
Ignition switch; Reverse Indicator Light and Neutral Indicator Light 14
High Beam Indicator Light; Temperature Indicator Meter
Left/Right Signal Indicator; Fuel Level Indicator .................................... 14
Headlight Switch ......................................................................................... 16
Startup Rocker Switch ................................................................................. 16
Accelerator Limiting Device; Accelerator Lever ........................................ 17
Manual Choke Rocker Switch; Shift Stick ................................................. 18
Brake Handle Lever Locking Button, Flagpole holder ............................... 19
Seat Lock ..................................................................................................... 20
Steering Handle Lock .................................................................................. 21
4. LCD Instrument Panel Adjustment ............................................................. 22
Starting the Engine Electrically .................................................................. 24
Before Starting The Engine, First Check Oil And Fuel Levels .................. 25
When Starting The Engine, Pull Tight The Front or The Rear Brake
When the Engine is Difficult to Start .......................................................... 25
5. Starting by Manual Cranking ...................................................................... 26
Normal Usage .............................................................................................. 27
Normal Riding ............................................................................................. 28
6. How to Stop the ATV ................................................................................. 32
Checks Before Riding ................................................................................. 34
Oil Check and Refilling............................................................................... 34
Recommended Oil Specification and Grade ............................................... 35
Changing Oil ............................................................................................. 36
Fuel Check and Refueling ........................................................................... 37
Front and Rear Brake Fluid Level Check and Refilling ............................. 38
Headlight Check; Headlight Beaming Distance Adjustment ...................... 40
Tire Check ................................................................................................... 41
Front and Rear Shock Absorber Check ....................................................... 42
Transmission Chain Check and Adjustment ............................................... 43
Coolant Check; Refilling; Changing Coolant ............................................. 45
Changing Gear Oil .................................................................................... 47
How to Replace the Air Cleaner ................................................................. 48
Spark Plug Check ..................................................................... 49
Simple Maintenance ................................................................. 50
Regular Maintenance Table ...................................................... 51
Battery Electrolyte Check.......................................................... 52
Replacing the Fuse................................................................... 53
Lubricating Each Part of the ATV.............................................. 54
When Failure Occurs................................................................ 55
Specifications............................................................................ 56

1
Important Message
Negligence of the following signs and warnings may cause
serious damage and even death.
Sign location
`
(3)
(5)
(2)
(1)
(4)

2
(1) (3)
(4)
(2) (5)

3
1. Riding Precautions
TE 250 ATV is a special multipurpose four-wheel motorbike
with entertainment features. In this section, we will describe
important notes and techniques in order for you to safely ride
this ATV. Please read this manual thoroughly and spend
some time practicing on your new ATV. Pay attention on your
safety and that of others.
* If you do not have any experience riding an ATV, you can only
ride it with instruction by a licensed or qualified instructor.
First of all, you have to ride it slowly to feel and adjust
yourself to the ATV, even if you are an experienced rider.
*Do not attempt to utilize the maximum limits of this ATV.
Notes: A. You should familiarize yourself with basic
operations of this ATV before you try more
difficult operational techniques.
B. To ensure the rider’s and others’ safety, anyone
who drinks, takes drugs or medicine is not
permitted to ride this ATV.
The rider’s ability to control this ATV will be
reduced by the effects of medicine or alcohol.

4
Attire
To ensure safety, the rider shall wear a safety helmet, goggles,
gloves, boots and protective clothing when riding this ATV.
Check Before Riding
* Conduct a pre-riding check in accordance with “Check before
riding” in user’s manual on Page 34 before riding to ensure
safety and the service life of this ATV.
* Your ability of controlling this ATV will be affected by insufficient
tire pressure or a tire that is out of specification. Contact your
service center for inspection to reduce the risk of an accident.

5
■Particular Attention on Parts That May Cause
Burn
* The exhaust pipe and the engine become very hot when or
after the ATV runs for a period of time. To avoid personal injury
(including human and objects, etc), do not touch these parts.
When the ATV is parked, also note that children or passers-by
should not touch these parts to avoid injury.
* To reduce the risk of fire, do not park this ATV near a dry lawn
or flammable substances.
■Load Weight Limit
Maximum allowable weight for this ATV is 200 kg (two riders)
* When you carry loads on the ATV, slow down your speed to
increase effective braking distance.
* When you carry loads on the ATV, you should keep loads in
balance to avoid loss of control of the ATV due to imbalance.
Notes: 1. Load weight limit: 200 kg
2. Exceeding the maximum load weight for this ATV
may cause an accident.
3. When using this ATV as a trailer, slow down your
riding speed.
Max weight 200 kg

6
■Looking At The Terrain
* Watch your speed and control technique when you ride on
excessively flat, loose and rough surface, and keep an eye on
any potential hazards such as pits, water puddles, rocks, root
blocks, etc to avoid the risk of an accident.
* When riding with poor visibility, e.g. riding at night, turn on the
headlight and slow down your speed to ensure safety.
* When riding in the area where your viewing angle is limited, e.g.
riding on a rough road in hills, it is advisable to attach a flag of
some height in the rear of the ATV for warning purposes. This
can assure safety for the rider, other riders and onlookers.

7
Making Turns
When you approach a turn, first slow down and smoothly turn the
handlebars to the direction you are going. Also, move your gravity
to the outer floor panel and tilt your upper body to the inner side of
the turn, which enables your control at the turn to be smoother
and safer.
Going Uphill
Note: When going uphill, move your gravity as forward as
possible. Also, sit in the front part of the seat and bend
your upper body forward. Keep a steady speed in the
uphill process and keep the ATV balanced.
Notes: 1. If the slope is too high to proceed and the ATV is
moving backward, apply the front brake to slow down
and carefully control the ATV to slip down. If it is
beyond control, the rider should immediately get off
from the left side to avoid the risk of being crushed by
the ATV once it turns over.
2. Do not apply only the rear brake to avoid the ATV
flipping over.
3. Do not abruptly apply the accelerator.

8
■Going Downhill
Note: Place your gravity as backward as possible and straighten
both of your arms. Keep the ATV in balance and apply the
rear brake to slow down your speed.
Unless otherwise necessary, do not press the accelerator
lever.
Do not apply only the front brake to avoid the ATV flipping
over.
■Riding Through Water
Watch the speed of water current and its depth if riding through
water is necessary. If water flows very fast or is deep, the
performance of the ATV will be affected, which may cause
unsafety to the rider.
Notes:
.Do not ride across a river with fast current or great depth to
avoid loss of control of the ATV and cause risk of hazard to the
rider.
.After crossing the water area, you should check that the brake
function is normal. If it is not, slow down your speed and also
intermittently apply both front and rear brakes to restore the
brake function.
.If it takes a long period of time to ride through the water area
and the brake system submerges in water too long, it will lead
to loss of brake function. Do not ride this ATV any longer and
take it to the nearest service center for inspection and
servicing.

9
* Smoking is strictly prohibited when refueling theATV.
Turn off your engine when refueling the ATV.
* Functionality of the ATV is dependant upon its structure. Any
modification without our permission may cause performance
degradation and in turn affect the service life of the ATV and
riding safety.
It is illegal to modify this ATV without our permission. Do not
attempt to make any modification.

10
2. Naming of Each Component
(01) Headlight / position light
(02) Front brake handle lever
(03) Right front turn signal light
(04) Handlebar to lock
(05) Left front turn signal light
3 5
1
2
4

11
(06) Right rear turn signal light
(07) Rear light / brake light
(08) Ignition switch
(09) Left rear turn signal light
(10) Exhaust pipe
(11) License plate light
(12) Battery
(13) Accompanying tools
(14) Manual Choke rocker switch
6
9
8
10
13
7
12
14
11

12
(15) Shift stick
(16) Front brake reservoir
(17) Seat
(18) Aux liquid bottle
18
15 16
17
18

13
(19) LCD instrument panel
(20) Front brake handle lever
(21) High/low beam switch
Startup rocker switch
Warning light switch
Turn signal light switch
Horn switch
(22) Left footrest
(23) Fuel tank cap
(24) Throttle Bottom Clamp
(25) Right footrest
(26) Foot brake (1 for 4 wheel)
(27) parking lever
(28) Cranking handle
(29) Throttle
(30) Power Supplier-12V
(19)
(21)
(23)
(25)
(27)
(28)
(29)
(30)
(22)
(24)
(20)
(26)

14
3. Operation of Each Component
■Ignition switch
OFF : At this position, power supply to the ATV is
completely cut off. The key can be removed. (The
engine stops)
ON : At this position, power supply to the ATV is
connected. The key cannot be removed at this
position. (The engine can be started up.)
: At this position, power supply to the ATV is
connected. The key cannot be removed and the
position light comes on. (The engine can be
started up.)
(1) Key hole (2) Key
Note:
Do not turn the key to the OFF position while riding. This is
the major cause of an accident.
Reverse Indicator Light:
1. The reverse indicator light comes on (red light) when you turn
on the ignition switch, when the transmission is at the reverse
gear.
2. Neutral Indicator Light:
The neutral indicator light comes on (green light) when you turn
on the ignition switch, when the transmission is at the neutral
position.
6
34
12785
5
Note:
When starting the engine, the transmission should be at the
neutral position to avoid any risk of hazard.

15
3. High Beam Indicator Light:
When this light comes on, the headlight is using high beam
light.
4. Temperature Indicator Light:
When this light comes on, it means the engine temperature is
too high. Check the coolant level in the Aux Liquid Bottle.
6
34
12785
5
Note:
*When the engine over-temperature indicator light comes on,
you must stop the engine and let it cool down.
5. Left/Right signal indicator:
When operating the Left/right turn signal light switch, this
indicator will come on.
6. Fuel level indicator:
When the pointer of the fuel level indicator rests near the last
scale, the fuel remaining in the tank is about 1.8 liters. Refuel
with 95 unleaded gasoline as early as possible.
Note:
There is no need to add any additive to the fuel when refueling.
Addition of any additive in fuel may cause engine failure.
6
34
12785
5

16
■ Headlight Switch
: At this position, the headlight comes on and the light
is beaming at a short distance. (The headlight will not
come on if the ignition switch is not turned on.)
: At this position, the headlight comes on and the light
is beaming at a far distance. (The headlight will not
come on if the ignition switch is not turned on.)
■ Startup Rocker Switch
When the engine is started electrically, be sure to pull
tight the front or rear brake handle lever to energize the
system. Then the engine can be started while pressing
the startup rocker switch.

17
■ Accelerator Lever
The speed of the ATV is controlled via the accelerator
lever. The ATV speed increases when pressing the
accelerator lever using your thumb. Press the accelerator
lever slowly. When starting the engine or riding uphill,
press the accelerator lever slowly, the engine revs up and
produces more power.
To reduce the speed, release the accelerator lever.
Note:
*The play of the accelerator lever should be 1 to 4 mm, which
can avoid jerking ahead when the engine is started.
■ Accelerator Limiting Device
To protect a new rider who is not familiar with this ATV
from an accident, this ATV is fitted with an accelerator
limiting device that can adjust the travel of the throttle
valve, which in turn limits engine power.
Adjustment:
.Loosen the retaining nut, and then turn the adjusting screw
with a screwdriver rider. Turning clockwise will reduce the
travel of the throttle valve, while turning counterclockwise will
increase the travel and increase the engine power up to its
maximum.
.When the appropriate engine power is reached, tighten the
retaining nut again.
(
(1) Retaining nut (2)Adjusting screw
(1)
(2)
This manual suits for next models
1
Table of contents
Other Access Motor Offroad Vehicle manuals