Access AX600 EFI 4x4 User manual

AX600 EFI 4x4
400
OWNER’S MANUAL

P/N 72117-A40-000

Dear Customers,
Thank you for purchasing AX600U 4x4 EFI.
This manual describes detailed instructions of correct operation,
maintenance and adjustment of AX600U 4x4 EFI. to ensure
durable, safe and comfortable riding.
In order for you to ride more safely and more comfortably, please
read this manual thoroughly before riding it. Have a nice time
riding!
If data and relevant pictures contained in this
manual differ from the real ATV, the data of the
real ATV shall supersede data contained herein.

Important message ..................................................................1
1. Riding precautions.....................................................................3
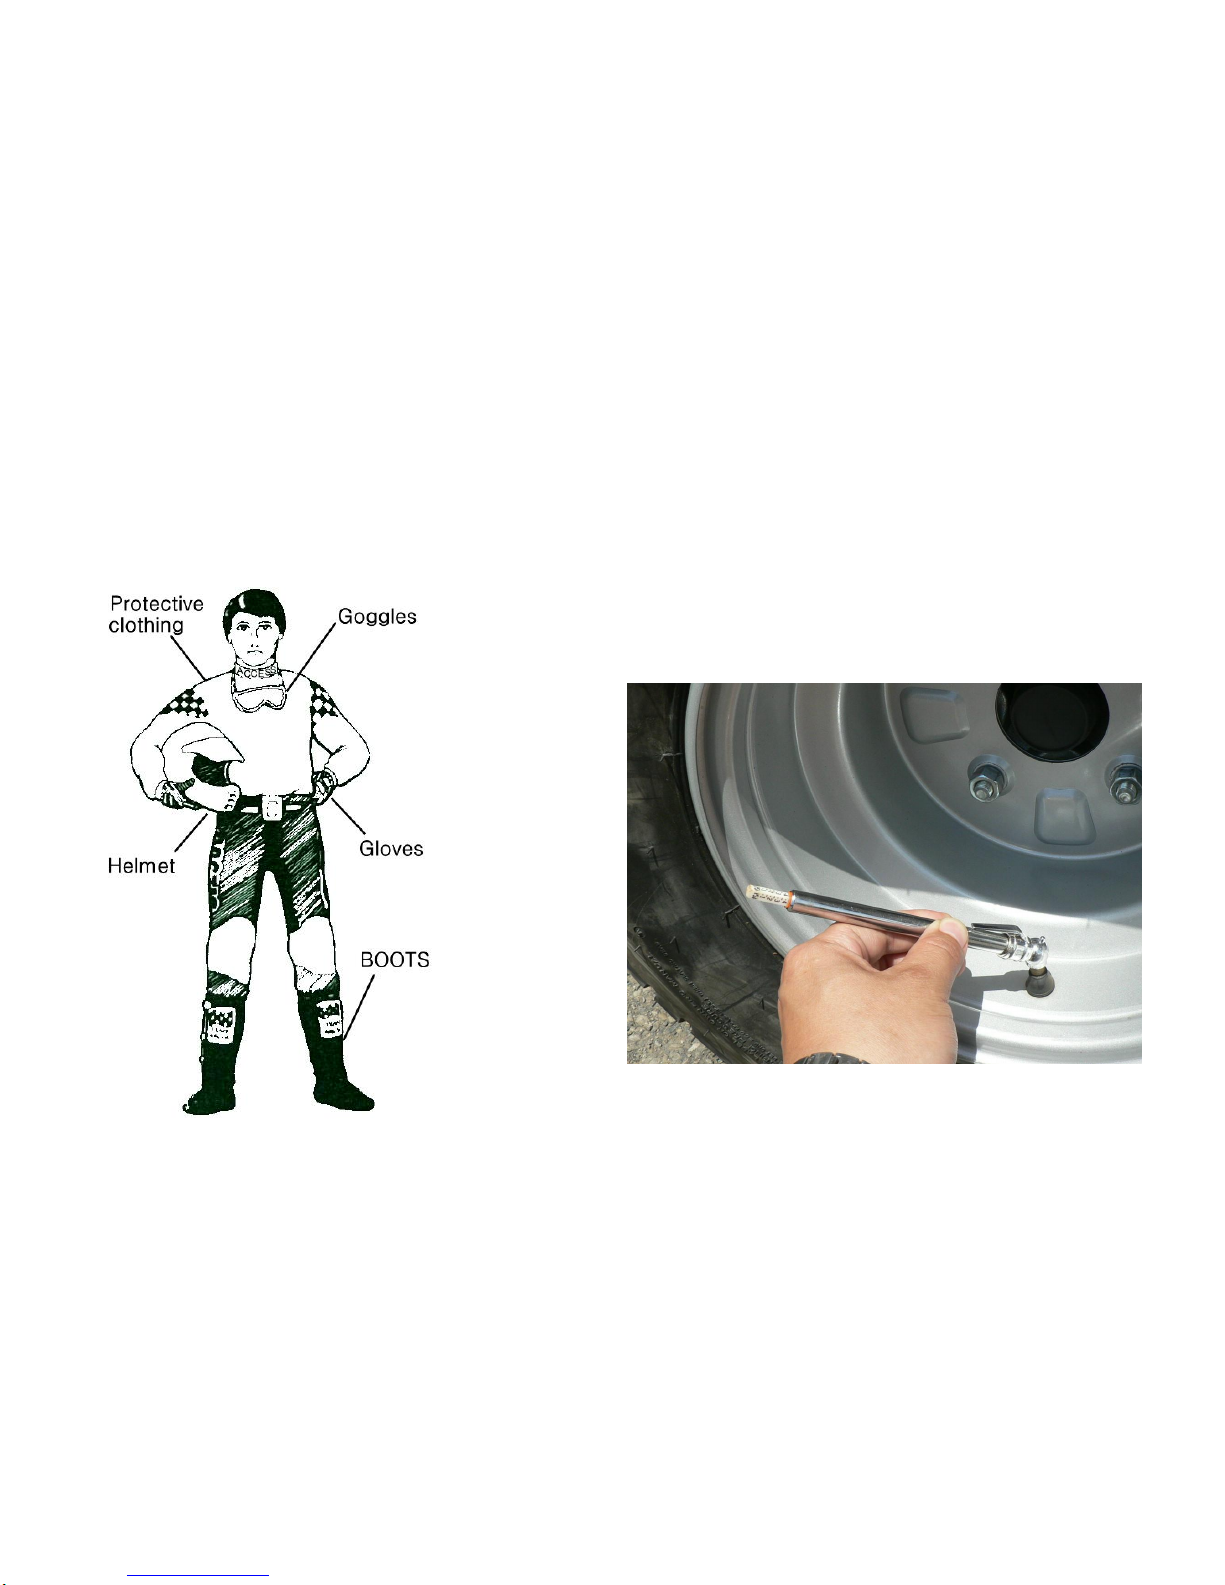
Attire; Check before riding.........................................................4
Particular attention on parts that may cause burn; Load weight
limit............................................................................................5
Looking at the terrain.................................................................6
Making turns; Going uphill.........................................................7
Going downhill; Riding through water........................................8
2. Naming of each component.......................................................10
3. Operation of each component; Ignition switch...........................14
Headlight switch; Startup rocker switch.....................................18
Accelerator lever; Accelerator limiting device ............................19
Shift stick; Parking lever (Rear brake).......................................20
Steering handle lock..................................................................21
Seat lock....................................................................................22
LCD Instrument panel adjustment.............................................23
4. Starting the engine electrically...................................................25
When starting the engine...........................................................26
5. Normal usage............................................................................27
Normal riding.............................................................................29
On command four-wheel drive switch“2WD”/“4WD” ..................30
On command differential gear lock switch“4WD”/“LOCK” ........31
Prolonged engine life depends upon correct riding ...................33
When applying brakes, simultaneously apply both front and
Rear brake handle levers .........................................................33
Do not apply emergency brake and have a quick turn...............34
Riding with particular attention in raining days ..........................34
How to stop the ATV; When the ATV comes to a full stop..........35
When parking the ATV...............................................................36
6. Checks before riding; Pre -riding check.................................... 37
Recommended oil specification and grade............................... 37
Oil check and refilling................................................................ 38
To change the engine oil ......................................................... 39
Differential gear oil; Change the differential gear oil ................ 41
Recommended oil specification and grade............................... 41
Final gear oil; Change the final gear oil ................................... 42
Recommended oil specification and grade............................... 42
Fuel check and refueling........................................................... 43
Front and Rear brake fluid level check and refilling .................. 45
Brake light check....................................................................... 46
Headlight check; Headlight beaming distance adjustment........ 47
Engine failure light check.......................................................... 48
Tire check ................................................................................. 49
Front and Rear shock absorber check...................................... 50
Front and Rear shock absorber adjustment.............................. 50
To refill coolant.......................................................................... 51
Changing coolant...................................................................... 52
Filling coolant............................................................................ 53
How to replace the air cleaner.................................................. 54
Spark plug check....................................................................... 56
Checking; Lubricating ............................................................... 57
Axle boots................................................................................. 59
Simple maintenance ................................................................. 60
Regular maintenance table....................................................... 61
Battery electrolyte check........................................................... 62
Replacing the fuse.................................................................... 63
Consumer information............................................................... 64
When Failure Occurs; If the engine stops................................. 65
Specifications............................................................................ 66

1
Important message
Negligence of the following signs and warnings may cause
serious damage and even death.
Sign location
(3)
(2)
(1)
(4)
(5)
(6)

2
(1)
(2)
(3)
(4)
(5)
(6)

3
1. Riding precautions
AX600U 4x4 EFI ATV is a special multipurpose four-wheel
motorbike with entertainment features. In this section, we will
describe important notes and techniques in order for you to
safely ride this ATV. Please read this manual thoroughly and
spend some time practicing on your new ATV. Pay attention
on your safety and that of others.
*If you do not have any experience riding an ATV, you can only
ride it with instruction by a licensed or qualified instructor.
First of all, you have to ride it slowly to feel and adjust
yourself to the ATV, even if you are an experienced rider.
*Do not attempt to utilize the maximum limits of this ATV.
Notes:
1. You should familiarize yourself with basic operations of
this ATV before you try more difficult operational
techniques.
2. To ensure the rider’s and others’safety, anyone who
drinks, takes drugs or medicine is not permitted to ride
this ATV. The rider’s ability to control this ATV will be
reduced by the effects of medicine or alcohol.

4
Attire
To ensure safety, the rider shall wear a safety helmet, goggles,
gloves, boots and protective clothing when riding this ATV.
Check before riding
*Conduct a pre-riding check in accordance with “Check before
riding”in user’s manual on Page 37 before riding to ensure
safety and the service life of thisATV.
*Your ability of controlling this ATV will be affected by insufficient
tire pressure or a tire that is out of specification. Contact your
service center for inspection to reduce the risk of an accident.

5
Particular attention on parts that may cause burn
*The exhaust pipe and the engine become very hot when or
after the ATV runs for a period of time. To avoid personal
injury (including human and objects, etc), do not touch these
parts. When the ATV is parked, also note that children or
passers-by should not touch these parts to avoid injury.
*To reduce the risk of fire, do not park thisATV near a dry lawn
or flammable substances.
Load weight limit
Maximum allowable weight for this ATV is 150 kg (two riders)
*When you carry loads on the ATV, slow down your speed to
increase effective braking distance.
*When you carry loads on the ATV, you should keep loads in
balance to avoid loss of control of the ATV due to imbalance.
Notes: 1. Load weight limit: 150 kg
2. Exceeding the maximum load weight for this ATV
may cause an accident.
3. When using this ATV as a trailer, slow down your
riding speed.
Max weight 150Kg

6
Looking at the terrain
*Watch your speed and control technique when you ride on
excessively flat, loose and rough surface, and keep an eye on
any potential hazards such as pits, water puddles, rocks, root
blocks, etc to avoid the risk of an accident.
*When riding with poor visibility, e.g. riding at night, turn on the
headlight and slow down your speed to ensure safety.
*When riding in the area where your viewing angle is limited, e.g.
riding on a rough road in hills, it is advisable to attach a flag of
some height in the rear of theATV for warning purposes. This
can assure safety for the rider, other riders and onlookers.

7
Making turns
When you approach a turn, first slow down and smoothly turn the
handlebars to the direction you are going. Also, move your gravity
to the outer floor panel and tilt your upper body to the inner side of
the turn, which enables your control at the turn to be smoother
and safer.
Going uphill
Note:When going uphill, move your gravity as forward as
possible. Also, sit in the front part of the seat and bend
your upper body forward. Keep a steady speed in the
uphill process and keep the ATV balanced.
Notes: 1. If the slope is too high to proceed and the ATV is
moving backward, apply the front brake to slow down
and carefully control the ATV to slip down. If it is
beyond control, the rider should immediately get off
from the left side to avoid the risk of being crushed by
the ATV once it turns over.
2. Do not apply only the rear brake to avoid the ATV
flipping over.
3. Do not abruptly apply the accelerator.

8
Going downhill
Note: Place your gravity as backward as possible and straighten
both of your arms. Keep the ATV in balance and apply the
rear brake to slow down your speed.
Unless otherwise necessary, do not press the accelerator
lever.
Do not apply only the front brake to avoid the ATV flipping
over.
Riding through water
Watch the speed of water current and its depth if riding through
water is necessary. If water flows very fast or is deep, the
performance of the ATV will be affected, which may cause
unsafely to the rider.
Notes:
1. Do not ride across a river with fast current or great depth to
avoid loss of control of the ATV and cause risk of hazard to
the rider.
2. After crossing the water area, you should check that the brake
function is normal. If it is not, slow down your speed and also
intermittently apply both front and rear brakes to restore the
brake function.
3. If it takes a long period of time to ride through the water area
and the brake system submerges in water too long, it will lead
to loss of brake function. Do not ride this ATV any longer and
take it to the nearest service center for inspection and
servicing.

9
*Smoking is strictly prohibited when refueling the ATV.
*Turn off your engine when refueling the ATV.
*Functionality of the ATV is dependant upon its structure.
Any modification without our permission may cause
performance degradation and in turn affect the service life
of the ATV and riding safety.
*It is illegal to modify thisATV without our permission. Do
not attempt to make any modification.

10
2. Naming of each component
(1) Headlight / position light
(2) Right front turn signal light
(3) Left front turn signal light
(4) Front brake handle lever
(5) Rear brake handle lever
(6) Parking lever
1
2
3
4
5
6

11
(7) Ignition switch
(8) Power Supplier-12V
(9) Foot brake (1 for 4 wheel )
(10) Front brake reservoir
(11) Seat
8
7
9
10
11

12
(12) Shift stick
(13) Exhaust pipe
(14) Aux liquid bottle
(15) Accelerator lever
(16)Throttle Bottom Clamp
(17) LCD instrument panel
(18) Battery/ECU/Fuse Box/Starter Relay
Blink Relay/Sound Blink Indicator/Rely
(19) Accompanying tools
15
12
13
14
16
17
18
19
17

13
(20) High/low beam switch
Startup rocker switch
Warning light switch
Turn signal light switch
Horn switch
Override
(21) Fuel tank cap
(22) Rear light / brake light
(23) License plate light
(24) Right rear turn signal light
(25) Left rear turn signal light
21
20
23
25
24
22

14
3. Operation of each component
Ignition switch
OFF : At this position, power supply to the ATV is
completely cut off. The key can be removed. (The
engine stops)
ON : At this position, power supply to the ATV is
connected. The key cannot be removed at this
position. (The engine can be started up.)
: At this position, the Rear light comes on.
(1) Key hole (2) Key
Note:
Do not turn the key to the OFF position while riding. This is
the major cause of an accident.
Indicator lights and warning lights
1. Hazard Light: (red light)
The Hazard Light and the Left/right turn signal light comes on
when you push on the Warning light switch.
2. Rear Fog Light: (amber light, selective equipment.)
When operating the Rear Fog Light, this indicator will come on.
Note:
When starting the engine, the transmission should be at the
neutral position to avoid any risk of hazard.
(1)
(2)
ON
OFF
P

15
3. High Beam Indicator Light: (blue light)
When this light comes on, the headlight is using high beam
light.
4. Temperature Indicator Light: (red light)
When this light comes on, it means the engine temperature is
too high. Check the coolant level in the Aux Liquid Bottle.
Note:
When the engine over-temperature indicator light comes on,
you must stop the engine and let it cool down.
5. Left/Right signal indicator: (green light)
When operating the Left/right turn signal light switch, this
indicator will come on.
6. Fuel level indicator:
When the pointer of the fuel level indicator rests near the last
scale, the fuel remaining in the tank is about 1.8 liters. Refuel
with 95 unleaded gasoline as early as possible.
Note:
There is no need to add any additive to the fuel when refueling.
Addition of any additive in fuel may cause engine failure.

16
7. Engine Failure Light: (red light)
The Engine Failure Light comes on (amber light) when you
turn on the ignition switch.
Starting the engine, the engine failure light extinguishment.
8. Four-wheel drive switch “2WD”/“4WD”:
Table of contents