Advanced Solutions MOBILMAX User manual

MOBILMAX
USE MANUAL
LANGUAGE
IT
ISTRUCTION
PROFESSIONAL IRONING FURNITURE
EN


1
GENERAL CONTENTS
PRODUCT HIGHLIGHTS: DESCRIPTION .....................................................................................PAG. 02
FIRST USE...................................................................................................................................PAG. 03
1ST PHASE: OPENING ............................................................................................................................................. PAG. 03
2ND PHASE: IGNITION ............................................................................................................................................ PAG. 03
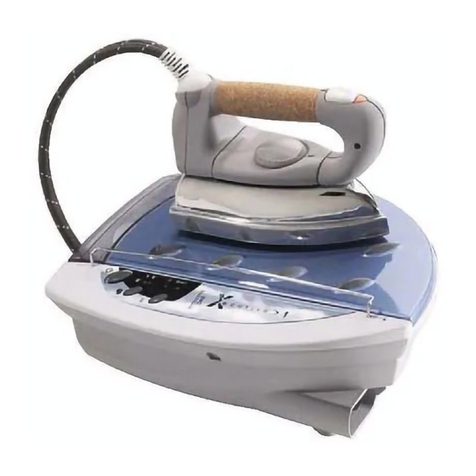
BUILT-IN IRON FOR MOBILMAX (OPTIONAL): DESCRIPTION....................................................PAG. 04
FIRST USE OF THE IRON ...........................................................................................................PAG. 04
1ST PHASE: TANK FILLING .................................................................................................................................... PAG. 04
2ND PHASE: IRON IGNITION .................................................................................................................................. PAG. 04
VERTICAL IRONING ...................................................................................................................PAG. 05
USEFUL TIPS ..............................................................................................................................PAG. 05
CLEANING AND REMOVING LIMESTONE FROM THE BOILER ..................................................PAG. 05
SAFETY RULES AND CAUTIONS ................................................................................................PAG. 06
TROUBLESHOOTING ..................................................................................................................PAG. 07
AFTER-SALES ASSISTANCE .......................................................................................................PAG. 08
WARNING: DO NOT USE THE APPLIANCE WITHOUT READING THE MANUAL.
INTRODUCTION
WE THANK YOU FOR CHOOSING THIS PRODUCT MADE IN ITALY.
THIS FURNITURE WITH INTEGRATED RONING BOARD IS THE RESULT OF A CAREFUL SEARCH CARRIED OUT BY
PEOPLE KEEN ON PROFESSIONAL IRONING.
SPECIAL FURNITURE WHICH IN A FEW SECONDS TRANSFORMS INTO A BOARD WITH WITH INNOVATIVE
TECHNOLOGY FOR PROFESSIONAL IRONING.
FAST TO CLOSE, IT IS FITTED WITH WHEELS AND CAN BE TRANSPORTED INTO ANY ROOM IN THE HOME.
ALL THIS PROVIDES REMARKABLE BENEFITS:
- NO MORE STEAM AND ODOUR ISSUES WHEN WORKING.
- NO MORE CONDENSATION WITH CONSEQUENT LOSS OF WATER DROPS UNDER THE BOARD.
- WELL IRONED LINEN AND DRY ON BOTH SIDES.
- FASTER WORK BECAUSE EVEN DELICATE FABRICS ADHERE TO THE WORK SURFACE THUS AVOIDING
WRINKLES WHILE USING THE SUCTION.
WE INVITE YOU TO READ THIS MANUAL CAREFULLY, TO GET TO KNOW THE PRODUCT BETTER AND TO
DISCOVER ITS FULL POTENTIAL.
WE RECOMMEND FOLLOWING THE SUGGESTIONS AND USE PRECAUTIONS, IN ORDER TO ENSURE OPTIMAL
RESULTS AND SAFETY.

6
2
4
14
7
16
15
3
1
5
10 11 13
8
9
12
22
PRODUCT HIGHLIGHTS: DESCRIPTION
01. Front wing
02. Locking / unlocking foot
03. Wheels
04. Rear window
05. Boiler door cover
06. Storage compartment
07. Ironing table
08. Motor
09. Cable reel
10. General switch and heating
11. Suction / blowing switch
12. Power cord
13. Irons power supply socket (max 2200Watt)
14. Suction/blowing ON / OFF button
15. Hanger (optional)
16. Sleeve iron (optional)

5
6
7
1
2
4
3
8
45 cm
55 cm
33
IMPORTANT: ONCE WORK IS COMPLETE, LEAVE
THE IRONING TABLE IN HEATING MODE FOR
10/15 MINUTES.
BEFORE CLOSING, COOL THE SURFACE
USING THE SUCTION, USE SWITCH “11”. THIS
OPERATION GUARANTEES LONG LIFE TO YOUR
IRONING TABLE BY REMOVING ANY POSSIBLE
WATER RESIDUES COMPLETELY.
BEFORE CLOSING THE FURNITURE, TURN THE
BOARD OFF USING THE GENERAL SWITCH “10”.
DISCONNECT THE IRON FROM THE POWER
SUPPLY “13” AND THEN DISCONNECT THE
POWER CABLE “12”.
FIRST USE
2ND PHASE: STARTING UP
• Insert the plug of your iron into the “13” socket located under the
ironing board;
• Connect the power cord of the cabinet “12” to a 220 Volts socket
equipped with an earthed socket;
• Select the “0” position of the green switch “11”;
• Turn on the red main switch “10” and wait a few minutes before
the table warms up;
• Suction: place the iron over the “14” button (black fabric area),
select the “I” position of the switch green “11”, when you lift the
iron the suction will be automatically activated;
• Blowing: select the “II” position of the green switch “11”.
1ST PHASE: OPENING
• Open the rear door (1) and press the locking foot (2);
• Open the boiler door and place it over the door back (3);
• Open the front door (4);
• Lift the ironing board (5), position the front door in the
appropriate seat (6), place the ironing board on the door (7)
and press the locking foot (8).
To move the furniture, push it from the
narrow side

44
1ST PHASE: FILLING THE TANK
• • The use of normal tap water is recommended. In case of particularly hard water (> 14 ° dH /> 17.5 ° and />
25.2 ° f), it is advisable to mix equal tap water with equal parts in equal parts.
• Before lling the tank, always unplug the appliance from the power socket.
• Remove the cap “2” and pour about 0.800 litres of water into the tank.
WHEN WATER IN THE TANK DECREASES TO THE MINIMUM, A WARNING SOUND INDICATES YOU NEED TO
TOP UP.
CAUTION: CONTINUING TO IRON WITHOUT WATER IN THE TANK CAN DAMAGE THE STEAM
DEVICE.
2ND PHASE: TURNING ON THE IRON
• After putting the water in the tank through the plug “2” insert the plug into the socket.
• Press the “6-8” switches. The lighting of the indicator lights indicates that the control unit and the iron are on.
• Select the desired temperature by turning the thermostat knob “4” .The sector between “cotton - linen” on the
thermostat knob delimits the eld of use of the steam.
• It takes about 5 minutes for the control unit to reach the optimal ironing pressure.
• The “5” steam ready light comes on to indicate that the appliance is ready for use. The next shutdown of light is
completely normal. The indicator light will turn on and off without however compromising ironing.
• The water indicator “7” remains on continuously. Switching off indicates that the self-charging system
malfunctions.
• During ironing, you will occasionally hear a buzz coming from the control unit; this is completely normal in fact,
it indicates that the pump is loading water.
• At the rst use of the iron, make a few ironing passes on a common cloth to eliminate any processing residues.
When rst used, the appliance may emit smoke and odor due to the smoke for a few minutes heating and
consequent drying of the sealants used in the assembly of iron and iron boiler. It is therefore recommended
to aerate the room to eliminate the bad smell.
• To emit steam from the hotplate, press the steam button “11”.
• In order to always obtain an excellent ironing, it is advisable to press the “11” steam iron button at intervals to
give iron way to vaporize in an optimal way, but also to be able to dry the stretched fabric.
1. Metal shell
2. Tank cap
3. Rubber mat
4. Thermostat adjustment knob
5. Steam warning light
6. Iron bright button
7. Water warning light
8. Boiler light button
9. Pipe holding rod
10. Steam / iron feeding tube
11. Iron steam button
12. Power cord
13. Underbody cap
FITTED IRON FOR MOBILMAX (OPTIONAL): DESCRIPTION
6
8
9
10
11
7
2 145
313
12
FIRST USE FOR THE IRON

5
We recommend cleaning the boiler at least once a year to preserve the performance of your boiler over time ironing
system. Do not use detergents. If you want to do it yourself, you can use a descaling agent that is non-toxic and / or
harmful to ironing systems, authorized by the manufacturer according to the instructions prescribed.
1. Always make sure that the boiler is no longer under pressure before unscrewing the boiler’s underoor drain
plug.
2. Make sure that the plug is not inserted into the socket.
3. Empty the tank by removing the cap “2” from the water.
4. Unscrew the underoor drain plug “13” and empty the boiler water into a container.
5. To remove limescale from the boiler, rinse it several times until the water is clean.
6. For an optimal cleaning of the boiler, dilute the descaling agent in ½ liter of water and pour the solution inside the
boiler through the underbody drain plug “13”.
7. Close the cap and let it sit for about 1 hour with the appliance in operating position but disconnected and cold.
8. Unscrew the underoor drain plug “13” and overturn the entire contents of the boiler in a container, taking care to
rinse with clean water for at least 4 times.
9. Close the underoor drain plug “13”.
WARNING: NEVER USE THE APPLIANCE WHILE THE DECALCIFYING SOLUTION IS PRESENT IN
THE BOILER. THE NON-OBSERVANCE OF THIS PROCEDURE NULLIFIES THE WARRANTY.
5
This appliance is able to generate steam in a vertical position so you can steam fabrics and easily restore them.
1. Place the knob of the iron thermostat “4” at the maximum capacity at the end of the word “linen”.
2. Hang the dress on the hanger, holding it lightly with your hand.
3. Pass the iron from top to bottom and press the steam button.
ATTENTION: FOR COTTON AND LINEN, IT IS ADVISABLE TO PLACE THE PLATE IN CONTACT
WITH THE FABRIC, WHILE FOR THE MOST DELICATE GARMENTS, IT IS RECOMMENDED TO
KEEP THE PLATE A FEW CENTIMETRES AWAY.
VERTICAL IRONING
USEFUL TIPS
CLEANING AND REMOVING LIMESTONE FROM THE BOILER
• It is advisable to divide the garments according to the temperatures indicated on the nameplate. Start ironing
with products that require low temperatures.
• Keep the iron plate clean; clean it when it is cold with a damp cloth. Do not clean the iron plate with descaling
products if not authorized by the manufacturer. Avoid contact of the plate with zippers, hooks, rings, etc.
• Place the iron on the appropriate mat after use. Make sure the plate is cold, the remainder of drops of water can
cause stains to form.
• After switching off, make sure that the iron plate has cooled down and then store the appliance in a dry place.
IMPORTANT: BEFORE YOU BEGIN, MAKE SURE THAT THE FABRIC TO BE IRONED IS SUITABLE
FOR STEAM IRONING: READ THE WARNINGS ON THE CLOTHING LABEL!

66
SAFETY NORMS AND PRECAUTIONS
• Before use, check that the mains voltage corresponds to that indicated on the nameplate below the ironing
system.
• Only connect the appliance to a power outlet that matches the rating plate data and is equipped with an efcient
one grounding.
• In case of incompatibility between the socket and the plug of the appliance, have the plug replaced with the
other suitable type, by professionally qualied personnel.
• The electrical safety of this appliance is only guaranteed when the appliance is correctly installed connected
to an efcient earthing system as required by current electrical safety standards. The Manufacturer declines
all responsibility for damage caused by inadequate earthing of the system. In case of doubt, contact qualied
technical personnel.
• Do not leave the appliance containing water in an environment with cold temperatures. After removing the
packaging check that the appliance is complete and not damaged. If in doubt, do not use the appliance e
contact an authorized center.
• Avoid using current adapters, multiple sockets, extension cords. In case it is necessary to use one of these
elements, make sure that they comply with the safety directives and the safety limit indicated in the appliance
plate (do not exceed the declared maximum capacity).
• Do not keep the packaging (plastic bags, expanded polystyrene etc.) within the reach of children: this way
accidents are avoided.
• This appliance should only be used for domestic use. Any other use is to be considered improper and therefore
dangerous.
• The manufacturer is not liable for damages due to improper use or for non-compliant repairs carried out by
unqualied personnel.
• Do not touch the appliance with wet hands or feet.
• Do not use the appliance in a bathroom.
• Do not remove the plug from the socket by pulling the power cord.
• Do not leave the appliance in an open place, exposed to atmospheric agents such as rain, sun, frost, etc.
• Do not allow the appliance to be used by children or incapacitated persons.
• Do not immerse the appliance in water.
• Before carrying out any cleaning or maintenance operation, disconnect the appliance from the mains power
supply, by unplugging.
• In case of failure or malfunction of the appliance, switch it off and do not tamper with it. For any repairs, contact
only and a Technical Assistance Center authorized by the manufacturer and request the use of original spare
parts.
Non-observance of the items above may compromise appliance safety.
• When you decide to permanently remove the appliance, after disconnecting the plug from the mains supply
power supply, it is recommended to make it unusable by cutting the power cord.
• The power cord of this appliance must not be replaced by the user as the replacement requires the use of
special tools.
• In case of damage to the cable, or to replace it, contact only one center Assistance authorized by the
manufacturer.
• Avoid directing the steam jet on people and / or animals as extremely dangerous.
• Noises due to normal may be heard during the heating and / or cooling phase of the boiler dilatation of the metal
with which this is achieved.
• Do not place the ironing system directly under a tap to add water.
• Avoid contact between the hot plate and the cables.
• In case of intervention of the thermo-limiting safety device, the appliance stops working. To restore the normal
operation, the appliance must be entrusted to qualied personnel.
• Avoid using iron on fabrics that are too wet.
• Do not ll the tank more than necessary and do not mix the water with stain removers, perfumes or similar.
• The user must not leave the appliance unattended when it is connected to the power supply.
• Disconnect the mains plug and switch off the main switch when the appliance is not on used.
• Do not leave the appliance unnecessarily inserted.
• The control unit must not be moved during operation and must be positioned on a surface at particularly
resistant to high temperatures.
• In the event of a fall of the ironing system with consequent visible breakage of the appliance (boiler or iron),
avoid re-use by bringing the appliance to a Service Center for repairs.
• The ironing system should not be used if there are visible damage or leakage. Before using the appliance
again, contact the qualied Service Centre.
• In case of leakage or loss of steam from the safety valve placed under the iron, it is necessary contact an
authorized Service Center to have the integrity checked even if the appliance continues to work regularly.
• Keep these instructions carefully for further consultation.
• This appliance complies with the EEC directive EN 55014 on radio interference suppression.
77
TROUBLESHOOTING
Sometimes problems arise from causes which can be easily removed by carrying out simple checks.
PROBLEM CAUSE SOLUTION
Ironing board does not heat up
• General switch “10” is off
• Lack of voltage at the socket.
• General switch “10” is switched off
• Turn on the “10” switch
• Check the operation of the socket with
another appliance
The board motor does not work
• “11” vacuum / blowing switch turned
off
• Lack of voltage at the outlet current
• The iron presses on button “14”.
• Turn on the “10” switch
• Turn on the “11” switch suction / blowing
• Check the operation of the taken with
another appliance
• Lift the iron from the table from the
ironing board
The ironing motor stays in
operation
The iron does not press on the
“14” button. Position the iron above button “14”.
The iron does not heat up
• The iron button “6” is off
• The thermostat knob on the iron “4” is
in the “off” position
• There is no voltage at the socket
• Turn on the “6” button
• Turn the knob to the position desired
• Check the operation of the socket with
another appliance
The iron warms but pressing the
“11” steam button does not come
out steam or it comes out little
• The water tank is empty
• The boiler is clogged with limestone
• Fill the tank with water continuous
recharge.
• Descale the boiler following the specic
instructions.
The iron plate drips
• The thermostat knob on the iron “4”
is not positioned in the “zone vapor”
• Condensation formation
• Turn the knob to the position correct
• A few drops of water at the beginning of
ironing is normal
The iron stains fabrics Perfumes have been added to the
water or additives
Rinse tank and boiler and use always
and only tap water e distilled water of
sure origin
Coloured fabrics become shiny
• Ironing mode not appropriate
• The boiler is clogged with limestone
• Check the correct label on the label
ironing temperature
• Iron the garments from inside or interpose
one cloth between them and the iron
f, after carrying out these checks, the appliance does not work, please contact the Technical Assistance
Service.
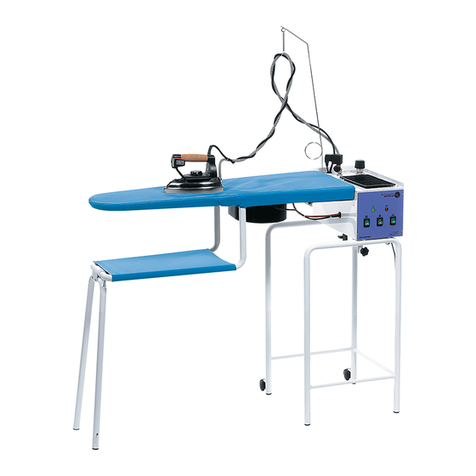
IRONING TABLEBUILT-IN IRON

88
For any malfunction, please contact your dealer or the Technical Service.
Never repair your device on your own. The regulations at the basis of its manufacture might break and consequently the warranty
might forfeit. The warranty forfeits also when any intervention is carried out by non-authorised staff.
CONDITIONS
The device sold is guaranteed according to the Law for possible manufacture failures. During this period, the faulty
components are replaced free, if the failure is not caused by collisions, falls, res, short circuits or by an improper use. The
non-working device or the faulty parts are to be sent carriage free to our Company or to the authorised Technical Service.
We send the repaired components back carriage paid to the purchaser address.
INFORMATION FOR THE USERS ON THE DISPOSAL OF OUTDATED ELECTRIC AND ELECTRONIC DEVICES (FOR
PRIVATE FAMILY UNIT)
This symbol on the products and/or on the documents means that the electric and electronic products used are
not to be dispose of with generic household waste. For a correct treatment, reutilization and recycling take these
products to the collecting points, where they are accepted free. Alternatively, in some Countries the products
could be given back to the local dealer when purchasing another equivalent product. A correct disposal of this
product will allow saving precious resources and avoid possible negative effects on the human health and on
the environment. For further details, contact the local authority or the nearest collecting point. In case of wrong
disposal, penalties may be applied according to the Local Law. For the Companies of the European Union: if you
wish to dispose of electric and electronic devices, contact the dealer or the supplier for further details.Information about disposal in
Countries not belonging to the European Union. This symbol is valid only in the European Union. If the device should be dispose
of, contact the local authority or the dealer and ask for information about a correct disposal.
WARRANTY AND TECHNICAL
TECHNICAL CHARACTERISTICS
IRONING FURNITURE
• Cabinet with chipboard structure covered in melamine
• Closed mobile measurements 55 x 45 x 94 h. cm
• Mobile open dimensions 55 x 160 x 90 h. cm
• Measurements of the ironing board 45 x 110 cm
• Operating temperature + 5 ° C / + 30 ° C
• Thermo safety limiter
• 12V Microcontrol
• Maximum 2000 Watt power supply socket
• 300 watt axle plane resistance power
• 30 watt motor power
• Maximum power 330 watts
• Voltage 220 - 240 Volt 50 - 60 Hz
• Complies with EEC directive EN 55014 on suppression
of radio interference.
TECHNICAL CHARACTERISTICS
IRON
• Stainless steel body
• Stainless steel boiler with removable resistance
• Operating temperature + 5 ° C / + 30 ° C
• Thermo safety limiter
• Safety valve
• 0.8 liter boiler water capacity
• Tank capacity of 0.8 litres
• Operating pressure 2.8 bar
• Boiler power 1,100 watts
• 800 watt iron power
• Maximum power 1,900 watts
• Voltage 220 - 240 Volt 50 - 60 Hz
• Complies with EEC directive EN 55014 on suppression
of radio interference.
WARNING:
DANGER OF BURNS


10
Table of contents