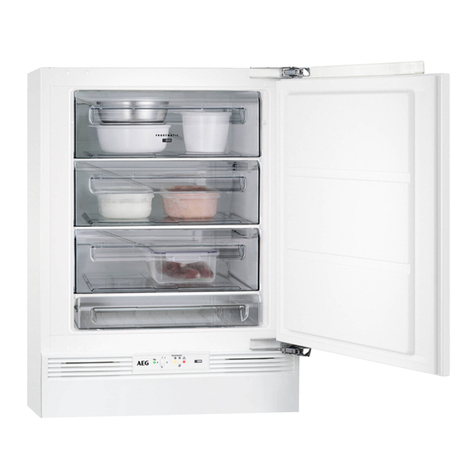
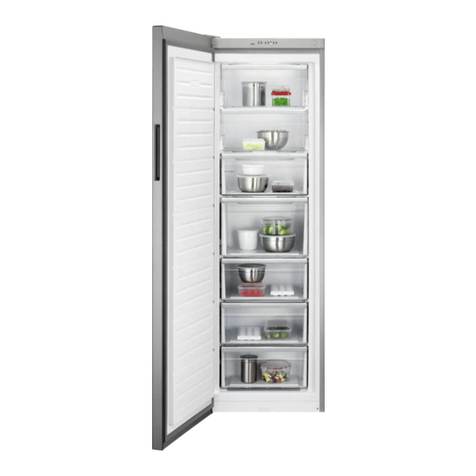
AEG ARCTIS 75210 GA User manual

ARCTIS 75210 GA
Diepvrieskast
Freezer
Congelador
Gebr iksaanwijzing
Operating Instr ction
Instr ções de tilização
AEG Ha sgeräte GmbH
Postfach 1036
D-90327 Nürnberg
http://www.aeg.ha sgeraete.de
© Copyright by AEG Wijzigingen voorbeho den
2223 396-61 01/06 S bject to change witho t notice
S jeito a alterações sem aviso prévio
All manuals and user guides at all-guides.com
all-guides.com

21
Dear customer,
Before placing yo r new refrigerator/freezer into operation please read the-
se operating instr ctions caref lly. They contain important information for
safe se, for installation and for care of the appliance.
Please keep these operating instr ctions for f t re reference. Pass them on
to possible new owners of the appliance.
Notes which are important for yo r safety or for the proper f nctioning of
the appliance are stressed with a warning triangle and/or with signal words
(Warning!, Ca tion!, Attention!). Please observe the following caref lly.
S pplementary information regarding operation and practical applications
of the appliance appear after this symbol.
Tips and notes concerning economical and environmentally so nd se of
the appliance are marked with the cloverleaf.
The operating instr ctions contain instr ctions for the correction of possi-
ble malf nctions by the ser in the section "What to do if ...". If these
instr ctions sho ld not be s fficient, o r c stomer service department is
always available to yo .
40
Segurança
A seg rança dos nossos aparelhos frigoríficos corresponde aos reg lamen-
tos técnicos vigentes e à lei sobre a seg rança de aparelhos. Cont do, sen-
timonos na obrigação de lhe dar a conhecer as seg intes indicações de
seg rança:
Utilização conforme às disposições
• O aparelho frigorífico destina-se ao so doméstico. Ele serve para refrige-
rar e congelar alimentos e para g ardar prod tos congelados, bem como
para preparar gelo. Se o aparelho for tilizado para o tros fins o opera-
do incorrectamente, o fabricante não ass me q alq er responsabilidade
pelos danos event ais.
• Não é permitido efect ar remodelações o alterações no aparelho frigorí-
fico, por razões de seg rança.
• Se tilizar o aparelho frigorífico para fins comerciais o para o tros fins
além da refrigeração e congelação de alimentos e do armazenamento de
prod tos congelados, é favor observar as prescrições legais vigentes na
s a zona.
Antes da primeira colocação em funcionamento
• Verifiq e se o aparelho frigorífico apresenta danos de transporte. Não
colocar, de modo alg m, aparelhos danificados em f ncionamento! Em
caso de danos, é favor dirigir-se aos fornecedores.
Agente de refrigeração
O aparelho contém, no circ ito de refrigeração, o agente de refrigeração
isob tano (R600a), m gás nat ral altamente compatível com o meio
ambiente, mas q e é, cont do, inflamável.
• Ao transportar e instalar o aparelho, preste atenção para q e nenh ma
das peças do circ ito de refrigeração seja danificada.
• Se o circ ito de refrigeração for danificado:
– É indispensável evitar fogo aberto e fontes de inflamação;
– Arejar bem o compartimento em q e se encontra o aparelho.
Segurança das crianças
• Os elementos de embalagem (p. ex. folhas, esferovite) podem ser peri-
gosos para as crianças. Perigo de asfixia! Manter os materiais de embala-
gem fora do alcance das crianças!
• Antes da remoção de aparelhos sados sem conserto, é favor in tilizá los.
All manuals and user guides at all-guides.com

22
Contents
Safety . . . . . . . . . . . . . . . . . . . . . . . . . . . . . . . . . . . . . . . . . . . . . . . . .23
Disposal . . . . . . . . . . . . . . . . . . . . . . . . . . . . . . . . . . . . . . . . . . . . . . .25
Appliance Packaging Information . . . . . . . . . . . . . . . . . . . . . . . . . . . . . .25
Disposal of old Appliances . . . . . . . . . . . . . . . . . . . . . . . . . . . . . . . . . . .25
Remove transport safeguard . . . . . . . . . . . . . . . . . . . . . . . . . . . . . . .26
Installation . . . . . . . . . . . . . . . . . . . . . . . . . . . . . . . . . . . . . . . . . . . . .26
Installation Location . . . . . . . . . . . . . . . . . . . . . . . . . . . . . . . . . . . . . . . . .26
Yo r appliance needs air . . . . . . . . . . . . . . . . . . . . . . . . . . . . . . . . . . . . .27
Rear spacers . . . . . . . . . . . . . . . . . . . . . . . . . . . . . . . . . . . . . . . . . . . . . . . .27
Rehingeing the door . . . . . . . . . . . . . . . . . . . . . . . . . . . . . . . . . . . . . . . . .27
Electrical Connection . . . . . . . . . . . . . . . . . . . . . . . . . . . . . . . . . . . . .26
Prior to Initial Start–Up . . . . . . . . . . . . . . . . . . . . . . . . . . . . . . . . . .29
Operating and indicator panel . . . . . . . . . . . . . . . . . . . . . . . . . . . . .29
Starting up and temperature regulation . . . . . . . . . . . . . . . . . . . . .30
Freezing and storing frozen food . . . . . . . . . . . . . . . . . . . . . . . . . .32
Preparation of Ice Cu es . . . . . . . . . . . . . . . . . . . . . . . . . . . . . . . . . .33
Ice Pack . . . . . . . . . . . . . . . . . . . . . . . . . . . . . . . . . . . . . . . . . . . . . . .33
Defrosting . . . . . . . . . . . . . . . . . . . . . . . . . . . . . . . . . . . . . . . . . . . . .33
Cleaning and Care . . . . . . . . . . . . . . . . . . . . . . . . . . . . . . . . . . . . . . .34
Switching off the appliance . . . . . . . . . . . . . . . . . . . . . . . . . . . . . . .35
Energy Saving Tips . . . . . . . . . . . . . . . . . . . . . . . . . . . . . . . . . . . . . . .35
What to do if . . . . . . . . . . . . . . . . . . . . . . . . . . . . . . . . . . . . . . . . . .36
Correcting Malf nctions . . . . . . . . . . . . . . . . . . . . . . . . . . . . . . . . . . . . . .36
Regulation, Standard and Guidesline . . . . . . . . . . . . . . . . . . . . . . . .37
39
Indice
Segurança . . . . . . . . . . . . . . . . . . . . . . . . . . . . . . . . . . . . . . . . . . . . . 40
Remoção de materiais . . . . . . . . . . . . . . . . . . . . . . . . . . . . . . . . . . . .42
Informações sobre a embalagem do aparelho . . . . . . . . . . . . . . . . . . . 42
Remoção de aparelhos sados . . . . . . . . . . . . . . . . . . . . . . . . . . . . . . . . 42
Remoção da proteção de transporte . . . . . . . . . . . . . . . . . . . . . . . . 43
Instalação . . . . . . . . . . . . . . . . . . . . . . . . . . . . . . . . . . . . . . . . . . . . . .43
Local de instalção . . . . . . . . . . . . . . . . . . . . . . . . . . . . . . . . . . . . . . . . . . .43
Colocaçao . . . . . . . . . . . . . . . . . . . . . . . . . . . . . . . . . . . . . . . . . . . . . . . . . .44
Espaçadores posteriores . . . . . . . . . . . . . . . . . . . . . . . . . . . . . . . . . . . . . .44
Reversibilidade das portas . . . . . . . . . . . . . . . . . . . . . . . . . . . . . . . . . . . .45
Ligação elétrica . . . . . . . . . . . . . . . . . . . . . . . . . . . . . . . . . . . . . . . . .46
Antes de colocar o aparelho em funcionamento . . . . . . . . . . . . . .46
Painel de comando . . . . . . . . . . . . . . . . . . . . . . . . . . . . . . . . . . . . . .47
Colocação do congelador em funcionamento . . . . . . . . . . . . . . . . .47
Congelar e armazenamento de produtos congelados . . . . . . . . . . .50
Massa eutéctica . . . . . . . . . . . . . . . . . . . . . . . . . . . . . . . . . . . . . . . . .51
Calendàrio de congelamento . . . . . . . . . . . . . . . . . . . . . . . . . . . . . .51
Preparação de cu os de gelo . . . . . . . . . . . . . . . . . . . . . . . . . . . . . .51
Descongelar . . . . . . . . . . . . . . . . . . . . . . . . . . . . . . . . . . . . . . . . . . . .52
Descrição do aparelho . . . . . . . . . . . . . . . . . . . . . . . . . . . . . . . . . . . .52
Limpeza e conservação . . . . . . . . . . . . . . . . . . . . . . . . . . . . . . . . . . .52
Conselhos pràticos para poupar energia . . . . . . . . . . . . . . . . . . . . .53
O que fazer, se... . . . . . . . . . . . . . . . . . . . . . . . . . . . . . . . . . . . . . . . .53
Sol ções para a eliminaça o de falhas . . . . . . . . . . . . . . . . . . . . . . . . . .53
Serviço de assistência técnica . . . . . . . . . . . . . . . . . . . . . . . . . . . . . .56
Prescrições, normas, directivas . . . . . . . . . . . . . . . . . . . . . . . . . . . . .56
All manuals and user guides at all-guides.com

23
Safety
The safety aspects of o r refrigerators/freezers comply with accepted tech-
nical standards and the German Appliance Safety Law. Nevertheless, we
consider it o r obligation to make yo aware of the following safety infor-
mation:
Intended use
• The refrigerator is intended for se in the home. It is s itable for the free-
zing and storing of frozen food, as well as for making ice. If the applian-
ce is sed for p rposes other than those intended or sed incorrectly, no
liability can be accepted by the man fact rer for any damage that may
be ca sed.
• Alterations or changes to the freezer are not permitted for reasons of
safety.
• If yo se theappliance in a commercial application or forp rposes other
than the freezing or frozen storage of foods,please observe all valid legal
reg lations for yo r application.
Prior to initial start–up
• Check the appliance for transport damage. Under no circ mstance sho ld
a damaged appliance be pl gged in! In the event of damage, please contact
the vendor.
Refrigerant
The refrigerant isob tane (R600a) is contained within the refrigerant circ it
of the appliance, a nat ral gas with a high level of environmental compa-
tibility, which is nevertheless flammable.
• D ring transportation and installation of the appliance, be certain that
none of the components of the refrigerant circ it become damaged.
• If the refrigerant circ it sho ld become damaged:
– avoid open flames and so rces of ignition;
– thoro ghly ventilate the room in which the appliance is sit ated.
Safety of children
• Packaging (e.g. wraps, polystyrene) can be dangero s for children. There is
a risk of s ffocation! Keep packaging material away from children!
• Please make old appliances n sable prior to disposal. P ll o t the mains
pl g, c t off the mains cable, break or remove spring or boltcatches, if fit-
ted. By doing this yo ens re that children cannot lock themselves in the
38
Cara cliente, caro cliente
Antes de colocar o se novo aparelho frigorífico em f ncionamento, leia,
por favor, atentamente estas instr ções de tilização. Elas incl em infor-
mações importantes sobre a tilização seg ra, a instalação e a conservação
do aparelho.
G arde, por favor, as instr ções de tilização para ma cons lta posterior.
Entreg e-as aos event ais proprietários posteriores do aparelho.
O triâng lo de sinalização e/o as palavras de advertência (Aviso!, C idado!,
Atenção!) destacam as indicações importantes para a s a seg rança o
para o f ncionamento do aparelho. Observar impreterivelmente.
Este símbolo significa q e, em seg ida, irá obter informações s plementa-
res sobre a operação e tilização prática do aparelho.
A folha de trevo assinala conselhos e indicações para q e o aparelho possa
ser tilizado de forma económica e não prej dicial ao meio ambiente.
As instr ções de tilização fornecem-lhe indicações para a eliminação de
falhas event ais, ver capít lo "O q e fazer, se...". Se estas indicações não
forem s ficientes, o nosso serviço de assistência técnica está sempre ao se
dispor.
All manuals and user guides at all-guides.com

24
fridge when playing (there is risk of s ffocation!)or get themselves into
other dangero s sit ations.
• Often children cannot recognise the hazards present in ho sehold
appliances. It is therefore important that yo ens re adeq ate s pervision
and never let children play with the appliance!
Daily Operation
• Containers with flammable gases or liq ids can leak at low temperat res.
There is a risk of an explosion! Do not store any containers with flamma-
ble materials s ch as, for example, spray cans, fire exting isher refill car-
tridges etc in the refrigerator/freezer.
• Bottles and cans m st not be placed in the freezer compartment. They can
b rst when the contents freeze, high carbonate content drinks can even
explode! Never store lemonade, j ices, beer, wine, sparkling wine etc. in
the freezer compartment. Exception: high alcohol content spirits can be
stored in the freezer compartment.
• Do not p t ice creams or ice c bes in the mo th immediately after remo-
val from the freezer compartment. Very cold ice can freeze to the lips or
tong e and ca se inj ry.
• Do not to ch frozen food with wet hands. Yo r hands co ld freeze to the
food.
• Do not operate any electrical appliances in the refrigerator/freezer (e.g.
electric ice cream makers, mixers etc.).
• Before cleaning the appliance, always switch off the appliance and npl g
it, or p ll the ho se f se or switch off the circ it breaker.
• When npl gging always p ll the pl g from the mains socket, do not p ll
on the cable.
In case of malfunction
• If the a malf nction occ rs on the appliance, please look first in the "What
to do if ..." section of these instr ctions. If the information given there
does not help, please do not perform any f rther repairs yo rself.
• Refrigerators/freezers may only be repaired by q alified service engineers.
Improper repairs can give rise to significant hazards. If yo r appliance
needs repairing, please contact yo r specialist dealer or o r C stomer Ser-
vice.
37
Malfunction Possi le Cause Remedy
Heavy b ild p of frost, possi-
bly also on the door seal.
Door seal is not air tight (pos-
sibly after changing over the
hinges).
Caref lly warm the leaking
sections of the door seal with
a hair dryer (not hotter than
approx. 50 °C). At the same
time shape the warmed door
seal by hand s ch that it sits
correctly.
Un s al noises.
The appliance is to ching the
wall or other objects.
Appliance is not level.
A component, e.g. a pipe, on
the rear of the appliance is
to ching another part of the
appliance or the wall.
The compressor starts after a
period of time.
This is normal, no error has
occ rred.
The compressor does not start
immediately after changing
the temperat re setting.
If necessary, caref lly bend
the component o t of the
way.
Move the appliance slightly.
Readj st the feet.
Regulations, Standards, Guidelines
This appliance was designed for ho sehold se and was man fact red in
accordance with the appropriate standards. The necessary meas res in
accordance with appliance safety legislation reg lations (GSG), accident
prevention reg lations for refrigeration appliances (VBG 20) and the reg -
lations of the German Society of Electrical Engineers (VDE) were observed in
the man fact re of this appliance.
The refrigerant circ it has been checked for leaks.
This appliance is in accordance with the following EU g idelines:
– 73/23/EWG dated 19 Febr ary 1973 - low voltage g idelines.
– 89/336/EWG dated 3 May 1989
(incl ding g ideline change notice 92/31/EWG) - EMV g ideline
All manuals and user guides at all-guides.com

25
Disposal
Appliance Packaging Information
All materials are environmentally so nd! They can be d mped or b rned at
an incinerating plant witho t danger!
Abo t the materials: The plastics can be recycled and are identified as fol-
lows:
>PE< for polyethylene, e.g. the o ter covering and the bags in the interior.
>PS< for polystyrene foam, e.g. the pads, which are all free of chlorofl o-
rocarbon.
The carton parts are made from recycled paper and sho ld be disposed of
at a waste-paper recycling collection location.
Disposal of old Appliances
For environmental reasons, refrigeration appliances m st be disposed of
properly. This applies to yo r old appliance, and - at the end of its service
life - for yo r new appliance as well.
Warning! Before disposing of old appliances make them inoperable. Remo-
ve pl g from mains, sever the power cable, remove or destroy any snap or
latch clos res. This eliminates the danger that playing children lock them-
selves into the appliance (danger of s ffocation!) or place themselves into
other life-endangering sit ations.
Disposal:
• The appliance may not be disposed of with domestic waste or b lky ref -
se.
• The refrigerant circ it, especially the heat exchanger at the back of the
appliance, may not be damaged.
• The symbol on the prod ct or on its packaging indicates that
this prod ct may not be treated as ho sehold waste. Instead it shall
be handed over to the applicable collection point for the recycling
of electrical and electronic eq ipment. By ens ring this prod ct is
disposed of correctly, yo will help prevent potential negative con-
seq ences for the environment and h man health, which co ld
otherwise be ca sed by inappropriate waste handling of this pro-
d ct. For more detailed information abo t recycling of this prod ct,
please contact yo r local city office, yo r ho sehold waste disposal
service or the shop where yo p rchased the prod ct.
36
What to do if ...
Correcting Malfunctions
A malf nction may be ca sed by only a minor fa lt that yo can rectify
yo rself sing the following instr ctions. Do not perform any other work on
the appliance if the following information does not provide assistance in
yo r specific case.
Warning! Repairs to refrigerators/freezers may only be performed by q ali-
fied service engineers. Improper repairs can give rise to significant hazards
for the ser. If yo r appliance needs repairing, please contact yo r speciali-
st dealer or o r C stomer Service.
Malfunction Possi le Cause Remedy
Appliance does not work, no
pilot light is ill minated.
Appliance is not switched on Switch on the appliance.
Mains pl g is not pl gged in
or is loose. Insert mains pl g.
F se has blown or is defective. Check f se, replace if neces-
sary.
Socket is defective. Mains malf nctions are to be
corrected by an electrician.
The freezer temperat re is not
s fficient, red light lights p,
temperat re signal so nds The appliance is near a heat
so rce.
Temperat re is not properly
adj sted.
Please look in the "Initial Start
Up" section.
Press the FROSTMATICb tton
Door was open for an exten-
ded period.
Please look in the "Installation
location" section.
Dist rbance on the appliance
Switch on the FROSTMATIC
b tton, keep the freezer clo-
sed, inform yo r c stomer ser-
vice
A large q antity of warm food
was placed in the appliance
within the last 24 ho rs.
Open the door only as long as
necessary. Press the FROST-
MATIC b tton
Green light does not light p,
yellow light lights p when
fast freeze f ction is activa-
ted, appliance is on.
Green light fa lty. Please inform yo r c stomer
service
Appliance cools too m ch. Temperat re is set too cold.
T rn the temperat re reg la-
tor to a warmer setting tem-
porarily.
Yellow light does not light p,
when fast freeze f ction is
activated, appliance is on.
Yellow light fa lty. Please inform yo r c stomer
service
All manuals and user guides at all-guides.com
all-guides.com

26
If installation next to a so rce of heat is navoidable, the following mini-
m m clearances m st be maintained at the sides of the appliance:
– for electric cookers 3 cm;
– for oil and coal fired ranges 30 cm.
If these clearances cannot be maintained a heat ins lating pad is req ired
between the cooker and the refrigeration appliance.
If the refrigeration appliance is installed next to another refrigerator or free-
zer a clearance of 5 cm at the sides is req ired, in order to prevent the for-
mation of condensation on the o tside of the appliance.
Installation
Installation Location
The appliance sho ld be set p in a well ventilated, dry room.
Energy se is affected by the ambient temperat re. The appliance sho ld
therefore
– not be exposed to direct s nlight;
– not be installed next to radiators, cookers or other so rces of heat;
– only be installed at a location whose ambient temperat re corresponds to
the climate classification, for which the appliance is designed.
The climate classification can be fo nd on the serial plate, which is located
at the left on the inside of the appliance.
The following table shows which ambient temperat re is correct for each
climate classification: each climate classification:
Climate classification for an am ient temperature of
SN +10 is +32 °C
N+16 is +32 °C
ST +18 is +38 °C
T+18 is +43 °C
Remove transport safeguard
The appliance and the interior fittings are protected for transport.
• P ll off the adhesive tape on the left and right side of the door.
• Remove all adhesive tape and packing pieces from the interior of the
appliance.
35
Switching off the appliance
If the appliance is not going to be sed for an extended period:
1. Remove all deep-frozen packages as well as ice trays.
2. Switch off the appliance by holding down the ON/OFF b tton.
3. Remove the mains pl g or switch off or t rn o t the circ it breaker or f se.
4. Clean thoro ghly (see section: “Cleaning and Care”).
5. Leave the door open to avoid the b ild p of odo rs.
Energy Saving Tips
• Do not install the appliance near cookers, radiators or other so rces of
warmth. High ambient temperat res ca se longer, more freq ent opera-
tion of the compressor.
• Ens re s fficient air circ lation and exha st at the appliance base and at
the back wall of the appliance. Never cover air vent openings.
• Do not place warm foods into the appliance. Allow warm foods to cool first.
• Only leave door open as long as necessary.
• Do not set temperat re any colder than necessary.
• P t frozen food in the fridge to defrost. The cold in the frozen food will
then be sed to cool the fridge.
• Keep the heat emitting condenser, the metall grille on the rear wall of
yo r appliance, always clean.
All manuals and user guides at all-guides.com

27
Your appliance needs air
For safety reasons, minim m ventila-
tionm st be as shown Fig.
Attention: keep ventilation ope-
nings clear of o struction;
100 mm10 mm
10 mm
AB
NP007
Rehingeing the door
The side at which the door opens can be changed from the right side (fac-
tory adj stment) to the left side, if the installation site req ires.
Warning! When changing the side at which the door opens, the appliance
may not be connected to the mains. Remove pl g from the mains befo-
rehand.
Procced as follow:
1. Remove the clip-in ventilation
grille (D).
2. Remove the bottom hinge (E) by
nscrewing the two fixing
screws.
3. Slide the door off pin (G);
nscrew pin (G) and refit it on
the opposite side.
4. Remove the two pl gs, to reveal
the holes for the hinge pivots,
Rear spacers
In the bag with the doc mentation,
there are two spacers which m st be
fitted.
Slacken the screws and insert the
spacer nder the screw head, then
re-tighten the screws.
PR153
F
D
PR18
F
F
F
E
E
34
Cleaning and Care
For hygienic reasons the appliance interior, incl ding interior accessories,
sho ld be cleaned reg larly.
Warning!
• The appliance may not be connected to the mains d ring cleaning. Danger
of electrical shock! Before cleaning switch the appliance offand rem ve the
pl g from the mains, or switch off or t rn o t the circ it breaker or f se.
• Never clean the appliance with a steam cleaner. Moist re co ld acc m -
late in electrical components, danger of electrical shock! Hot vapo rs can
lead to the damage of plastic parts.
• The appliance m st be dry before it is placed back into service.
Attention!
• Ethereal oils and organic solvents can attack plastic parts, e.g.
– lemon j ice or the j ice from orange peals;
– b tyric acid;
– cleansers which contain acetic acid.
Do not allow s ch s bstances to come into contact with appliance parts.
• Do not se any abrasive cleansers.
1. Remove frozen food and the food from the refrigerator. Wrap frozen food
in several layers of newspaper. Store it in a cool place, well covered.
2. Switch the appliance off and remove the pl g from the mains, or switch off
or t rn o t the circ it breaker or f se.
3. Clean the appliance and the interior accessories with a cloth and l kewarm
water. Commercially available dish washing detergents may also be sed.
5. After cleaning wipe with fresh water and r b dry.
Acc m lation of d st at the condenser increases energy cons mption. For
this reason caref lly clean the condenser at the back of the appliance once
a year with a soft br sh or a vac m cleaner.
Do not pull, move or damage any pipes and/or ca les inside the ca inet.
All manuals and user guides at all-guides.com

28
and remo nt them on the other
side.
5. Refit the door.
6. Refit bottom hinge (E) on the
opposite side, sing the two
screws previo sly removed.
7. Remove blanking cover (F) from
ventilation grille (D) by p shing it
in the direction of the arrow and
refit it on the opposite side.
8. Refit ventilation grille (D), clip-
ping it into place.
9. Unscrew the handle. Refit it on
opposite side after having pierced
the pl gs with a p nch. Cover the
holes left open with the pl gs
contained in the doc mentation
pack.
Attention:
After having reversed the ope-
ning direction of the doors check
that all the screws are
properly tightened and that the magnetic seal adheres to the cabinet. If the
ambient temperat re is cold (i.e. in Winter), the gasket may not fit perfec-
tly to the cabinet. in that case, wait for the nat ral fitting of the gasket or
accelerate this process by heating p the part involved with a normal hair-
drier.
Electrical connection
Before initial start- p, refer to the appliance rating plate to ascertain if s p-
ply voltage and c rrent val es correspond with those of the mains at the
installation location.
e.g.: AC 220 ... 240 V 50 Hz or
220 ... 240 V~ 50 Hz
(i.e. 220 to 240 volts alternating c rrent, 50 Hertz)
The rating plate is inside the appliance on the left.
A correctly installed, earthed socket is req ired for the electrical s pply. The
s pply m st have a f se rating of at least 10 Amps.
G
33
2. Press the fast freeze b tton 24 ho rs before introd cing fresh food for free-
zing of fresh food. The yellow light comes on.
3. Place frozen foods in the drawers sorted by type, as far as possible.
Preparation of Ice Cu es
1. Fill the ice c be tray 3/4 f ll with cold water, place it in the freezer com-
partment and leave to freeze.
2. To loosen the frozen c bes, either bend the ice c be tray or hold it nder
r nning water for a few seconds.
Important! Never try to free an ice tray that is frozen to the freezer com-
partment sing pointed or sharp edged objects. Use the ice scraper s pplied.
Ice pack
There are two ice packs in one drawer of the freezer.
In the event of a power fail re or malf nction, the ice packs will lengthen
the amo nt of time it takes for the frozen food to become too warm by
several ho rs. The ice packs can only f lfil this task optimally if it is placed
in the ppermost drawer, at the front, above the frozen food. Yo can se
the ice packs for cooling cold bags.
Defrosting
Freezer
The inner walls of the freezer are a tomatically defrosted.
All manuals and user guides at all-guides.com

29
If the socket is not accessible once the appliance is b ilt in, the electrical
installation m st incl de s itable means of isolating the appliance from the
mains (e.g. f se, c t-o t, c rrent trip or similar with a minim m contact
separation of 3 mm).
Attention: The mains connection cable may only be replaced by a skilled
electrician. Please contact yo r dealer or o r c stomer service department
for repairs.
Prior to Initial Start–Up
• Please clean the appliance interior and all accessories prior to initial start-
p (see section: “Cleaning and Care”).
Operating and indicator panel
A. Mains pilot indicator (green)
B. Freezer b tton ON/OFF
C. Temperat re setting b tton (+)
D. Temperat re display
E. Temperat re setting b tton (-)
F. FROSTMATIC f nction "on" indicator (yellow)
G. FROSTMATIC b tton
H. Alarm reset light
I. ALARM OFF b tton
BCEGI
AFH
D
32
Freezing and storing frozen food
Yo can se yo r freezer for freezing fresh food yo rself.
Important!
• The temperat re in the freezer compartment m st be –18 °C or colder
before freezing food.
• Please observe the freezing capacity given on the rating plate. The
freezing capacity is the maxim m q antity of fresh food that can be
frozen within a period of 24 ho rs. If yo wish to freeze food several
days in a row, please observe a maxim m capacity of only 2/3 to 3/4
of that on the rating plate. The q ality of the food is best preserved
when it is frozen right thro gh to the core as q ickly as possible.
• Allow warm food to cool down before freezing. The warmth will ca se
increased ice formation and increase the power cons mption.
• Please note the maxim m storage times specified by the man fact rer.
• Thawed foods which have not been processed f rther (cooked into meals)
may not nder any circ mstances be frozen a second time.
• Containers with flammable gases or liq ids can leak at low temperat res.
There is a risk of an explosion! Do not store any containers with flamma-
ble materials s ch as, for example, spray cans, fire exting isher refill car-
tridges etc in the refrigerator/freezer.
• Bottles and cans m st not be placed in the freezer. They can b rst when
the contents freeze, high carbonate content drinks can even explode!
Never store lemonade, j ices, beer, wine, sparkling wine etc. in the free-
zer. Exception: high alcohol content spirits can be stored in the freezer.
• All foods m st be packed air tight
prior to freezing, so that they do
not dry o t or lose their flavo r,
and so that no flavo r contamina-
tion of other frozen goods occ rs.
Caution! Do not to ch frozen food
with wet hands. Yo r hands co ld
freeze to the food.
1. Place the packed food in the drawers.
Place food to be frozen As shown in
fig re. Unfrozen food m st not to -
ch items already frozen, otherwise
the frozen food co ld begin to
defrost.
10 kg
10 kg
All manuals and user guides at all-guides.com

30
Temperature setting uttons
The temperat re is adj sted sing the „C“ and „E“ b ttons. These b ttons are
connected to the temperat re display.
• The temperat re display is switched over from the display of the ACTUAL
temperat re (Temperat re display is ill minated) to the display of the DESI-
RED temperat re (Temperat re display flashes) by pressing one of the two
b ttons, „C“ or „E“.
• Each time one of the two b ttons is pressed again the DESIRED temperat -
re is adj sted by 1 °C. The DESIRED temperat re m st be reached within 24
ho rs.
If neither b tton is pressed, the temperat re display a tomatically switches
back after a short period (approx. 5 sec.) to the display of the ACTUAL tem-
perat re.
DESIRED temperature means:
The temperat re that has been selected for inside the freezer. The DESIRED
temperat re is indicated by flashing n mbers.
ACTUAL temperature means:
The temperat re display indicates the c rrent temperat re inside the freezer.
The ACTUAL temperat re is indicated with ill minated n mbers.
Temperature display
The temperat re display can indicate several pieces of information.
• D ring normal operation, the temperat re c rrently present in the freezer
(ACTUAL temperat re) is displayed.
• When the temperat re is being adj sted a flashing display indicates the
freezer temperat re c rrently set (DESIRED temperat re).
Starting Up - Setting the Temperature
1. Pl g the mains pl g into the mains socket.
2. If the display is OFF, press ON/OFF b tton. The green mains pilot indicator
ill minates. The alarm light flashes and the b zzer so nds.
3. Press the “I” b tton to stop the b zzer, the light still flashes since the tem-
perat r is reached.
4. Press either the „C“ or „E“ b tton. The temperat re display switches over and
the DESIRED temperat re c rrently set flashes on the temperat re display.
5. Set the req ired temperat re by pressing the „C“ or „E“ b ttons (see section
"Temperat re setting b ttons"). The temperat re display will immediately
show the changed setting. Each time the b tton is pressed the temperat -
re is adj sted by 1 °C.
31
From a food safety point of view -18 °C sho ld be considered s fficiently
cold for storing food in the freezer.
FROSTMATIC
The FROSTMATIC f nction accelerates the freezing of fresh food and, at
the same time, protects foodst ffs already stored from ndesirable war-
ming.
1. The FROSTMATIC f nction is switched on by pressing the FROSTMATIC
b tton. The yellow light ill minates.
If the FROSTMATIC f nction is not ended man ally, the appliance electro-
nics switch off the FROSTMATIC f nction after 52 ho rs. The yellow light
goes o t.
2. The FROSTMATIC f nction can be ended man ally at any time by pressing
the FROSTMATIC b tton again. The yellow light goes o t.
Alarm OFF utton
In the event of an abnormal temperat re rise inside the freezer (e.g. power
c t) warning light (H) will start to flash and a b zzer will so nd.
After the temperat re has ret rned to normal, the warning light (H) will
contin e to flash, altho gh the b zzer has stopped.
When the alarm b tton is pressed, the warmest temperat re reached in
the compartment flashes on the indicator.(max. 5 seconds).
To stop the b zzer p sh the b tton “I”.
Switching the Appliance off
To switch off, hold down the ON/OFF b tton for approx. 3 seconds. This
will res lt in a co ntdown from "3" to "1" taking place in the temperat -
re display. On reaching "1" the fridge will switch off. The temperat re
display will go off.
Note: The appliance cannot be switched on or off if npl gged, or if the-
re is no power being s pplied to it. Following connection to the mains
power s pply, the appliance ret rns to the same operating state as before
the interr ption of main power.
If the appliance is not going to be sed for an extended period:
1. Switch off the appliance, holding down the ON/OFF b tton ntil the
display goes off (see above).
2. Remove the mains pl g or switch off or t rn o t the circ it breaker or
f se.
3. Defrost the freezer compartment and clean the appliance thoro ghly (see
section: “Cleaning and Maintenance”).
4. Finally, leave the doors open so as to avoid a b ild p of odo rs.
All manuals and user guides at all-guides.com
all-guides.com
Other manuals for ARCTIS 75210 GA
1
Table of contents
Other AEG Freezer manuals

AEG
AEG S73400CNW1 User manual

AEG
AEG ARCTIS 2232GS User manual

AEG
AEG AGE62526NW User manual

AEG
AEG SANTO C 7 18 40-4I User manual

AEG
AEG AHB538E1LW User manual

AEG
AEG RDB424E1AW User manual

AEG
AEG RDB72321AX User manual

AEG
AEG SCB61826NS User manual

AEG
AEG ATB48E1AW User manual

AEG
AEG C 718 40 i User manual
Popular Freezer manuals by other brands

Zanussi Electrolux
Zanussi Electrolux ZV 160 R3 Instruction booklet

Frigidaire
Frigidaire FV 1802 Instruction booklet

Electrolux
Electrolux ICON E32AF85PQS Use & care guide

Whirlpool
Whirlpool EV181NZTQ Energy guide

Inalto
Inalto ICF142W2 user manual

Mitsubishi Electric
Mitsubishi Electric MF-U160R Series operating instructions