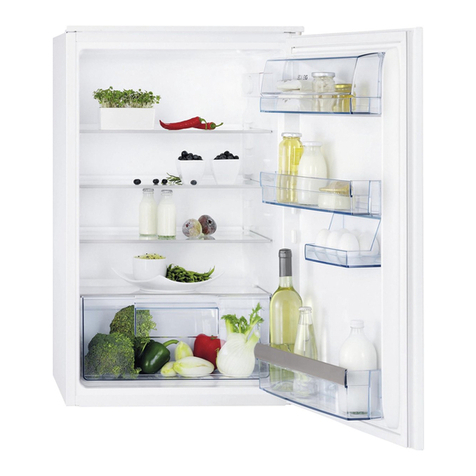
AEG S55300XNS User manual

S55300XNS, S65280XNX, S75190XNX, S75090XNX

www.aeg.com
FOR PERFECT RESULTS
Thank you for choosing this AEG product. We have created it to give you impeccable
performance for many years, with innovative technologies that help make life simpler
to get the very best from it.
Visit our website to:
Get usage advice, brochures, trouble shooter, service information:
www.aeg.com
Register your product for better service:
www.registeraeg.com
Buy Accessories, Consumables and Original spare parts for your appliance:
www.aeg.com/shop
CUSTOMER CARE AND SERVICE
Always use original spare parts.
When contacting our Authorised Service Centre, ensure that you have the following data
available: Model, PNC, Serial Number.
The information can be found on the rating plate.
Warning / Caution-Safety information.
General information and tips
Environmental information.
Subject to change without notice.
CONTENTS
SAFETY INFORMATION ........................................................................................1
SAFETY INSTRUCTIONS ......................................................................................2
PRODUCT DESCRIPTION.....................................................................................4
CONTROL PANEL ..................................................................................................6
HELPFUL HINTS AND TIPS...................................................................................10
CARE AND CLEANING ..........................................................................................13
CLEANING AND MAINTENANCE..........................................................................14
PRODUCT APPEARANCE AND INSTALLATION SIZE.........................................17
ENVIRONMENTAL CONCERNS............................................................................18
WHAT TO DO IF......................................................................................................19
ENVIRONMENTAL CONCERNS............................................................................ 20
ELECTROLUX / AEG MAJOR APPLIANCES -WARRANTY CONDITIONS.......... 21
Connecting water supply
CONNECTING WATER SUPPLY.......................................................................... 15

ENGLISH 1
Before the installation and use of the appliance, carefully read the sup-
plied instructions. The manufacturer is not responsible if an incorrect
installation and use causes injuries and damages. Always keep the
instructions with the appliance for future reference.
Children and vulnerable people safety
•This appliance can be used by children aged from 8 years and above
and persons with reduced physical, sensory or mental capabilities or
lack of experience and knowledge if they have been given supervi-
sion or instruction concerning use of the appliance in a safe way and
understand the hazards involved.
•Do not let children play with the appliance.
•Keep all packaging away from children.
•Cleaning and user maintenance shall not be made by children with-
out supervision.
General Safety
•
This appliance is intended for domestic use only.
•Keep ventilation openings, in the appliance enclosure or in the built-
in structure, clear of obstruction.
•Do not use mechanical devices or other means to accelerate the
defrosting process, other than those recommended by the manufac-
turer.
•Do not damage the refrigerant circuit.
•Do not use electrical appliances inside the food storage compart-
ments of the appliance, unless they are of the type recommended by
the manufacturer.
•Do not use water spray and steam to clean the appliance.
•Clean the appliance with a moist soft cloth. Only use neutral de-
tergents. Do not use abrasive products, abrasive cleaning pads,
solvents or metal objects.
•-
mable propellant in this appliance.
SAFETY INFORMATION

2 www.aeg.com
Installation
WARNING!
install this appliance.
• Remove all the packaging.
• Do not install or use a damaged
appliance.
• Obey the installation instruction
supplied with the appliance.
• Always be careful when you move the
appliance because it is heavy. Always
wear safety gloves.
• Make sure the air can circulate
around the appliance.
• Wait at least 4 hours before
connecting the appliance to the power
back in the compressor.
• Do not install the appliance close to
radiators or cookers, oven or hobs.
• The rear of the appliance must stand
against the wall.
• Do not install the appliance where
there is direct sunlight.
• Do not install this appliance in areas
that are too humid or too colds, such
as the construction appendices,
garages or wine cellars.
• When you move the appliance, lift it
by the front edge to avoid scratching
.
Electrical connection
WARNING!
• The appliance must be earthed.
• All electrical connections should be
• Make sure that the electrical informa-
tion on the rating plate agrees with
the power supply. If not, contact an
electrician.
• Always use a correctly installed
shockproof socket.
• Do not use multi-plug adapters and
extension cables.
• Make sure not to cause damage to
the electrical components (e.g. mains
plug, mains cable, compressor). Con-
tact the Service or an electrician to
change the electrical components.
• The mains cable must stay below the
level of the mains plug.
• Connect the mains plug to the mains
socket only at the end of the installa-
tion. Make sure that there is access
to the mains plug after the installation.
• Do not pull the mains cable to discon-
nect the appliance. Always pull the
mains plug.
Use
WARNING!
Risk of injury, burns, electrical
SAFETY INSTRUCTIONS
•If the supply cord is damaged, it must be replaced by the manufac-
a hazard.
•If the appliance is equipped with an Ice maker or a water dispenser,
.
•If the appliance requires a water connection, connect it to potable
water supply only.
•The inlet water pressure (minimum and maximum)must be between
0,15 MPa and 0,85 MPa

ENGLISH 3
•Do not change the specification of
this appliance.
•Do not put electrical appliances (e.g.
ice cream makers) in the appliance
unless they are stated applicable by
the manufacturer.
•Be careful not to cause damage to
the refrigerant circuit. It contains
isobutane (R600a), a natural gas with
a high level of environmental compat-
ibility. This gas is flammable
•If damage occurs to the refrigerant
circuit, make sure that there are no
flames and sources of ignition in the
room. Ventilate the room.
•Do not let hot items to touch the plas-
tic parts of the appliance.
•Do not put soft drinks in the freezer
compartment. This will create pres-
sure on the drink container.
•Do not store flammable gas and liquid
in the appliance.
•Do not put flammable products or
items that are wet with flammable
products in, near or on the appliance.
•Do not touch the compressor or the
condenser. They are hot.
•Do not remove or touch items from
the freezer compartment if your
hands are wet or damp.
•Do not freeze again food that has
been thawed.
•Obey the storage instructions on the
packaging of frozen food.
Internal light
•The type of lamp used for this appli-
ance is not suitable for household
room illumination.
Care and cleaning
WARNING!
Risk of injury or damage to the
appliance.
•Before maintenance, deactivate the
appliance and disconnect the mains
plug from the mains socket.
•This appliance contains hydrocarbons
in the cooling unit. Only a qualified
person must do the maintenance and
the recharging of the unit.
•Regularly examine the drain of the
appliance and if necessary, clean it. If
the drain is blocked, defrosted water
collects in the bottom of the appli-
ance.
Disposal
WARNING!
Risk of injury or suffocation.
•Disconnect the appliance from the
mains supply.
•Cut off the mains cable and discard it.
•Remove the door to prevent children
and pets to be closed inside of the
appliance.
•The refrigerant circuit and the insula-
tion materials of this appliance are
ozone-friendly.
•The insulation foam contains fla -
mable gas. Contact your municipal
authority for information on how to
discard the appliance correctly.
•Do not cause damage to the part of
the cooling unit that is near the heat
exchanger.
4 www.aeg.com
PRODUCT DESCRIPTION
MODELS WITH AUTO ICE MAKER
1 Door Storage Compartment(two–star compartment)
For short-term storage of food and icecream.
2
3
1
4
5
6
2Freezer Shelf(tempered glass)
For storing frozen foods such as meat,fish,ice-cream.
3Freezer Case
For storing dried meat or fish for a longer period of time.
4Refrigerator Shelf(tempered glass)
For storing common foods.
5Vegetable crisper
6Refrigerator door rack
78
7
Ice box
8
Ice-maker box
9
9
Water Filter
10
10
Home Bar(MODEL:S75090XNX)

ENGLISH 5
MODELS WITHOUT AUTO ICE MAKER
1
Door Storage Compartment
(two–star compartment)
For short-term storage of food and icecream.
2
3
1
4
5
6
2
Freezer Shelf
(tempered glass)
For storing frozen foods such as meat,fish,ice-cream.
3
Freezer Case
For storing dried meat or fish for a longer period of time.
4
Refrigerator Shelf
(tempered glass)
For storing common foods.
5
Vegetable crisper
6
Refrigerator door rack
7
7
Manual Water Dispenser (S65280XNX)

6 www.aeg.com
CONTROL PANEL
MODELS WITH AUTO ICE MAKER
Display Control
Power on the display panel to reach full display after 3s, the start-up tone rings and the
panel displays the systemic memory mode and temperature settings. This is a lock mode.
The factory default memory status of main control board: temperature of refrigerating
chamber and freezing chamber is set to 5 and -18 respectively; there is no setting
for special mode; the ice-maker is off by default. After the operation of display panel, the
status is changed and memorized to main control board. In normal cases, display screen
enters standby state and then dies out after display board is locked without operation of
door opening and key operations for 30s.
Where there are key operation, communication failure, sensor failure and ice-making
malfunction when the door is opened, the display screen will light up and prompt relative
information. Numeric area displays the temperature settings of all chambers; when a
communication failure occurs, the area of freezing temperature gives a prompt of
communication failure; when a sensor failure occurs, the area of freezing temperature give
a prompt of all fault codes in turns under the lock state; in unlock state, the unlock pattern
lights up; in lock state, the lock pattern lights up. To operate the unlocked keys under the
lock state (except option key of ice water and filter reset), the lock pattern will flash lights.
Key Operation
FRZ.TEMP.:Freezing temperature key
REF.TEMP.:Refrigerating temperature key
MODE.:Option Key of Function
LOCK/UNLOCK:Lock/Unlock Key
ICE OFF:Ice-maker On/Off Key
DISPENSER:Option Key of Ice Water

ENGLISH 7
1.LOCK/UNLOCK
Hold "LOCK/UNLOCK" key for 2s under the unlock state, the system enters the lock state;
hold "LOCK/ UNLOCK" key for 2s under the lock state, the system enters the unlock state.
In unlocking, the unlock pattern lights up; in locking, the lock pattern lights up.
To operate the unlocked keys under the lock state (except option key of ice water and filter
reset), the lock pattern will flash lights.
Without any key operation for 30s under the unlock state, the system enters the lock state
automatically. Except the key "DISPENSER" and operation of filter rest, the operations of
following keys must be conducted under unlock state. For any operation under the lock
state, the lock icon will flash and prompt a buzzing sound for fault operation.
The following settings must be valid upon locking.
2.MODE
Press "MODE" for cycle setting of the mode "Vacation" → "Super Freezing" → "Super
Cooling +Super Freezing" → "Super Cooling" → "None" → "Vacation"... Display panel
and relative setting icon will display/die out synchronously.
Vacation mode( ): Freezing chamber is operating upon the temperature setting of
-18 and refrigerating chamber is off (not cooling). (Closedown of refrigerating chamber
has no effect on its lamp control)
Super Freezing mode( ): Freezing chamber is operating upon the temperature
setting of -24 ; the Super Freezing mode will exit automatically after operation for 26h.
Then, freezing chamber restores to the valid temperature setting before Super Freezing
mode.(Power off and then on, the Super Freezing mode exits. After that, the set temperature
of freezing chamber is restored to -18 )
Super Cooling mode( ):Refrigerating chamber is operating upon the temperature
setting of 2 ; the Super Cooling mode will exit automatically after operation for 150min .
Then, refrigerating chamber restores to the original temperature setting. (Power off and then
on, Super-cooling mode exits. After that, the set temperature of refrigerating chamber restores
to 5 )
Press "FRZ. TEMP." or "REF. TEMP.", vacation mode exits; refrigerating chamber and
freezing chamber restore to original temperature settings;
Press "FRZ. TEMP.", Super Freezing mode exits; freezing chamber restores to operation
under the original temperature setting;
Press "REF.TEMP.", Super Cooling mode exits; refrigerating chamber restores to operation
under the original temperature setting;

3.REF.TEMP.
1) Temperature setting of refrigerating chamber
Press "REF.TEMP." key to choose refrigerating chamber, the temperature setting of
refrigerating chamber blinks; press "REF.TEMP." again to set the temperature of
refrigerating chamber; set the refrigerating chamber circulating under the state of
"8→7→6→5→4→3→2→8→……" Without key operation, the area of refrigerating
temperature stops blinking after 5s.
4.FRZ.TEMP.
1) Temperature Setting of Freezing Chamber
Press "FRZ.TEMP." key to choose freezing chamber, the temperature setting of freezing
chamber blinks; press "FRZ.TEMP." again to set the temperature of freezing chamber; set
the refrigerating chamber circulating under the state of "-16→-17→-18→-19→-20→-21
→-22→-23→-24→-16…… " Without key operation, the area of refrigerating temperature
stops blinking after 5s.
5.ICE OFF
Press "ICE OFF" key, the relative words and icon die out/lights up, activating/deactivating
the ice-making function.
6.DISPENSER
Press "DISPENSER" key to choose ice/water state; set it circulate under the state of
"Cubes Ice→Crushed Ice→Water→None→Cubes Ice ..." , the relative icon on the panel
will light up/die out in turns.
To dispense ice:
1. Make sure the desired type of ice is selected.To switch between cubed and crushed,
press ICE TYPE.
Select ice option pressing using interface panel.The display screen indicates which
type of ice is selected.
Cubes ice Crushed ice Water
For crushed ice, cubes are crushed before being dispensed.This may cause a slight
delay when dispensing crushed ice. Noise from the ice crusher is normal, and pieces
of ice mayvary in size. When changing from crushed to cubed, some crushed ice will
be dispensed along with the first cubes.
8 www.aeg.com

ENGLISH 9
IMPORTANT: You do not need to apply a lot of pressure to the pad in order to
activate the ice dispenser. Pressing hard will not make the ice dispense faster or in
greater quantities.
2. Remove the glass to stop dispensing.
NOTE :Ice may continue to dispense for a short while after removing the glass from the
pad.The dispenser may continue to make noise for a short while after dispensing.
Ice guide
2.Press a sturdy glass against the ice dispenser pad. Hold the glass close to the ice guide
to ensure that the ice dispenses into the glass.
CAUTION!
If the amount of water which is
supplied to Ice Maker needs ad-
justing, call for a service agent.
CAUTION!
In case of power failure ice cubes
to last for quite a few hours, pull out
the case and remove the ice cubes
from it, then replace it back.

10 www.aeg.com
HELPFUL HINTS AND TIPS
HINTS FOR STORING FOOD
•Wash foods before storing.
•Divide and separate foods into
smaller pieces.
•Place watery foods or foods with
much moisture in front of shelves
(close to the door side). If they are
placed close to the cold air spout,
they can be frozen.
•Warm or hot foods should be cooled
down enough before storing to reduce
power consumption and to enhance
refrigeration performance.
•Be careful in storing tropical fruit such
as bananas, pineapples and toma-
toes as they can easily deteriorate in
lower temperature.
•Keep as much space between foods
as possible. If it is too tight or too
close, cold air circulation is hindered,
resulting in poor refrigeration.
•Never forget to cover or wrap foods to
prevent odour of foods.
•Do not store vegetables in the chilled
place as they can become frozen.
•Egg case can be placed on a refrig-
erator shelf the way you prefer.

ENGLISH 11
MODELS WITHOUT AUTO ICE MAKER
1.Button operation
A.Freezer compartment temperature adjustment
B.Mode Settings
C.Refrigerator compartment temperature adjustment
D.Lock/Unlock
2.Display
1.Vacation mode
2.Super Freezing mode
3.Super Cooling mode
4.Lock icon
5.Freezer compartment temperature
6.Refrigerator compartment temperature
7.Close icon
3.Lock/Unlock
At non-lock state (the 4 icon shows ),Press D key for 2 seconds,the refrigerator will go
into the state of Locked and the 4 icon shows .
Press D key for 2 seconds persistently at the Locked state, the 4 icon shows and the
Locked state releases.
The following functions must be in operation under the unlocked state
Press mode button (button B), you can choose running mode as the following.
Vacation —►Quick-freezer—►Quick-cold and freezer —► Quick-cold —►None
The following settings must be valid upon locking.

12 www.aeg.com
4.Vacation mode ( )
Press B key to select Vacation mode,the icon 1 shows,then press D key to confirm,the
freezing chamber is operating upon the temperature setting of -18 and refrigerating
chamber is off (not cooling). (Close down of refrigerating chamber has no effect on its lamp
control)
Press "FRZ. TEMP." or "REF. TEMP.", vacation mode exits; refrigerating chamber
and freezing chamber restore to original temperature settings;
5.Super cooling mode ( )
Press B key to select super cooling mode,the icon 3 shows, then press D key to confirm,
the freezing chamber is operating upon the temperature setting of -24°C; the Super Freezing
mode will exit automatically after operation for 26h. Then, freezing chamber restores to the
valid temperature setting before Super Freezing mode.(Power off and then on, the Super
Freezing mode exits. After that, the set temperature of freezing chamber is restored to -18°C)
Press "FRZ. TEMP.", Super Freezing mode exits; freezing chamber restores to operation
under the original temperature setting;
6.Super freezing mode ( )
Press B key to choose super freezing mode, the icon 2 shows, then press D key to confirm
the refrigerating chamber is operating upon the temperature setting of 2°C; the Super
cooling mode will exit automatically after operation for 150min . Then, refrigerating chamber
restores to the original temperature setting. (Power off and then on, Super-cooling mode exits.
After that, the set temperature of refrigerating chamber restores to 5°C)
Press "REF.TEMP.", Super Cooling mode exits; refrigerating chamber restores to operation
under the original temperature setting;
7.Refrigerator compartment temperature settings
Press C key once,the Refrigerator compartment temperature displays with flashing, press C
key again and you can set the temperature ,the range of temperature is from 2°C to 8°C.
8.Freezer compartment temperature settings
Press A key once,the Freezer compartment temperature displays with flashing,press D key
again and you can set the temperature ,the range of temperature is from -16°C to -24 °C.

ENGLISH 13
CARE AND CLEANING
Put food which is short-term storage or to eat at any time in the refrigerator comparment.
Shelf adjustment
According to the needs of food storage you can adjust the shelf to proper position;To
facilitate the use of it or adjustment the location, the shelf can be set to slip so that you can
use and adjust it easily.when you want to clear the shelf,please move the shelf by the
direction(1),then turn the shelf in the direction(2) for 90° until it is Perpendicular to the
original direction,pull out the shelf by the direction (3).
Height adjustment and cleaning of door rack
Lift the rack by the direction(1) ,hold both the sides ,then pull it out by the direction(2) . After
cleaning to install the rack by the opposite direction. You can aslo adjust the position
according to the height of stored food.

14 www.aeg.com
Replacement on lights in freezer and refrigerator, and specification
of lights
Specification: 12V DC, LED
Shut off the power and remove plug from wall socket.
As per the photo, remove the light cover along the drive direction of the arrow, and then
tighten the screws, remove the LED lights
Restore, the light cover by clipping into place.
If needed, a technician can replace the LED lights.
Way to replace the filter (only for models with auto ice maker)
1
2
1. The filter installed in this refrigeratory is refined by NSF42,which can filter odours, chlorine
etc. in running water.
2. The replacement cycle of the filter is about 6 mouths. When replacement is needed, the
indicator( ) on the display board will turn on. The replacement cycle may be shortened
according to operating environment.
3. To activate the filter BYPASS function, remove the filter manually from the refrigerator
compartment. This will direct the water supply directly to the water and ice maker without
the use of a filter. The replacement of the filter can be done manually or by a technician
if required.
4. During replacement, water in the connection part may drip into fridge, a container can be
inserted manually under it to receive the drops.
5. The filter is installed in the top right corner of the refrigerator compartment. to remove the
filter, turn the filter to the left as shown in the diagram below.
6.
1
2
CLEANING AND MAINTENANCE
The assembling of the filter is done in the opposite order as shown in the diagram below.
Push it upwards and turn the filter to the right at the same time.

ENGLISH 15
(MODELS WITH AUTO ICE MAKER ONLY)
CONNECTING WATER SUPPLY
Read all directions before you begin.
IMPORTANT:
● Plumbing shall be installed in accordance with the international Plumbing Code and any local
codes and ordinances.
● Water Valve: It is recommended an exclusive valve for the refrigerator water line. For more
information, please contact our authorized service network.
● Pre-filter: To extend the life of your water filter, we recommend the installation of a pre-filter
between the tap and your refrigerator. For more information, please contact our service centre
(contact details at end of this booklet).
● The white water tubing, on the back of the refrigerator (which is used to connect to the
household ¼” water line) is a PEX (cross-linked polyethylene) tube. Copper and PEX tubing
connections from the household waterline to the refrigerator are acceptable - ensure that the
pipes used are made from those 2 materials – it will help eliminate contaminating the taste of
the ice and water.
● Install tubing only in areas where temperatures will remain above freezing.
● Ensure the tubing is not longer than 8mt and there are no kinks that could hamper water flow.
Items required for installation:
Style 1 (Recommended)
(A) Household water line
(B) Valve (not included)
(C) Pre-filter (not included but recommended
to extended refrigerator filter life)
(D) Adapter for 1/4” tube (included)
(E) Refrigerator tube
ABCD
E

16 www.aeg.com
Style 2
(A) Tap (not included) connected to
the household water line
(B) Adapter for 1/4” tube (included)
(C) Refrigerator tube.
A
B
C
Style 3
(A) Household water line
(B) Adapter for 1/4” tube with valve (not included).
(C) Refrigerator tube.
AB
C
For far water point, maybe it will be nescessary:
(A) Hose (included)
(B) Connector (included)
(C) Refrigerator tube.
NOTE: In the event of leaks in the hose connections,
check that the seals are correctly fitted.Use thread sealing
tape to eliminate possible leaks. If the problem persists,
contact technical assistance.
A
B
C

ENGLISH 17
External dimension of product
PRODUCT APPEARANCE AND INSTALLATION SIZE
Installation size of product
All dimensions in mm
100
50
50

18www.aeg.com
ENVIRONMENTAL CONCERNS
Recycle the materials with the symbol .
Put the packaging in applicable con-
tainers to recycle it. Help protect the
environment and human health and to
recycle waste of electrical and electronic
appliances.
Do not dispose appliances marked
with the symbol with the household
waste. Return the product to your local
recycling facility or contact your munici-
When Switching Off the refrigerator
No use for Long period of time
You Should pull out the power supply,otherwise,it may cause electric shock or fire if power
lines are aging.
When Power failure
You Should minimize the frequency of opening the door,and it is not appropriate to add
fresh foods in the refrigerator.
When discarding the refrigerator
Before you throw away your old refirigerator,make sure take off the doors,so as to avoid
children climbing inside and closing the door with possible dire consequences.
This manual suits for next models
3
Table of contents
Other AEG Refrigerator manuals