AGA marvel 17CAF Manual

Installaon
Operaon
and
Maintenance
Instrucons
Commercial
Freezer
17CAF

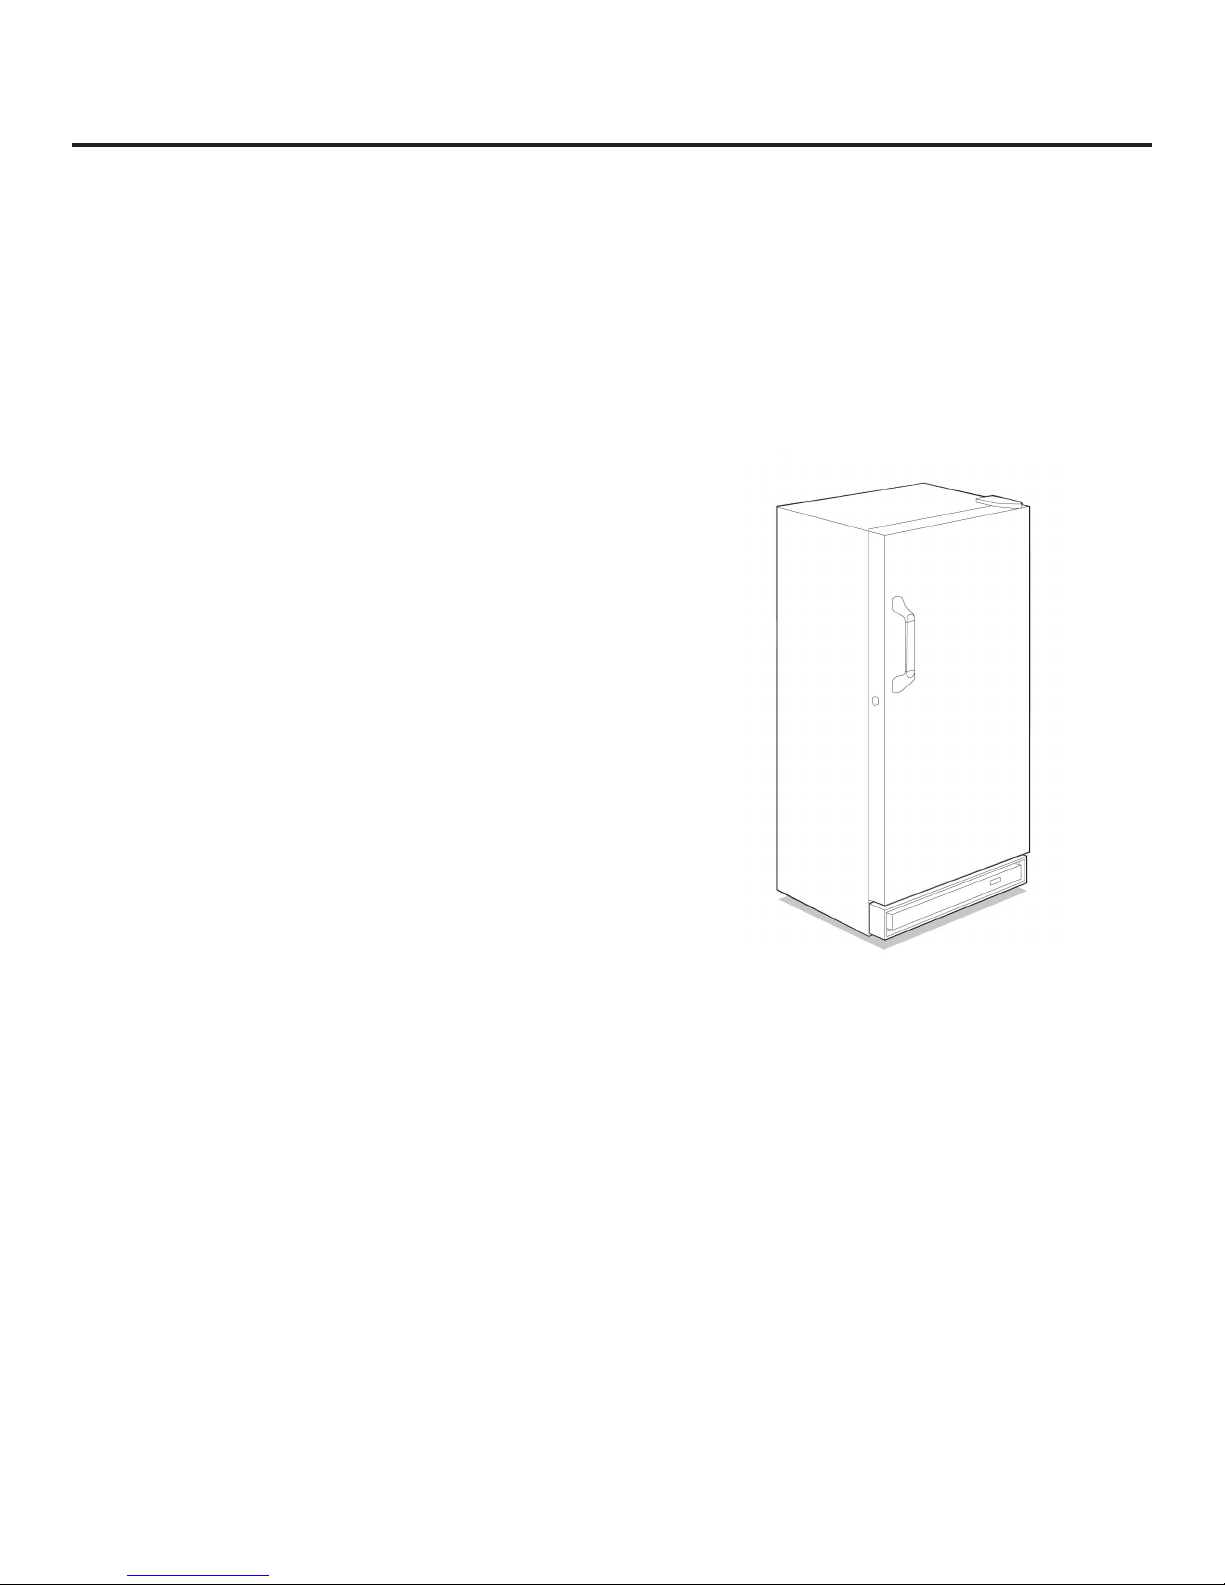
Remove Packaging
Your commercial freezer (see Figure 1) has been packed for ship-
ment with all parts that could be damaged by movement securely
fastened. Before using, be sure all packing materials and tape
have been removed.
Important
Keep your carton packaging unl your freezer has been thoroughly
inspected and found to be in good condion. If there is damage,
the packaging will be needed as proof of damage in transit.
Note to Customer
This merchandise was carefully packed and thoroughly inspected
before leaving our plant. Responsibility for its safe delivery was
assumed by the carrier upon acceptance of the shipment. As di-
rected on the side of your packing carton, claims for loss or dam-
age sustained in transit must be made on the carrier as follows:
• Exterior Damage
Make thorough damage notaon on your delivery receipt and
have driver acknowledge by signature and date. Send a wrien
request asking for an inspecon report from carrier. Include the
name of carrier representave and the date the inspecon was
requested. Retain inspecon report and receipt for ling of a
claim.
• Concealed Damage
This must be reported to the carrier within 15 days. Obtain in-
specon report from the carrier. Retain the inspecon report for
ling the claim.
DO NOT RETURN DAMAGED MERCHANDISE TO THE MANUFAC-
TURER - FILE THE CLAIM WITH THE CARRIER.
STARTING OUT
Figure 1
2
SAFETY INSTRUCTIONS
Read all instrucons before using this freezer.
WARNING
For Your Safety
Do not store or use gasoline or other ammable vapors or liquids
in the vicinity of this or any other appliance. Read product labels
for ammability and other warnings.
WARNING
Child Safety
• Destroy carton, plasc bags, and any exterior wrapping im-
mediately aer the freezer is unpacked. Children should
never use these items for play. Cartons covered with rugs,
bedspreads, plasc sheets, or stretch wrap may become air-
ght chambers and can quickly cause suocaon.
• A child might suocate if he crawls into a freezer to hide or
play. Remove the door of a freezer when not in use, even
if you plan to discard the freezer. Many communies have
laws requiring you to take this safety precauon.
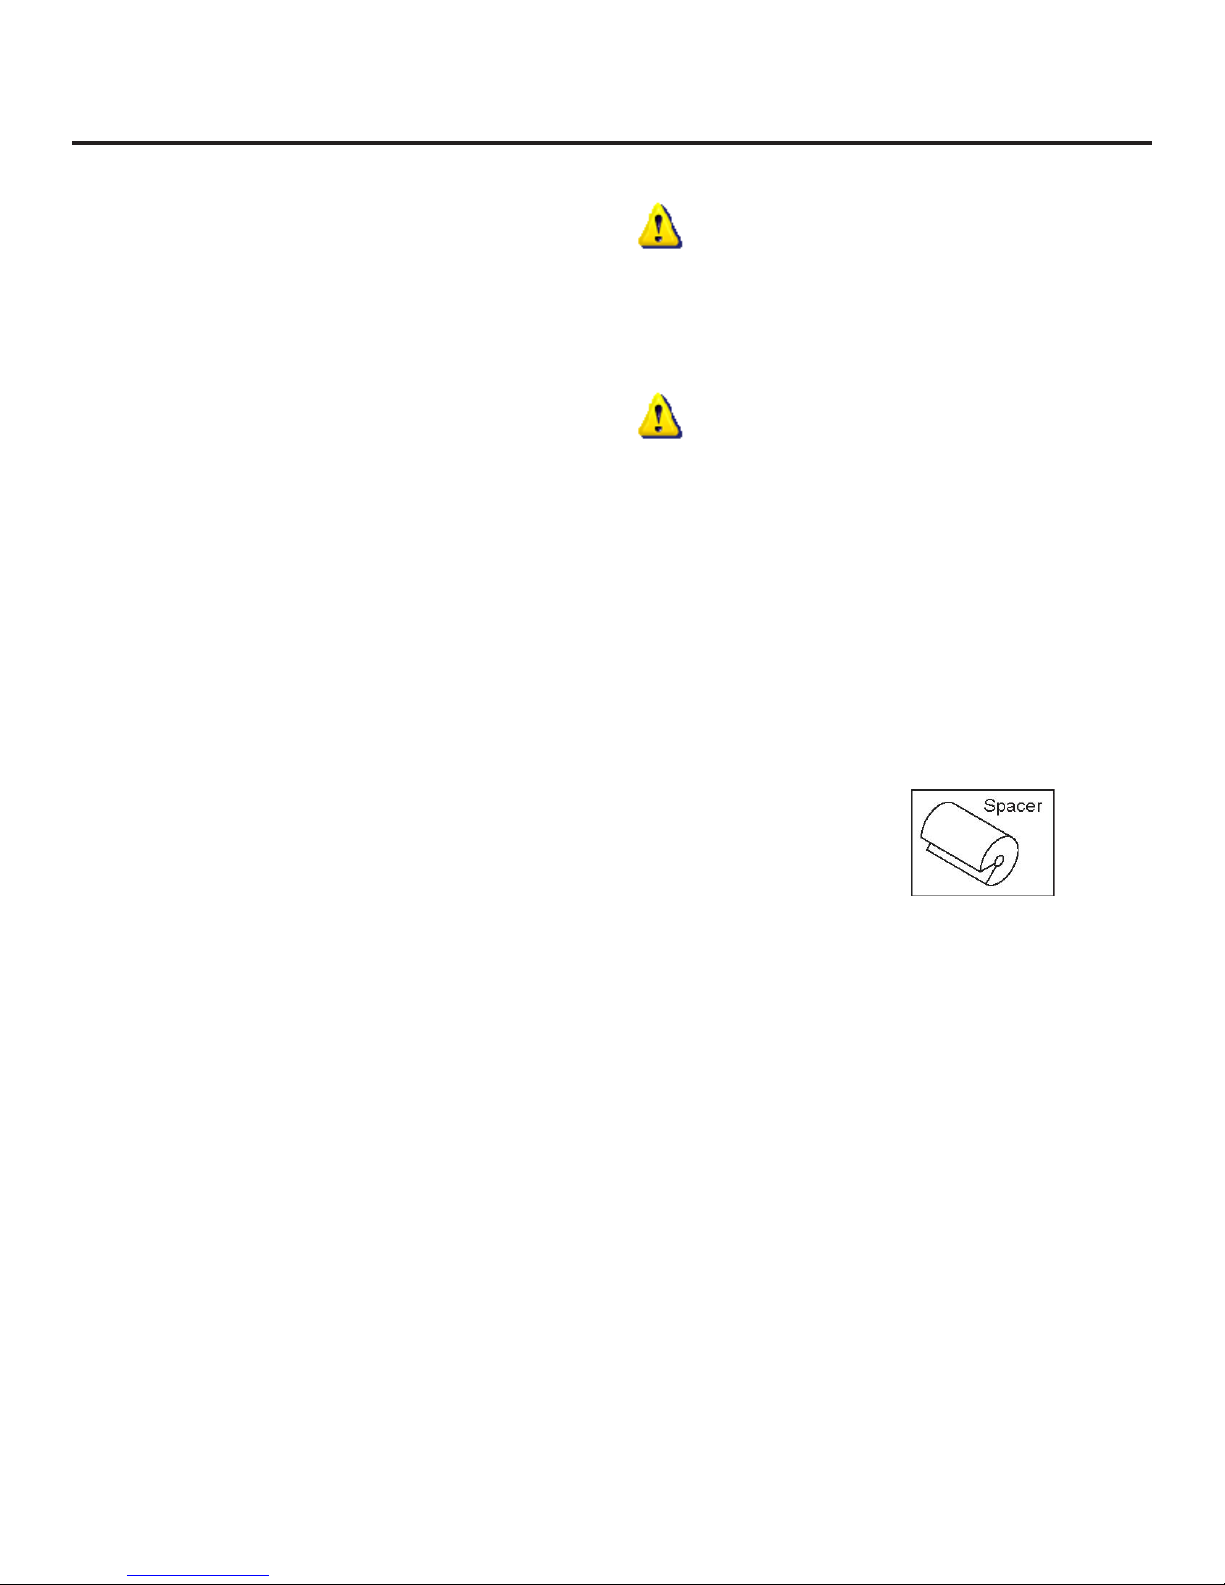
• Remove and discard any spacers (see Figure 2) used to secure
the shelves during shipping. Small objects are a choke hazard
to children.
• Each year, children die because they climb inside a discarded
refrigeraon product, get trapped inside and suocate. Take
precauons to prevent such tragedies by removing the door
or by taping or chaining it shut before discarding.
Figure 2
3
INSTALLATION
WARNING
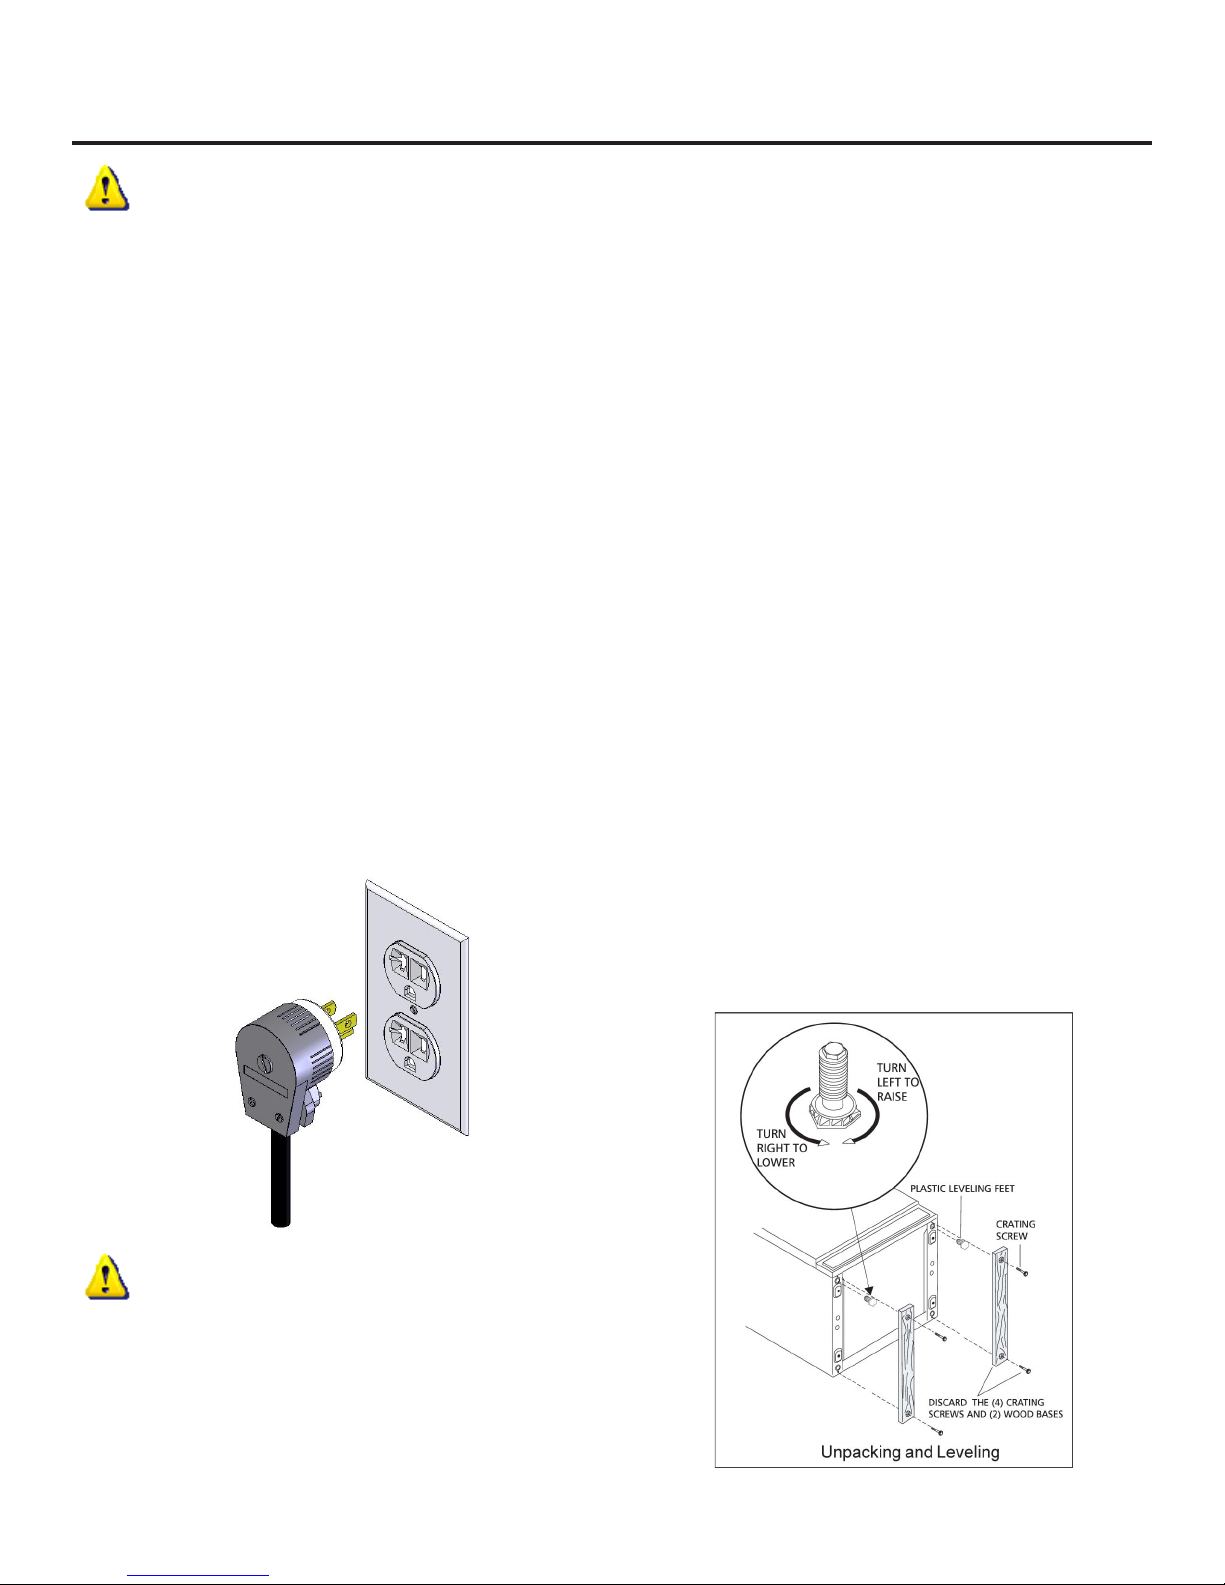
Electrical Informaon
• The power cord of the appliance is equipped with a three-
prong grounding plug for protecon against shock hazards
(see Figure 3 below). It must be plugged directly into its own
properly grounded three-prong receptacle, protected with
a 15 amp me delay fuse or circuit breaker. The receptacle
must be installed in accordance with the local codes and or-
dinances. Consult a qualied electrician. Receptacles pro-
tected by Ground Fault Circuit Interrupters (GFCI) are NOT
RECOMMENDED. DO NOT use an extension cord or adapter
plug.
• If voltage varies by 10 percent or more, freezer performance
may be aected. Operang the freezer with insucient pow-
er can damage the motor. Such damage is not covered under
the warranty. If you suspect your voltage is high or low, con-
sult your power company for tesng.
• To prevent the freezer from being turned o accidentally, do
not plug the unit into an outlet controlled by a wall switch or
pull cord.
• Do not pinch, knot, or bend power cord in any manner.
Before starng the freezer, follow these important steps:
Installaon
• Choose a place that is near a grounded electrical outlet.
• The freezer should be located where surrounding tempera-
tures will not exceed 110 degrees F (43 degrees C). Tempera-
tures of 32 degrees F (0 degrees C) and below will NOT aect
freezer operaon. Addional compressor heaters are not
recommended.
• Allow space around the unit for good air circulaon. Leave a
three (3) inch (75 millimeter) space on all sides of the freezer
for adequate circulaon.
Leveling
The freezer must have all boom corners resng rmly on a solid
oor. The oor must be strong enough to support a fully loaded
freezer. NOTE: It is VERY IMPORTANT for your freezer to be level
in order to funcon properly. If the freezer is not leveled dur-
ing installaon, the door may be misaligned and not close or seal
properly, causing cooling, frost, or moisture problems.
To Level Unit (see Figure 4 below)
Aer discarding crang screws and wood base, use a carpenter’s
level to level the freezer from front-to-back. Adjust the plasc
leveling feet in front, 1/2 bubble higher, so that the door closes
easily when le halfway open.
Figure 3
Figure 4
WARNING
Other Precauons
• To defrost freezer, always unplug the freezer rst.
• Never unplug the freezer by pulling on the power cord. Al-
ways grip the plug rmly and pull straight out from the re-
ceptacle.
• Turning the control to OFF turns o the compressor, but does
not disconnect power to other electrical components.
4
INSTALLATION
Seng the Temperature Control
Cleaning
• Wash any removable parts of the freezer interior, and exte-
rior with mild detergent and warm water. Wipe dry. DO NOT
USE HARSH CLEANERS ON THESE SURFACES.
• Do not use razor blades or other sharp instruments, which
can scratch the appliance surface when removing adhesive
labels. Any glue le from the tape can be removed with a
mixture of warm water and mild detergent, or touch the resi-
due with the scky side of tape already removed. DO NOT
REMOVE THE SERIAL NAMEPLATE.
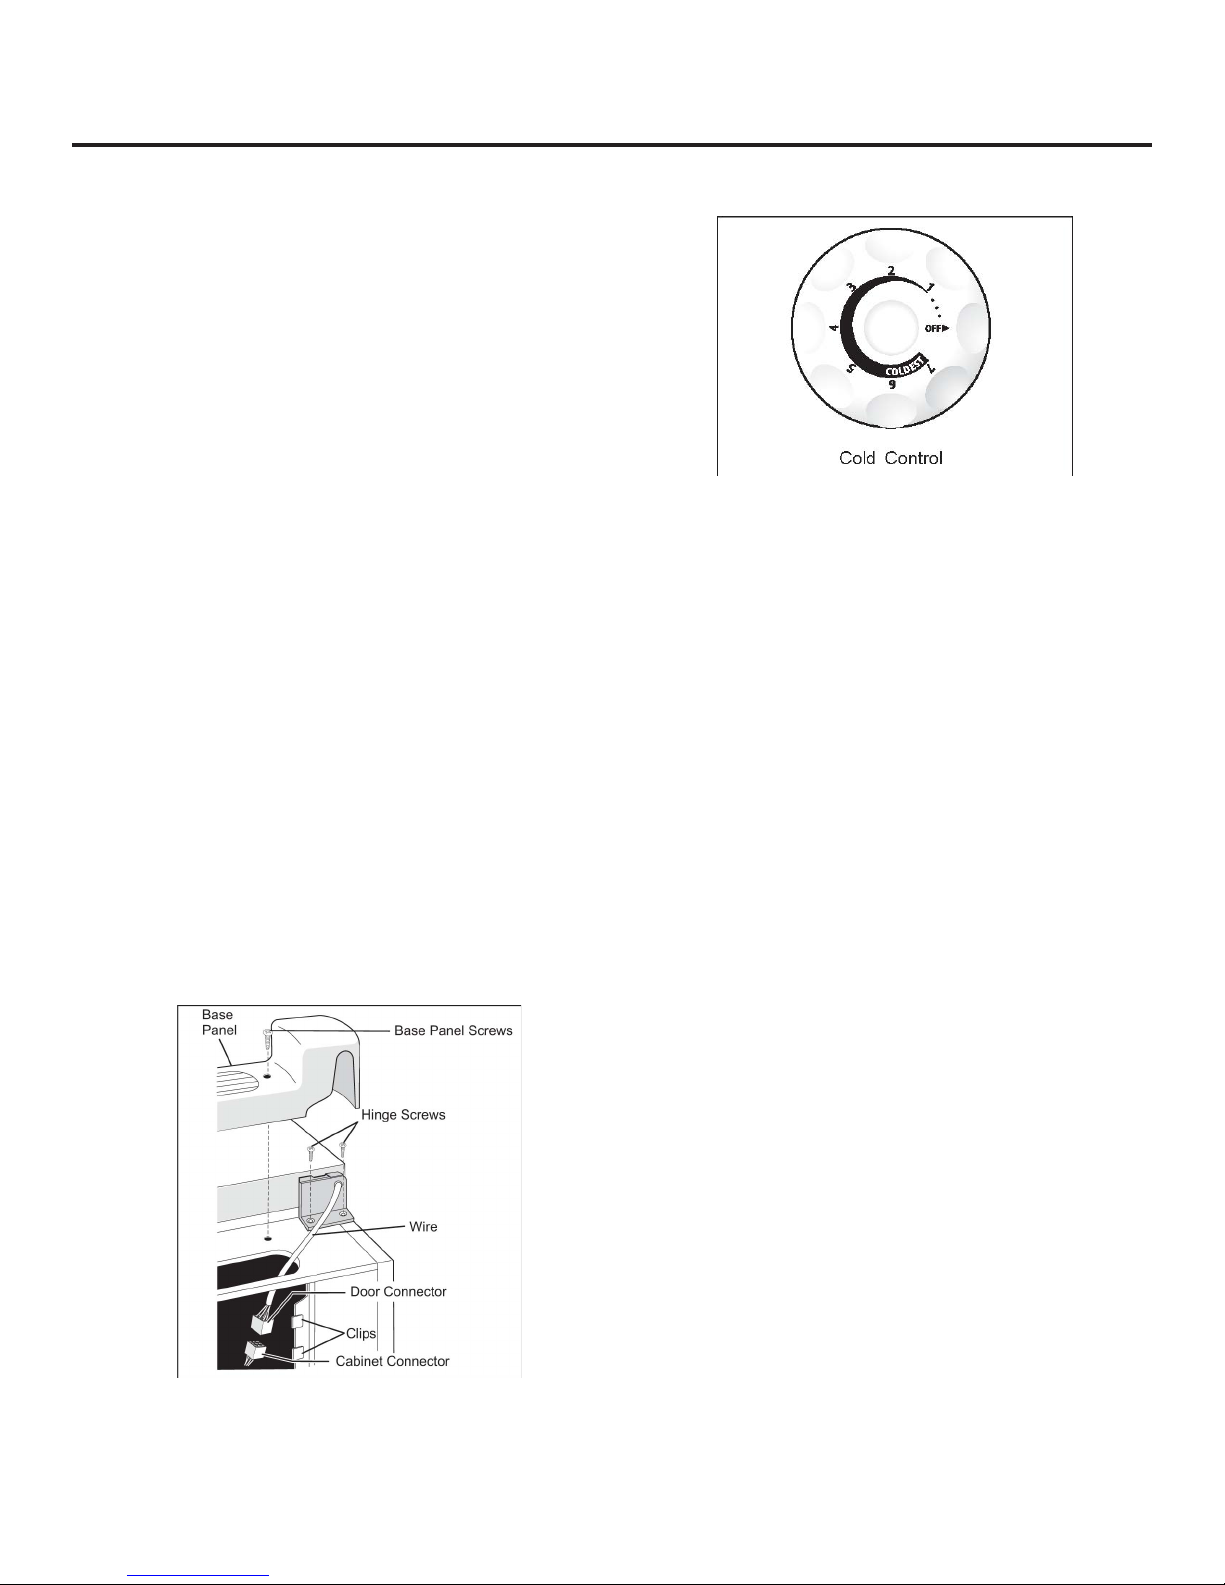
Door Removal (see Figure 5 below)
If the door must be removed to t through narrow doorways, UN-
PLUG THE UNIT.
1. Gently lay freezer on its back, on a rug or blanket.
2. Remove the two grille screws and grille. Remove wire from
clips on boom of cabinet.
3. Unplug connector, if required, by holding the cabinet connec-
tor in place, and pulling the door connector out.
4. Remove the boom hinge screws.
5. Remove the plasc top hinge cover.
6. Remove the top hinge from cabinet.
7. Remove the door and boom hinge from the cabinet.
8. To replace the door, reverse the above order and securely
ghten all screws to prevent hinge slippage.
Figure 6
Figure 5
Cool Down Period
• For safe content storage, allow four (4) hours for freezer to
cool down completely. The freezer will run connuously for
the rst several hours. Contents that are already frozen may
be placed in freezer aer the rst few hours of operaon.
Unfrozen contents should NOT be loaded into the freezer un-
l freezer has operated for four (4) hours.
• When loading the freezer, freeze only three (3) pounds of
commodies per cubic foot of freezer space at one me. Dis-
tribute packages to be frozen evenly throughout the freezer.
It is not necessary to turn the control knob to a colder seng
while inially freezing commodies.
Temperature Control
The temperature control (see Figure 6 above) is located inside the
freezer. The temperature is factory preset to provide sasfactory
content storage temperatures. However, the temperature control
is adjustable to provide a range of temperatures for your personal
sasfacon. If a colder temperature is desired, turn the tempera-
ture control knob toward COLDEST and allow several hours for
temperatures to stabilize between adjustments.
5

NOTE
Your freezer may have some, or all of the features listed below.
Become familiar with these features, and their use and care.
Power Cord Clamp
The clamp prevents the power cord from being accidently un-
plugged. Remember when removing or replacing the electrical
cord, to remove or replace the power cord clamp.
Slide-Out Basket
The slide-out basket, located at the boom of the freezer pro-
vides separate storage space for items that are dicult to store on
freezer shelves. To remove the basket, pull out, and li up.
Security Lock with Pop-Out Key
This security lock fastens the door snugly, ensuring that stored
contents are secure. To lock or unlock the freezer, push the key
into the lock and turn. The key pops out of the lock aer it has
been turned.
Interior Light
The light comes on automacally when the door is opened. To
replace the light bulb, turn the temperature control to OFF and
unplug the electrical cord. Replace the old bulb with a bulb of the
same waage.
Adjustable Shelf
This shelf can be moved to one of two posions. Li the shelf up
and out to move to the desired posion.
Defrost Drain
The defrost drain provides a method of draining the water during
defrosng and cleaning. See “Defrosng” in the “Care and Clean-
ing of Your Freezer” Secon.
FREEZER OPTIONAL FEATURES
Fast Freezing Shelves
These shelves contain cooling coils to freeze contents quickly and
allow cold air to constantly circulate throughout the freezer. Do
not use sharp metal objects such as ice picks or scrapers to clean
the shelves. This could damage the shelves and reduce their cool-
ing ability. These shelves are not adjustable.
Drop Front
The drop front, located at the boom of the freezer, provides a
separate compartment for small irregular shaped items or large,
bulky items. Li the front up and out to remove.
6
CARE AND CLEANING OF YOUR FREEZER
CAUTION
Damp objects tend to sck to cold metal surfaces. Do not touch
interior metal surfaces with wet or damp hands.
Between Defrost Cycles
To avoid frequent defrosng, occasionally use a plasc scraper to
remove frost. Scrape with a pulling moon. Never use a metal
instrument to remove frost.
CAUTION
Freezer must be unplugged (to avoid electrical hazard) from pow-
er source when defrosng unit.
Defrosng
It is important to defrost and clean the freezer when 1/4 to 1/2
inch of frost has accumulated. Frost may tend to accumulate fast-
er on upper part of the freezer due to warm, moist air entering
the freezer when the door is opened. Remove contents and leave
the door open when defrosng the freezer.
Cleaning the Inside
Aer defrosng, wash inside surfaces of the freezer with a solu-
on of two tablespoons of baking soda in one quart (1.136 liters)
of warm water. Rinse and dry. Wring excess water out of the
sponge or cloth when cleaning in the area of the controls, or any
electrical parts.
Wash the removable parts with the baking soda soluon men-
oned above, or mild detergent and warm water. Rinse and dry.
NEVER use metallic scouring pads, brushes, abrasive cleaners, or
alkaline soluons on any surface. Do not wash removable parts
in a dishwasher.
Cleaning the Outside
Wash the cabinet with warm water and a mild liquid detergent.
Rinse well and wipe dry with a clean so cloth.
Figure 7
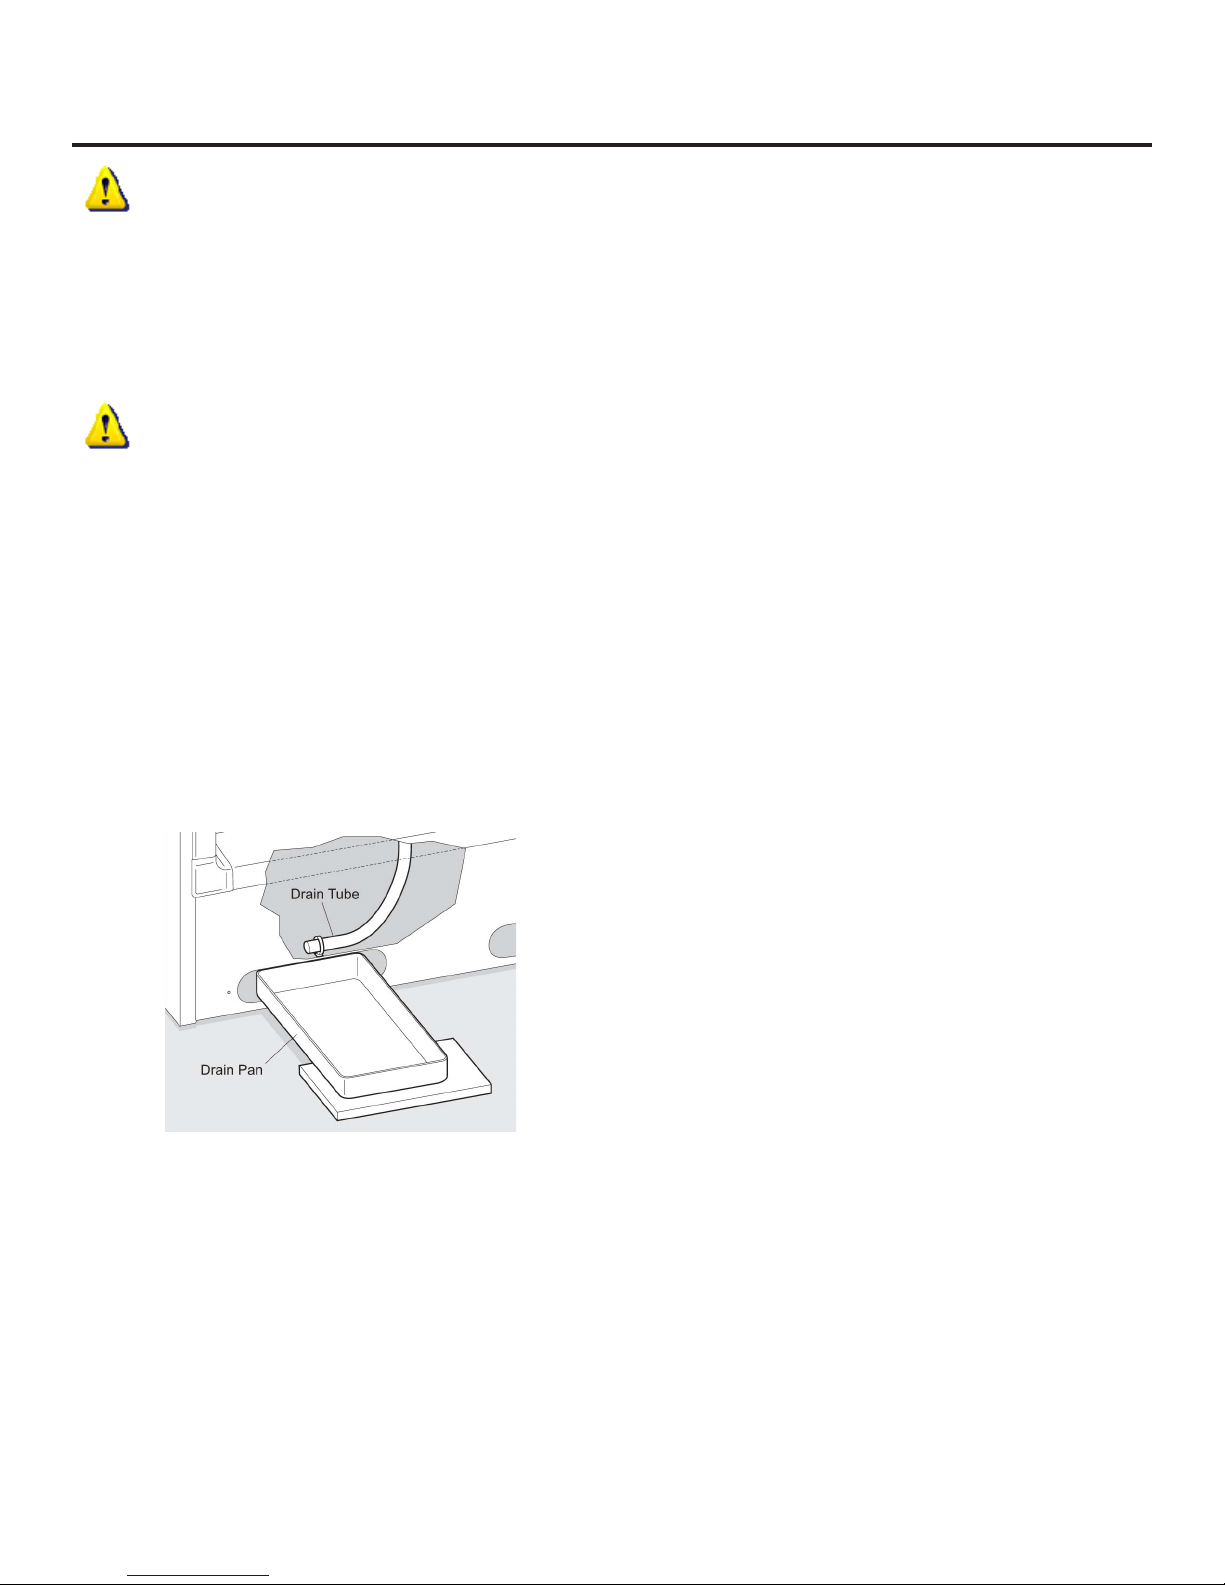
On upright models with a defrost drain (see Figure 7 above),
remove drain plug on the inside oor of the freezer by pulling
straight out. To access external drain tube on models with a grille,
rst remove the two screws from the grille. Locate the drain tube
near the le center under the freezer. Place a shallow pan under
the drain tube. Defrost water will drain out. Check pan occa-
sionally so water does not overow. Replace the drain plug when
defrosng and cleaning are completed. If the drain is le open,
warm air may enter the freezer.
7

POWER FAILURE / FREEZER FAILURE
If a power failure occurs, frozen contents will stay frozen for at
least 24 hours if the freezer is kept closed. If the power failure
connues, pack seven or eight pounds of dry ice into the freezer
every 24 hours. Look in the Yellow Pages under “Dry Ice,” “Dair-
ies,” or “Ice Cream Manufacturers” for local dry ice suppliers. Al-
ways wear gloves and use cauon when handling dry ice.
If the freezer has stopped operang, see “Freezer does not run”
in the Troubleshoong Secon of this manual. If you cannot solve
the problem, call an authorized servicer immediately.
If the freezer remains o for several hours, follow the direcons
above for the use of dry ice during a power failure.
8

Before Calling for Service
Before calling for service, check the troubleshoong table on this page. This table lists possible problems that you can remedy without
diculty to avoid an unnecessary service call.
OCCURRENCE POSSIBLE SOLUTIONS
Freezer does not run
1. Check to ensure that the freezer is not plugged into a circuit that has ground fault interrupt. If you
are unsure about the outlet, have it checked by a cered technician.
2. Temperature control is in the OFF posion. See “Seng the Temperature Control” in the Installa-
on secon.
3. Freezer may not be plugged in or plug may be loose. Be sure plug is ghtly pushed into electrical
outlet.
4. Circuit breaker has tripped. Check/reset circuit breaker.
5. Power outage. Call local electric company.
Freezer runs too much or
too long
1. Room or outside weather is too hot. It is normal for the freezer to work harder under these con-
dions.
2. Freezer has recently been disconnected for a period of me. Freezer requires four (4) hours to
cool down completely.
3. Large amounts of warm commodies have been stored recently. Warm commodies will cause
the freezer to run more unl the desired temperature is reached.
4. Door is kept open too long or too frequently. Warm air enters the freezer every me the door is
opened. Open the door less oen.
5. Freezer door may be slightly open. See “Door will not close” under OCCURRENCE.
6. Temperature control is set too cold. Turn the control knob to a warmer seng. Allow several
hours for the temperature to stabilize.
7. Freezer gasket is dirty, worn, cracked, or poorly ed. Clean or change gasket. Leaks in the door
seal will cause freezer to run longer in order to maintain desired temperature.
Temperature inside the
freezer is too cold
1. Temperature control is set too cold. Turn the control to a warmer seng. Allow several hours for
the temperature to stabilize.
Temperature inside the
freezer is too warm
1. Temperature control is set too warm. Turn the control to a colder seng. Allow several hours for
the temperature to stabilize.
2. Door is kept open too long or too frequently. Warm air enters the freezer every me the door is
opened. Open the door less oen.
3. Freezer door may be slightly open. See “Door will not close” under OCCURRENCE.
4. Large amounts of warm commodies have been stored recently. Wait unl the freezer has had a
chance to reach its selected temperature.
5. Freezer has recently been disconnected for a period of me. Freezer requires four (4) hours to
cool down completely.
Temperature of external
freezer surface is warm
1. The exterior freezer walls can be as much as 30 degrees F warmer than room temperature. This is
normal while the compressor works to transfer heat from inside the freezer cabinet.
Louder sound levels when-
ever freezer is ON
1. Modern freezers have increased storage capabilies and more even temperatures. They require a
high eciency compressor. When the surrounding noise level is low, you might hear the compressor
running while it cools the interior.
TROUBLESHOOTING
9
TROUBLESHOOTING
OCCURRENCE POSSIBLE SOLUTIONS
Louder sound levels when
compressor comes ON
1. Freezer operates at higher pressures during the start of the ON cycle. This is normal. Sound will
level o or disappear as freezer connues to run.
Popping or cracking sound
when compressor comes
ON
1. Metal parts undergo expansion and contracon, as in hot water pipes. This is normal. Sound will
level o or disappear as freezer connues to run.
Bubbling or gurgling sound,
like water boiling 1. Refrigerant (used to cool freezer) is circulang throughout the system. This is normal.
Vibrang or raling noise
1. Freezer is not level. It rocks on the oor when it is moved slightly. Level the unit. Refer to “Level-
ing“ in the Installaon secon.
2. Floor is uneven or weak. Freezer rocks on the oor when it is moved slightly. Be sure oor can
adequately support freezer. Level the freezer by pung wood or metal shims under part of the
freezer.
3. Freezer is touching the wall. Level the freezer or move slightly. Refer to “Leveling “ in the Installa-
on secon.
Moisture forms on inside
freezer walls
1. Weather is hot and humid, which increases internal rate of frost build-up. This is normal.
2. Door is slightly open. See “Door will not close” under OCCURRENCE.
3. Door is kept open too long, or is opened too frequently. Open the door less oen.
Moisture forms on outside
of freezer
1. Door is slightly open, causing the cold air from inside the freezer to meet warm moist air from the
outside. See “Door will not close” under OCCURRENCE.
Odor in freezer 1. Interior needs to be cleaned. Clean interior with sponge, warm water, and baking soda.
2. Commodies with strong odors are in the freezer. Store commodies in ghtly sealed containers.
Door will not close
1. Freezer is not level. It rocks on the oor when it is moved slightly. This condion can force the
cabinet out of square and misalign the door. Refer to “Leveling“ in the Installaon secon.
2. Floor is uneven or weak. Freezer rocks on the oor when it is moved slightly. Be sure oor can
adequately support freezer. Level the freezer by pung wood or metal shims under the freezer or
brace the oor supporng the freezer.
Light bulb is not ON
1. Light bulb is burned out. Follow direcons under “Interior Light“ in the Freezer Oponal Features
secon.
2. No electric current is reaching the freezer. See “Freezer does not run” under OCCURRENCE.
10

COMMERCIAL PRODUCT WARRANTY
Enre Product - One Year Parts and Labor Warranty
AGA MARVEL warrants to the original purchaser that it will sup-
ply all necessary parts and labor to repair or replace in the end
user’s establishment, any component which is found by an autho-
rized representave of AGA MARVEL to be defecve in materials
or workmanship, subject to the condions and exclusions stated
below, for a period of one year from the date of purchase by the
end user.
Refrigeraon System - Addional Second Through Fih Year
Parts Only Warranty
During the four years following expiraon of the one year limited
warranty, AGA MARVEL warrants to the original purchaser that
it will supply replacement parts for the hermecally sealed re-
frigeraon system which consists of the compressor, evaporator,
condenser, drier, and connecng tubing that are found to be de-
fecve in workmanship or materials. Other parts, labor costs, and
freight charges are the responsibility of the end user.
If AGA MARVEL is unable to repair or replace the defecve prod-
uct or component, AGA MARVEL shall issue a credit to the buyer
for all or part of the purchase price, as AGA MARVEL shall de-
termine. The repair, replacement or payment in the manner de-
scribed above shall be the sole and exclusive remedy of buyer for
a breach of this warranty.
Buyer must give wrien noce of any alleged defect in the prod-
uct to AGA MARVEL within 30 days aer discovery of the defect
by buyer. If noce is not given within such period, any claim for
breach of warranty shall be conclusively deemed to have been
waived, and AGA MARVEL shall not be liable under these war-
ranes. AGA MARVEL or its agents shall be entled to examine
the product. AGA MARVEL shall have the opon of requiring the
return of the defecve component, transportaon prepaid, to es-
tablish the claim. The acceptance by AGA MARVEL of any compo-
nent returned shall not be deemed an admission that the product
is defecve or in breach of any warranty and, if AGA MARVEL de-
termines that the product is not defecve, the component shall
be reshipped to the buyer at the buyer’s expense. No component
will be returned to AGA MARVEL without its prior consent.
The above warranes do not cover:
• Shipping costs of replacement parts or returned defecve
parts.
• Customer educaon or instrucons on how to use the refrig-
erator/freezer.
• Any content loss, or incidental or consequenal damage or
loss due to product failure.
• Removal or installaon.
Nor do the above warranes cover failure of this product or its
components due to:
• Transportaon, damage sustained in transit or subsequent
damages.
• Use in hosle environments or use for storage of contents
hosle to the product.
• Improper installaon, misuse, abuse, accident or alteraon,
use on wiring not conforming to electrical codes, low volt-
ages, failure to provide necessary maintenance, or other un-
reasonable use.
• Parts or service not supplied or designated by AGA MARVEL.
The above warranes also do not apply if:
• The original bill of sale, deliver date, or serial number cannot
be veried.
• The refrigeraon equipment is not in the possession of the
original end use purchaser.
The warranes set forth herein are the only warranes extend-
ed by AGA MARVEL are in lieu of all warranes, express, implied,
statutory or otherwise. In parcular, AGA MARVEL makes no
warranty of merchantability or tness for a parcular purpose.
AGA MARVEL’s liability for any defect in the product shall not ex-
ceed the purchase price of the product. AGA MARVEL shall have
no liability for consequenal damages of any kind whatsoever,
including, but not limited to, personal injury, property damage,
lost prots or other economic injury due to any defect in the
product.
No person, rm, or corporaon is authorized to modify, expand or
extend these warranes, to waive any of the limitaons or exclu-
sions, or to make any other warranty or assume any other obliga-
on for AGA MARVEL. These warranes apply only to products
used in any of the y states of the United States and the District
of Columbia.
To obtain performance of this warranty, report any defects to:
1260 E. VanDeinse St.
Greenville MI 48838
Phone: 800.223.3900
11

All specicaons and product designs subject to change without noce. Such revisions do not entle the
buyer to corresponding changes, improvements, addions, replacements or compensaon for previously
purchased products.
1260 E. VanDeinse St.
Greenville MI 48838
800.223.3900
41010861-EN Rev. E
6/6/12
www.agamarvel.com

Instrucons
d’installaon,
d’ulisaon
et d’entreen
Congélateur
commercial
17CAF
Dépose de l’emballage
Votre congélateur commercial (voir la Figure 1) a été emballé pour
son expédion, avec toutes les pièces pouvant être endomma-
gées par le mouvement bien aachées. Avant de pouvoir l’uliser,
assurez-vous que tous les matériaux et les morceaux de bande
d’emballage ont été enlevés.
Important
Gardez votre carton d’emballage jusqu’à ce que votre congélateur
ait été inspecté à fond et trouvé en bon état. En cas de domma-
ges constatés, cet emballage serait nécessaire comme preuve de
dommages durant le transport.
Note au clients
Cee marchandise a été soigneusement emballée et complète-
ment inspectée avant de quier notre usine. La responsabilité
de sa livraison intacte a été assumée par le transporteur qui a
accepté son envoi. Comme c’est indiqué sur le côté du carton,
les réclamaons pour pertes ou dommages intervenus durant le
transport doivent être formules auprès du transporteur, de la fa-
çon suivante :
• Dommages extérieurs
Notez soigneusement les dommages sur votre récépissé de livrai-
son, et obtenez dessus la signature datée du chaueur. Envoyez
une demande écrite sollicitant un rapport d’inspecon du trans-
porteur. Incluez-y le nom du représentant du transporteur et la
date de la demande d’inspecon. Conservez le rapport d’inspec-
on et son reçu pour remplir une réclamaon.
• Dommages cachés
Ils devront être signalés au transporteur dans les 15 jours
suivant la récepon. Obtenez un rapport d’inspecon du trans-
porteur. Conservez ce rapport pour remplir la réclamaon.
NE RENVOYEZ PAS DE MARCHANDISE ENDOMMAGÉE AU FABRI-
CANT – FORMULEZ UNE RÉCLAMATION AUPRÈS DU TRANSPOR-
TEUR.
MISE EN ŒUVRE
Figure 1
2

INSTRUCTIONS DE SÉCURITÉ
Lisez toutes les instrucons avant d’uliser ce congélateur.
AVERTISSEMENT
Pour votre sécurité
N’entreposez pas et n’ulisez pas d’essence, ou d’autres
produits inammables sous forme liquide ou gazeuse, à
proximité de cet appareil ou de tout autre appareil électrique. Li-
sez les équees des produits sur leur inammabilité et les autres
mises en garde.
AVERTISSEMENT
Sécurité des enfants
• Détruisez le carton, les sacs en plasque, et toutes les san-
gles extérieures immédiatement après le déballage du
congélateur. Les enfants ne doivent jamais les uliser pour
jouer. Des cartons recouverts par des tapis, des dessus-
de-lit, des feuilles en plasque ou du lm érable peuvent
devenir des chambres étanches, et peuvent causer une
suocaon rapidement.
• Un enfant peut suoquer s’il pénètre dans un vieux
congélateur pour s’y cacher ou jouer. Enlevez la porte
d’un congélateur hors d’usage, même si vous avez prévu
de vous en débarrasser vite. Beaucoup de communau-
tés ont des lois exigeant de prendre cee disposion de
sécurité.
• Enlevez et jetez toutes les cales d’écartement (voir la Figure
2) ulisées pour maintenir les étagères durant l’expédion.
Les pets objets présentent un risque d’étouement pour les
pets enfants.
• Chaque année, des enfants meurent parce qu’ils ont grimpé à
l’intérieur d’un produit de réfrigéraon mis au rebut, se sont
trouvés emprisonnés à l’intérieur et ont suoqué. Prenez
des précauons pour éviter de telles tragédies en enlevant la
porte, ou en fermant bien l’appareil par bande ou par chaîne
avant de le mere au rebut.
Figure 2
Cale
3

INSTALLATION
AVERTISSEMENT
Informaons électriques
• Le cordon d’alimentaon de l’appareil est équipé d’une prise
à trois broches avec terre, pour une protecon contre les ris-
ques de commoon électrique (voir la Figure 3 ci-dessous).
Elle doit être branchée directement dans sa prise secteur
individuelle à trois trous, protégée en amont par un fusi-
ble temporisé de 15 ampères ou un disjoncteur. Cee prise
secteur doit être installée en conformité avec les normes et
ordonnances locales. Consultez s’il le faut un électricien qua-
lié. Des prises protégées par des interrupteurs de défaut à
la terre (GFCI) NE SONT PAS RECOMMANDÉES. N’ulisez PAS
un cordon rallonge ni un adaptateur de che.
• Si la tension du secteur varie de 10% ou plus, la performance
du congélateur peut en être aectée. Faire fonconner le
congélateur avec une alimentaon insusante peut endom-
mager son moteur. Un tel dommage n’est pas couvert par la
garane. Si vous soupçonnez que votre tension de secteur est
trop forte ou trop faible, consulter votre régie de distribuon
pour qu’elle eectue une véricaon.
• Pour éviter que le congélateur ne soit arrêté accidentelle-
ment, ne le branchez pas sur une prise secteur contrôlée par
un interrupteur mural ou un cordon à rer.
• Il ne faut pas, d’aucune manière, pincer, nouer ou couder le
cordon d’alimentaon.
Avant de démarrer le congélateur, suivez ces étapes importan-
tes :
Installaon
• Choisissez un endroit qui soit proche d’une prise secteur avec
terre.
• Le congélateur devra être placé dans un environnement ne
dépassant pas une température ambiante de 43 °C (110°F).
Des températures de 0 °C (32°F) ou moins n’aectent PAS le
fonconnement du congélateur. Des réchaueurs addion-
nels de compresseur ne sont pas recommandés.
• Laissez de la place autour de l’appareil pour une bonne cir-
culaon de l’air. Laissez un intervalle d’au moins 7,5 cm (3
pouces) tout autour du congélateur pour que cee circula-
on soit adéquate.
Mise à niveau
Le congélateur doit avoir ses quatre angles inférieurs s’appuyant
sur un sol ferme. Le sol doit être susamment solide pour suppor-
ter le congélateur complètement rempli. REMARQUE : Il est TRÈS
IMPORTANT que votre congélateur soit posé d’aplomb pour bien
fonconner. S’il n’est pas mis de niveau à l’installaon, sa porte
peut être mal alignée et ne pas se fermer correctement ou n’être
pas étanche, ce qui cause des problèmes de refroidissement, de
givrage ou d’humidité.
Pour mere l’unité à niveau (voir la Figure 4 ci-dessous)
Après avoir jeté les vis d’emballage et les bases en bois, ulisez un
niveau à bulles pour que le congélateur soit horizontal d’avant en
arrière. Relevez les pieds en plasque de mise à niveau sur l’avant
d’environ 1/2 bulle an que la porte se referme seule facilement
quand elle est laissée entrouverte.
Figure 3
Figure 4
TOURNER
VERS LA
GAUCHE POUR
MONTER
TOURNER
VERS LA
DROITE POUR
DESCENDRE PIEDS EN PLASTIQUE DE
MISE À NIVEAU
VIS D'EMBALLAGE
JETER LES (4) VIS D'EMBALLAGE
ET LES (2) BASES EN BOIS
Déballage et mise à niveau
AVERTISSEMENT
Autres précauons
• Pour dégivrer le congélateur, il faut toujours le débrancher
électriquement auparavant.
• Ne débranchez jamais le congélateur en rant directement
sur son cordon d’alimentaon. Prenez toujours fermement sa
che et sortez-la de la prise secteur en rant tout droit.
• En passant l’appareil sur arrêt (OFF), vous arrêtez son com-
presseur, mais cela ne coupe pas l’arrivée du secteur sur
d’autres composants électriques internes.
4

INSTALLATION
Réglage du contrôle de température
Neoyage
• Lavez toutes les pares amovibles du congélateur, inté-
rieures et extérieures, avec un détergent doux et de
l’eau ède. Essuyez pour sécher. N’UTILISEZ PAS DE PRO-
DUITS NETTOYANTS AGRESSIFS SUR CES SURFACES.
• N’ulisez pas de lames de rasoir ou d’autres instruments
coupants, qui pourraient rayer la surface de l’appareil, quand
vous enlevez des équees adhésives. Une trace de colle
éventuelle laissée par de la bande peut s’enlever à l’aide
d’une soluon ède de détergent doux, ou en touchant le
résidu avec le côté collant d’un morceau de bande déjà ôté.
N’ENLEVEZ PAS LA PLAQUE SIGNALÉTIQUE DE L’APPAREIL.
Dépose de la porte (voir la Figure 5 ci-dessous)
Si la porte doit être enlevée, comme pour pouvoir passer dans des
couloirs étroits, DÉBRANCHEZ D’ABORD L’UNITÉ.
1. Posez doucement le congélateur sur le dos, sur un tapis ou
une couverture.
2. Ôtez les deux vis de grille puis la grille. Dégagez le câble des
aaches en bas de l’armoire.
3. Débranchez le connecteur, si nécessaire, en maintenant le
connecteur de l’armoire en place et en rant sur le connec-
teur de porte pour le sorr.
4. Ôtez les vis de charnière du bas.
5. Enlevez le cache plasque de charnière du haut.
6. Enlevez la charnière du haut de l’armoire.
7. Enlevez la porte et sa charnière du bas de l’armoire.
8. Pour remere la porte en place, procédez en ordre inverse et
serrez bien toutes les vis pour éviter un glissement de char-
nière.
Figure 6
Figure 5
Période de refroidissement
• Pour une conservaon sans risques du contenu, prévoyez
quatre (4) heures pour le refroidissement complet du congé-
lateur. Il tournera en permanence pendant les quelques pre-
mières heures. Des produits déjà congelés pourront être pla-
cés dedans après quelques heures de fonconnement. Des
produits non congelés ne doivent PAS être chargés dans le
congélateur avant d’avoir fonconné pendant au moins qua-
tre (4) heures.
• Quand vous chargez le congélateur, ne congelez en même
temps que l’équivalent de 14,4 kg de marchandises par mètre
cube de volume de congélateur. Réparssez régulièrement
les paquets dans le congélateur. Il n’est pas ule de passer
le bouton de contrôle sur un réglage plus froid quand vous
congelez inialement des marchandises.
Contrôle de température
Le contrôle de température (voir la Figure 6 ci-dessus) est situé à
l’intérieur du congélateur. Le point de consigne est réglé à l’avance
en usine pour fournir des températures internes de conservaon
sasfaisantes. Cependant, ce contrôle est réglable, permeant
une plage de températures pour votre sasfacon personnelle.
Si vous souhaitez une température plus froide, tournez ce bou-
ton de contrôle vers COLDEST, il faut plusieurs heures pour que la
température se stabilise après un changement de réglage.
Vis de panneau
de base
Panneau
de base
Vis de charnière
Câble
Connecteur de porte
Aaches
Connecteur d’armoire
Contrôle du froid
5

REMARQUE
Votre congélateur peut comporter certaines des possibilités lis-
tées ci-dessous, ou toutes. Familiarisez-vous avec elles, leur uli-
saon et leur entreen.
Aache de cordon d’alimentaon
Cee aache évite que le cordon d’alimentaon ne soit acciden-
tellement débranché. N’oubliez pas quand vous enlevez ou re-
meez en place le cordon d’alimentaon d’enlever ou remere
en place aussi cee aache de cordon.
Panier coulissant
Ce panier coulissant amovible, placé en bas du congélateur, four-
nit un espace d’entreposage séparé pour des arcles diciles à
conserver sur les étagères du congélateur. Pour sorr ce panier,
rez-le et soulevez-le.
Fermeture de sécurité rejetant la clé
Cee fermeture de sécurité verrouille bien la porte, assurant que
le contenu entreposé ne risque rien. Pour verrouiller ou déver-
rouiller le congélateur, poussez la clé dans la fermeture et tour-
nez-la. La clé est rejetée de la fermeture après qu’elle ait été tour-
née.
Éclairage intérieur
L’éclairage s’acve automaquement quand la porte est ouverte.
Pour remplacer l’ampoule d’éclairage, passez le contrôle de tem-
pérature à l’arrêt (OFF) et débranchez le cordon d’alimentaon
électrique. Remplacez la vieille ampoule par une neuve du même
type et de la même puissance.
Étagère réglable
Cee étagère peut être déplacée sur deux posions possibles. Le-
vez et sortez l’étagère pour la mere en posion désirée.
Drainage de dégivrage
Ce drainage fournit une méthode d’évacuaon de l’eau pendant
les opéraons de dégivrage et de neoyage. Reportez-vous à “Dé-
givrage” dans la secon “Entreen et neoyage de votre congé-
lateur”.
POSSIBILITÉS DU CONGÉLATEUR EN OPTION
Étagères pour congélaon rapide
Ces étagères conennent des serpenns de refroidissement pour
congeler rapidement le contenu et permere à de l’air froid de
circuler en permanence dans le congélateur. N’ulisez pas d’ob-
jets métalliques tranchants comme des pics à glace ou des grat-
toirs pour neoyer ces étagères. Cela pourrait les endommager
et réduire leur capacité de refroidissement. Ces étagères ne sont
pas réglables.
Abaant
Cet abaant, situé au fond du congélateur, donne accès à un com-
parment séparé pour des pets arcles de forme irrégulière ou
de gros produits encombrants. Vous le sortez en le soulevant par
l’avant.
6

ENTRETIEN ET NETTOYAGE DE VOTRE CONGÉLATEUR
ATTENTION
Les objets humides ont tendance à coller aux surfaces métalliques
très froides. Ne touchez pas les surfaces métalliques intérieures
avec des mains mouillées ou humides.
Entre les dégivrages
Pour éviter des dégivrages trop fréquents, ulisez de temps en
temps un graoir en plasque pour éliminer du givre. Graez
avec un mouvement d’arrachage. N’ulisez jamais d’instruments
métalliques pour dégivrer à la main.
ATTENTION
Le congélateur doit être débranché de sa prise secteur (pour évi-
ter un risque électrique) avant de le dégivrer.
Dégivrage
Il est important de dégivrer et de neoyer ensuite le congélateur
quand du givre s’est accumulé sur 6 à 12 mm d’épaisseur. Le gi-
vrage a tendance à s’accumuler plus vite sur la pare haute du
congélateur, du fait de l’air ède et humide entrant dedans quand
sa porte est ouverte. Sortez le contenu et laissez la porte ouverte
durant le dégivrage du congélateur.
Neoyage à l’intérieur
Après le dégivrage, lavez les surfaces intérieures du congélateur
avec une soluon de deux cuillers à soupe de bicarbonate de
soude dans 1,136 litre (un quart de gallon) d’eau ède. Rincez et
essuyez. Essorez-bien votre éponge ou votre chion avant de net-
toyer la zone des contrôles ou toute pare électrique.
Lavez les pares amovibles avec la soluon au bicarbonate men-
onné avant, ou avec du détergent doux et de l’eau ède. Rincez
et essuyez. N’ulisez JAMAIS de tampons métalliques de récura-
ge, de brosses, de produits neoyants abrasifs, ou de soluons
alcalines, sur aucune surface. Ne passez pas les pares amovibles
au lave-vaisselle.
Neoyage à l’extérieur
Neoyez l’armoire avec de l’eau ède et un détergent liquide
doux. Rincez bien et essuyez avec un chion doux propre.
Figure 7
Sur les modèles vercaux avec un drainage de dégivrage (voir la
Figure 7 ci-dessus), ôtez le bouchon du drainage sur le plancher
interne du congélateur, en le rant droit pour le sorr. Pour accé-
der au tube de drainage externe sur les modèles avec une grille,
ôtez d’abord les deux vis de la grille. Repérez le tube de drainage
près du milieu à gauche sous le congélateur. Placez un bac plat
sous ce tube de drainage. L’eau de dégivrage va s’écouler par là.
Vériez le bac de temps en temps pour que l’eau ne déborde pas.
Remeez le bouchon de drainage quand le dégivrage et le net-
toyage sont terminés. Si le drainage était laissé ouvert, de l’air
plus chaud pourrait pénétrer dans le congélateur.
7

COUPURE DU SECTEUR / PANNE DU CONGÉLATEUR
En cas de coupure de l’alimentaon électrique, le contenu conge-
lé le restera pendant au moins 24 heures si le congélateur est gar-
dé fermé. Si la coupure se prolonge, ajoutez trois à quatre kilos de
glace carbonique dans le congélateur toutes les 24 heures. Regar-
dez dans les pages jaunes de l’annuaire à “Glace carbonique,” “Lai-
teries,” ou “Fabricants de crème glacée” pour trouver des fournis-
seurs locaux de glace sèche. Portez toujours des gants quand vous
manipulez de la glace carbonique.
Si le congélateur a cessé de fonconner, voyez la pare “Le
congélateur ne fonconne pas” dans la secon dépannage de ce
manuel. Si vous ne réussissez pas à régler le problème, appelez
immédiatement un dépanneur agréé.
Si pour cause de panne le congélateur reste inopérant pendant
plusieurs heures, suivez les instrucons précédentes d’ulisaon
de glace carbonique durant une coupure de secteur.
8
Table of contents
Languages:
Other AGA marvel Freezer manuals


