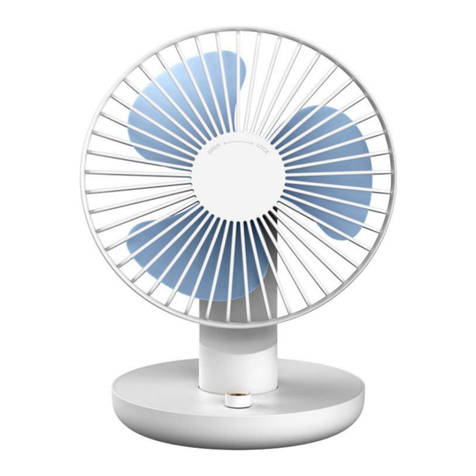
Airbi ZEPHYR User manual

EN
Tower fan
Airbi ZEPHYR
Instruction manual
(version 1.0)
Please read the instruction manual carefully before using this appliance!
Page 1 of

EN
Important safety instructions
Please read through the operating instructions carefully before you use
the appliance for the first time and keep them safely for later
reference. If necessary pass them on to the next owner.
•The appliance is only to be used in the home for the purposes
described in these instructions. Unauthorised use and technical
modifications to the appliance can lead to danger to life and
health.
•This appliance can be used by children aged from years and
above and persons with reduced physical, sensory or mental
capabilities or lack of experience and knowledge if they have
been given supervision or instruction concerning use of the
appliance in a safe way and understand the hazards involved.
Children shall not play with the appliance. Cleaning and user
maintenance shall not be made by children without supervision.
•After unpacking, make sure that appliance wasn't damaged
during transport. If you find any damage, contact your dealer as
soon as possible. We recommend you keep the packaging for
possible future use .
•Before first use check that the device parameters (electric
voltage, etc.) correspond to local conditions.
•Use appliance in an environment of 10°C to 30°C. Do not use
outdoors.
•Please put appliance more than 1 meter away from TV or radio.
It is recommended to put appliance on a flat ground in the room.
•Do not place the appliance near a heat source. Do not subject the
power cord to direct heat (such as a heated hotplate, open flames,
hot iron sole plates or heaters for example). Protect power cords
from oil.
•Always put the appliance on a hard, flat horizontal surface. There
should be a gap of at least 20 cm at both sides and back of the
product, while 30 cm from top surface.
•Do not place anything on the appliance and do not block the air
inlet and outlet.
•Before using the appliance, check if AC adapter or power cord is
Page 2 of

EN
not damaged. Do not use it if the cord is damaged.
•If the power cord is damaged, it must be replaced by the
manufacturer or a repair shop authorized by the manufacturer or
by similarly qualified persons in order to avoid a hazard
•Switch off and unplug the unit before any manipulation such as
cleaning of filters maintenance.
•Do not lift or move the appliance when it is working.
•Do not touch the power cord with wet hands, may cause electric
shock.
•Do not insert fingers or metal objects into the air outlet gap, may
cause electric shock.
•Do not let water, flammable detergent or other liquid get into the
product, may cause electric shock of fire.
•This product is not supposed to be used as daily air cleaner, air
conditioner or cooker hood.
•Do not place appliance in too humid or too hot places.
•Do not use the appliance in aromatherapy scent insecticide
environment.
•Store the appliance in a dry place inaccessible to children (pack
the appliance).
•Manufacturer is not responsible for any damage due to improper
use of appliance.
Packing list
•fan
•stand
•remote control
•user manual
Features
•2 different air outlet directions
•oscillation function
•4 operating modes - normal, night, natural and ECO
•3 fan speeds - low, medium and high
•timer - 1, 2, 4 and hours
•LED display with automatic dimming function
•remote control
Page 3 of

EN
Product‘s scheme
1. Handle
2. Top cover
3. Upper housing
4. Control panel
5. Bottom housing
6. Oscillation base
7. Stand
Control panel/remote
control:
. ON/OFF button
9. FAN SPEED button
10.TIMER button
11. MODE button
12.OSCILLATION
button
Display
Installation
•Take out the fan for assembly and make sure all accessories are included
•Please assemble the fan as below instructions:
1. Lock rear base and front base together according
to Figure 1.
2. Put the main body into the assembled base along
Page 4 of

EN
the locating pole, according to Figure 2.
3. After assembled, put the machine in a suitable
place, plug in and operate according to the
instruction manual.
Figure 1
Figure 2
Operation instructions
When plugging in the first time you will hear 2 beeping sounds. This means the fan is correctly
connected. When the unit is on standby status, only the ON/OFF will be available. (Two beeps when
unit is plugged in, one beep when buttons are pressed and one beep for power off)
ON/OFF button
Start the fan operation by pressing the “ON/OFF” button on the control panel.
The fan works initially in “LOW” speed, normal mode, no timer and no
oscillation setting. To turn off the fan, press the “ON/OFF” button and the unit
will shift to stand by mode with one beep sound.
FAN SPEED button
•Press FAN SPEED button to set wind speed, and circulate as the rule of
LOW - MED - HI - LOW. LED lights show accordingly.
Page 5 of

EN
TIMER button
•No timer status when turning on the fan, timer LED no display.
•Press TIMER button to set and circulate as the rule of 1H - 2H - 4H -
H - no timer- 1H. LED lights show accordingly. There is no timer and
related display show under the initial conditions. The fan will be under
count down status until it turns off.
MODE button
•The initial wind mode is “Normal”, press MODE button to set wind
mode and shift as the rule of “Normal” - “Sleep” - “Natural” - “ECO” -
“Normal”.The LED lights show accordingly. (No display for NORMAL
mode.)
•Working rule of wind modes:
◦NORMAL - you can choose Low – Medium – High fan speed
◦SLEEP
▪High speed: 30 minutes in High NATURAL mode, 30 minutes
in Medium NATURAL mode and continue in Low NATURAL
mode.
▪Medium speed: 30 minutes in Medium NATURAL mode and
continue in Low NATURAL mode.
▪Low speed: in Low NATURAL mode.
◦NATURAL
▪Oscillogram for 3 natural wind (HI, MED, LOW)
◦ECO
▪Under this mode, the machine works in Low speed when
ambience temperature < 25°C; in HI speed when > 29°C; in
MED speed when 25°C~29°C
•Auto dimming function – The LED lights will dim 100% automatically
without operation more than 1 minute.
Page 6 of

EN
OSCILLATION button
•By pressing this button you can switch on/off oscillation function
•The setting (except timer and mode) is memorized even the unit is turned off (not power off).
Remote control – battery change
WARNIN - KEEP BATTERIES OUT OF REACH OF CHILDREN
Remote control has a battery compartment that requires two or
more independent and simultaneous actions to remove its cover;
press and pull out the battery compartment on the back of
remote control, install the button cell (CR2032 3V) according to
the positive and negative sign and close the compartment. Align
the remote control with the receiver on the fan to operate
Maintenance
If there is too much dust or dirt on the front grid cover and wind wheel of the fan, the performance of
air-out would be affected, so we suggest clean the fan once per month at least.
1. Always remember unplug the fan before cleaning, or may cause electric shock or product
damage.
2. Clean with ordinary cleaner and banister brush. Do not use any chemical agents.
Unit surface cleaning
1. Do not allow water and steam to drip on.
2. Do not use corrosive detergent or solvent cleaning.
3. Always unplug the fan before cleaning.
Maintain guidance
1. Unplugged and packed to prevent dust from entering the body if not use for a long time.
2. Placed in a dry well ventilated place after packed.
Page 7 of

EN
Troubleshooting
Trouble Solution
Can not turn on or button has no response •Check the power cord if is plugged in.
Strange sound or smell during operation. •Switch off appliance and check if there is any
blocking object inside fan.
Technical specification
Rated voltage 220-240 V, 50 Hz
Power 45 W
Noise < 55 dB (A)
Air flow 500 m3/h
Dimensions 2 0 x 2 0 x 96 mm
Weight 4, kg
Disposal of the device (environment)
The European directive 2012 / 19 / EU on Waste Electrical and Electronic Equipment
(WEEE), requires that old household electrical appliances must not be disposed in the normal
unsorted municipal waste stream. Old appliances must be collected separately in order to
optimize the recovery and recycling of the materials they contain and reduce the impact on
human health and the environment. The crossed out “wheeled bin” symbol on the product
reminds you of your obligation, that when you dispose of the appliance it must be separately
collected. Consumers should contact their local authority or retailer for information concerning the
correct disposal of their old appliance.
This product is in compliance with the essential requirements and other relevant provisions of EMC
directive 2014/30/EU. The device was approved for use in EU countries, therefore, bear the CE. All
necessary documentation is available at the importer address.
Changes in technical parameters, properties, printing errors in the instruction manual reserved.
Importer address:
Bibetus s.r.o.
Loosova 262/1
Brno 63 00
Czech republic
E-mail: [email protected]
Tel: +420-544214627
Page of
Table of contents
Other Airbi Fan manuals
Popular Fan manuals by other brands

Greenheck
Greenheck AMPLIFY DS Installation, operation and maintenance manual

Harbor Breeze
Harbor Breeze PLM52CB5D instruction manual

Hunter
Hunter Donegan installation manual

Costway
Costway ES10021US user manual

Cumberland
Cumberland Competitor Series Installation and operation manual

PAX
PAX 250 installation instructions

Master
Master CD 5000 CH operating manual

Minka-Aire
Minka-Aire Pancake F738 instruction manual

KDK
KDK K15Z5 Operating and installation instructions

inVENTer
inVENTer iV14R Installation and operating instructions

Derale
Derale 16927 installation instructions

Harbor Breeze
Harbor Breeze MAZON MZ44MBLK3LR manual