AKUART Installation Manual | SmartDivider
2 // 4
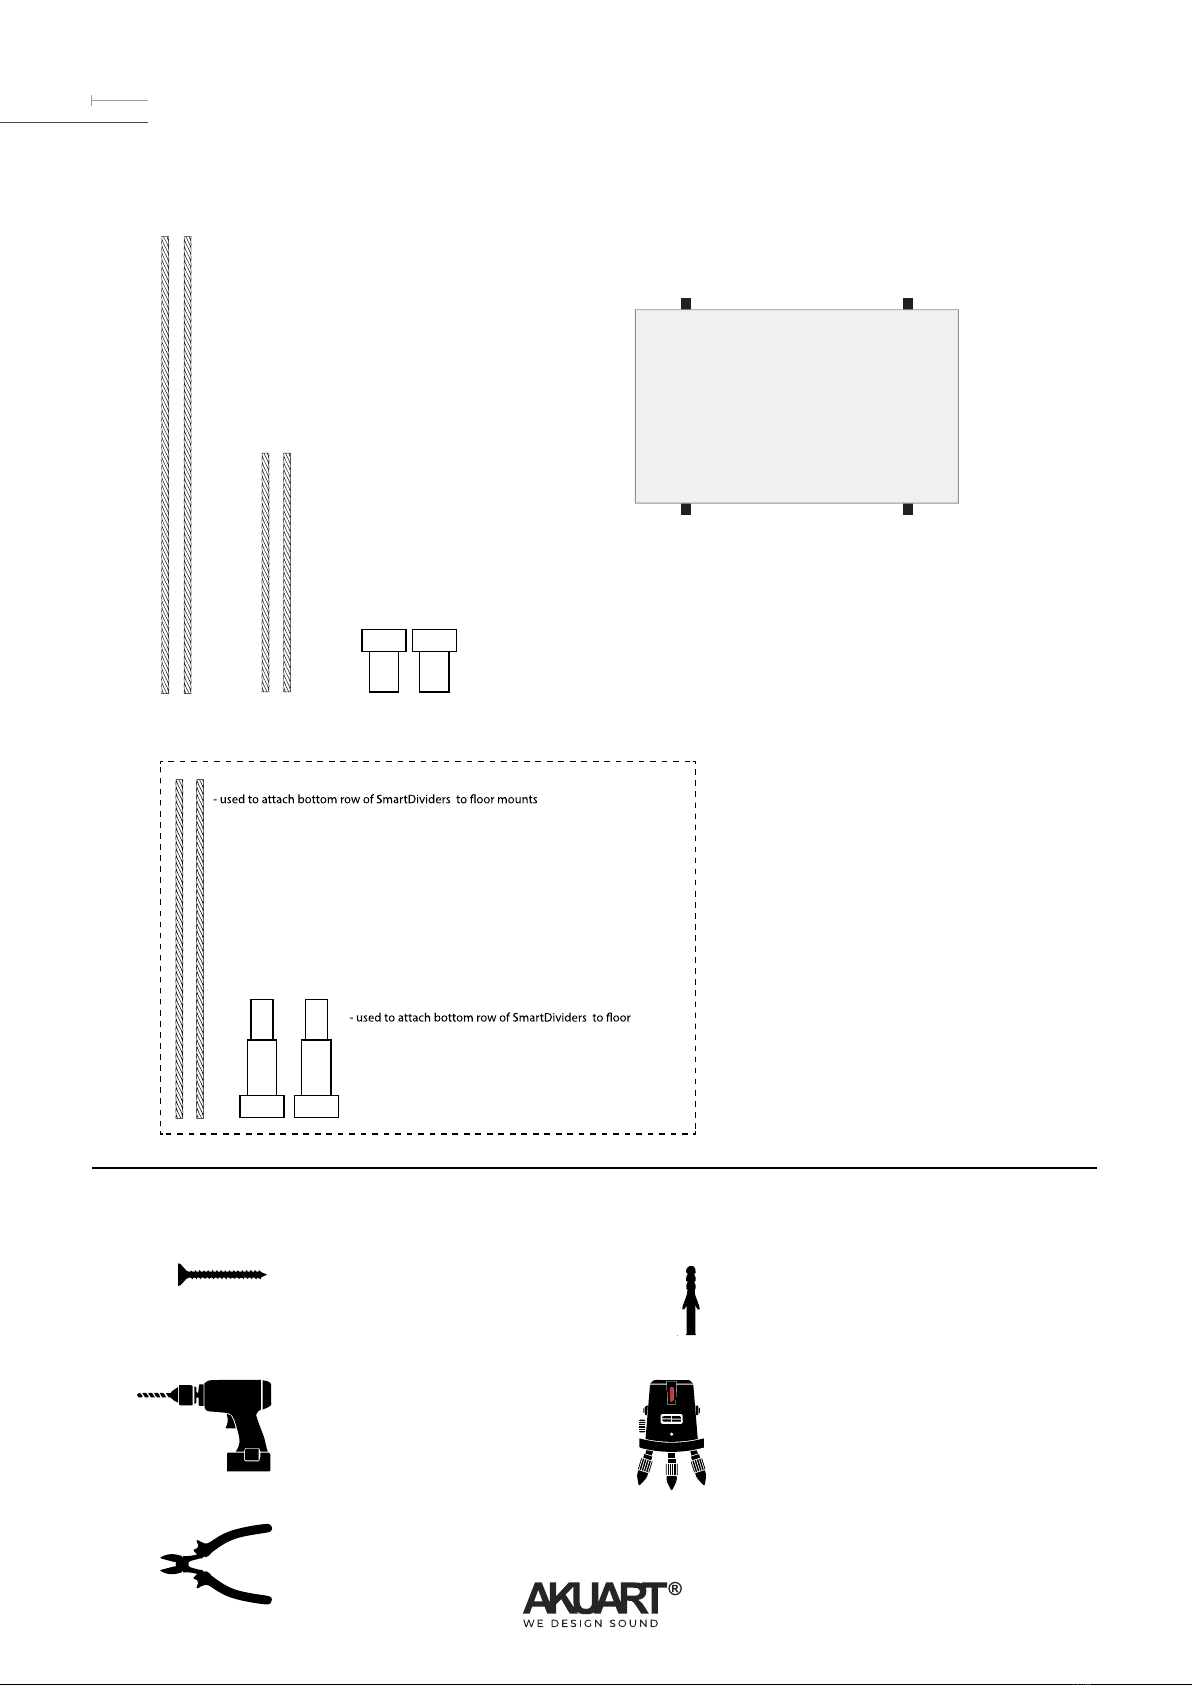
TOP WIRES (200 cm)
- used to attach the top row of SmartDividers to the ceiling mounts
- two per column
CONNECTOR WIRES (20 cm)
- two for each middle- and bottom row frames
CEILING MOUNTS
- used to attach the top row of SmartDividers to the ceiling
- two per column
FLOOR WIRES (100 cm)
- two per column
FLOOR ATTACHMENT KIT (OPTIONAL)
FLOOR MOUNTS
- two per column
SMARTDIVIDER FRAME
- comes with four wire locks pre-installed, two in top, two in bottom
RAWL PLUGS
- two needed per column
- must be appropriate size for screws
- must be appropriate for ceiling material
WIRE CUTTERS
- for trimming excess wire
POWER DRILL
- drill bit must be appropriate size for rawl plugs
SCREWS
- body diameter max. 5 mm
- must be appropriate size for rawl plugs
LASER LEVEL (suggested)
- helps with alignment of frames and drilled holes
COMPONENTS (included)
TOOLS NEEDED (not included)
1
2
SmartDivider frame


