Aleratec 1:1 HDD Cruiser User manual

®
QUICK START GUIDE
Aleratec
1:1 HDD Cruiser™
Part No. 350103

www.aleratec.com
Welcome!
Congratulations on your purchase of an Aleratec 1:1 HDD Cruiser,
considered by industry experts to be one of the finest Hard Disk Drive
Duplicators available.
The entire Aleratec team is committed to providing you with courteous
service. Our knowledgeable staff will strive to make owning and
operating your new Aleratec 1:1 HDD Cruiser a pleasant experience.
For more detailed information on configuring the 1:1 HDD Cruiser and
applying it’s various capabilities, please refer to the User Guide on the
CD included.
This Quick Start Guide will lead you step-by step through the basic
operation procedures of your 1:1 HDD Cruiser.
We at Aleratec appreciate your selection of our product, and wish you
great success and enjoyment of your new 1:1 HDD Cruiser.
Check out Aleratec online!
www.aleratec.com
www.twitter.com/Aleratec
www.youtube.com/user/Aleratec
Included Items
•1:1 HDD Cruiser
•Two Hard Disk Drive Bay Keys
•USB 2.0 Cable
•Power Cord
•User Guide CD
•Quick Start Guide (this document)
•Aleratec Registration Card
NOTE: Please store and track the included software, registration
codes and parts carefully. Requests for replacement software,
registration codes, and/or parts may incur a fee.
www.aleratec.com 1
Product Features
Thank you for purchasing the 1:1 HDD Cruiser. Please read this User
Guide thoroughly before using this product.
The 1:1 HDD Cruiser is a
Hard Disk Drive Duplicator.
•Duplicates/Makes HDD copies
•Sanitizes HDDs
•Quick load drive bays
•Supports 3.5” SATA HDDs
Note: Optional 2.5” SATA HDD Adapter 2 pack available (Aleratec Part
Number 350106)
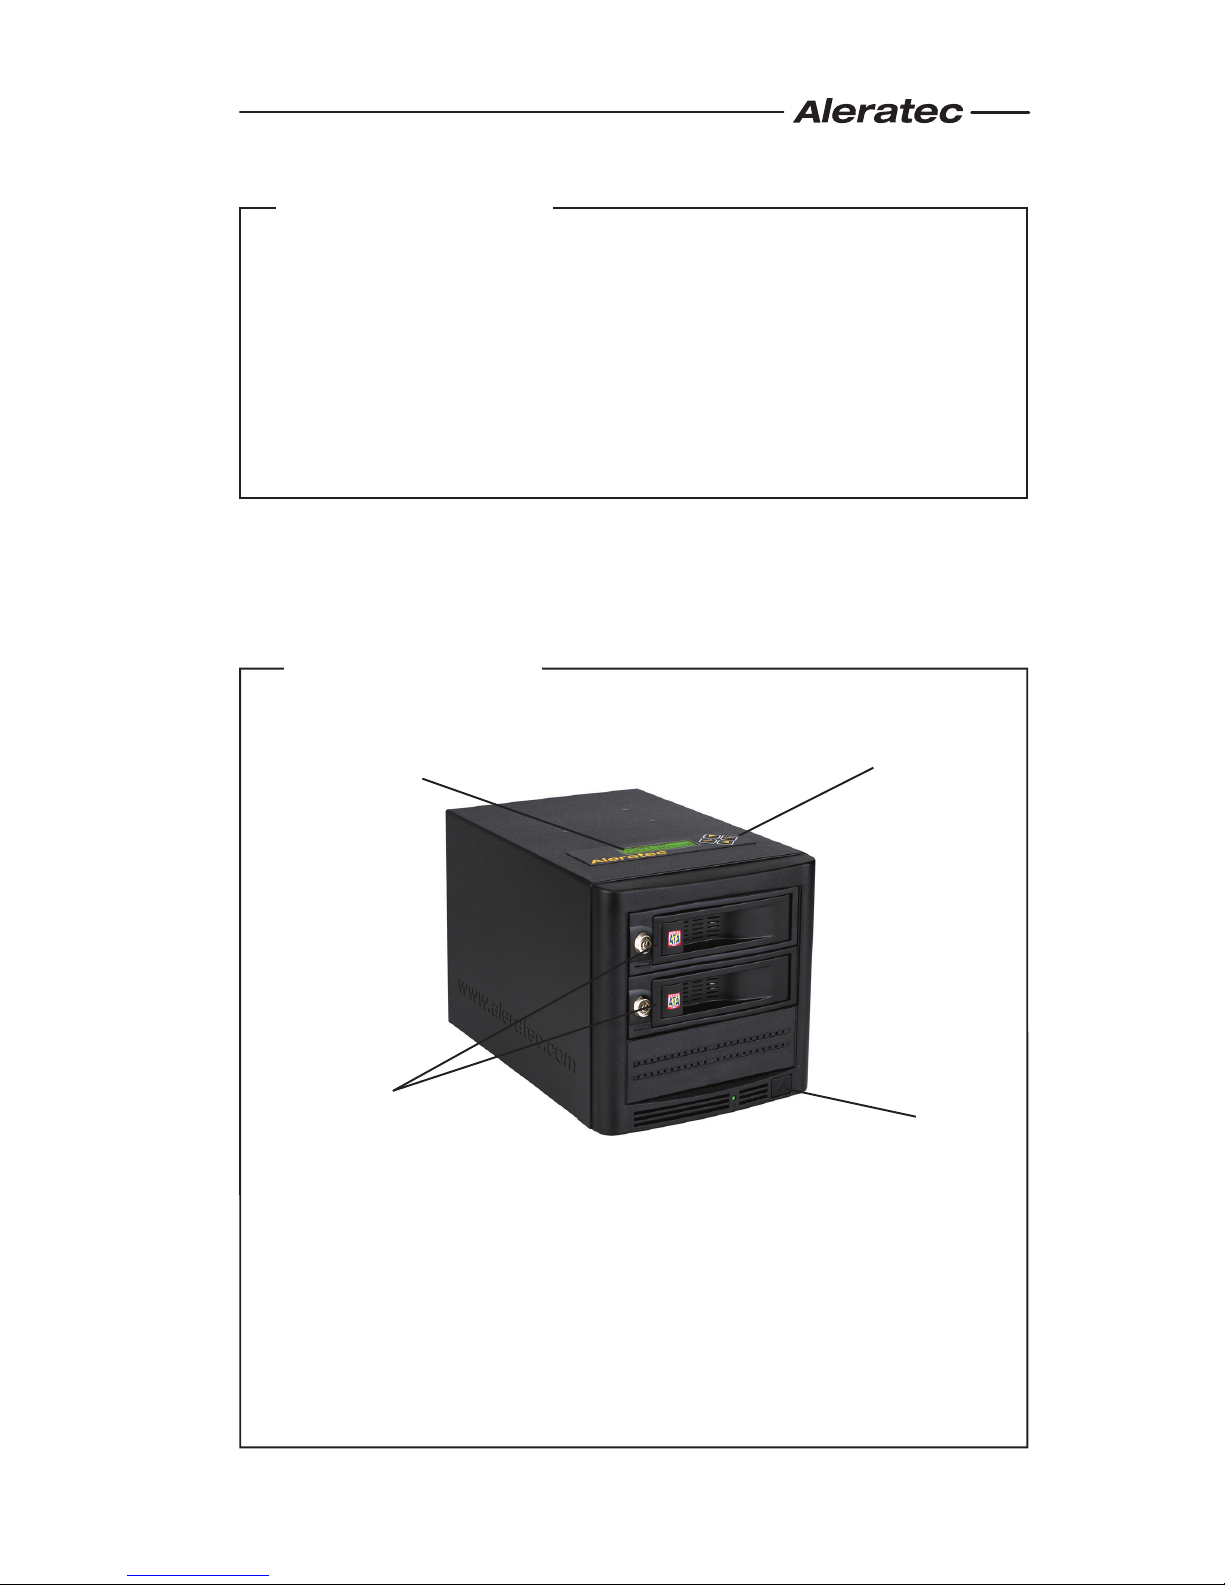
Key Items on the
1:1 HDD Cruiser
Note: Choose a Good Location
1. Allow adequate clearance for moving parts.
2. Do not place near heat sources such as radiators or air ducts, or
in a place subject to direct sunlight, excessive dust, mechanical
vibration or shock.
3. Good care will help assure maximum product life. Improper
operating environment and misuse may void the warranty.
Display Panel
(see page 3)
Power Switch
Controller
Drive Bays
(2)
www.aleratec.com
2
1
2
3
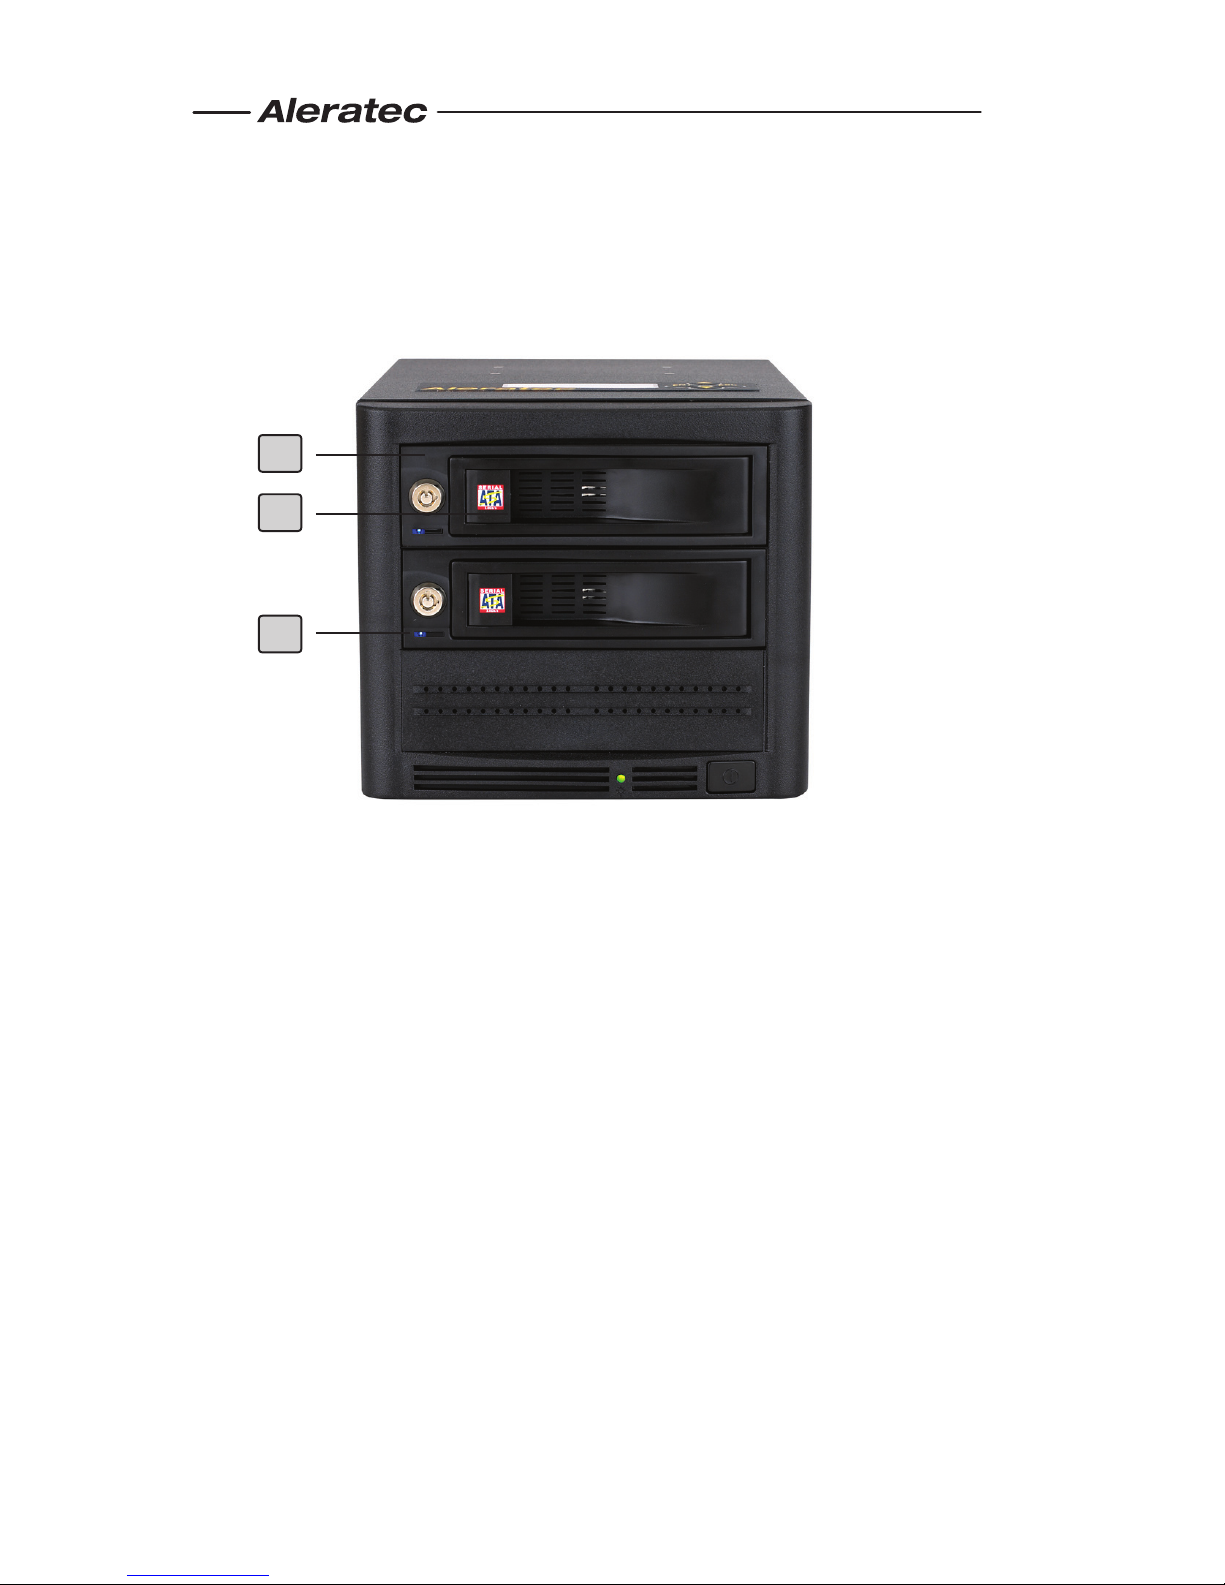
Introduction
1:1 HDD Cruiser Front Panel
1 Drive Bays
Drive bays with quick loading doors.
2 Drive Bay Door
The drive bay handle/tab is used to open the individual drive bays.
3 Drive LEDs
Each HDD bay has a blue power light that will be on when there is an HDD
properly inserted in the drive bay.
Each HDD bay has an orange drive activity light that will light when the HDD
is being used. Do not remove a drive when this light is on, otherwise you may
loose your data.

www.aleratec.com 3
Introduction
1:1 HDD Cruiser Copy Controller Display Panel and Buttons
(Actual display may vary from illustration)
1. LCD display shows all functions and messages
2. ENT button is used to execute a selected function, or enter a menu
3. ESC button is used to cancel a selected function, or exit a menu
4. UP arrow is used to scroll backward through functions or menus
5. DOWN arrow is used to scroll forward through functions or menus
ENT
1. Copy HDD
4
13
5
2
ESC

www.aleratec.com
4
Precautions
Before installing you 1:1 HDD Cruiser, please read the following.
Installation
Avoid placing the 1:1 HDD Cruiser in a location subject to:
• High humidity
• High temperature
• Excessive dust
• Mechanical vibration
• Direct sunlight
• Electromagnetic radiation
Transportation
Keep the original packing materials for future moving or shipping of the 1:1
HDD Cruiser.
www.aleratec.com 5
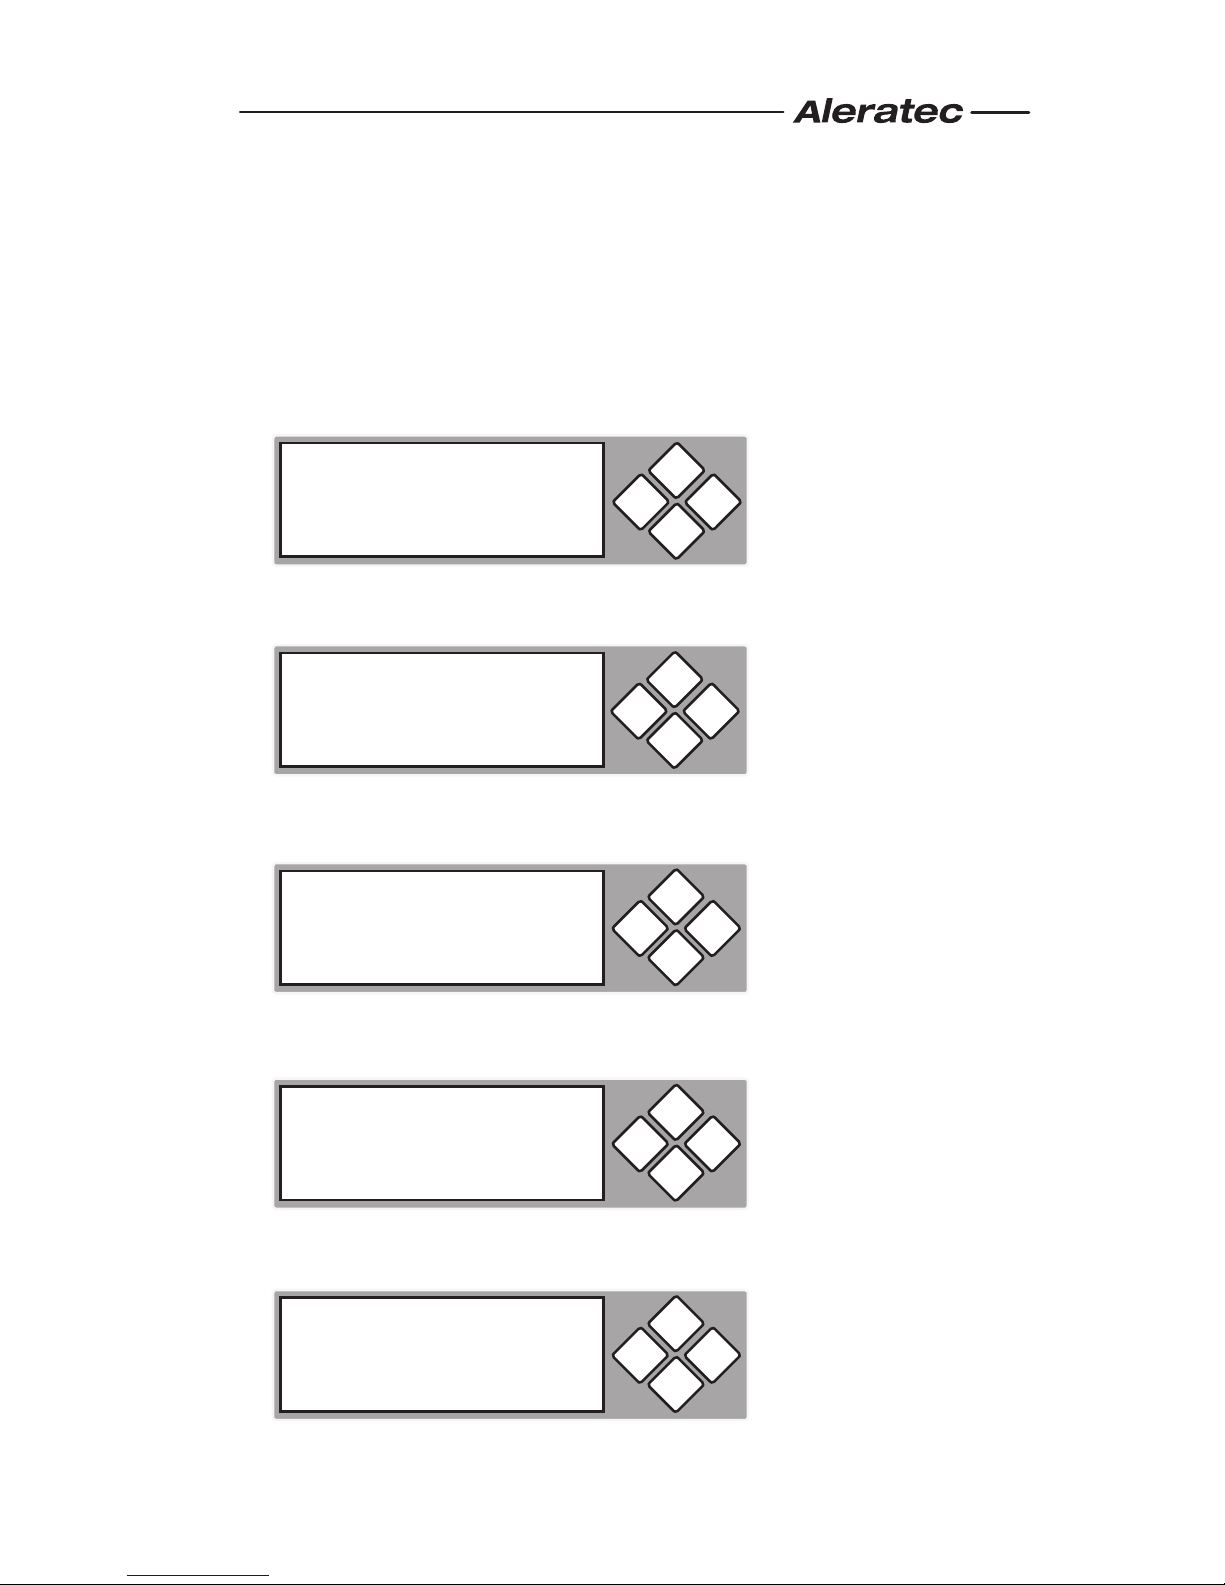
Overview
Power Up Sequence
During the normal power-up sequence of the 1:1 HDD Cruiser, the following
information will be displayed.
• Figure 1 shows the rmware version
• Figure 2 shows the memory initialization
• Figure 3 shows the scanning of the drives
• Figure 4 shows the number of drives loaded.
• Figure 5 shows the rst function.
ENT ESC
HDD Cruiser
2051F ver:A.14H
Initialize SDRAM
ENT ESC
Detect Drives
Please wait... ENT ESC
Detect Drives
Found 0 Devices ENT ESC
1. Copy HDD
ENT ESC
www.aleratec.com
6
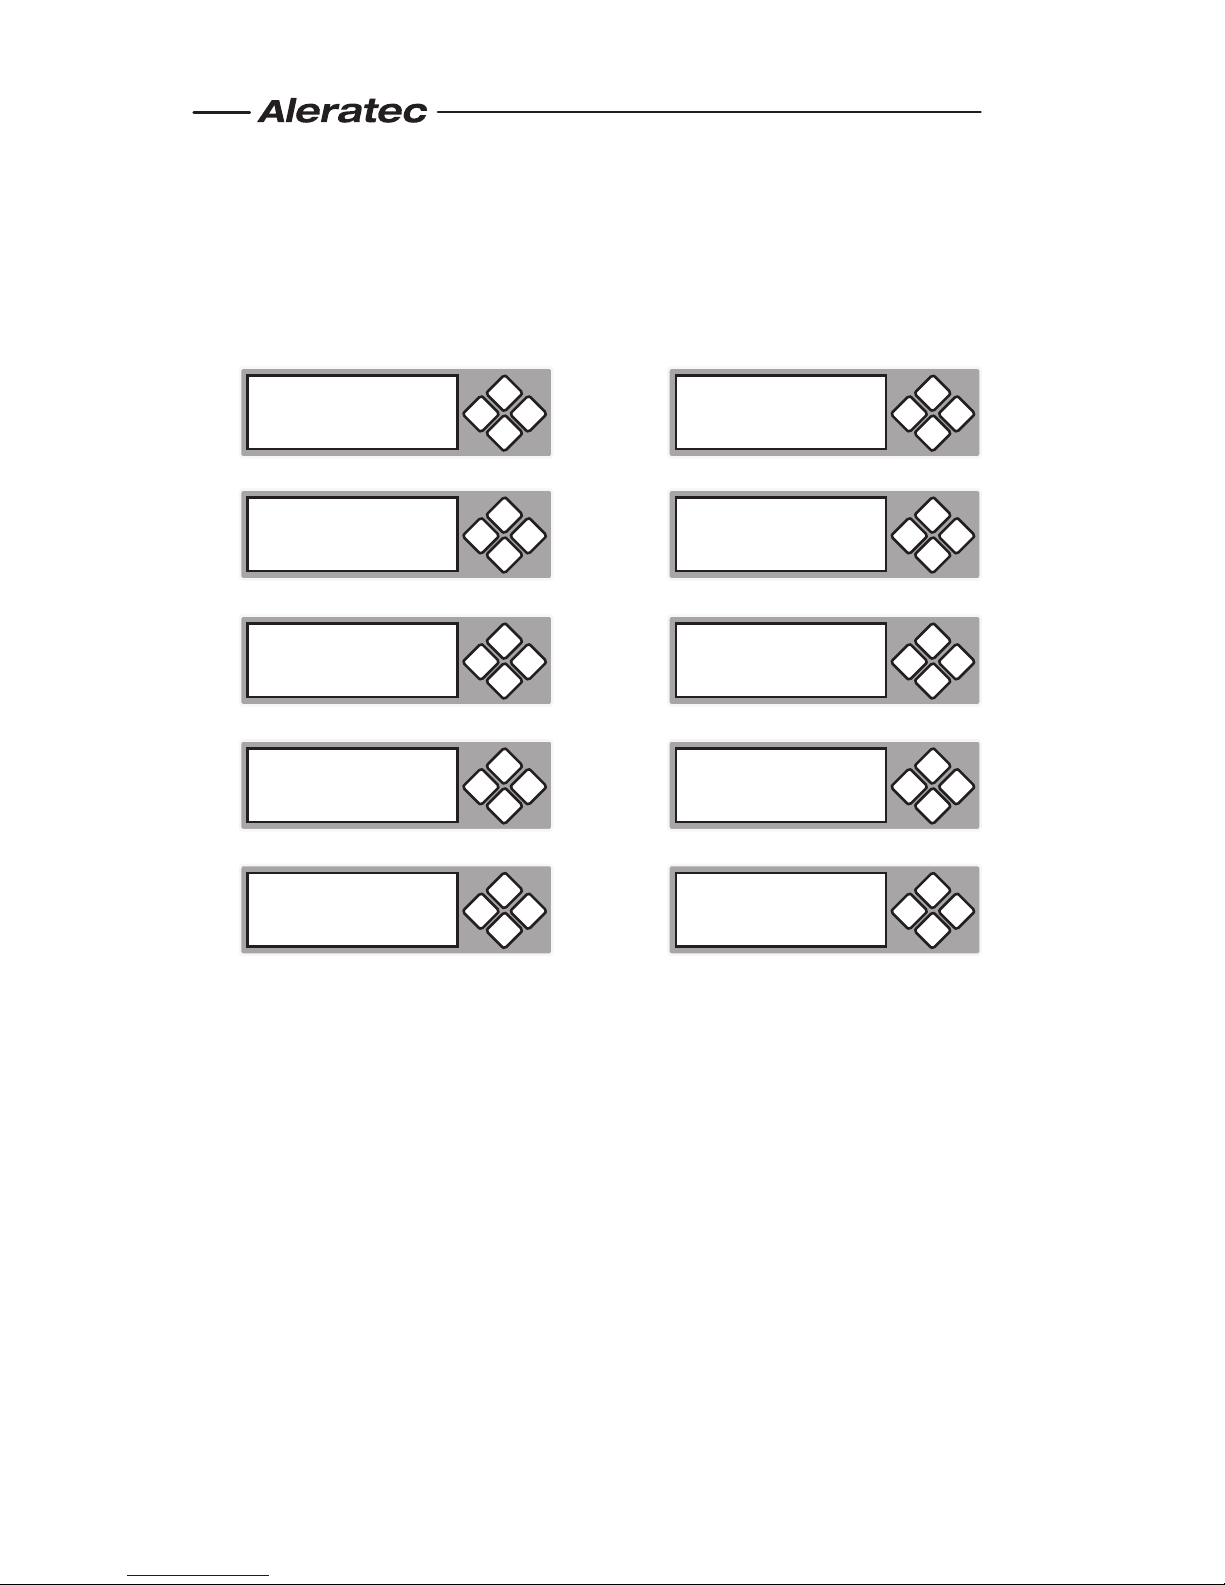
Overview
Main Menu
There are ten main menu items that can be seen in the 1:1 HDD Cruiser Copy
Controller Display Panel. These are:
1.
2.
3.
4.
5.
Note: The Advanced Setup function is a hidden menu. To access this
menu, press ESC for 3 seconds. After you have completed any desired
adjustments, press ESC to exit Advanced Setup.
ENT
1. Copy HDD
ESC
ENT ESC
2. Compare HDD
ENT ESC
3. PreScan Source
ENT ESC
4. ReScan Bus
ENT ESC
5. Source Size
ENT
6. Secure Erase
ESC
ENT ESC
7. Overwrite
ENT ESC
8. Setup
ENT ESC
9. USB Mode
ENT ESC
10. Adv Setup
6.
7.
8.
9.
10.

www.aleratec.com 7
Overview
Subfunctions
The “Setup” menu has nine (9) subfunctions. These are:
8-03 Startup Menu
8-04 Auto Compare
8-05 Copy with Size
8-06 Button Sound
8-07 Device Info
8-08 System Info
8-09 Fast Copy
ENT ESC
8. Setup
8-01 Language
8-02 Copy Size

www.aleratec.com
8
Overview
The “Advanced Setup” menu has ten (10) subfunctions. These are:
10-01 Detect HDD Delay
10-02 Read Error Skip
10-03 Update Firmware
10-04 Compare Firmware
10-05 Quick Erase HDD
10-06 H/W Diagnostic
10-07 Load Default
10-08 Link Option
10-09 USB Auto Link
10-10 Copy HPA
ENT ESC
10. Adv Setup
(for USB Mode)
www.aleratec.com 9
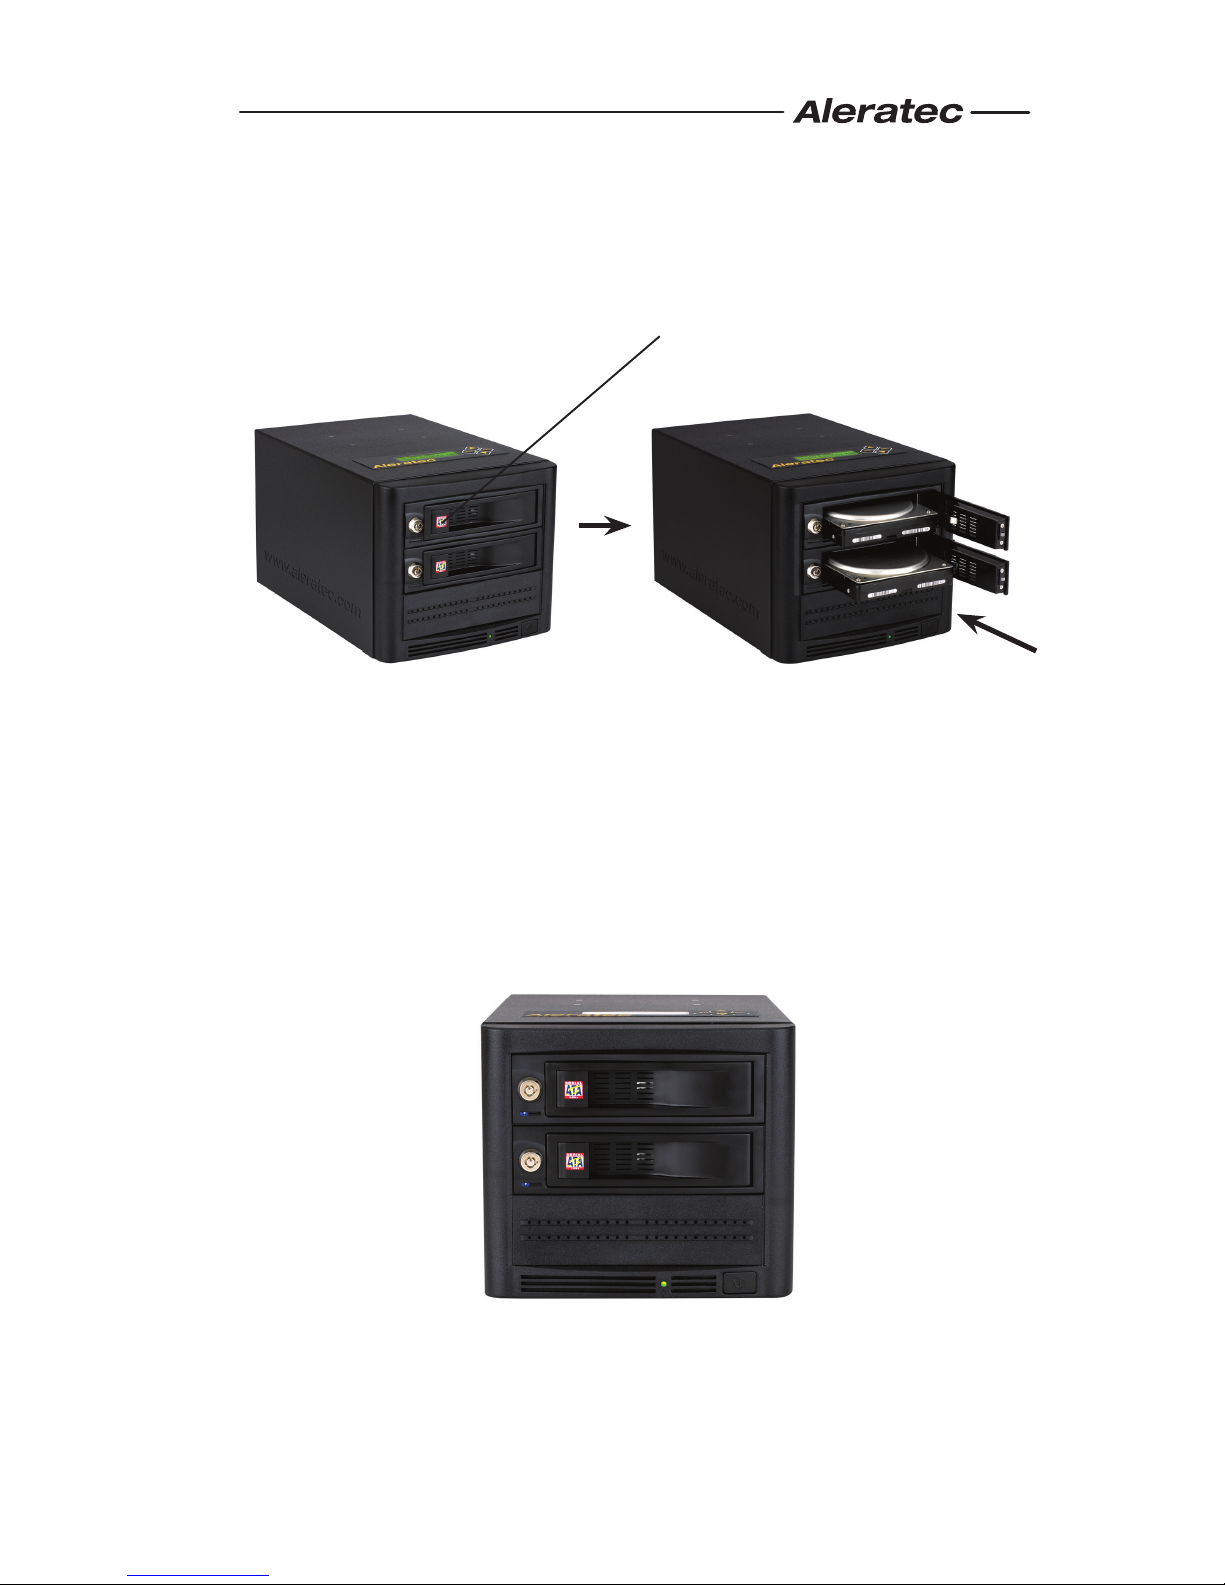
Using the 1:1 HDD Cruiser
Loading the Hard Drives
1. Open the drive tray doors by lifting the tab on the left side of each drive bay
you wish to use.
2. Take the Hard Disc Drive (HDD) and align the drive’s SATA plug to the lower
right hand side of the drive bay.
3. Slide the HDD into the drive bay until it stops. The drive will still be about 1
inch outside of the bay. When the door is closed it will push and plug the HDD
into the duplicator.
4. Swing the drive bay door closed and press the left side of the door until the tab
latches. When it latches, a click can be felt and heard.
Note: If you are duplicating, the source hard disc drive goes in the top bay.

www.aleratec.com
10
Using the 1:1 HDD Cruiser
Removing hard Drives
1. Open the drive tray doors by pulling the handle/tab on the left side of each
drive tray door.
Note: Do not attempt to remove the hard drive if the drive activity LED
is on.
2. To disengage the HDD, swing the drive tray door to the full open position.
3. Pull drive out toward you, and remove drive.

www.aleratec.com 11
Technical Support Addresses and
Phone Numbers
►By e-mail: [email protected]
►By Telephone: 1-818-678-0484
Technical Support Group can be reached 8:00 AM to 5:00 PM, Pacific
Time, Monday through Friday, excluding U.S. holidays.
Please try to call from a phone near your computer system.
►Access is available 24 hours a day, 365 days a year, via:
The World Wide Web at: www.aleratec.com
FAX at: 1-818-678-0483

Notes:
www.aleratec.com

Notes:
www.aleratec.com

Document Number: 9299060_ENG_Rev. J Copyright © 2010
Specifications subject to change without notice.
Aleratec, Inc.
9851 Owensmouth Avenue
Chatsworth, CA 91311 U.S.A.
www.aleratec.com
Other manuals for 1:1 HDD Cruiser
1
Table of contents
Other Aleratec Storage manuals


Popular Storage manuals by other brands


Asus
Asus Leather External HDD USB 3.0 user manual

Medion
Medion P83790 user manual

Seagate
Seagate IRONWOLF NAS ST14000VN0008 product manual

Buffalo
Buffalo DriveStation Combo Specifications

Thermo Scientific
Thermo Scientific Cryo 740 Series Operating and maintenance manual

Seagate
Seagate Constellation ES.3 ST4000NM0033 product manual