All Pond Solutions AQUAFLO-PP User manual

VARIABLE FREQUENCY
POND PUMP
AQUAFLO-PP RANGE
Pompe de Bassin à Fréquence Variable
Filtro para Estanque de Frecuencia Variable
Teichpumpe mit Variabler Frequenz
Pompa per Laghetti a Frequenza Variabile

To ensure your new pond pump is set up and running correctly, and to prevent
any accidental damage or injury, please read and follow the below instructions
carefully before using your product.
SAFETY
Important! Disconnect the mains electricity supply before attempting any
installation / maintenance of any kind. Do not attempt to modify this unit in
any way and only use the recommended parts for replacement.
ŸThe pond pump should never be run dry as this will cause the unit to
overheat and cause permanent damage. The pump must be fully immersed
completely and never operated outside of water.
Ÿ All connections must be earthed.
ŸIf the unit shows any signs of water leakage, or if the RCD switches off,
disconnect from the mains and remove the pump from the water.
ŸThe power cord of this appliance cannot be replaced; if the cord is damaged,
the appliance should be discarded. Never cut the cord.
ŸDo not connect to any voltage other than that stated.
ŸDo not install or store this unit where it will be exposed to temperatures
below freezing. During adverse weather conditions, remove and store the
pump in a sheltered place away from direct sunlight.
ŸThis pump is suitable for outdoor ponds only. Do not place in liquids other
than fresh water.
ŸDo not use this pump for anything other than its intended use (i.e. do not use
in bathrooms, swimming pools etc).
ŸDo not use with water above 90F or 30C.
ŸDo not carry or pull the unit by its electrical cable.
ŸDo not use this unit if it has a damaged cord, if it is malfunctioning or it is
dropped or damaged in any manner
ŸDo not attempt to modify this unit in any way and only use attachments and
the recommended parts for replacement recommended by the
manufacturer.
ŸBefore installing, maintaining or handling your equipment, or before placing
your hands in your pond, ensure that the unit is disconnected from the
electricity supply.

ŸAlways disconnect any electrical devices when not in use.
ŸCarefully examine your filter after installation. Do not connect the unit to the
mains if there is water on any parts not intended to be wet.
ŸBefore operating the pond pump observe that water is flowing through it -
the UV requires constant flow to avoid overheating.
ŸTo avoid injury, do not touch any moving or hot parts.
ELECTRIC
This unit comes complete with a generous supply of 3 core cable, however
should any additional cable be required, the use of an approved waterproof
cable connector with a proper rating is essential. A cord rated for less amperes or
watts than the appliance rating may overheat.
Please Ensure:
· The power supply must be earthed and fused at 3amps.
· You regularly inspect the cable for damage and deterioration.
· Do not connect to any voltage other than that stated.
· A residential current device (RCD) is used for additional safety
· You have complied with Local Electricity Authority regulations if permanently
installing to the mains supply.
Please Ensure: The power supply must be earthed and fused at 3amps.
Regularly inspect the cable for damage and deterioration. Consult a qualified
electrician if in doubt about any aspects of wiring.
OPERATION GUIDE
IMPORTANT - Do not plug in the pump before it is correctly and fully installed.
Connect inlet / outlet to filter system or water feature if desired. Connect a
flexible hose (not included) to the hosetail provided. If necessary, cut the
hosetail at the required size by using a small hack saw to allow the hose to fit
correctly.
Securely position the pump on a raised, flat and stable surface in your pond
ensuring it is fully submerged.
Connect unit to the power supply.

Connect the pump with the controller and lock the nut in place (see images
below)
Connect the power supply of the controller. Ensure the controller is kept in an
upright position.
Controller Operation
SWITCHING ON OR OFF
Plug in the controller and press to switch the pump on or
off.
FLOW RATE ADJUSTER
Press or to adjust the flow rate. There are 10 levels
available and the screen will show SP-01 to SP-10.
LEVEL
POWER
FLOW RATE
HEAD
SP-01
80w
13000 L/H
2.8m
SPO-02
100w
14000 L/H
3.4m
SPO-03
130w
15500 L/H
4.0m
SPO-04
160w
17000 L/H
4.5m
SPO-05
200w
18000 L/H
5.1m
SPO-06
240w
19000 L/H
5.8m
SPO-07
285w
20500 L/H
6.5m
SPO-08
335w
22000 L/H
7.2m
SPO-09
380w
23500 L/H
7.8m
SPO-10
450w
26000 L/H
8.5m

FEEDING MODE
Press and hold for 3 seconds to enter time delay start mode, and Fd10 will
appear on the screen. The devise will start to work after ten minutes. Press and
hold for 3 seconds to exit feeding mode.
LOCK FUNCTION
Press and hold to lock the keys - LOC will appear on the screen. Press and
hold to unlock the keys.
AUTOMATIC MEMORY FUNCTION
If the power to the controller is accidentally switched off, the unit will recover
the last settings when the controller is switched back on.
ERROR REPORT
if the pump is run dry without water for more than 30 seconds, the unit will
temporarily switch off, attempting to restart after 3 seconds. This will repeat 5
times before power to the unit will shut off completely.
Er03 - this will display on the screen when the pump has been
automatically stopped.
Er02 - this will display if the pump stops working due to a blockage.
CODE
DEFINITION
STATUS
TROUBLESHOOT
P000
Power
Normal
Sp01 - 10
Flow Rate Level
Normal
Fd10-01
Feeding Mode
Normal
_LOC
Lock
Normal
Er01
Over or Under Voltage
Warning
Check the voltage is
corect
Er02
Pump Lock Protection
Warning
Check for blockage in the
pump
Er03
Pump Idling Protection
Warning
1. Check if the pump is
being run dry
2. Check wihether there is
air in the pump
Er04
Overheating
Warning
Clean the pump
Er05
Short Circuit Current
Warning
Check the controller

PARTS DIAGRAM
FIXING SCREWS M6X40
15
16
17
BODY
FILTER BASKET FIXING SCREWS M6X35
OUTLET BODY O-RING
O-RING PUMP COVER
IMPELLER HOUSING FIXING SCREWS X20
IMPELLER GUARD BASE PLATE
IMPELLER FIXING SCREWS M6X16
IMPELLER O-RING FIXING SCREWS M6X45
BEARING

MAINTENANCE
To ensure optimal performance and that your unit functions correctly, regular
maintenance is essential. Failure to do so may result in damage to your unit and
may invalidate your warranty.
We recommend that a regular cleaning and maintenance schedule is followed to
ensure responsible fishkeeping. Depending on water volume and stocking levels,
regular inspection, cleaning and replacement of o-rings, impellers and
inlet/outlet pipework will help ensure that the product works efficiently and your
pond remains healthy.
For further maintenance guidance, please see the table and additional
information:
1 MONTH
3 MONTHS
6 MONTHS
ANNUALLY
All Pipework
Clean & Inspect
Hosing
Clean & Inspect
O-Rings
Clean & Inspect
Lubricate &
Clean
Replace
Impeller
Clean & Inspect
Replace
Filter Basket
Clean & Inspect
After a period of use, it is common for debris to collect in your impeller. It is
important to clean and inspect your impeller regularly as a blockage will not only
reduce the effectiveness of your pump, but can cause long-lasting damage to
the unit.
IMPORTANT - Before carrying out any maintenance, ensure the unit is not
connected to the power supply.
Use a screw driver to remove the 4 screws from the filter basket (image 1) and
2 screws from the base plate (image 2). The unit will then appear as per image
3.
Use a screw driver to remove the 4 screws from the impeller housing (image
4). The unit will then appear as per image 5.
Cleaning Your Impeller

Remove the impeller from the body of the pump - clean and replace if
required.
Reassemble the pump and return to your pond
Reconnect to the power supply.
Protection From Frost Damage
To protect the unit from frost during the winter months, disconnect from your
water and electricity supplies and store indoors during the winter.
Once you have removed the unit from your pond, let the pump run in a vessel of
clean water for a few minutes. Next, clean and dry the unit, before storing out of
direct sunlight.
It is vital that O-rings are regularly inspected and replaced as the rubber
watertight seal will perish over time, which may cause your unit to leak. Before
replacing your o-rings, ensure they are well lubricated.
O-rings

TROUBLESHOOTING
If your pump is making excess noise, this is normally caused by the following:
1. Debris has collected inside the pump
2. The ceramic shaft is worn or broken
The Pump is Noisy
ŸRemove your pump from your pond to clean / remove any debris
ŸInspect the ceramic shaft for any damage and replace if necessary.
If water is not flowing through your pump correctly, this could be caused by:
1. Damage to the impeller
2. An inlet or outlet obstruction.
3. An obstruction in the filter basket.
4. Low voltage to the unit.
Water Is Not Flowing Through The Pump
ŸClean and inspect the impeller (see maintenance section) and replace if
required.
ŸRemove any blockages from the inlet/outlet and filter basket.
ŸCheck the voltage being supplied to your unit.
If your pump will not run, this could be due to the following causes:
1. It is not connected to a power supply
2. The pump is not fully submersed and is being run dry.
3. The pump is not connected to the controller.
4. The controller is damaged
The Pump Is Not Running Correctly
ŸCheck that the unit is correctly connected to the power supply and the RCD
unit is not faulty.
ŸEnsure that the pump is fully submersed in your pond and filled with water.
ŸEnsure that the controller is correctly connected to the pump. If it is
connected but still not working, contact the supplier of your unit for further
troubleshooting or replacement.

SPECIFICATION
Max Flow Rate
Power
Max Height
Frequency
26000 Litres per hour
60-440W
8.5m
50Hz
Hose Adapter
Cable Length
32 / 38 / 50mm
10m
Dimensions 470x176x240mm
Voltage 220V/240V

The All Pond Solutions AQUAFLO-PP range is guaranteed against defects in
material or workmanship under normal pond usage and comes with 24 months
warranty for all electrical parts. The warranty period commences from the date
of purchase.
If you require support on how to use your unit, replacement parts or if your unit
develops a fault during the warranty period, please contact the supplier of your
unit.
Non-replaceable, non-perishable and non-serviceable parts will be repaired or
replaced free of charge, once the unit is returned with all components along
with a valid proof of purchase and postage paid. We reserve the right to replace
or repair the unit at our discretion.
Please be aware that perishable parts that are subject to normal wear and tear,
such as o-rings, quartz sleeves and UV bulbs, are not covered by your warranty
and a charge may be required for replacements of these.
This warranty does not apply to any unit that has been subjected to misuse,
accidental damage, negligence, tampering or customisation. It does not apply
to units which have been assembled incorrectly, improperly maintained, or
where the instructions and safety information in this manual has not been
followed correctly.
No liability is assumed with respect to loss or damage to livestock or personal
property irrespective of the cause thereof.
Please ensure that only genuine All Pond Solutions components are used when
completing a replacement or repair. Spare parts are available at our official
website or from your local supplier.
Before returning your unit under warranty terms, check that all setup and
maintenance instructions have been correctly followed. If you are in doubt,
please contact your local aquatic retailer for further advice before returning the
product.
This does not affect your statutory rights.
WARRANTY

Pour vous assurer que votre nouvelle pompe de bassin soit bien configurée et
fonctionne correctement et pour éviter tout dommage accidentel ou toute
blessure, veuillez lire et suivre attentivement les instructions ci-dessous avant
d'utiliser votre produit.
SÉCURITÉ
Important! Débranchez l'alimentation électrique du secteur avant de tenter
toute installation / maintenance de quelque nature que ce soit. N'essayez
en aucun cas de modifier cet appareil et utilisez uniquement les pièces
recommandées.
ŸLa pompe de bassin ne doit jamais fonctionner à sec, cela pourrait entraîner
une surchauffe de l'appareil et des dommages permanents. La pompe doit
être complètement immergée et ne doit jamais fonctionner en dehors de
l'eau.
ŸToutes les connexions doivent être branchées sur une prise de terre.
ŸSi l'appareil présente des signes de fuite d'eau ou si le différentiel s'arrête,
débranchez-le du secteur et retirez la pompe de l'eau.
ŸLe cordon d'alimentation de cet appareil ne peut pas être remplacé. Si le
cordon est endommagé, l'appareil doit être mis au rebut. Ne jamais couper
le cordon.
ŸNe pas connecter à une tension autre que celle indiquée.
ŸNe pas installer ou stocker cet appareil dans un endroit où il sera exposé à
des températures inférieures au gel. Lors de conditions météorologiques
difficiles, retirez la pompe et mettez-la dans un endroit à l'abri de la lumière
directe du soleil.
ŸCette pompe convient uniquement aux bassins extérieurs. Ne pas placer
dans des liquides autres que de l'eau douce.
ŸNe pas utiliser cette pompe à des fins autres que celles prévues (à savoir, ne
pas utiliser dans les salles de bain, les piscines, etc.).
ŸNe pas utiliser avec une eau supérieure à 90F ou 30C.
ŸNe transportez pas et ne tirez pas l'appareil par son câble électrique.
ŸN'utilisez pas cet appareil si son cordon est endommagé, s'il fonctionne mal
ou s'il est tombé ou est endommagé de quelque manière que ce soit.
ŸN'essayez pas de modifier cet appareil de quelque manière que ce soit et
utilisez uniquement les accessoires et les pièces recommandées pour le
remplacement recommandé par le fabricant.
ŸAvant d'installer, d'entretenir ou de manipuler votre équipement, ou avant de
placer vos mains dans votre bassin, assurez-vous que l'appareil soit bien
débranché de l'alimentation électrique.

ŸToujours débrancher tout appareil électrique lorsqu'il n'est pas utilisé.
ŸExaminez attentivement votre filtre après l'installation. Ne connectez pas
l'appareil au secteur s'il y a de l'eau sur des pièces qui ne sont pas conçues
pour être mouillées.
ŸAvant de faire fonctionner la pompe, assurez-vous que l'eau y circule - les
UV nécessitent un débit constant pour éviter toute surchauffe.
ŸPour éviter les blessures, ne touchez aucune pièce en mouvement ou
chaude.
ÉLECTRIQUE
Cette unité est livrée avec un large choix de câbles à 3 conducteurs. Toutefois, si
vous avez besoin de câbles supplémentaires, il est essentiel d'utiliser un
connecteur de câble étanche homologué avec une classification appropriée. Un
cordon conçu pour des ampères ou des watts inférieurs à ceux de l'appareil peut
surchauffer.
Veillez à ce que :
Ÿ L'alimentation soit être mise à la terre et fusionnée à 3 ampères.
Ÿ Vous inspectez régulièrement le câble à la recherche de dommages et de
détérioration.
Ÿ Ne pas connecter à une tension autre que celle indiquée.
Ÿ Un dispositif de courant résidentiel (RCD) est utilisé pour plus de sécurité
Ÿ Vous vous êtes conformé aux réglementations de l'Autorité locale de
l'électricité pour une installation permanente sur le secteur.
Veillez à ce que : L'alimentation soit être mise à la terre et protégée par un
fusible à 3 ampères. Inspectez régulièrement le câble à la recherche de
dommages et de détérioration. Consultez un électricien qualifié en cas de doute
sur un aspect quelconque du câblage.
GUIDE D'OPÉRATION
IMPORTANT - Ne branchez pas la pompe avant qu'elle ne soit correctement et
complètement installée.
Connectez l'entrée / la sortie au système de filtrage ou à la fonction bassin si
vous le souhaitez. Raccordez un tuyau flexible (non inclus) à la gaine
d'étanchéité fournie. Si nécessaire, coupez le bec à cran à la taille requise en
utilisant une petite scie à métaux pour permettre au tuyau de s'adapter
correctement.
Positionnez fermement la pompe sur une surface surélevée, plane et stable
dans votre bassin en vous assurant qu'elle soit complètement immergée.
Branchez l'appareil.

ALLUMER OU ÉTEINDRE
Branchez le contrôleur et appuyez sur pour allumer ou
éteindre la pompe
REGULATEUR DE DEBIT
Appuyez sur ou pour régler le débit. Il y a 10 niveaux
disponibles qui seront visible à l'écran : SP-01 à SP-10.
Connectez la pompe au contrôleur et verrouillez l'écrou (voir les images ci-
dessous)
Branchez l'alimentation du contrôleur. Assurez-vous que le contrôleur soit
maintenu en position verticale.
Fonctionnement du Contrôleur
NIVEAU
PUISSANCE
DEBIT MAX
HAUTEUR
SP-01
80w
13000 L/H
2.8m
SPO-02
100w
14000 L/H
3.4m
SPO-03
130w
15500 L/H
4.0m
SPO-04
160w
17000 L/H
4.5m
SPO-05
200w
18000 L/H
5.1m
SPO-06
240w
19000 L/H
5.8m
SPO-07
285w
20500 L/H
6.5m
SPO-08
335w
22000 L/H
7.2m
SPO-09
380w
23500 L/H
7.8m
SPO-10
450w
26000 L/H
8.5m

MODE ALIMENTATION
Maintenez la touche enfoncée pendant 3 secondes pour passer en mode
de démarrage différé. Fd10 apparaît alors à l'écran. Le système commencera à
fonctionner au bout de dix minutes. Appuyez et maintenez enfoncé
pendant 3 secondes pour quitter le mode
FONCTION VERROUILLAGE
Appuyez et maintenez enfoncé pour verrouiller les touches - LOC
apparaîtra à l'écran. Appuyez et maintenez pour déverrouiller les touches.
FONCTION MÉMOIRE AUTOMATIQUE
Si le contrôleur est mis hors tension par inadvertance, l'unité récupère les
derniers réglages lors de la remise sous tension du contrôleur.
RAPPORT D'ERREUR
Si la pompe tourne à sec (sans eau) pendant plus de 30 secondes, l'unité
s'éteint temporairement et tente de redémarrer après 3 secondes. Cela se
répète 5 fois avant que l'appareil ne s'éteigne complètement.
CODE
DÉFINITION
STATUT
DÉPANNAGE
P000
Alimentation
Normal
Sp01 - 10
Niveau de Débit
Normal
Fd10-01
Mode Alimentation
Normal
_LOC
Verrouillage
Normal
Er01
Sur ou Sous Tension
Alerte
Vérifiez que le voltage soit
correcte
Er02
Protection de
Verrouillage de Pompe
Alerte
Vérifiez s'il y a un blocage
dans la pompe
Er03
Protection de la Pompe
au Ralenti
Alerte
1. Vérifiez si la pompe
fonctionne à sec
2. Vérifiez s'il y a de l'air
dans la pompe
Er04
Surchauffe
Alerte
Nettoyez la pompe
Er05
Courant en Court-Circuit
Alerte
Vérifiez le contrôleur

DIAGRAMME DES PIECES
VIS DE FIXATION M6 X 40
15
16
17
CORPS
PANIER-FILTRE VIS DE FIXATION M6 X 35
SORTIE JOINT TORIQUE CORPS
JOINT TORIQUE COUVERCLE DE POMPE
CARTER DE TURBINE VIS DE FIXATION WS X 20
GARDE DE TURBINE PLAQUE DE BASE
TURBINE VIS DE FIXATION M6 X 16
JOINT TORIQUE VIS DE FIXATION M6 X 45
PALIER

ENTRETIEN
Pour assurer des performances optimales et le bon fonctionnement de votre
appareil, un entretien régulier est essentiel. Dans le cas contraire, cela pourrait
endommager votre appareil et annuler votre garantie.
Nous vous recommandons de suivre un programme de nettoyage et d'entretien
régulier pour assurer un bassin propre. En fonction du volume d'eau et des
niveaux de stockage, une inspection régulière, le nettoyage et le remplacement
des joints toriques, de la turbine et de la tuyauterie d'entrée / de sortie
contribueront à l'efficacité du produit et à la santé de votre bassin.
Pour plus de conseils sur la maintenance, veuillez vous reporter au tableau et
aux informations supplémentaires :
1 MOIS
3 MOIS
6 MOIS
TOUT LES ANS
Toutes les
tuyauteries
Nettoyer et
inspecter
Conduit
Nettoyer et
inspecter
Joints toriques
Nettoyer et
inspecter
Lubrifier et
nettoyer
Remplacer
Turbines
Nettoyer et
inspecter
Remplacer
Panier-filtre
Nettoyer et
inspecter
Après une période d'utilisation, il est courant que des débris s'accumulent dans
votre roue. Il est important de nettoyer et d'inspecter votre turbine régulièrement
car un blocage ne réduirait pas seulement l'efficacité de votre pompe, mais
pourrait également l'endommager durablement.
IMPORTANT - Avant de procéder à toute opération de maintenance, assurez-
vous que l'unité ne soit pas sous tension.
Utilisez un tournevis pour retirer les 4 vis du panier-filtre (image 1) et les 2 vis
de la plaque de base (image 2). L'unité apparaîtra alors comme dans l'image
3.
Utilisez un tournevis pour retirer les 4 vis du carter de la turbine(image 4).
L'unité apparaîtra alors comme dans l'image 5.
Nettoyer Votre Turbine

Retirez la turbine du corps de la pompe - nettoyez-la et remplacez-la si
nécessaire.
Remontez la pompe et replacez-la dans votre étang
Branchez.
Protection Contre le Gel
Pour protéger l'appareil du gel pendant les mois d'hiver, débranchez-le de votre
alimentation en eau et en électricité et rangez-le à l'intérieur pendant l'hiver.
Une fois que vous avez retiré l'unité de votre étang, laissez la pompe
fonctionner dans un récipient d'eau propre pendant quelques minutes. Ensuite,
nettoyez et séchez l'appareil avant de le stocker à l'abri de la lumière directe du
soleil.
Il est essentiel que les joints toriques soient régulièrement inspectés et
remplacés, car le joint d'étanchéité en caoutchouc périra avec le temps, ce
qui pourrait entraîner une fuite de votre appareil. Avant de remplacer vos
joints toriques, assurez-vous qu'ils sont bien lubrifiés.
Joint Toriques

DÉPANNAGE
Si votre pompe produit un excès de bruit, ceci est normalement dû à :
1. Des débris se sont accumulés à l'intérieur de la pompe
2. La tige en céramique est usée ou cassée
La pompe est bruyante
ŸRetirez votre pompe de votre étang pour nettoyer / enlever les débris
ŸInspectez la tige en céramique pour tout dommage et remplacez-la si
nécessaire.
Si l'eau ne circule pas correctement dans votre pompe, ceci peut être causé par :
1. Dommages à la turbine
2. Une obstruction d'entrée ou de sortie.
3. Une obstruction dans le panier-filtre.
4. Basse tension à l'unité.
L'eau ne coule pas dans la pompe
ŸNettoyez et inspectez la turbine (voir la section maintenance) et remplacez-la
si nécessaire.
ŸEnlevez toute obstruction de l'entrée / sortie et du panier-filtre.
ŸVérifiez la tension fournie à votre appareil.
Si votre pompe ne fonctionne pas, vérifiez que :
1. La pompe soit bien connecté à une source d'alimentation
2. La pompe soit complètement immergée et ne fonctionne pas à sec.
3. La pompe soit bien connectée au contrôleur.
4. Le contrôleur ne soit pas endommagé
La pompe ne fonctionne pas correctement
ŸVérifiez que l'unité soit correctement connectée à l'alimentation et que l'unité
RCD ne soit pas défectueuse.
ŸAssurez-vous que la pompe soit complètement immergée dans votre bassin
et remplie d'eau.
ŸAssurez-vous que le contrôleur soit correctement connecté à la pompe. S'il
est connecté mais ne fonctionne toujours pas, contactez le fournisseur de
votre appareil pour un dépannage plus approfondi ou un remplacement.

SPÉCIFICATION
Debit Max (litres)
Puissance
Hauteur Maximale
Frequency
26000 Litres par heure
60-440W
8.5m
50Hz
Adapteur de Tuyau
Longueur du Cable
32 / 38 / 50mm
10m
Dimensions 470x176x240mm
Tension 220V/240V
Table of contents
Languages:
Other All Pond Solutions Pond Pump manuals
Popular Pond Pump manuals by other brands
Pontec
Pontec PondoTronic UVC 18 operating instructions
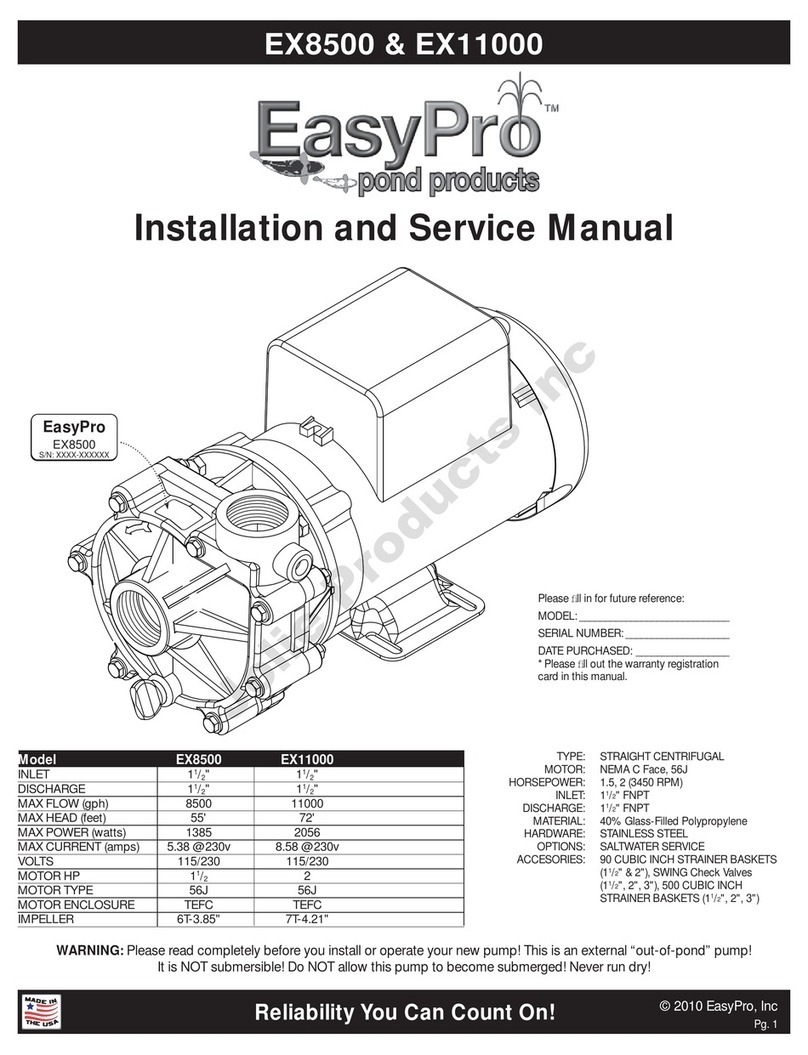
EasyPro
EasyPro EX11000 Installation and service manual
ubbink
ubbink AcquaArte Nova Scotia quick start guide
Exo Terra
Exo Terra REPTI FLO 200 instruction manual

TotalPond
TotalPond 52213 instruction manual
Fiap
Fiap profifeed SolarFeeder operating instructions


