ALLIANCE BL200-bt Administrator Guide

BL200-bt
HOW-TO
GUIDE

TABLE OF CONTENTS
Specications and Features.......................pg 3
How to Download the App .......................pg 4
Basic Functions.........................................pg 5
How to Create a Secured Network.........pgs 6-9
How to Name a Fixture ............................pg 10
How to Create a Group ......................pgs 12-14
Online video library available at:
www.allianceoutdoorlighting.com/bt-support
What’s in the Box?
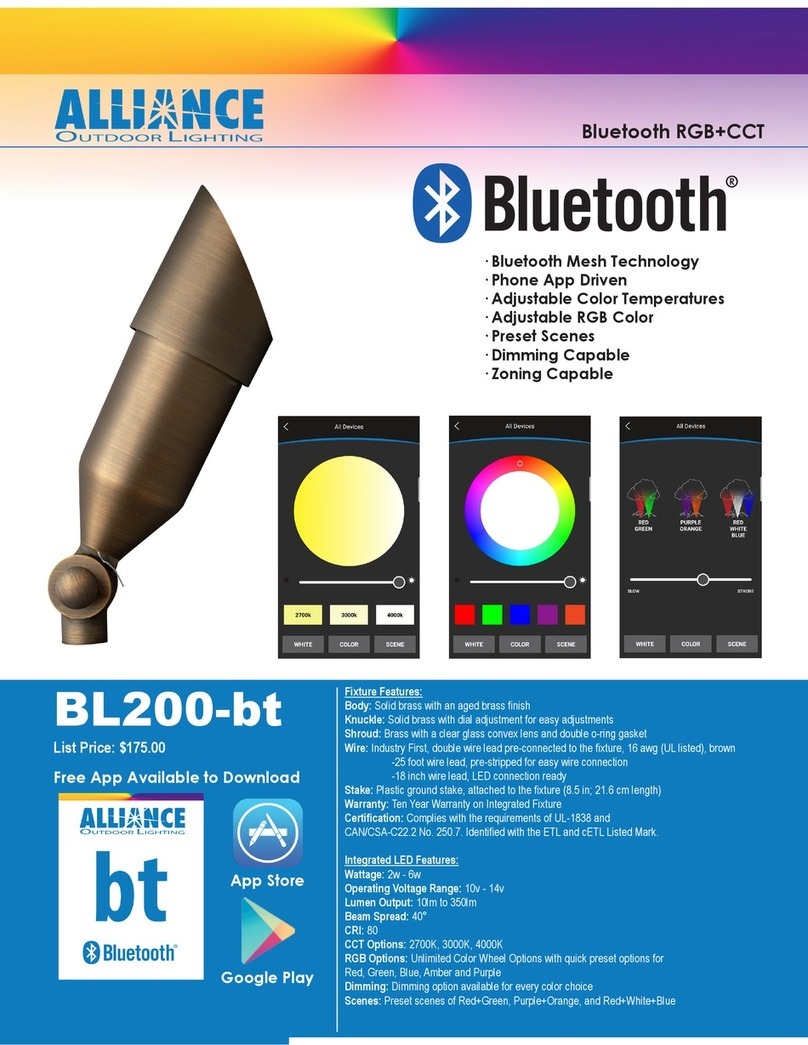
Fixture Features:
Body: Solid brass with an aged brass nish
Knuckle: Solid brass with dial for easy adjustments
Shroud: Brass with clear glass convex lens and double gasket
Wire: Industry First, double wire lead pre-connected to the
xture, 16 awg (UL listed), brown
-25 foot wire lead, pre-stripped for easy
wire connection
-18 inch wire lead, LED connection ready
Stake: Plastic ground stake, attached to the xture
Warranty: Ten Year Warranty on Integrated Fixture
Certication: Complies with the requirements of UL-1838 and
CAN/CSA-C22.2 No. 250.7. Identied with the ETL and cETL
Listed Mark.
Integrated LED Features:
Wattage: 2w - 6w
Operating Voltage Range: 10v - 14v
Lumen Output: 10lm to 350lm
Beam Spread: 40°
CRI: 80
CCT Options: 2700K, 3000K, 4000K
RGB Options: Unlimited Color Wheel Options with quick preset
options for Red, Green, Blue, Amber and Purple
Dimming: Dimming option available for every color choice
Scenes: Preset scenes of Red+Green, Purple+Orange, and
Red+White+Blue
7.25 in. (18.42 cm)
2.5 in. (6.35 cm)
1.75 in. (4.45cm)
3
· Bluetooth Mesh Technology
· Phone App Driven
· Tunable White
· Adjustable RGB Color
· Preset Scenes
· Dimming Capable
· Grouping Capable
· No Special Equipment Needed
· Ready To Install
· List Price: $175.00
bt

5
How to Download the App
Android QR Code
iOS QR Code
The bt app is available on the App Store for Apple devices and on the Google Play
Store for Android devices.
Search “Alliance bt” and download the app with the blue bt icon.
You can also scan the QR codes below to go straight to the download page.
App Store
Google Play
Basic Functions
Color temperature can be
adjusted with preset buttons
for 2700K, 3000K, and 4000K.
A color wheel can also be
used for more precise adjust-
ments. Dimming is adjusted
with an easy to use slider.
RGB colors can be selected
with preset buttons for red,
green, blue, purple and amber.
A RGB color wheel can also be
used to select additional colors.
Dimming is adjusted with an
easy to use slider.
Preset scenes can be selected
for seasons and holidays. The
time it takes for each scene to
cycle colors can be adjusted
with an easy to use slider.
Tunable White RGB Colors Holiday Scenes

All About Secured Networks
A secured network ensures that only those with permission
can access the lighting system. The lighting system functions
whether it is on a secured network or not, so it is entirely up to
the end user whether they want to have their lighting system
on a secured network or not.
Once a xture has been added to a secured network, that
xture is now locked into that secured network and will not
be able to be controlled from the default home network. If a
secured network is deleted while a xture is still attached to
that network, the user will not be able to access that xture
from the default home network. It is very important to remove
all xtures from a secured network before deleting a secured
network. The app allows up to 10 secured networks at a time.
How to Create a Secured Network
Step 1: Click on the settings
button in the top left corner of the
dashboard. (Shown circled in red)
Step 2: Click on “Default Home.”
This will bring up your list of avail-
able networks.
Step 3: Click on the “+” sign and
then select “Add new home” to
create a new network. Name your
network.
Step 4: Click and drag left on
your new network until you see a
green box and a yellow box. Click
on the green “Add” box.
Step 5: The bt app will begin
searching for devices and adding
them to the network.
Please note, xtures that were
added to an existing secured
network will not be discoverable
by a new secured network.
Step 6: When the bt app has
nished ndind all the avail-
able devices, select “No” when
prompted. If there are more
devices to be found, select “Yes.”
7
PLEASE NOTE: If you plan to create a secured network, and you also plan to name
your xtures and create groups, you should create the secured network rst. When
you put xtures into a secured network, they will lose any naming or grouping that
was created prior to being placed into the secured network.

8
How to Share a Secured Network
PLEASE NOTE: Sharing a secured network with another user allows them to access
and control the xtures, however, it does not transfer any naming or grouping.
Step 1: With the device that originally set up the secured network, click
and drag left on your the network you want to share until you see a
green box and a yellow box. Click on the yellow “Share” box.
Step 2: Using the device that you want to share the secured network
with, click on the “+” sign and then select “Scan QR code add home”
to scan the QR code from the original device. Once the QR code is
scanned, the secured network is shared.
How to Remove a Device from a Secured Network
9
PLEASE NOTE: Removing a device from a secured network is the only way to make it accessible to the default home again.
Deleting a secured network without removing the devices that are attached to it rst will cause the devices to be unaccessable.
Step 1: Long press on the icon of
the lamp you want to remove to
bring up the control panel.
Step 2: Click on the page icon in
the upper right corner to bring up
the edit device panel.
Step 3: Click on the red “Remove
present device” button to remove
the device from the network.

How to Name the Fixtures
Step 1: From the home screen,
long press on the icon of the lamp
you want to rename to bring up
the control panel.
Step 2: Click on the page icon in
the upper right corner to bring up
the edit device panel.
Step 3: Click on the current
device name to bring up the input
device name window.
Step 4: Use the keyboard to
name the xture and then click
the yellow “Conrm” box.
10 bt

Step 5: Click on the “GroupIcon”
button and select an icon from the
pop up window and then click the
yellow “Conrm” box.
Step 7: Double click on the icons for the xtures you want to add to the
group. A single click will bring up a “+” sign over the icon, a second click
will conrm that you want the xture added to the group. The xture will
blink off and on as it is being added to the group.
Step 6: Click on the “+” sign to
the right of where it says “current
device” to bring up the add device
to group panel.
How to Create a Group
Step 1: From the home screen,
click on the “+” sign next to “Add
Group.” To see all your groups,
click on the icon in the upper right
corner.
Step 2: Click on the group you
want to control to bring up the
options panel. Select “Manage” to
bring up the group manage panel.
Step 3: Click on the “Group-
Name” to bring up the “Input
GroupName” window.
Step 4: Use the keyboard to
name the group and then click the
yellow “Conrm” box.
12 13

Get Creati
How to Remove a Device from a Group
Step 2: Double click on the icons for the xtures you want to delete from
the group. A single click will bring up a “-” sign over the icon, a second
click will conrm that you want the xture deleted from the group.
Step 1: Click on the “-” sign to
the right of where it says “current
device” to bring up the delete
device to group panel. bt
14
Get Creative!
The BL200-bt provides endless possibilities for creativity.
You can control all bt xtures and set them all to your favorite
white color temperature, or your favorite color on the RGB
wheel. You can create groups and give part of your landscape
a different color or brightness to set it apart from the rest of
your space. Use the preset scenes for different holidays
and seasons. Sync all the xtures together, or offset them by
setting some groups with a different interval time using the
easy slider. Show your team spirit by changing your xtures to
your favorite team’s colors on game day. The BL200-bt makes
it easy to have the best looking house in the neighborhood!
We would love to see any pictures or videos showing off your
creativity!
Submit your BL200-bt photos and videos to
Be sure to like us on facebook to see how others are getting
creative: facebook.com/doyouknowalliance

www.allianceoutdoorlighting.com/bt-support | info@allianceoutdoorlighting.com
Other manuals for BL200-bt
1
Table of contents
Other ALLIANCE Outdoor Light manuals
Popular Outdoor Light manuals by other brands

Quoizel
Quoizel RO9018IZ installation guide

Würth
Würth POWERQUAD M AC-R Translation of the original operating instructions

Lights
Lights LampLust Elloway installation instructions

Westinghouse
Westinghouse 6122600 owner's manual

LIGMAN
LIGMAN OD-21103 installation manual

HEPER
HEPER TURA 2x16 LED Installation & maintenance instructions