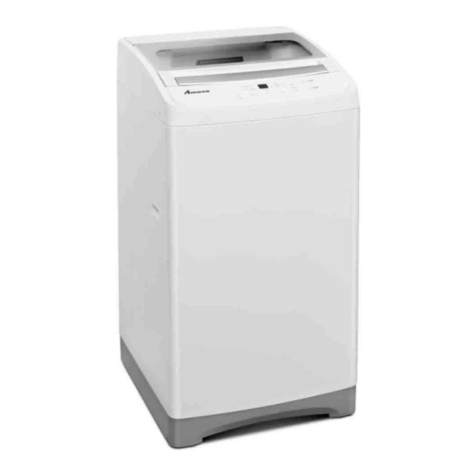
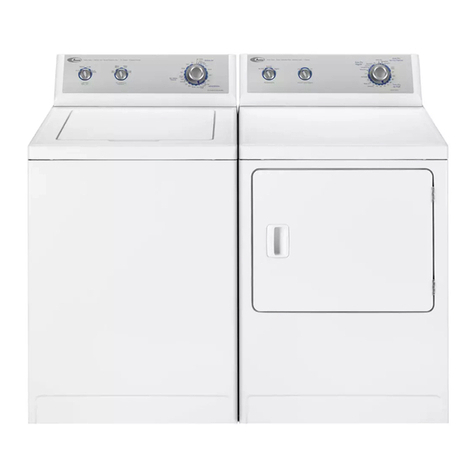
Amana Top Loading Washer User manual

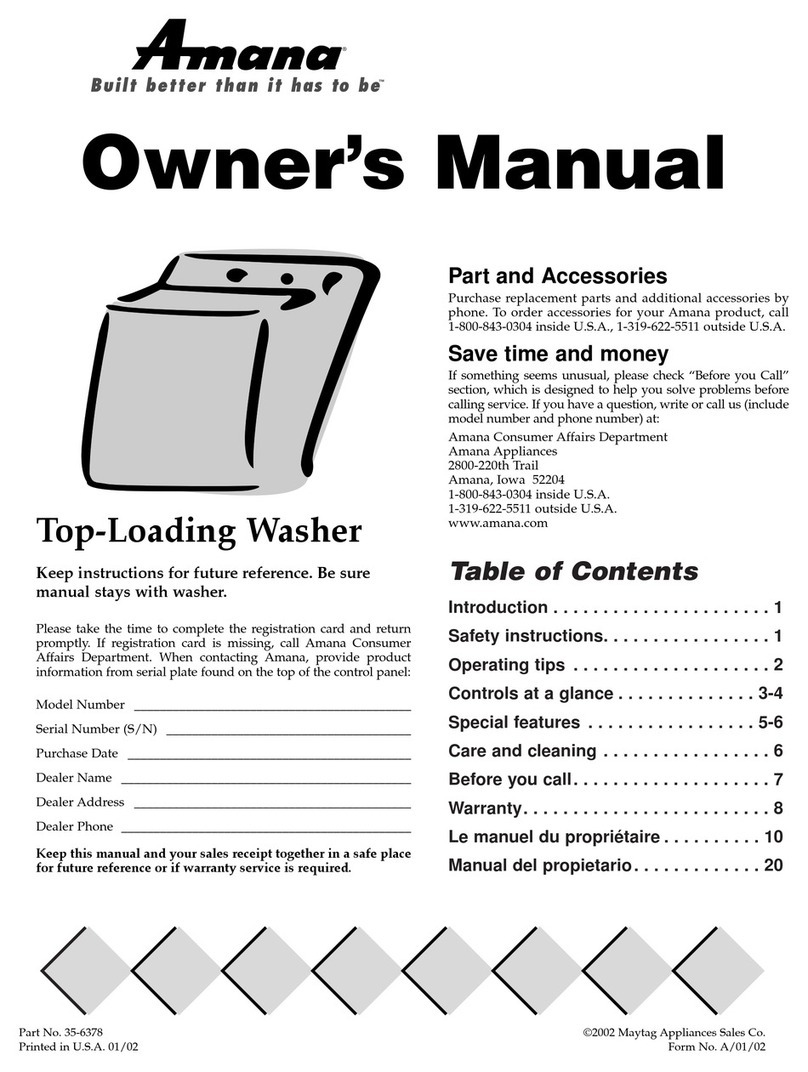
Owner's Manual
Top Loading Washer
Keep instructions for future reference. Be sure
manual stays with washer.
Contents
ImportantSafetyInformation................ 3
Starting the Wash ............................... 4
Cycles ................................................ 6
Dispensers.......................................... 7
Features,Hints, and Care ................... 8
MovingandStorage............................. 9
TroubleShooting ................................. 10
Warranty ............................................. 12

2
Recognize Safety Symbols, Words, Labels
DANGER
!
DANGER—Immediatehazards whichWILL result in severepersonal injury
ordeath.
WARNING
!
WARNING—Hazardsorunsafe practices whichCOULD resultinsevere
personalinjury or death.
CAUTION
!
CAUTION—Hazards orunsafe practices whichCOULD result in minor
personalinjury or product orproperty damage.
What You Need to Know
about Safety Instructions
Warning and Important Safety
Instructions appearing in this manual
are not meant to cover all possible
conditions and situations that may
occur. Common sense, caution, and care
must be exercised when installing,
maintaining, or operating washer.
Always contact your dealer, distributor,
service agent, or manufacturer about
problems or conditions you do not
understand.
Please take the time to complete the registration card and return promptly. If
registrationcard is missing, call Amana Consumer AffairsDepartment. When
contactingAmana,provide product information fromserialplate found onlower
righthand corner ofinner lid:
ModelNumber __________________________________
Manufacturing(P)Number_________________________
SerialNumber(S/N)______________________________
PurchaseDate__________________________________
DealerName ___________________________________
DealerAddress _________________________________
DealerPhone___________________________________
Keep this manual and your sales receipt together in a safe place for
futurereferenceorif warranty serviceisrequired.
Foranswers to questionsor to locate an authorizedservicer,call1-800-NAT-
LSVC(1-800-628-5782)insideUSA or 319-622-5511outside USA. Warranty
servicemust be performedby an authorizedservicer.AmanaAppliancesalso
recommendscontactingan authorized servicerifservice is requiredafter
warrantyexpires.
For more information on this and other Amana
products, visit our Web site
www.amana.com
or
call Consumer Affairs Department at
1-800-843-0304
AsureExtended
Service Plan
AmanaAppliances offers long-term
service protection for this new washer.
Asure™Extended Service Plan,
covering functional parts, labor, and
travel charges, is specially designed to
supplement a strong warranty. Call 1-
800-528-2682 for information.
Parts and Accessories
Purchase replacement parts and
additional accessories by phone.
To order accessories for yourAmana
product, call 1-800-843-0304 inside
USA or 319-622-5511 outside USA.
Save Time and Money
If something seems unusual, please
check “Trouble Shooting” section,
which is designed to help you solve
problems before calling service. If you
have a question, write or call us
(include model number and phone
number) at:
ConsumerAffairs DepartmentAmana
Appliances
2800 - 220th Trail
Amana, Iowa 52204
Ph# 1-800-843-0304
Thank you for buying an Amana washer!

3
Important Safety Information
WARNING
!
To reduce risk of fire, electric shock, serious injury, or death when using your
washer, follow these basic precautions: 17. Use only fabric softeners or
products to eliminate static that
areappropriate for automatic
washers.
18. Keep your washer in good
condition.Bumping or dropping
washercan damage safety
features.If damageoccurs,
havewasher checked by
qualifiedservice technician.
19.Replace worn power cords and/
or loose plugs.
20. Loading door must be closed
wheneverwasheris agitating or
spinning. Do not bypass loading
door switch by permitting
washerto operate with loading
dooropen.
21.Always read and follow
manufacturer’sinstructions on
packagesof laundry and
cleaningaids. Heedall
warningsor precautions. To
reduce risk of poisoning or
chemical burns, keep products
away from children at all times,
preferably, in a locked cabinet.
22.Neveroperate washer with
guardsand/orpanelsremoved.
23.Do not operate washer with
missing or broken parts.
24. Do not bypass safety devices.
1. Readall instructions before
usingwasher.
2. Be sure washer is properly
grounded.
3. Do not wash articles that have
been cleaned in, washed in,
soaked in, or spotted with
gasoline,dry-cleaning solvents,
orother flammable orexplosive
substances. Vapors could
igniteor explode.
4. Do not add gasoline, dry-
cleaningsolvents, or other
flammableorexplosive
substances to wash water.
Vapors could ignite or explode.
5. Do not store or use gasoline or
otherflammablevaporsand
liquids near this or any other
appliance.
6. Do not allow children to play on
orin washer. Close supervision
of children is necessary when
washer is used near children, a
safety rule for all appliances.
7. Beforewasherisremoved from
serviceordiscarded,remove
doorto washingcompartment.
8. Do not reach into washer if
washtub is moving.
9. Do not install or store washer
where it will be exposed to
waterand/orweather.
10. Do not tamper with washer
controls.
11. Do not repair or replace any part
ofwasher or attempt any service,
unlessspecifically recommended
inuser-maintenance instructions
orin published user-repair
instructions that you understand
and have skills to carry out.
12. To reduce risk of electric shock
or fire, do not use extension
cords or adapters to connect
washerto electricalpower
source.
13. Use your washer only for its
intendedpurpose:non-
commercial clothes washing.
14. Alwaysdisconnectwasher from
electricalsupply before
attemptingany service.
Disconnectpower cordby
grasping the plug, not the cord.
15. Installwasheraccording to
Installation Instructions. All
connectionsfor water,drain,
electricalpower,andgrounding
must comply with local codes
and be made by licensed
personnelwhenrequired.
16. To reduce risk of fire, do not use
washerto launder clothes which
havetraces of any flammable
substance,such as vegetable
oil, cooking oil, machine oil,
flammablechemicals, thinner,
etc., or anything containing wax
or chemicals, such as mops and
cleaning cloths. Flammable
substances may cause fabric to
catch fire by itself.
Save These Instructions

4
Starting the Wash
1. Prepare clothes for washing
For best wash results:
• Removeitems frompockets andcuffs
• Close zippers and fasteners; mend rips and tears
• Sort items into separate loads
• Pre-treatstains and heavily soiled areas
2. Select WASH/RINSE temperature
Alwaysfollow garmentmanufacturer’s care labels for each fabric. See
chartbelow.
WASH / RINSE TYPE OF CLOTHING
Hot/Cold Sturdy whites and colorfast items;
work clothes, soiled items, and cloth
diapers
Warm/Warm
Available on
some models
Delicate or colorfast items
Warm/Cold −Moderately soiled permanent press,
silks, woolens, nylon, acrylic
Rinsing of some items
Cold/Cold −Non-colorfast items
Extra-delicate clothing
Rinsing of most items
NOTE: Energy Saver settings, marked with a dash (–), show
temperature settings that use the least energy.
3. Select LOAD SIZE / WATER LEVEL
Variable control allows you to select the most appropriate setting for each
wash load. Do not fill above top row of holes in tub with clothes. Use Water
Levelchart below todetermine setting.
IMPORTANT: Donotholdknob at RESETfor extended periods or washer
floodingmay result.
If These Controls
are Different from
Yours
These controls are intended to
show the variety of features that are
available in the product line. If your
washer does not have all the options
that are shown, it is not a mistake. The
information provided applies to several
of the models in the product line.
If you change your mind
and the LOAD SIZE
SETTING
If the tub is filling and you decide to
change the LOAD SIZE SETTING, you
must turn the knob to RESET before
changing the load size. The tub can
overfill if you do not turn to RESET
first.
QUICK WASH
LOAD SIZE WATER
LEVEL
Super Plus Max. Fill
Large 3/4 – Full
Medium 1/2 – 3/4 Full
Small
QUICK WASH
1/2 Full

5
Starting the Wash (cont'd)
4. Select WASH/SPIN speed
Select wash/spin speed most appropriate to type of fabric in wash load.
Seechart below.
WASH/SPIN
SPEED LOAD TYPE
Regular/Fast Sturdy fabrics needing maximum water extraction
Regular/Slow Sturdy fabrics needing slower spin speed to reduce
wrinkling
Gentle/Fast Heavy loads of delicate fabrics needing fast spin for
better water extraction
Gentle/Slow Delicate fabrics needing slower spin to protect fabric and
clothing
5. Select wash cycle and time
Push timer knob in and turn to desired cycle and wash time. Timer knob
can be turned in either direction. Wash cycle and time selection depends
upon type of fabric and amount of soil. For best results when cleaning
heavily soiled items, use longer wash time, up to 15 minute maximum.
Lightly soiled items require less wash time. See "Cycles" section for
moreinformation.
6. Select EXTRA RINSE, if desired
EXTRA RINSE is useful forpeople with detergent sensitive skin.It
providesasecond rinse tomorecompletely remove laundryadditives,
suds,andperfumes in REGULAR,PERMANENTPRESS/KNITS, and
DELICATE cycles. To select, set switch to ON. Set switch to OFF if not
desired. EXTRA RINSE adds 10–15 minutes to total cycle time.
EXTRA SPIN (some models) shouldbe used when washingheavier
items, like towels, that retain water. The extra spin extracts additional
water from the clothing and shortens drying times. To select, set switch to
ON. Set switch to OFF if not desired. EXTRA SPIN adds approximately 3
minutes to your total wash time.
7. Pull OUT timer knob to start
Water fill begins. Stop washer by pushing knob in.
Measure and add detergent to washtub
Useonlydetergent recommended for top-
loadingwashers.
Add clothing to water in washtub
•Clothes should fill wash tub but should
not be packed. Loosely fill tub with
clothes no higher than top row of
holes.Items mustmove freelythrough
wash/rinsewater.
•Bulky fabrics may need more water
addedafter agitation begins. TurnLoad
Size knob to RESET and back to
desiredsetting.
Close washer lid
Washer will not operate when lid is open.

6
Cycles
REGULAR
Use for sturdy items, like play or
work clothes, towels, T-shirts, etc.
DOUBLE WASH
DOUBLEWASH automatically
advancesintotheREGULAR wash
cycle. Use to wash heavily soiled
clothes twice with detergent in
each cycle.
Todeliverextradetergent,
• LIQUIDDETERGENT: place in
fabricsoftener dispenser foruse
in second wash.
DO NOT use
dispenser for fabric softener.
• POWDERDETERGENT: place
extra detergent in tub for use in
firstwash; recommend
approximately 1½ times normal
amount.
PERMANENT
PRESS/KNITS
Use for clothes that recommend a
permanentpress cycle and other
synthetics.
DELICATE
Use to wash delicate items often
washedby hand. Even with small
loads, full tub of water is recom-
mendedso items canmove freely
formorecomplete cleaning. More
wateralso helps reduce fabricwear
andwrinkling. Toprotectdelicate
fabrics,washerspeed automati-
callyruns at Gentle/Slow, regard-
less of position of speed selector
switch.
SOAK (SOME MODELS)
Usefor heavily soiledor stained
items. Washtub fills with water,
pausesapproximately 12 minutesfor
soaking, and spins water out to
complete cycle.
HAND WASH
(SOME MODELS)
Useforfine fabrics normallywashed
byhand. Toprotect fragile fabrics,
washerspeed automatically runs at
Gentle/Slow, regardlessofposition of
speed selector switch.
If These Controls
are Different from
Yours
These controls are intended
to show the variety of features that
are available in the product line. If
your washer does not have all the
options that are shown, it is not a
mistake. The information provided
applies to several of the models in
the product line.
What do the little
numbers mean?
Numbers next to cycle setting shows
the approximate total agitation time.
The total wash time includes periods
of soaking and is longer than the
agitation time.
Q
UICK WASH
QUICK WASH
(SOME MODELS) Use for a small load of lightly soiled items that
needs to be washed quickly. QUICK WASH has
a shortened cycle with a light period of agitation.
It then automatically sets to a fast spin speed to
help shorten drying times. The total cycle time is
approximately15-20minutes.

7
Dispensers
Fabric Softener
Dispenser
Fabricsoftener dispenser is
locatedon top of agitator.
Dispenserautomatically releases
liquidfabric softener atproper time
during rinse cycle.
Fabric Softener Use Tips
• Liquid fabric softeners are
dispensed during final rinse. Do
not combine with bleach, bluing,
starch, detergents, soaps, or
packaged water conditioners
during rinse.
• Do not use fabric softener in
dispenser during DOUBLE WASH
cycle.
• Do not mix powdered detergent
with liquid softener in dispenser or
softener will become gummy.
Fabric
softener
dispenser
To use dispenser, follow these steps:
1. Pourliquid fabric softenerinto dispenser,usingamount recommended
onpackage.
2. Add water up to fill level, but do not exceed tip of fill arrow indicator.
FABRIC SOFTENER MUST BE DILUTED FOR USE.
• Do not stop washer during first spin or dispenser will empty too
soon.
• Never pour fabric softener directly onto clothes or spots and stains
may result. To remove softener stains, soak in soapy solution of
Sard™Wonder Soap or Ivory™soap, or rub stain with bar of Sard™or
Ivory™soapand wash garment as usual.
• Forbest softenerperformance, set water level to medium or higher.
3. Clean softener dispenser after
each use. Remove dispenser
housingfrom agitator by
squeezinglower part of dispenser
andpulling upon housingwhile
tilting slightly to expose
dispensercup. Rinsedispenser
housing and cup in hot soapy
water.
Cleanfunnel shapein top of
agitator and inside of agitator. Use small brush on hole and slots in two
funnelrings for thorough cleaning.
Aftercleaning, re-install dispenser cup. Push dispenser housing
directly down onto top of agitator until firmly snapped together.
To prevent build-up, fill dispenser with clean water in wash cycles when
notusing softener.
Bleach Dispenser
Bleach dispenser is located in left
frontcornerunderloadingdoor.
Bleach
dispenser
Use only liquid bleach in
dispenser. To use powdered
bleach, add to wash tub with
detergent.
Carefullypourrecommendedamount
ofbleach into dispenserduring first
washerfill. See table.
Be careful not to spill undiluted
bleach. It is a strong chemical and
candamage cabinet finishesand
somefabrics if not properly diluted.
Followbleachmanufacturer’slabel for
properuse.
LOAD SIZE BLEACH
(Max Amt.)
SUPER PLUS 1 cup
LARGE 1 cup
MEDIUM 3/4 cup
SMALL 1/2 cup

8
Lint Filter
Amana's self cleaning lint filter works throughout the wash cycle to constantly
removelint and other residuefrom the water. Locatedbetween the outerand
inner tub, the lint filter removes lint as water passes from the bottom of the
outer tub back to the inner tub. As water passes from the outer tub to the
inner tub, water is forced through the bottom of the lint filter. The filter traps
lint under the filter until the spin cycle begins. During the spin cycle
centrifugalforce removes the lint by pulling it off thebottom of the filter and
washingit down the drain.
Motor Overload Protector
Internaloverloadprotectorautomatically stops motorineventof overload.
Overloadprotector resets inapproximately 3 minutes and motorautomatically
restarts.If overload protector stops motor again, stopusing washerand call
servicetechnician. Loading wash tub toofull may result in motoroverload.
Automatic Balance System
Yournewwasher will automatically adjust tounbalanced loadswithout
shutting down or interrupting the cycle. The cycle will automatically complete
at the fastest spin speed possible.
Inasevere out-of-balance condition,clothesmay
containexcessive moisture. If this shouldhappen,
simply redistribute the clothes, and reset the control to
the spin mark after the rinse setting in the regular cycle.
Safety Lid Switch
The washer will not spin when the lid is open for any reason. This is for your
personal safety. If the lid is opened mid-cycle, operation will automatically
start when lid is closed.
General Washer Care
• Use only damp or sudsy cloth for cleaning control panel. Some cleaning
product sprays may harm control panel finish or may damage interior of
hood.
• Wipewasher cabinetas needed. If detergent, bleach, or other washing
products are spilled on cabinet, wipe immediately. Some products will
causepermanent damage if spilled on cabinet.
• Top of washer should not be used for removing garment stains. Some stain
removers,such as rust remover,may damage cabinet finish.
• Do not use scouring pads or abrasive cleansers.
• Do not lay sharp or rough objects on or against washer. Finish could be
damaged.
• Remove pins, buckles, or other sharp objects from clothes to prevent
scratching interior parts.
• Leave lid open after use to allow inside of washer to dry, and to help
preventmustyodorsfrom developing.
• Do not allow small children to play on or around washer.
• Donot move washer without reinstalling shipping brace(Part #39365)and
shippingplug (Part#38149). See
MovingWasher to NewLocation
section.
Features, Hints, and Care
Follow the Colors
Your washer control panel is color
coordinated for your convenience.
When you set your washer controls,
notice which colors are the same. They
will help guide you through setting the
controls.
Need more Time? Reset
the Timer Knob.
Although wash cycles are automatic,
timer may be reset to lengthen, shorten,
or repeat a portion of a cycle.
To set or reset timer, push in timer knob
to stop washer. Hold in timer knob
firmly while slowly turning it to desired
setting. Pull out timer knob to start
washer.
Stops and Starts
Wash action consists of periods of
agitation, with pauses or periods of
soaking. For best results, do not turn
timer through pauses, which are normal
part of wash cycles.
Cleaner Clothes
Water temperature affects how clean
clothes become. If your clothes are not
as clean as you would like, check your
water heater temperature.You may need
to turn your water temperature up to
140°F. Also, check that your water
hoses are hooked up correctly. If they
are switched you might be getting cold
water in your warm and hot cycles.
Hard water does not remove soil as
well as soft water. Check with your local
water company to see if you have hard
water. If you have hard water, try
softening it with a packaged
conditioner or use a little more
detergent.
Risers
Risers or air cushions may be installed
if pipes knock or pound when flow of
water stops. Risers are more efficient
when installed as close as possible to
water supply faucets.
Spin mark

9
Moving and Storage
Moving Washer to
New Location
Replaceshippingplugunder motor
andshipping brace in tub. Referto
InstallationInstructions
for proper
procedureswheneverwasheris
moved.Seeillustration.
Shipping
plug and
location
in washer
Shipping
brace
Cold Storage and Non-Use Periods
WARNING
!
Explosive hydrogen gas may be produced in a hot water system that
has not been used for two weeks or more. Before using washer, if
hot water system has not been used for such a period, turn on all hot
water faucets and let water flow for several minutes to release
accumulated hydrogen gas. Hydrogen gas is flammable: Do not
smoke or use an open flame when flushing water lines.
Cold Weather Care
Ifwasheris delivered whenoutsidetemperature is belowfreezing or if washer
is stored in unheated room or area during cold months, do not operate until
washer has warmed to room temperature. Do not install or operate
washer where temperatures will drop below freezing.
Cold Weather Storage
If washer must be stored in seasonal home or storage building, use one of the
followingstoragemethods.
METHOD1
1. Turnoff water supply faucets and disconnect hoses. Drain water from
both hoses.
2. Addone gallon ofnon-toxic RV antifreeze(availablefrom hardware or
recreationalvehicle dealers) to washer tub.
3. Push in cycle selector knob and turn to SPIN.
4. Pull knob out and let washer spin for 1–2 minutes to drain water. Some
antifreeze will also be lost. (If you have a septic system, contact
antifreeze manufacturer and make sure it will not harm system.)
5. Push in cycle selector knob to stop washer. Dry inner wash tub,
disconnect electrical plug, and close washer lid. If moving washer,
disconnectdrain hose. Move and store washer ONLY in upright position.
To removeantifreeze afterstorage, runwasher througha completecycle
using½ cupof detergent.DO NOT ADD CLOTHES TO CYCLE.
METHOD2
1. Push in cycle selector knob and turn to SPIN. Run through complete
spin cycle to remove excess water.
2. When spin cycle is complete, push in cycle selector knob to stop
washer.
3. Turnoff water supply faucets and disconnect hoses. Drain water from
both hoses.
4. Dry inner wash tub, disconnect electrical plug, and close washer lid. If
movingwasher,disconnectdrain hose. Move and storewasher ONLYin
uprightposition.
5. It is normal for some water to remain inside pump. To prevent damage to
washerand pumpif remaining water freezes, allow washer to warm to 24
to48 hoursafter removing from storage, so water can thaw before use.
Vacations and
Extended Non-Use
IMPORTANT: To avoidpossible
propertydamagefromflooding,turn
offwatersupply to washerduring
extendedperiodsofnon-use.
To prevent mold ormildew,leavelid
open so moisture inside machine can
evaporate.
Whenclosing your homefor extended
periods,haveservicetechniciandrain
washertoavoidstagnant water.
Unplugcord from electricaloutlet.
Disconnecthoses from faucets.
Tilt washer back slightly
and slide shipping
plug into position
under washer

10
Trouble Shooting
You may save time and money by checking items below before calling for service. List includes common concerns that
arenot theresult ofdefective workmanship or materials. If your question is not explained below, contact Amana
ConsumerAffairsDepartmentat800-843-0304.
TOPIC POSSIBLE CAUSE SOLUTION
NOISE
Gear sounds or a low hum Normal mechanical sounds in commercial-
quality washer Normal operation.
Loose objects, such as coins or pins, in tub
or pump Stop washer and check tub. Remove loose objects. If noise
continues after washer is restarted, objects may be in
pump: call your authorized servicer.
Rattling and clanking noise
Belt buckles, metal fasteners hitting wash tub Close zippers, buttons, and fasteners. Clothing with
buckles must be turned inside out.
Squealing sound or hot
rubber odor Overloaded wash tub Do not overload washer. Stop washer and reduce size of
load.
Thumping sound Heavy wash loads; unbalanced loads Usually normal, but unbalanced loads should be
redistributed. Stop washer and rearrange load.
Vibrating noise Washer not resting firmly on floor Make sure floor is strong enough for washer. Adjust
leveling legs so washer rests firmly on floor. See
Installation Instructions
for leveling details.
Wash load distributed unevenly in tub Stop washer and rearrange load.
Shipping plug not removed during installation See
Installation Instructions
for details on removing
shipping plug.
Water splashing or slapping
noise Spray rinse Normal operation. Washer sprays water inside tub while
running at high speed during rinse and spin.
Whistling or whirling noise Drum spinning without cloths Normal operation. Holes in the tub can cause this sound.
OPERATION
Washer does not start Electrical power cord may not be plugged in,
or connection may be loose Make sure plug from power cord fits tightly into wall outlet.
Fuse blown, circuit breaker tripped, or power
outage occurred Replace fuse or reset circuit breaker. Do NOT increase
fuse capacity. Call qualified electrician to correct circuit
overload problem. Call local utility company to correct
power outage.
Water supply faucets not turned on Turn on water supply faucets.
Timer knob/cycle selector set incorrectly Move indicator slightly clockwise. Pull out on timer knob.
Motor overheated Internal overload protector automatically stops motor in
event of overload. Protector resets in approximately 3
minutes and motor automatically restarts. If overload
protector stops motor again, quit using washer and call
service technician.
Do not overload washer. Largest dry load level should not
be higher than bottom of fabric softener dispenser or top of
agitator.
Washer won’t spin Lid partially open Close lid completely.
Residue left in tub Heavily soiled items Wipe tub with non-abrasive household cleaner and rinse.
Before washing, shake or brush excess dirt and sand from
items.

11
Trouble Shooting (cont'd)
TOPIC POSSIBLE CAUSE SOLUTION
WATER
Wash load too wet after spin Overloaded wash tub Do not overload washer.
Unbalanced load Rearrange load to allow proper spin.
Kinked drain hose Straighten drain hose.
Water enters slowly or does
not enter washer Inadequate main water supply Check water pressure at another faucet in house. Wait for
water supply and pressure to increase.
Water supply faucets partly closed Fully open hot and cold water supply faucets.
Water being used elsewhere in house Water pressure must be at least 20 psi (138 kPa). Avoid
running water elsewhere when washer is filling.
Clogged water inlet filters Disconnect water fill hoses from faucet. Clean and
reposition screen filters. Reconnect water fill hoses.
Kinked water inlet hoses Straighten hoses.
Water level does not cover
clothes Incorrect water level/load size selection Select higher water level/load size. Add water by turning
selector to RESET and back to larger load size.
Overloaded wash tub Do not overload washer. Largest dry load level should not
be higher than bottom of fabric softener dispenser or top of
agitator.
Warm or hot water not hot
enough Water heater temperature set too low; water
heater too far from washer Use candy/meat thermometer to measure hot water
temperature at nearby faucet. Water temperature should
be at least 140°F (60°C). Adjust water heater as
necessary.
Hot water being used elsewhere in house Avoid using hot water elsewhere before or during washer
use, or there may not be enough hot water for proper
cleaning. If problem continues, enlarge capacity of hot
water system, or use for only one application at a time.
Water drains slowly or does
not drain Drain hose kinked or clogged Clean and straighten drain hose.
Water leaks Loose fill hose connections Check and tighten all hose/faucet connections. Install
rubber sealing washers provided.
Clogged drain pipes Unclog drain pipes. Call plumber if necessary.
Changed water levels during fill Always use RESET on water level switch when changing
water level. Do not hold switch at RESET; return switch to
desired load size.
Oversudsing Use less detergent.
Incorrect wash and rinse
temperatures Hot and cold water hoses connected to
wrong supply faucets Check hose connections. Connect hot water hose to hot
water faucet; connect cold water hose to cold water faucet.
Water enters washer, but tub
does not fill Incorrect standpipe height for drain hose Recommended standpipe height is 36” (91.44 cm); for low
standpipes, install Siphon Break Kit (part #562P3). See
Installation Instructions
for details.

1999 Amana Appliances
Amana, Iowa 52204
Part No. 40068302
Printed in U.S.A. 8/99
Amana Washer Warranty
Full ONE Year Warranty
For one (1) year from the date of original retail purchase, Amana will repair or replace any part that fails due to a
defectin materials orworkmanship.
Limited Warranty
Afterone year from the date of originalretail purchase,Amana will provide a free part, aslisted below, toreplace
any part that fails due to a defect in materials or workmanship. The owner will be responsible for paying all other
costsincluding labor,mileage,and transportation.
Second through Third Year
Amanawillprovide any part.
Third through Fifth Year
Amanawillprovide the drivemotoror timer.
Third through Tenth Year
Amana will provide the transmission assembly and seal kit.
Amanawill provide the outer tubassembly.
Amanawill provide the cabinet assembly should thepart rustthrough.
Amanawill providethe outer wash tub should the part fail to contain water.
Lifetime
Amanawill provide theinner wash basket.
What is not covered by these
warranties
• Replacementof householdfuses, resetting of circuit
breakers,or correctionto householdwiring
orplumbing.
• Productswith original serial numbers removed,
altered,or notreadily determined.
• Productspurchased for commercial, industrial,
rental, or leased use.
• Products located outside of the United States
orCanada.
• Premium service charges, if the servicer is
requestedto perform service in addition to normal
serviceor outside normal service hours or area.
• Adjustments after the first year.
• Damageto clothing.
Repairs resulting from the following:
• Improperinstallation or maintenance.
• Any modification, alteration, or adjustment not
authorizedby Amana.
• Accident, misuse, abuse, fire, flood, or
acts of nature.
• Connectionsto improperelectrical current,
voltage,or supply.
To Receive Warranty Service
Servicemust be performed byan authorized Amana
servicerepresentative. Toscheduleservice,contactthe
Amanadealerwhere you purchased yourapplianceor
contactAmana Appliances Factory Service.
Amana Appliances Factory Service
1-800-628-5782insideUSA
For more information,
Amana Appliances Consumer Services
AmanaAppliances
2800220thTrail
Amana,Iowa52204
1-800-843-0304insideUSA
(319)622-5511worldwide
When contacting Amana Appliances please
include the following information:
• Yourname,address, and telephone number.
• Modelnumber and serial number ofyour appliance
(found on inside of lid in the bottom right corner).
• Thename andaddress of your dealer and the date
ofpurchase.
• A clear description of the problem.
• Proofof purchase(sales receipt).
Amana Appliances Online
• http://www.amana.com
INNO EVENTSHALLAMANA BELIABLEFORINCIDENTALORCONSEQUENTIALDAMAGES.
This warranty gives you specific legal rights, and you may have others which vary from state to state. For example, some states
do not allow the exclusion or limitation of incidental or consequential damages, so this exclusion may not apply to you.
Table of contents
Other Amana Washer manuals

Amana
Amana LWA50AL User manual

Amana
Amana WASHER User manual

Amana
Amana NTW5205TQ0 User manual

Amana
Amana NAV3330AWW User manual

Amana
Amana LWA05AW User manual

Amana
Amana 40085801 User manual

Amana
Amana LWA30BL User manual

Amana
Amana LW3502 User manual

Amana
Amana NTW5500TQ0 Operating and installation instructions

Amana
Amana W10150618A User manual

Amana
Amana NTW4500X User manual

Amana
Amana TANDEM W10410362A User manual

Amana
Amana NAV-2 User manual

Amana
Amana LW8263L2 User manual

Amana
Amana NAV8805EWW User manual

Amana
Amana NTW5500TQ User manual

Amana
Amana NTW4600Y User manual

Amana
Amana NTW5400T User manual

Amana
Amana NFW7300W User instructions

Amana
Amana NTW4500XQ0 User manual