AMP®ForesterPro Downlight
AAL-1015-40-B-BZ
INSTALLATION & MAINTENANCE GUIDE
www.amplighting.com
–2–
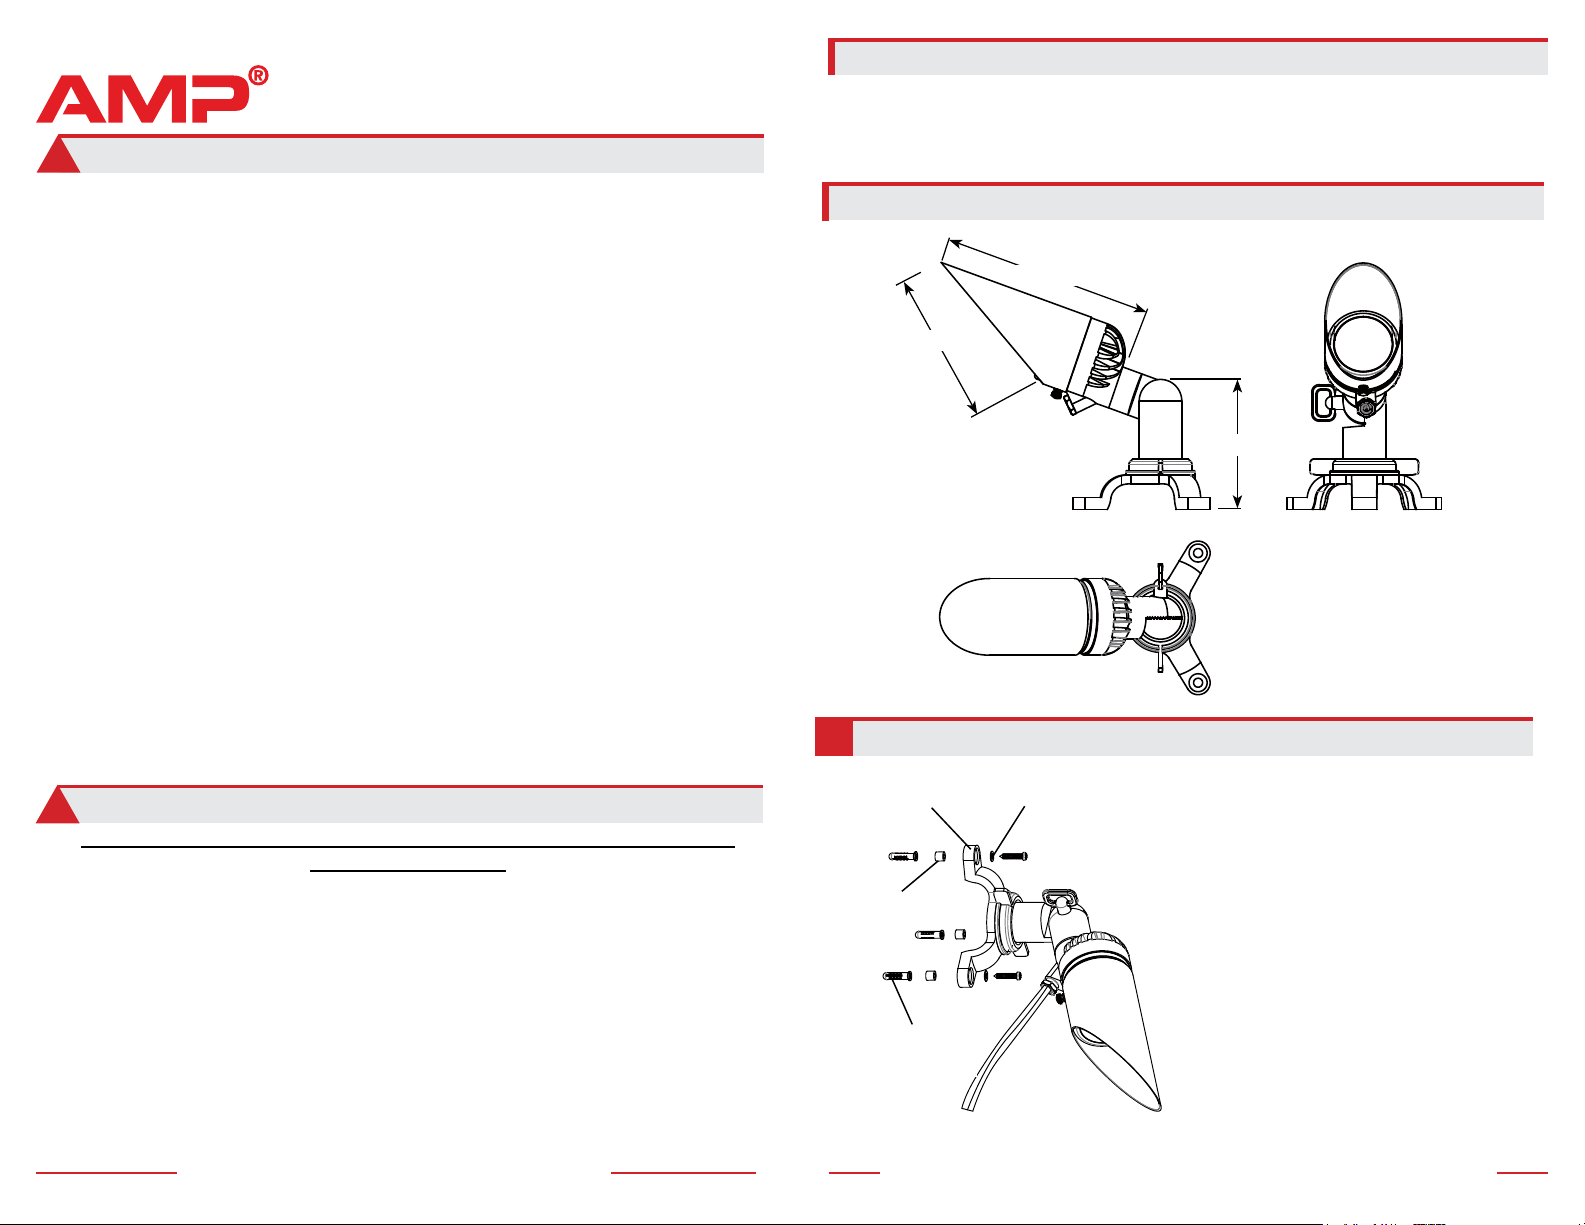
Product Dimensions
–3–
Install Fixture
1
Important Safety Instructions: Read Before Installation
!
This luminaire is intended for installation in accordance with local codes
and the National Electric Code (NEC). Failure to adhere to these codes and
instructions may result in serious injury, property damage and void the
warranty.
These instructions do not intend to cover all variations in installation,
operation maintenance or mounting situations.
1. Make sure the power is turned OFF before installing or servicing this
luminaire.
2. WARNING: risk of electrical shock. Install all luminaires 10 feet (3.05M)
or more from pool, spa or fountain.
3. This luminaire is intended to be used only with a power supply
(transformer) rated maximum of 300 watts (25 AMPS) at 15 volts.
4. Wiring connections must be made with wire connectors that are suitable
for outdoor use.
5. Position the low voltage wire and wire connector so that it is located
within 6 inches (15.2 cm) from a building structure, a luminaire or
tting.
6. The main low voltage cable is intended for shallow burial - less than 6
inches (152 mm).
7. If additional lengths of low voltage cable are required, please contact
www.amplighting.com or call 1-813-978-3900.
Important Safety Instructions
!
INSTRUCTIONS PERTAINING TO A RISK OF FIRE, OR INJURY TO PERSONS
Lighted lamp is HOT!
WARNING – To reduce the risk of FIRE OR INJURY TO PERSONS.
1. Turn off/unplug and allow to cool before replacing lamp.
2. Lamp gets HOT quickly! Contact only switch/plug when turning on.
3. Do not touch the hot lens, guard or enclosure.
4. Keep lamp away from materials that may burn.
5. Do not touch lamp at any time. Use a soft cloth. Oil from skin may dam-
age lamp.
6. Do not operate the luminaire tting with a missing or damaged shield.
SAVE THESE INSTRUCTIONS
Package Contents
A. (1) Fixture
4 1/8”
6 5/8”
4.68”
Determine the desired location
for the xture. Place the washers
onto the self-tapping screws. Pass
the self-tapping screws through
the holes of the feet of xture and
spacers. Thread the self-tapping
screws into the desired location to
secure the xture.
NOTE: Anchors are required for brick
walls or concrete walls. To deter-
mine the locations for the anchors
place the feet of the xture onto
your desired location and mark
points from the holes of the feet.
Self-tapping Screw
(not supplied)
Washer (not supplied)
Anchor (optional,
not supplied)
Foot
Spacer
Fixture


