ARB ELEMENTS Service manual

OPERATING AND SERVICE GUIDE …………………………… 1
EN

1

2
Please read this operating and service guide carefully before starting your ARB Fridge
for the first time. This guide should be kept in a safe place together with a copy of your
receipt.
CONTENTS
1INTRODUCTION ....................................................................................................................... 3
2SUPPLY DETAILS....................................................................................................................... 3
3SAFETY INSTRUCTIONS .......................................................................................................... 4
3.1 General safety ...........................................................................................................................................................4
3.2 Safe operation of the fridge...............................................................................................................................4
4INTRODUCTION TO YOUR ARB FRIDGE ............................................................................. 5
5INSTALLATION ......................................................................................................................... 6
5.1 General installation.................................................................................................................................................6
5.2 Vehicle Installation..................................................................................................................................................7
5.2.1 Permanent mounting............................................................................................................................7
5.2.2 Temporary mounting............................................................................................................................8
6OPERATION .............................................................................................................................. 9
6.1 Before use ...................................................................................................................................................................9
6.2 Carrying your fridge...............................................................................................................................................9
6.3 Opening your fridge .............................................................................................................................................9
6.4 Connecting your fridge ....................................................................................................................................10
6.4.1 Connecting to 100-240V AC..........................................................................................................10
6.4.2 Connecting to an engine driven generator...........................................................................10
6.4.3 Connecting to 12/24V DC..............................................................................................................11
6.4.4 12/24 V DC wiring requirements................................................................................................11
6.4.5 12/24V DC power socket................................................................................................................12
6.5 Turning the fridge on or off............................................................................................................................ 13
6.6 Setting the target cabinet temperature....................................................................................................13
6.7 Changing between °C and °F .......................................................................................................................13
6.8 Changing transmission channel ..................................................................................................................14
6.9 Changing control panel brightness ........................................................................................................... 14
6.10 Displaying supply voltage................................................................................................................................14
6.11 Electronic lock........................................................................................................................................................15
6.11.1 To activate electronic lock .............................................................................................................15
6.11.2 To deactivate electronic lock........................................................................................................15
6.11.3 To lock fridge........................................................................................................................................15
6.11.4 To unlock fridge..................................................................................................................................16
6.11.5 To change access code.................................................................................................................. 16
6.12 Using the battery monitor...............................................................................................................................17
6.13 Making use of the basket .................................................................................................................................18
6.14 Basket divider..........................................................................................................................................................19
6.15 Drain plug................................................................................................................................................................19
6.16 Locking fridge with padlock...........................................................................................................................19
6.17 Cable Strap...............................................................................................................................................................20
6.18 Energy saving advice .........................................................................................................................................20
6.19 Defrosting your fridge .......................................................................................................................................20
6.20 Replacing the plug fuse (12/24V)............................................................................................................... 21
6.21 Replacing the cabinet fuse.............................................................................................................................. 21
6.22 Storing your fridge...............................................................................................................................................22
7CLEANING AND MAINTENANCE .......................................................................................22
8DISPOSAL ................................................................................................................................22
9TECHNICAL DATA .................................................................................................................23
10 WARRANTY.............................................................................................................................24
11 TROUBLESHOOTING.............................................................................................................25

3
1INTRODUCTION
Congratulations on purchasing an ARB Fridge. Your ARB Fridge has been specifically
designed for tough off road conditions and its primary purpose is for cooling down
food and beverages. It may also be used as a freezer if desired. By following the
instructions and guidelines listed in this document, you will ensure that you receive
maximum performance and long term reliability out of your new fridge.
Your ARB Fridge is designed to operate on a 12V DC or 24V DC supply from a vehicle,
boat or caravan. It can also be operated from a 100-240V AC mains supply using the
inbuilt power inverter.
CAUTION - If you wish to cool medicines, please check if the cooling capacity
of the fridge is adequate for the purpose.
2SUPPLY DETAILS
Your ARB Fridge has been delivered with the following items. If any of these items have
not been included with your fridge, please contact your local ARB Fridge dealer.
ITEM
QUANTITY
ARB Fridge
1
Reversible basket
1
Basket divider
1
12/24V DC power cable
1
100-240V AC power cable
1
Cable Strap
1
Operating and service guide
1

4
3SAFETY INSTRUCTIONS
3.1 General safety
For the safety of all people who will use your fridge, ARB recommends that you take
note of the following general safety points:
Always apply the correct voltage to the fridge with the correct polarity.
Do not connect your fridge to a battery charger, AC/DC converter or rectifier.
Disconnect the fridge from the battery before using a high-speed battery charger.
Do not use sharp, abrasive or corrosive materials to clean or defrost the fridge.
Children should be supervised whilst operating the fridge.
This appliance can be used by children aged from 8 years and above and persons with
reduced physical, sensory or mental capabilities or lack of experience and knowledge if they
have been given supervision or instruction concerning use of the appliance in a safe way and
understand the hazards involved. Children shall not play with the appliance. Cleaning and user
maintenance shall not be made by children without supervision.
If your power cable is damaged, it must be replaced before the fridge is used.
Disconnect your fridge from all power supplies before cleaning or maintenance.
Do not store flammable liquids or gases in or near your fridge.
Do not open or tamper with the refrigerant circuit.
Do not remove or modify any of the electrical components.
Do not store or transport caustic or solvent based material in the fridge.
Do not use your fridge if there are visible signs of damage.
Only have your fridge serviced by an authorised ARB Fridge Service Agent.
Do not store explosive substances such as aerosol cans with a flammable propellant in this
appliance.
This appliance is intended to be used in household and similar applications such as:
-Staff Kitchen areas in shops, offices and other working environments.
-Farm Houses and by clients in hotels, motels and other residential type environments.
-Bed and breakfast type environments.
-Catering and similar non-retail applications.
3.2 Safe operation of the fridge
For safe operation of your fridge, ARB recommends that you take note of the following
safety points.
Ensure that there is always sufficient ventilation around the fridge to prevent overheating. Refer
to section 5.1 for details.
Do not touch the internal metal shell of the fridge with a wet hand.
Do not place your fridge near naked flames or other heat sources (heaters, camp fires, gas
ovens etc.).
Do not fill your fridge cabinet with ice or fluid.
Do not place electrical devices inside your fridge.
Do not use your fridge if you suspect that the electrical system has been exposed to water.
Do not use your fridge if it has been immersed in water.
5
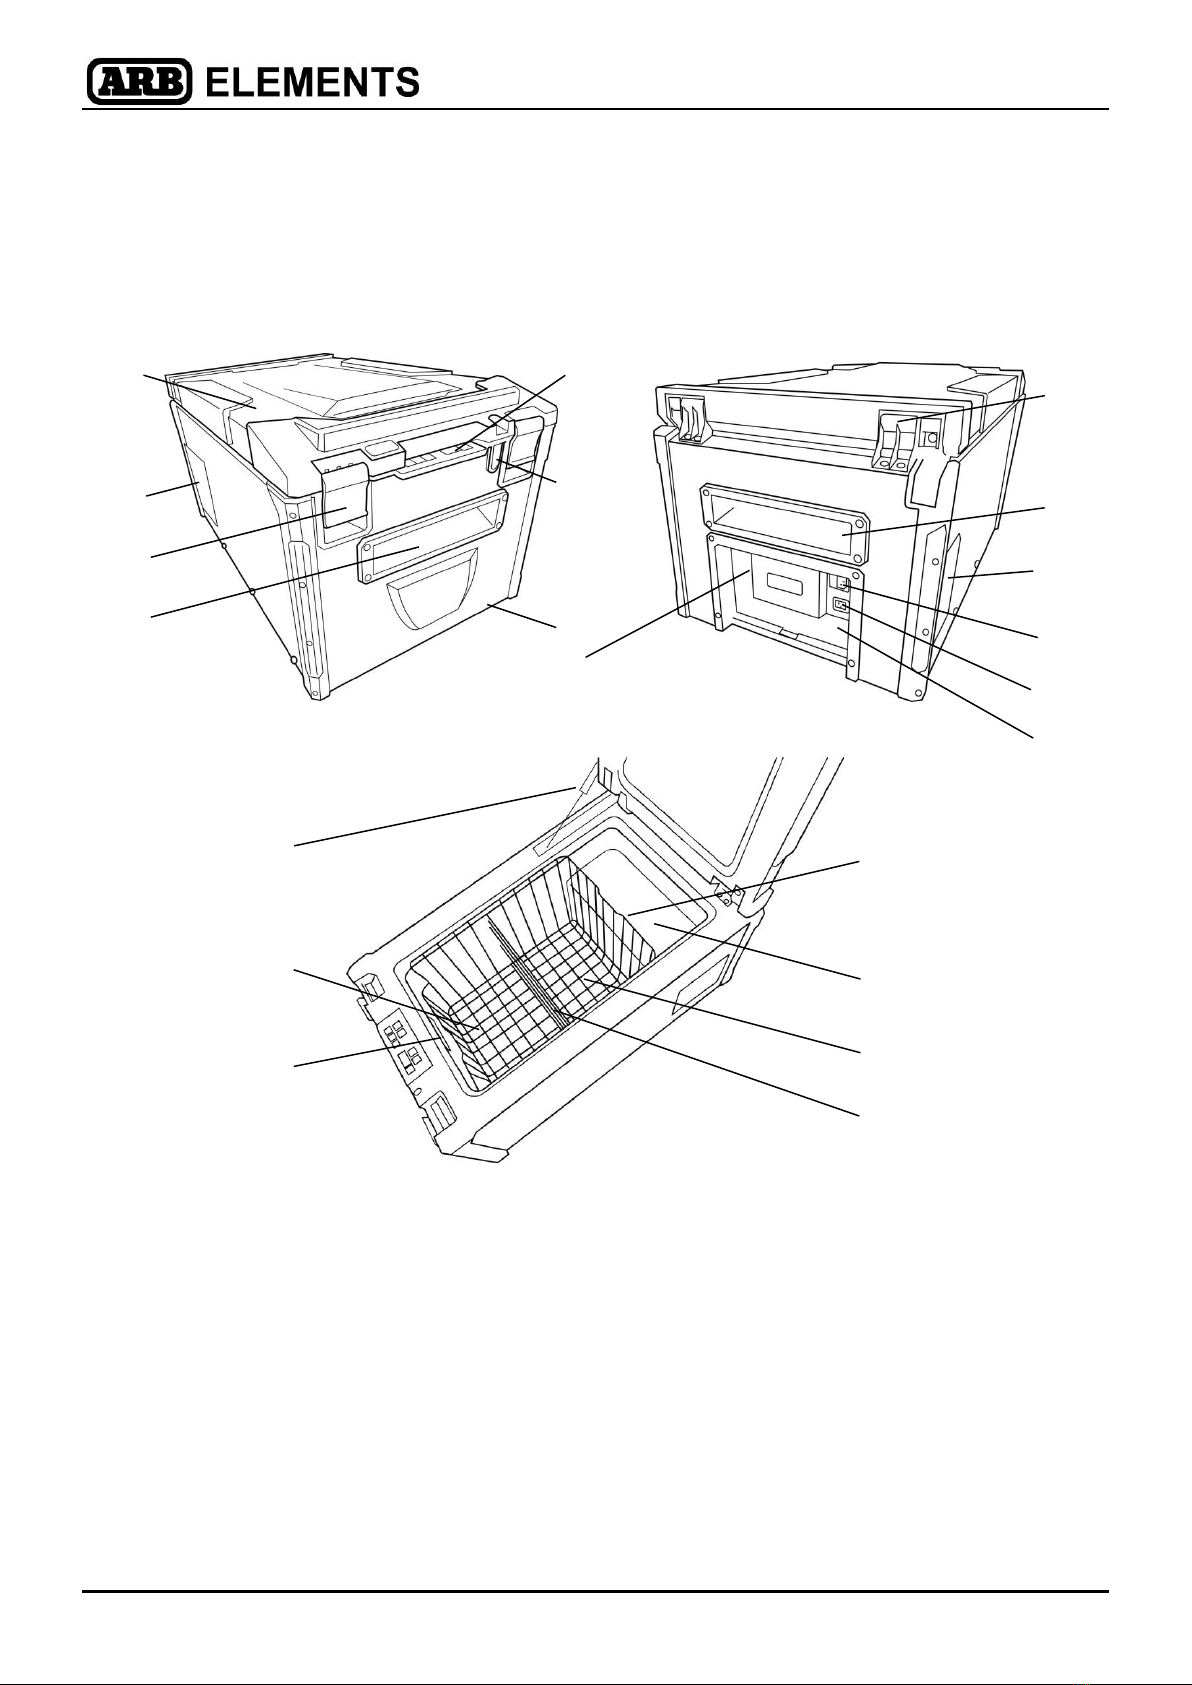
4INTRODUCTION TO YOUR ARB FRIDGE
The key components of your ARB Fridge are identified below in Figures 1 to 4.
Figure 1 –Front of fridge Figure 2 –Rear of fridge
Figure 3 –Interior cabinet
1. Lid
12. 100-240V AC power socket
2. Cooling vent LH
13. 12/24V DC power socket
3. Lid latch x 2
14. Compliance plate and serial number
4. Front carry handle
15. Gas strut
5. Control panel
16. Drain plug
6. Padlock position
17. LED cabinet light
7. Rubber feet x 4
18. Reversible basket
8. Socket for wireless transmitter
19. Secondary cooling cabinet
9. Hinge x 2
20. Primary cooling cabinet
10. Rear carry handle
21. Basket divider
11. Cooling vent RH
1
5
2
3
4
7
8
9
10
11
12
13
6
15
16
17
21
18
19
14
20
6
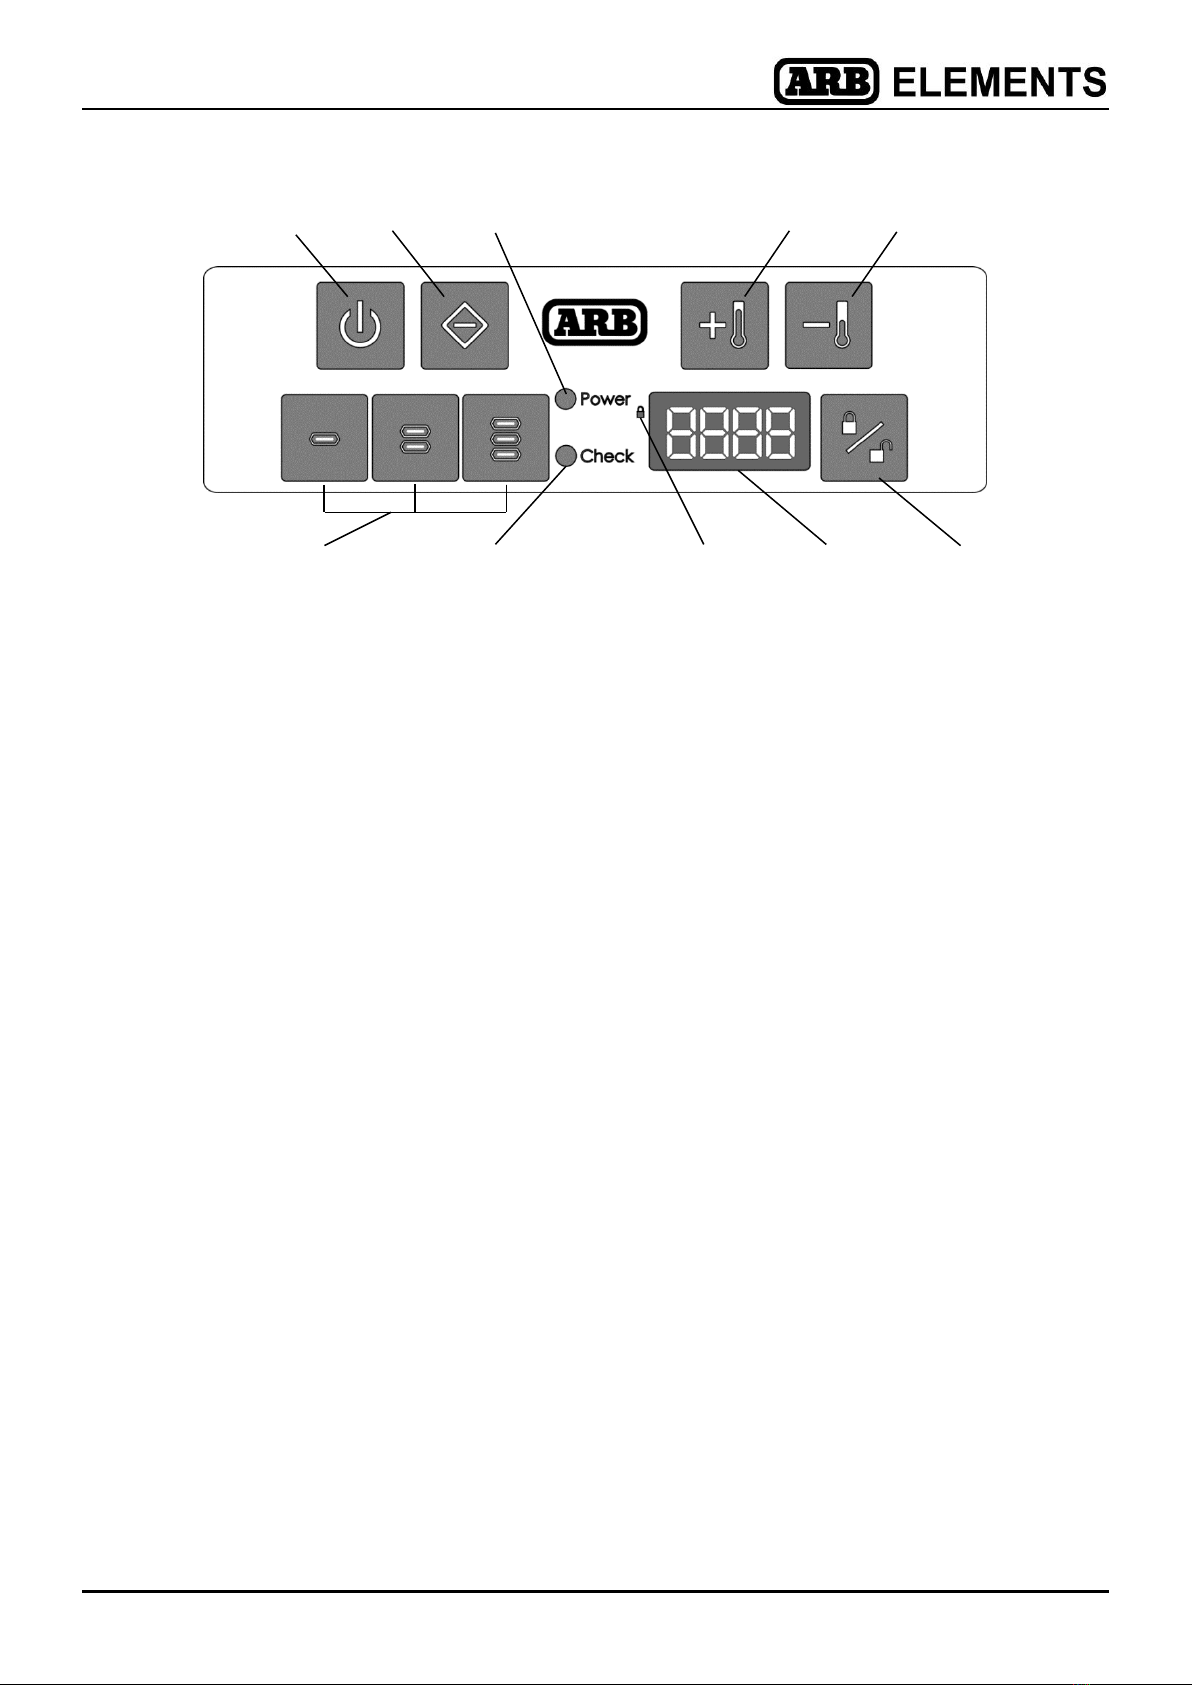
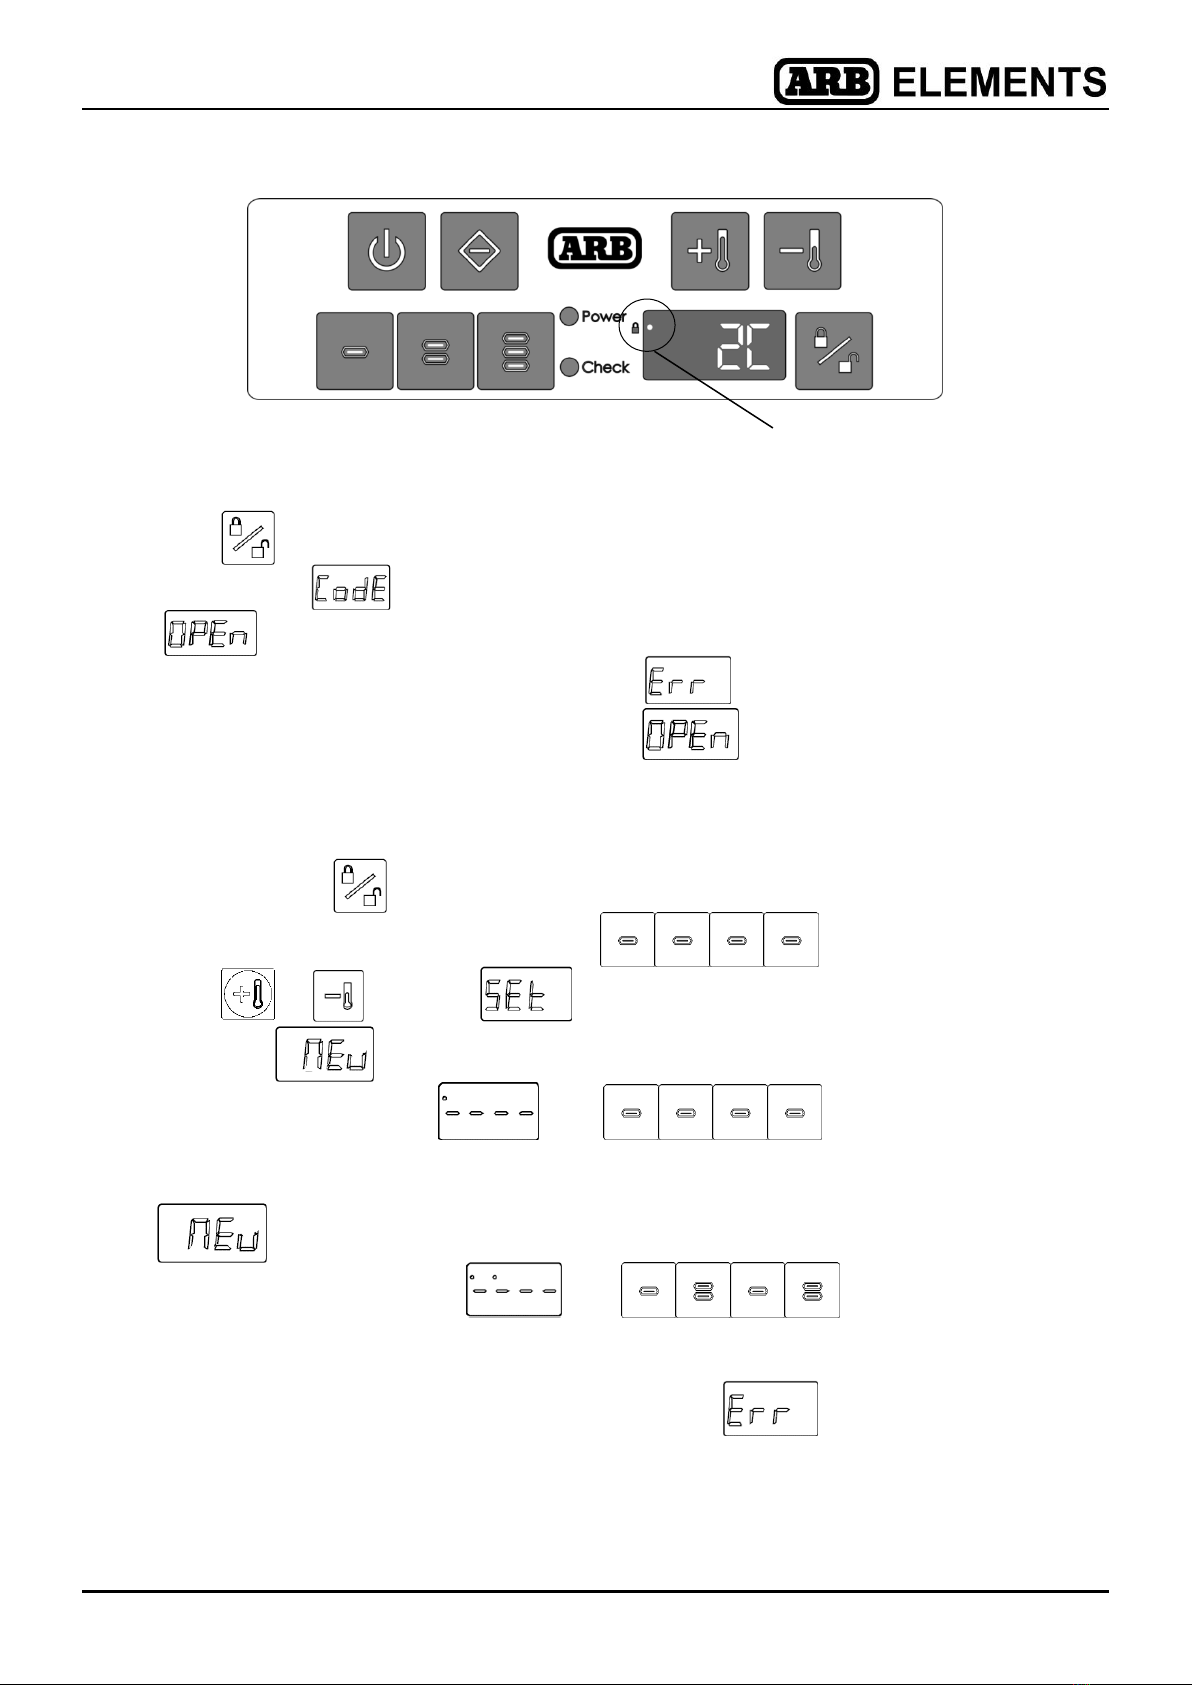
Figure 4 - Control panel
A. Power ON / OFF Button
F. Key pad for electronic lock
B. Function Button
G. Check Indication LED
C. Power Indication LED *
H. Lock Symbol
D. Temperature Up Button
(change setting up)
J. Display
E. Temperature Down Button
(change setting down)
K. Lock / Unlock Button
* The power LED is green when the compressor is running. The power LED is orange when the
compressor is not running (eg. when the fridge has reached its target temperature).
5INSTALLATION
5.1 General installation
The following points should be considered when choosing a location to install your
ARB Fridge.
A minimum clearance of 50 mm must be maintained on all sides of the fridge.
Whether the installation is permanent or temporary, the fridge must be attached
to secure anchorage points.
The ideal mounting position for the fridge is on a flat, horizontal surface. If the
fridge is subject to sideways angles (eg heal on a boat), it can withstand a
sideways angle of 30°.
Avoid placing the fridge near sharp or hot objects.
Avoid placing the fridge near loose objects that could fall on the cabinet and
obstruct its operation.
Never operate the fridge near flammable liquids or vapours.
Avoid turning or storing your fridge on its side.
A
B
D
E
C
F
H
J
K
G

7
5.2 Vehicle Installation
5.2.1 Permanent mounting
Your ARB fridge can be permanently mounted to a flat solid surface using the four
threaded inserts in its base or the ARB Solid Mounting Kit. If your fridge will be removed
on a regular basis, please refer to section 5.2.2 (temporary mounting).
For further information on the ARB Solid Mounting Kit, refer to instructions provided
with the kit.
To permanently mount the fridge using the threaded inserts in the fridge base:
Position the fridge on the mounting surface at the desired location and mark the
outline of the cabinet.
Remove the fridge and mark the centre of the cabinet. The centre is shown as
point C in Figure 5a.
Mark and drill four 6.5 mm holes in the mounting surface using the diagram in
Figure 5a as a guide.
To make use of the drain plug, mark and drill one 13 mm hole in the mounting
surface at the point shown in Figure 5a.
Remove the M6 bolt from the centre of each of the four rubber feet to expose the
treaded inserts. Ensure that the rubber feet remain in the base of the cabinet.
Position the fridge on the mounting surface so that the drilled holes line up with
the threaded inserts in the cabinet.
Attach the cabinet to the mounting surface using M6 bolts as shown in figure 5b.
Do not exceed the fastener assembly torque of 3.5 Nm (2.5 lbft) when tightening
the M6 bolts. ARB recommends applying no permanent thread sealant to the bolt
threads.
NOTE :
-
The rubber feet must be fitted between the base of the cabinet and the
mounting surface.
-
If longer bolts are required, M6 x 1.0 high tensile socket head cap
screws with a minimum grade of 8.8 must be used. To avoid damaging
electrical components within the fridge, the bolt length must only be
increased by the thickness of the mounting surface (dimension ‘A’ in
Figure 5a) plus 8 mm to allow for the recess in the rubber feet.
-
When removing the M6 bolts, avoid turning the fridge on its side.

8
Figure 5a
Fridge Capacity
D
E
F
G
H
J
K
60/63qz (mm/in)
182/7.2
182/7.2
365/14.4
365/14.4
182/7.2
182 7.2
266/10.5
Figure 5b
5.2.2 Temporary mounting
ARB recommends that the ARB Tie Down Kit be used to mount the fridge to solid
anchorage points. This kit includes a quick release feature to allow the fridge to be
quickly and easily released from its mounting position.
Dimensions in mm
Drain plug
Base of fridge
Front of
fridge freezer
Mounting
surface
C
A = Thickness of mounting surface
Rubber mounting foot
Mounting surface
of thickness ‘A’ mm
Mounting bolt
A

9
6OPERATION
6.1 Before use
Before starting your fridge for the first time, it should be cleaned inside and out with a
damp cloth. Please refer to the chapter 7, “Cleaning and maintenance” for further
details on maintaining your fridge.
6.2 Carrying your fridge
Your ARB Fridge is supplied with a handle at each end of the cabinet. These handles
should be used to lift and move the fridge.
WARNING - The lid latches MUST NEVER be used to lift or move the fridge.
CAUTION - The fridge should always be lifted by at least two people using
correct lifting techniques.
6.3 Opening your fridge
Your ARB fridge has two over-centre lid latches that provide positive closure between
the lid, the cabinet and the lid seal.
To open the lid:
Place your hand under each latch and pull away from body of fridge.
Once released, unhook latches from lid and open fridge. Refer to Figure 6a.
To close the lid:
Position each latch onto latch stops in lid and press towards body of fridge.
The latches will make a crisp, clicking noise as they close. Refer to Figure 6b.
Figure 6a Figure 6b
10
6.4 Connecting your fridge
6.4.1 Connecting to 100-240V AC
Your ARB Fridge can be operated on an AC voltage of 100 –240V. The fridge has a
priority circuit which gives priority to mains AC power over DC power. If the fridge is
connected to both AC and DC power, the unit will run solely on the AC supply.
NOTE: The red LED on the control panel may light up briefly when the
supply voltage is switched between AC and DC.
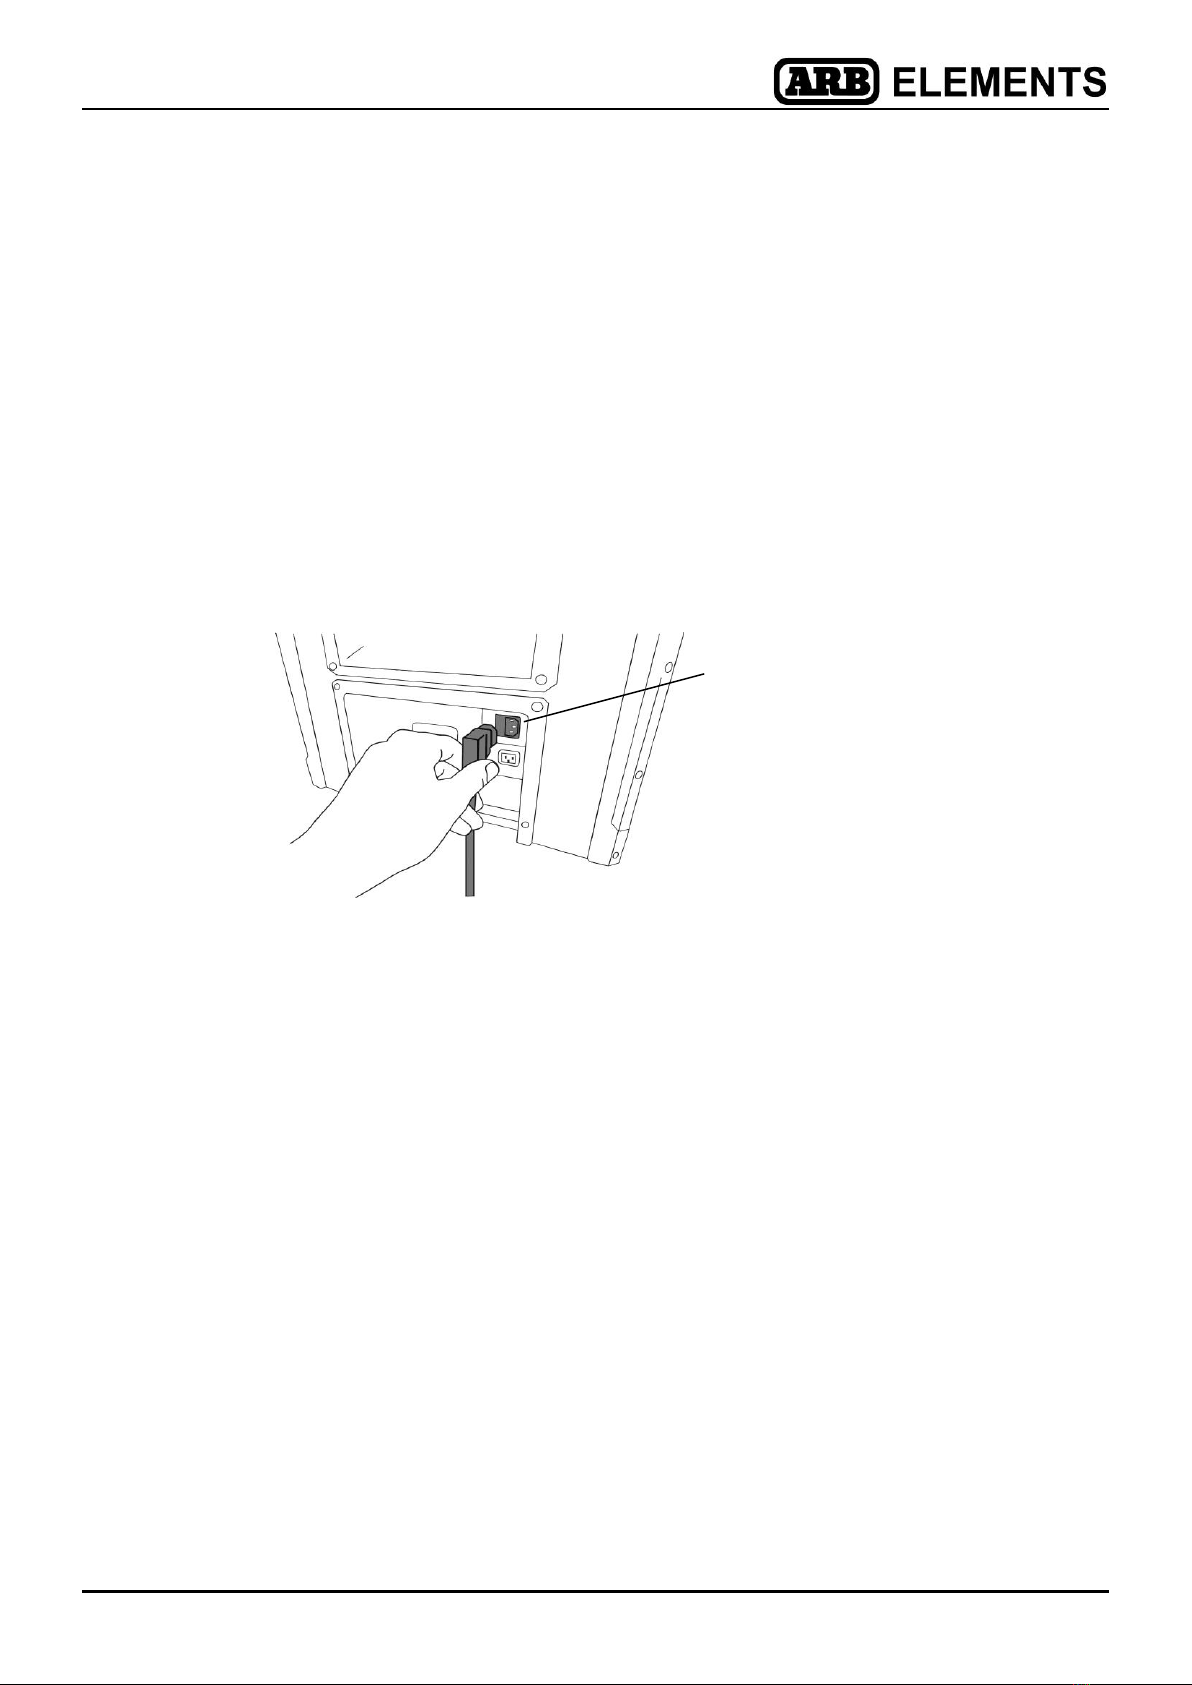
To connect your fridge to 100 –240 V AC supply:
Plug the 100-240 V power lead into the AC power socket on the back panel of
the fridge as shown in Figure 7.
Connect the free end of the power lead to a 100 –240 V AC supply.
Figure 7
CAUTION - Never handle the plugs, leads or switches with wet hands or
while standing on a wet surface.
CAUTION - If you are operating your fridge from a 100-240 V AC supply, a
residual current circuit breaker must be installed in the circuit. ARB advises
seeking advice from a qualified technician.
6.4.2 Connecting to an engine driven generator
Take note of the following points before connecting your fridge to an engine driven
generator.
The generator must be fitted with an automatic voltage regulator. It must supply
a standard, pure sine wave AC voltage, without fluctuation in voltage or
frequency (eg 120 VAC~60Hz or 240 VAC~50Hz).
When using the DC output from your generator, a battery of correct voltage (12
or 24V) must be connected between the generator and the fridge.
The fridge should be turned off when starting and stopping your generator.
CAUTION –Some engine driven generators are not suitable for powering
your fridge.
100-240V AC
power socket
11
6.4.3 Connecting to 12/24V DC
Your ARB fridge can be operated on either 12V or 24V DC. Your fridge is fitted with a
control circuit to prevent polarity reversal and possible short-circuiting when the unit is
connected to a battery.
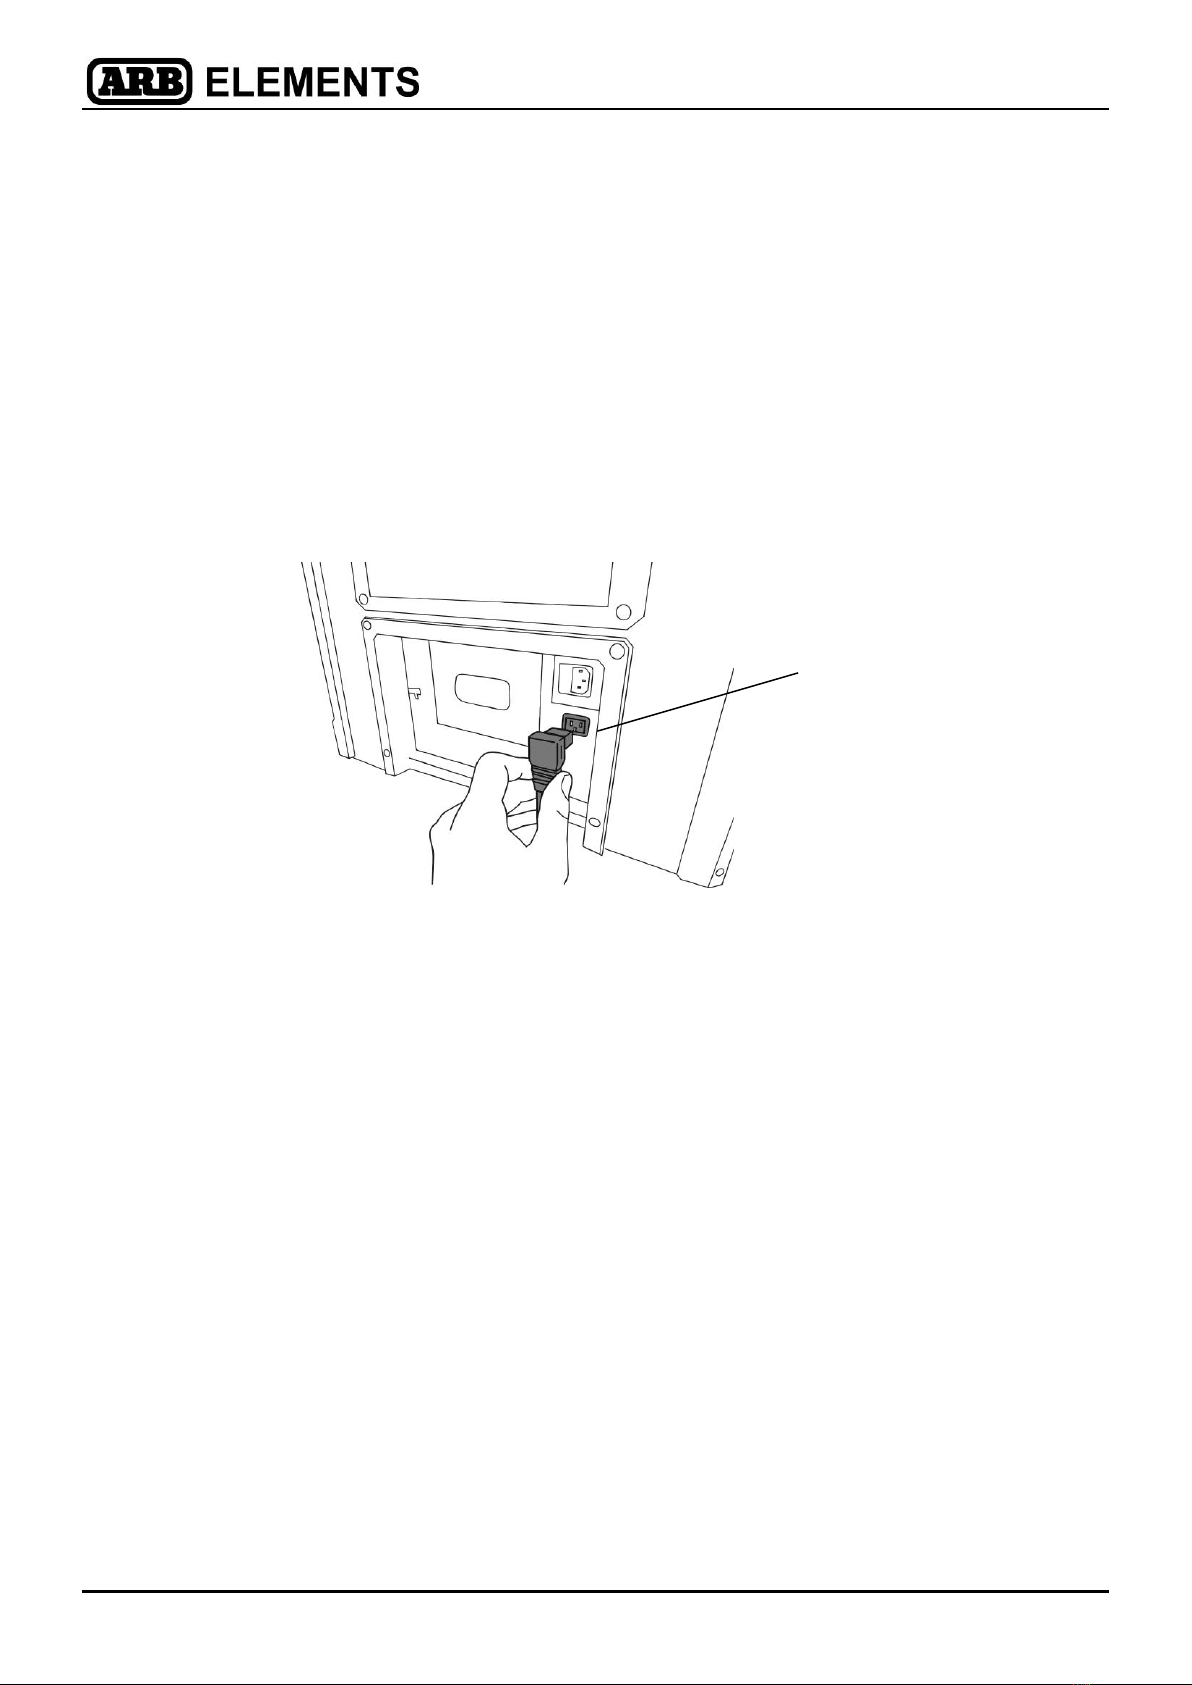
To connect your fridge to a 12 V or 24V DC supply:
Plug the 12/24V power lead into the DC power socket on the back panel of the
fridge as shown in Figure 8.
Connect the free end of the power lead to a 12V or 24V DC supply that is
suitably fused. Refer to section 6.4.4 for information about DC wiring and fusing.
Figure 8
6.4.4 12/24 V DC wiring requirements
To ensure optimum performance of your fridge, it is important that your wiring system is
capable of carrying the required load. The accessories wiring system in many vehicles is
not adequate for such a task.
ARB recommends that a dedicated wiring circuit be installed to power the fridge. This
circuit should be as short as practical and be connected directly to the power supply via
a 15 Amp fuse. The ARB DC wiring kit provides all material for such a circuit.
For an automotive or marine installation, ARB recommends that the wiring circuit be
connected to an isolated power supply like an auxiliary battery system. This will prevent
discharge of the main starting battery.
For cable lengths up to 6m (20’), ARB recommends a minimum of 6mm automotive
cable (4.5mm2/ AWG11).
For cable lengths greater than 6m (20’), ARB recommends that you consult a qualified
technician for advice on the correct cable size.
12/24V DC
power socket

12
6.4.5 12/24V DC power socket
The plug on your 12/24V DC power lead has a removable end. With the end in place
as shown in Figure 9a, this plug will fit into a conventional vehicle accessories power
socket (cigarette lighter). With the end removed as shown in Figure 9b, this plug will fit
into an ARB 2 pole auxiliary power socket.
Figure 9a Figure 9b
ARB highly recommends that this 2 pole connection be used for all 12V DC and 24V
DC connections of your fridge. This will provide a positive and secure connection
between your power source and your fridge.
The following points should be considered when choosing a location for your fridge
auxiliary power socket:
Position the power socket as close to the fridge as is practical.
Position the power socket in a convenient location that will allow the user to
easily connect and disconnect the plug from the socket.
Position the power socket in a protected location away from dust and moisture.
Position the socket high in the vehicle to prevent it from becoming wet should
the vehicle ingest water.
NOTE –If the plug or adaptor collar are removed and the fridge is connected
to a 12V or 24V DC circuit, a 15 Amp inline fuse must be included in the
circuit.
Plug end
removed
Plug end in place
13
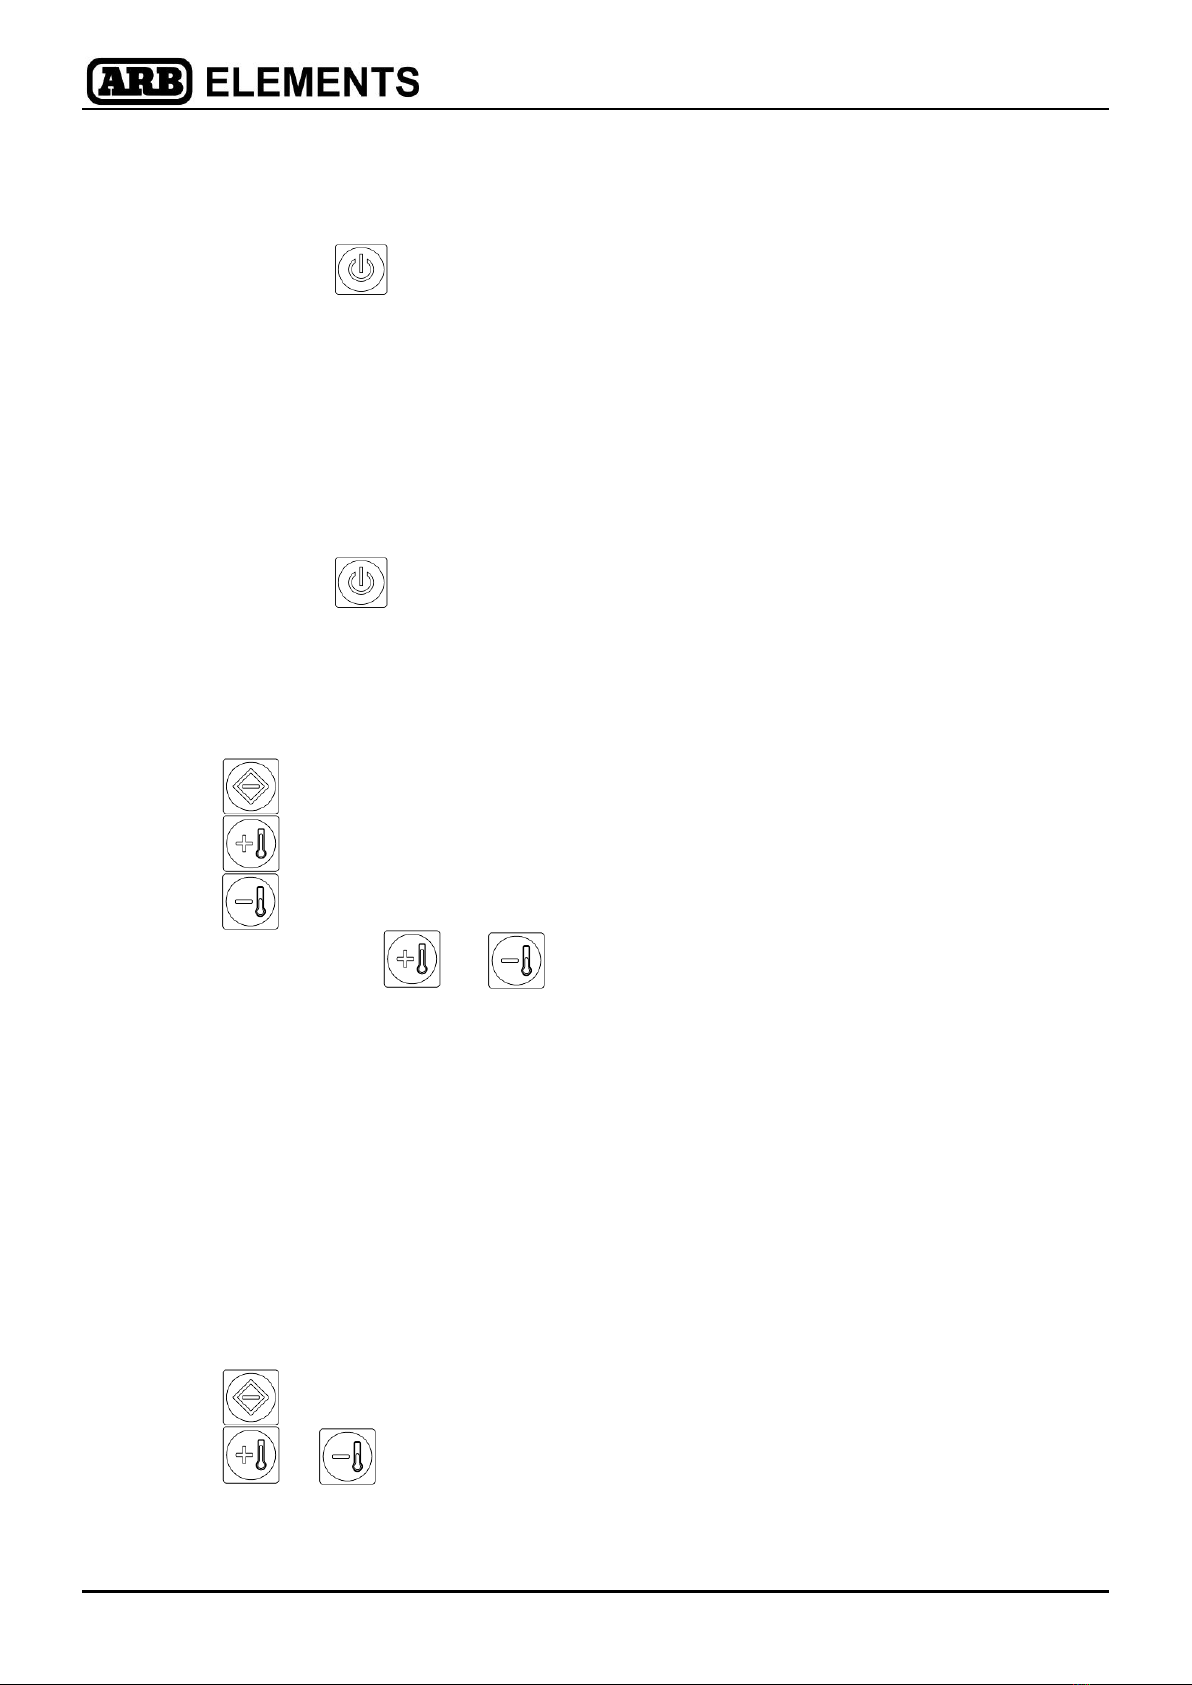
6.5 Turning the fridge on or off
To turn your ARB Fridge on:
Open lid
Press and hold for 2 –3 seconds.
When the fridge is on, the power LED will light up green.
The display will show the current cabinet temperature.
NOTE - The current cabinet temperature is a reading of the temperature at the centre of
the cabinet. The temperature at other areas of the cabinet can deviate from this
temperature.
To turn the fridge off:
Open lid
Press and hold for 2 –3 seconds.
When the fridge is off, the power LED and the display will go blank.
6.6 Setting the target cabinet temperature
To set the target cabinet temperature of your ARB Fridge:
Open lid and turn the fridge on.
Press once to display current cabinet target temperature.
Press to increase the target temperature by one degree.
Press to decrease the target temperature by one degree.
Continue pressing or until the desired target cabinet temperature is
reached.
After 5 to 6 seconds of inactivity, the display will flash and return to displaying the
current cabinet temperature.
NOTE - When the target temperature is reached, the compressor will stop running and
the Power LED will change to orange.
6.7 Changing between °C and °F
Your ARB Fridge is capable of displaying temperature in either degrees Celsius (°C) or
degrees Fahrenheit (°F.)
To change the display between °C and °F:
Open lid and turn the fridge on.
Press twice to display current temperature unit setting.
Press or to change between °C and °F.
After 5 to 6 seconds of inactivity, the display will flash and return to displaying the
current cabinet temperature.
14
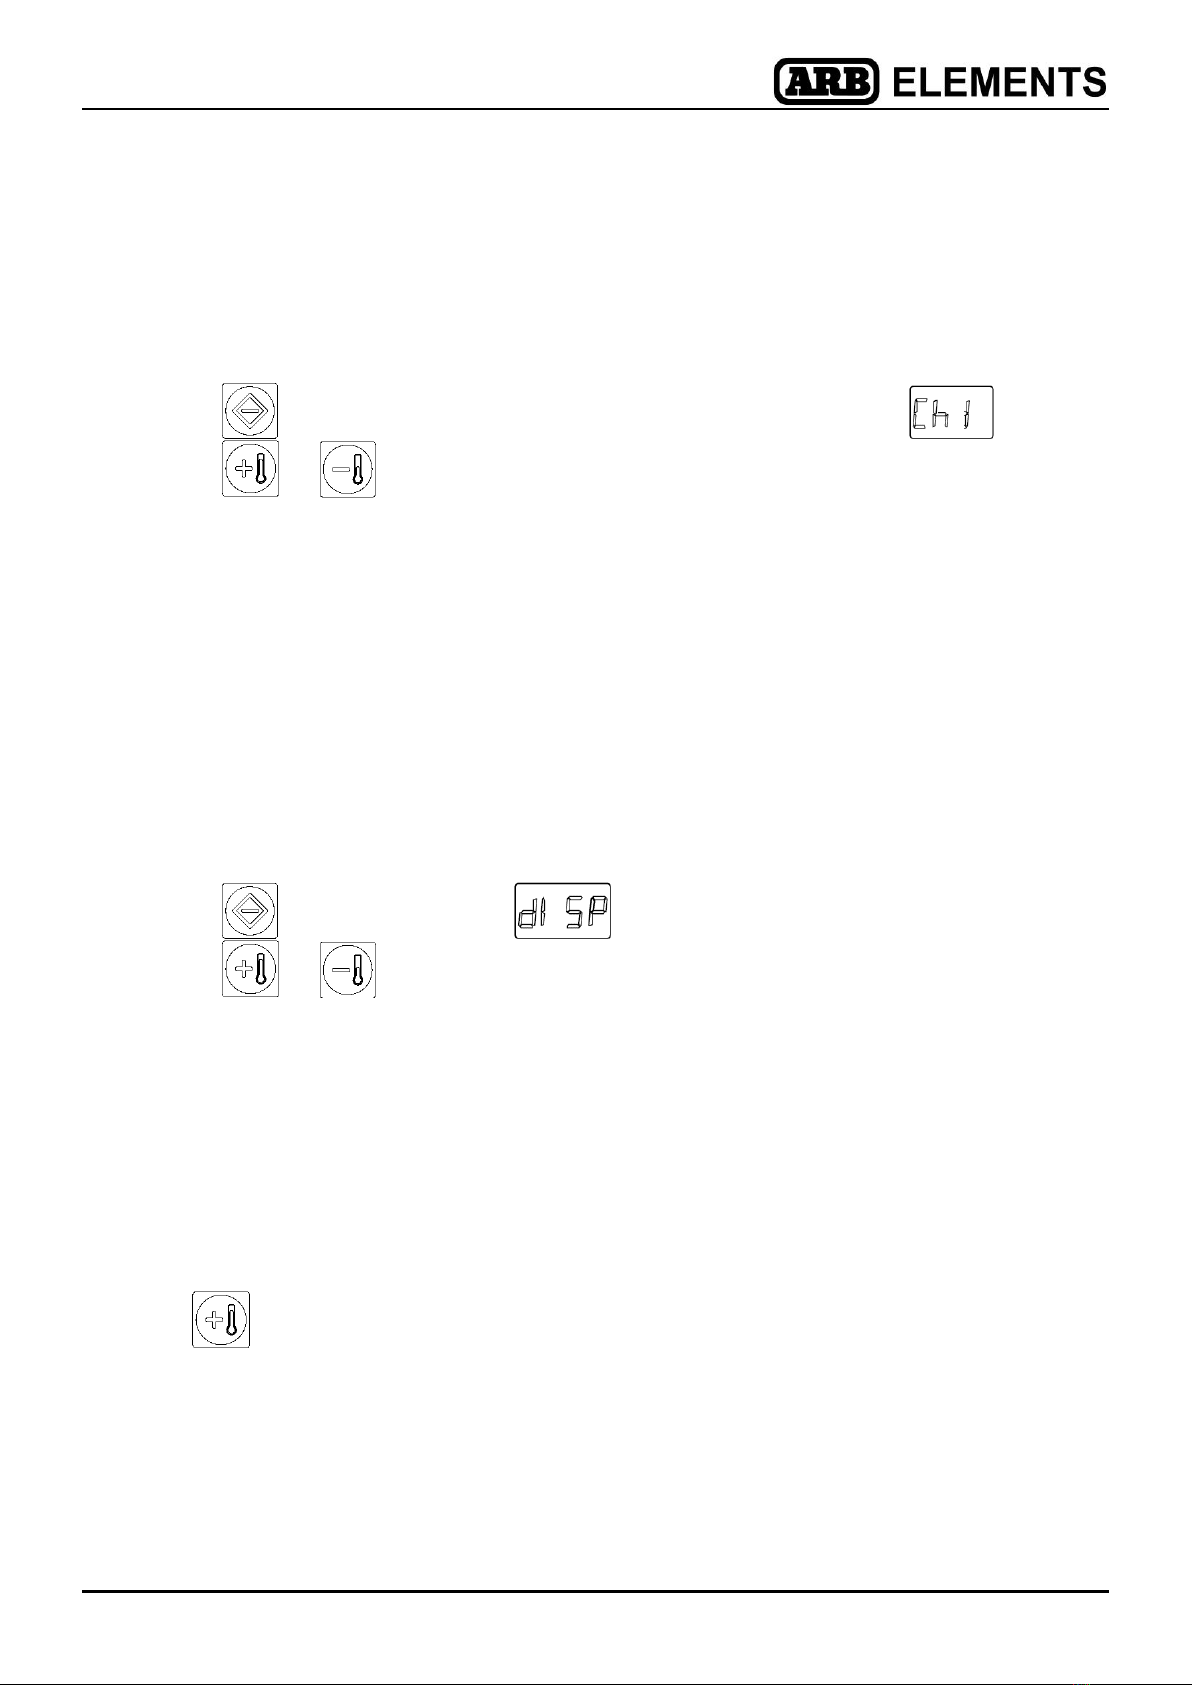
6.8 Changing transmission channel
Your ARB fridge can be used with the ARB wireless fridge display (sold separately) that
has the choice of 4 transmission channels.
To change the transmission channel:
Open lid and turn fridge on.
Press four times to display current transmission channel (eg ).
Press or to change between Ch1, Ch2, Ch3 and Ch4.
After 5 to 6 seconds of inactivity, the display will flash and return to displaying the
current cabinet temperature.
Refer to instructions provided with the ARB wireless fridge display for information about
its installation and use.
6.9 Changing control panel brightness
The brightness of the control panel display on your ARB fridge is adjustable.
To change the brightness of the control panel display:
Open lid and turn fridge on.
Press five times to display
Press or to change between the two brightness levels.
After 5 to 6 seconds of inactivity, the display will flash and return to displaying the
current cabinet temperature.
6.10 Displaying supply voltage
Your ARB fridge can display the voltage being supplied to your fridge.
To display the supply voltage:
Open lid and turn fridge on.
Press to display supply voltage.
When connected to DC power, the supply voltage will be shown
When connected to AC power, ‘AC’ will be displayed
15
6.11 Electronic lock
Your ARB fridge can be locked to prevent access to the cooling compartment and
changes to the control panel settings. This lock is controlled by the control panel on the
front of the fridge. When the fridge is new, the lock is turned off and must be activated
before use.
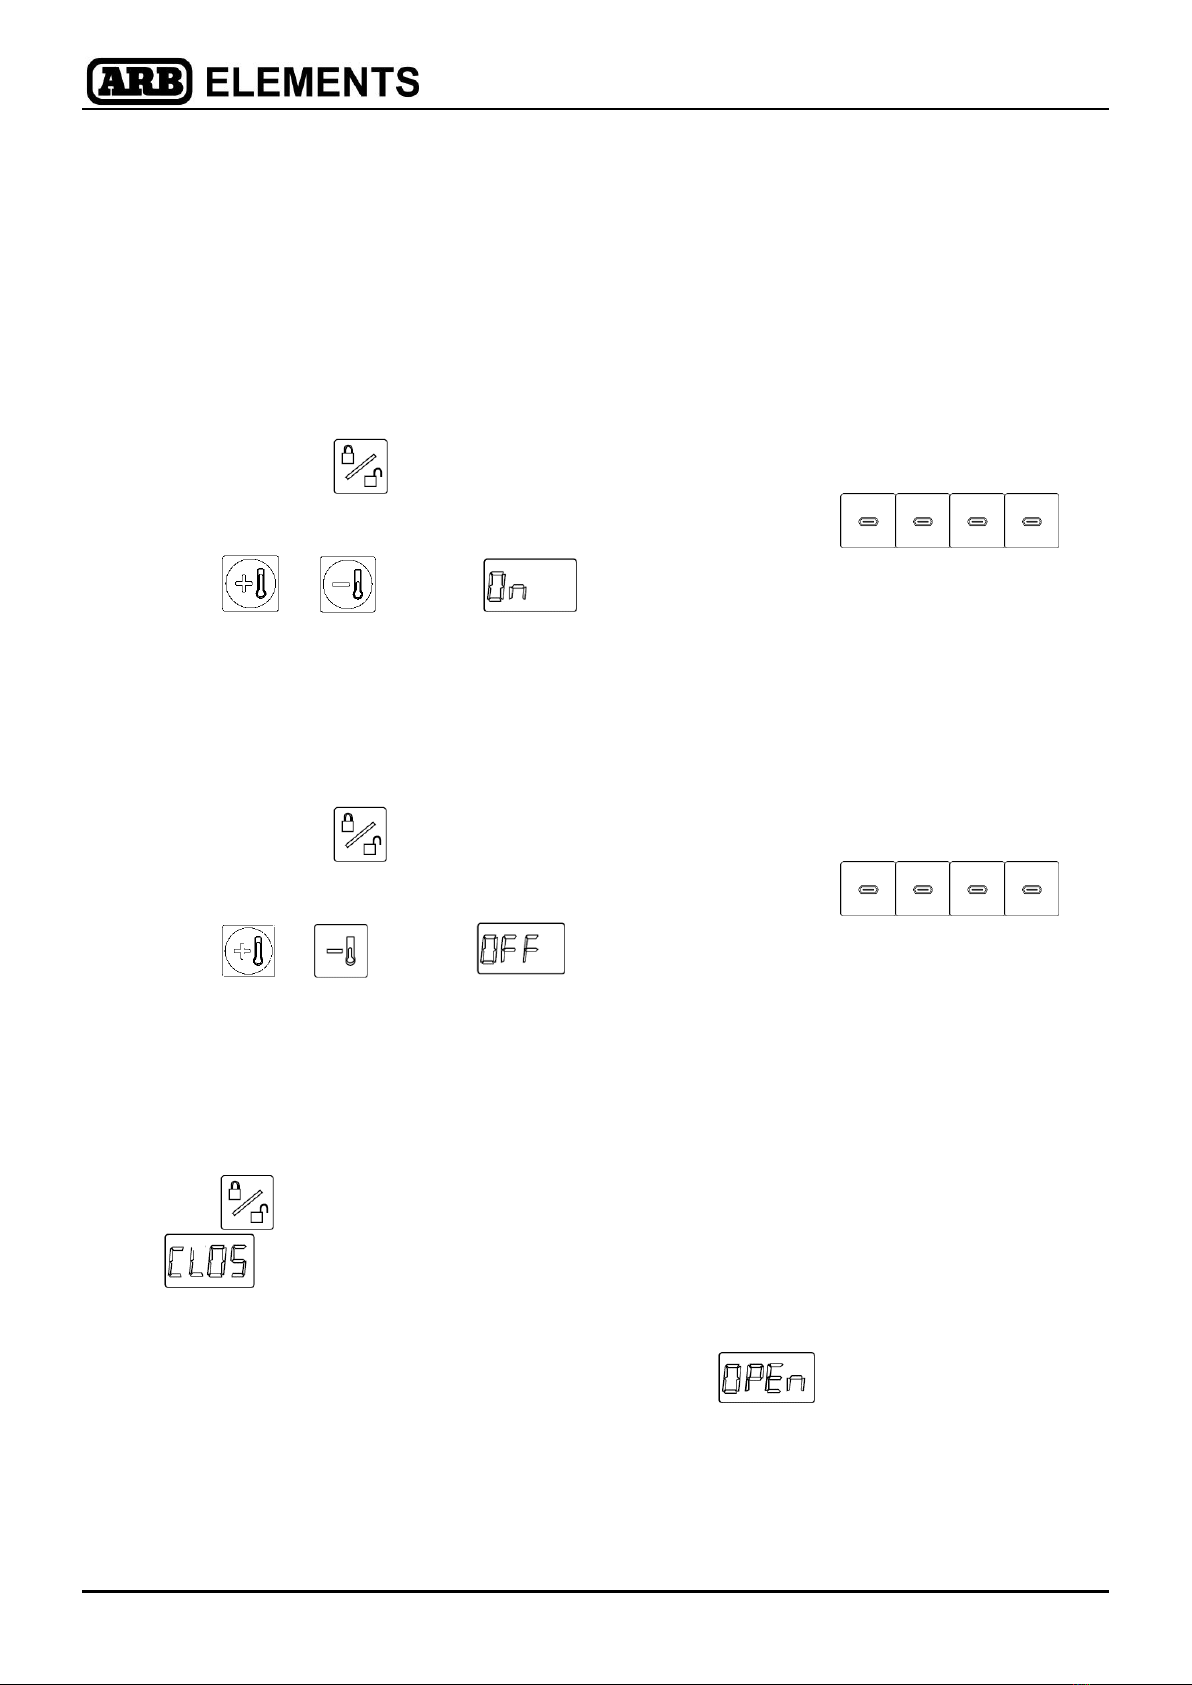
6.11.1 To activate electronic lock
Open lid and turn fridge on.
Press and hold for 3-5 seconds.
Enter Code. Unless otherwise changed, the default code is .
Press or to select
After 3-5 seconds of inactivity, the display will flash 3 times and return to
displaying current cabinet temperature.
6.11.2 To deactivate electronic lock
Open lid and turn fridge on.
Press and hold for 3-5 seconds.
Enter Code. Unless otherwise changed, the default code is .
Press or to select .
After 3-5 seconds of inactivity, the display will flash 3 times and return to
displaying current cabinet temperature
6.11.3 To lock fridge
Turn fridge on and close lid.
Press to lock fridge.
will flash 3 times as fridge is locked. There will be a single dot visible on
the top left hand (LH) corner of the display indicating that the fridge is locked as
shown in Figure 10.
NOTE: If the electronic lock is not activated, will display.
If the lid is not closed, the fridge will not lock.
16
Figure 10.
6.11.4 To unlock fridge
Press to unlock fridge.
Enter 4 digit using control panel.
will flash 3 times as the fridge is unlocked.
NOTE: If the incorrect code is entered, will display.
If the electric lock is turned off,
will display.
6.11.5 To change access code
Open lid and turn fridge on.
Press and hold for 3 seconds.
Enter 4 digit code. The default code is .
Press or to select .
Wait until is displayed.
Enter new 4 digit code - eg . Note single dot on top
LH corner to indicate 1st entry.
will be displayed again.
Re-enter new 4 digit code - eg . Note two dots on top
LH corner to indicate 2nd entry.
NOTE: If new codes are not the same then will display and user
will be prompted to re-enter new codes.
Lock Symbols
17
6.12 Using the battery monitor
Your ARB Fridge is fitted with a battery monitor to control the level of discharge of your
battery. The battery monitor has three settings; HIGH, MEDIUM and LOW. When set to
HIGH, the battery monitor will provide maximum protection for the battery against
excessive discharging. When set to LOW, the battery monitor will allow maximum use
of the energy stored in the battery. Table 1 shows the voltage cutout levels for the three
battery monitor settings.
If your fridge can operate without the vehicle ignition being on, the battery monitor will
cause the unit to switch off as soon as the supply voltage falls below the set level. The
fridge will automatically restart once the restart voltage is reached.
NOTE - When the battery monitor is active, the cooling unit (including
compressor) will not run. The power LED on the control panel will be OFF
and the check LED will flash RED. The cooling unit will not restart until the
voltage level of the battery reaches the restart voltage listed in Table 1.
Table 1
BATTERY MONITOR MODE
LOW
MED
HIGH
Switch off voltage –12V DC
10.1V
11.4V
11.8V
Restart voltage –12V DC
11.1V
12.2V
12.6V
Switch off voltage –24V DC
21.5V
24.1V
24.6V
Restart voltage –24V DC
23.0V
25.3V
26.2V
If your fridge is connected to the starting battery on a 12/24V DC system, ARB
recommends that the battery monitor level be set to HIGH/MEDIUM.
If your fridge is connected to an auxiliary battery on a 12/24V DC system, ARB
recommends that the battery monitor level be set to LOW.
NOTE - ARB recommends that the battery be charged once the battery
monitor has been triggered. ARB also recommends that all non-essential
electrical equipment that draws power from the same source as the fridge be
turned off until the battery is fully charged.

18
To change the battery protection level:
Open lid and turn the fridge on.
Press three times to display current battery protection setting.
Press or to change the battery protection voltage between High (HI),
Medium (nEd) and Low (Lo).
After 5 to 6 seconds of inactivity, the display will flash and return to displaying the
current cabinet temperature.
High Medium Low
6.13 Making use of the basket
Your ARB Fridge is supplied with a reversible wire basket that helps to protect the
internal walls of the fridge cabinet. The basket can be installed with the high side of the
basket against the front of the fridge as shown in Figure 11a. This allows long items to
be laid across the top section of the fridge cabinet. The basket can also be repositioned
so that the high side of the basket is in the centre of the cabinet as shown in Figure
11b. This provides a full height divider between the primary and secondary cooling
zones.
Figure 11a Figure 11b
To remove the basket from the cabinet:
Lift the basket vertically out of the fridge cabinet. Some models have a fixed
basket. To remove such baskets, remove the fastener and replace when basket is
repositioned.
To reinstall the basket into the cabinet:
Slide the basket down into the cabinet of the fridge. The basket is correctly
positioned when its base is in contact with the base of the fridge cabinet.
Fix basket if required using original fastener.
High side
of basket
High side
of basket

19
6.14 Basket divider
Your ARB Fridge is supplied with a removable basket divider which can be easily
removed by lifting it vertically from the basket. When refitted, it is important that the
basket divider is located between the ribs on the sides of the wire basket. For models
with a fixed divider, the divider must not be detached from the basket.
6.15 Drain plug
Your ARB Fridge has a removable drain plug in the base of the cabinet as shown in
Figure 12. The drain plug can be removed to drain liquid from the cabinet of the fridge.
Figure 12
To remove the drain plug:
Open the lid of the fridge.
Grip the drain plug with your fingers.
Gently lift the drain plug away from the base of the cabinet.
To refit the drain plug:
Open the lid of the fridge.
Locate the tip of the drain plug in the drain.
Apply gentle pressure to the drain plug so that it slides into the drain. The drain
plug is correctly located when the lip of the drain plug makes full contact with the
base of the cabinet.
NOTE - It is important the drain plug is refitted before operation of fridge
6.16 Locking fridge with padlock
Your ARB fridge can be locked with a padlock to prevent access to the cooling
compartment and changes to the control panel settings.
To lock the fridge, install a padlock between the lid and the cabinet as shown in Figure
13.
Figure 13.
Padlock
Drain plug
Table of contents
Other ARB Refrigerator manuals


