Cleaning—Inside
Unplug the refrigerator and remove food, shelves and
trays. Wash inside with warm water and baking soda
solution—about two tablespoons of baking soda to a
quart of water. Then rinse and dry.
Don’t use cleansers such as soaps, detergents,
scouring powder or spray cleaners-they may cause
odors inside the refrigerator.
Wash ice cube trays, drip tray and shelves in mild
detergent solution and dry with a soft cloth.
Wipe outside of refrigerator with a soft cloth
dampened with soapy water or Appliance Polish Wax
Cleaner (Cat. No. WR97X216), available from GE
Appliance Service and Parts Center. Use only mild,
soapy water to clean the door gasket.
Never use acids, chemical thinner, gasoline, benzine
or the like for cleaning any part of the refrigerator.
Boiling water or benzine may deform or damage
plastic parts.
To help prevent odors, leave an open box of baking
Do
not
wash any
plastic parts from your
soda in the rear of the refrigerator, on the shelf.
Change the box every three months. refrigerator in your automatic dishwasher.
Location
PREPARATION
Clearances
The refrigerator must be installed Allow the following clearances for
on a floor strong enough to support ease of installation, door opening
it when it is fully loaded. and proper air circulation:
If the refrigerator is in a 40”F. or . Top of refrigerator to
colder room, it will operate but it
underside of countertop . . . . . . . . . 1
k“
will not cool foods properly.
. Above flooring
Also see Energy-Saving Tips. (including carpeting) .............1 %“
● Hinge side, if refrigerator
is next to a wall
. . . . . . . . . . . . . . . . . . . . . 1
H“
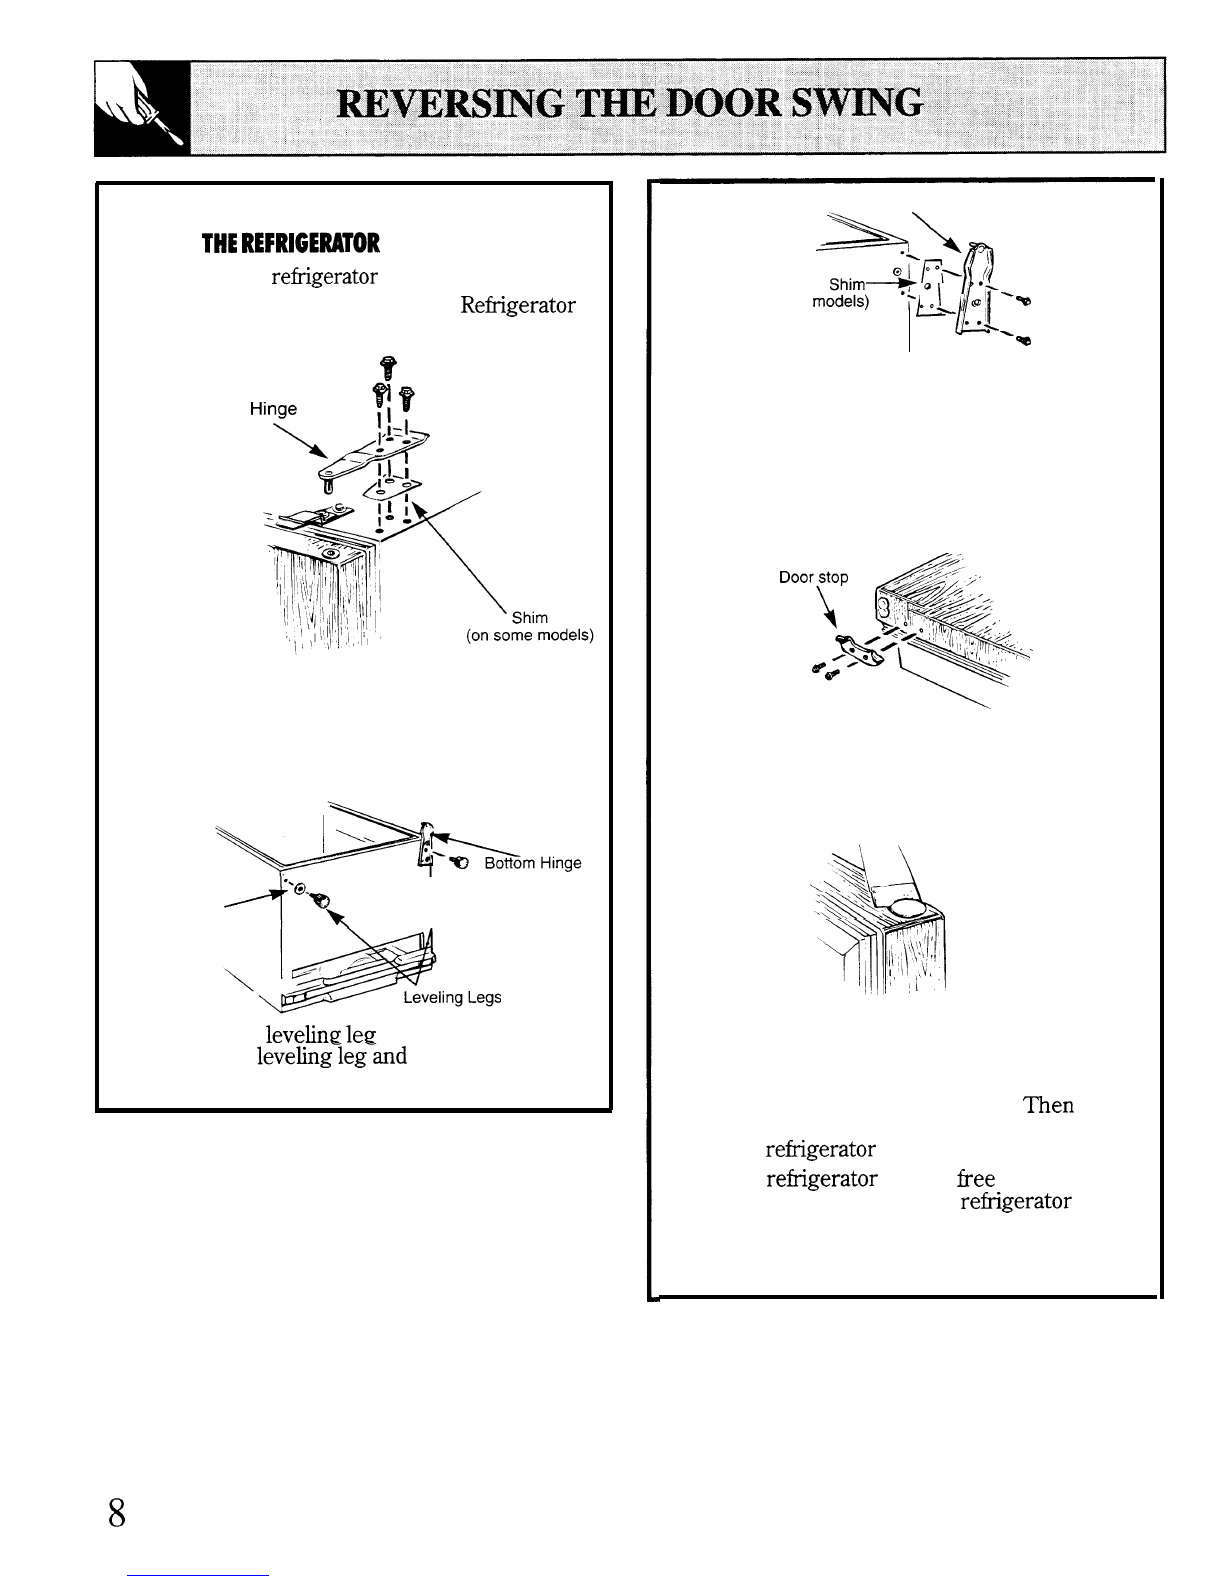
Leveling Legs
Adjustable legs at the front corners
should be set so the refrigerator is
ftiy
positioned on the floor. Legs
should extend 1
y8°
down from
bottom of cabinet; the front of the
refrigerator may need to be raised a
bit more so the door closes easily
when opened about halfway.
Turn leveling legs counterclockwise
to raise refrigerator, clockwise to
lower it.
Preparing to Move
Disconnect the power cord from wall outlet, Be sure refrigerator stays in upright position
remove food and defrost refrigerator. Then clean and during actual moving and in van. Refrigerator must be
dry the interior.
secured in van to prevent movement. Protect outside
Secure all loose items such as ice trays and drip tray
of refrigerator with blanket.
by taping them securely in place to prevent damage.
Preparing for Vacation
For extended vacations or absences, unplug the For shorter vacations, remove perishable foods and
refrigerator.
Clean
the interior with ba.kin=~~a
leave the control at regular setting. However, if room
solution of one tablespoon of soda to one quart of
temperature is expected to drop below 40”F. follow
water. Wipe dry. To prevent odors, leave an open box the same instructions as for extended vacations.
of baking soda in refrigerator. Leave doors open.
5