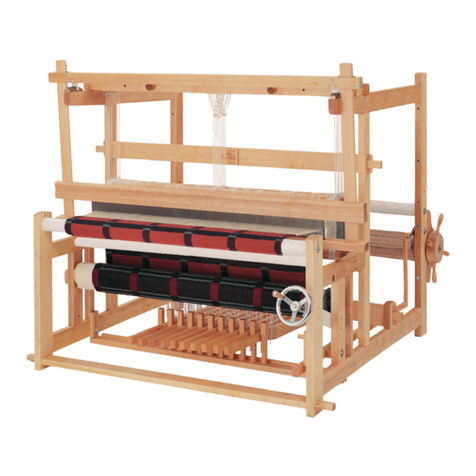
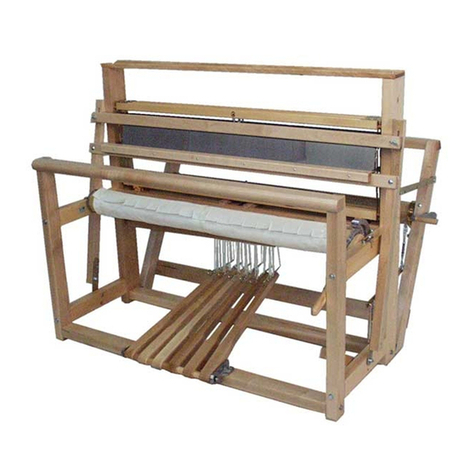
Ashford Jack User manual

INSTRUCTIONS
Ashford Guarantee
Thank you for purchasing this Ashford product. In the unlikely event there is any
fault in manufacture we will replace the item. To validate our guarantee please
visit our website or write to us.
Ashford Handicrafts Limited
Factory and Showroom: 415 West Street
PO Box 474, Ashburton, 7700 New Zealand
Telephone 64 3 308 9087 Facsimile 64 3 308 8664
JL90ES260117
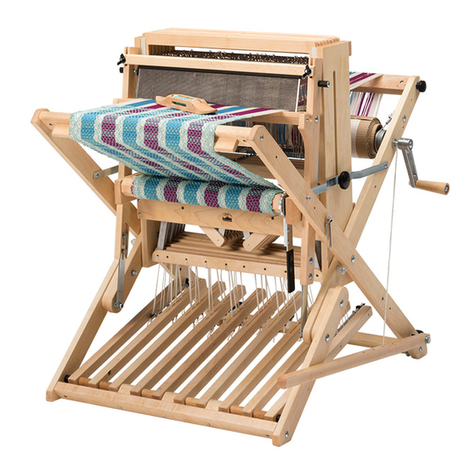
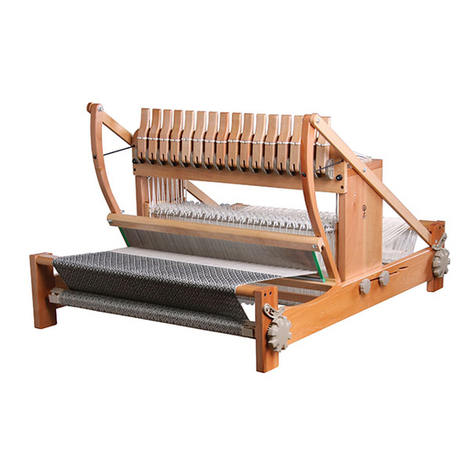
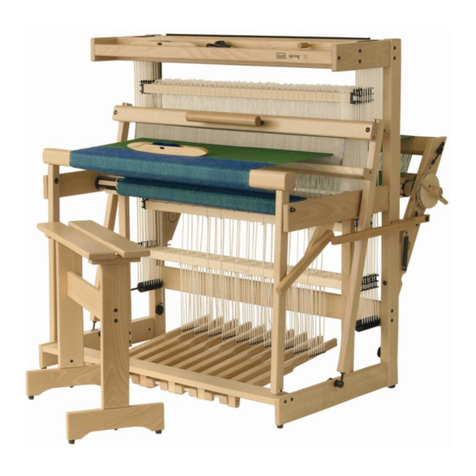
Jack Loom
8 Shaft - 97cm (38ins)

2
Finishing the wood
The Sliver Beech tree is a native of New Zealand and has a lovely variety of colour and grain.
This Jack Loom has been finished with a water based lacquer to protect the kiln dried timber from climatic changes and enhance its
natural character. To repair and restore the finish use Ashford Wax Polish to enhance the natural beauty of the wood.
Before Assembly
• Please read these instructions completely, identify all parts and hardware and note the assembly sequence.
• BOLTS. Check and sort the sizes and quantities against the full-size drawing on page 4.
• Rub candlewax on the threads of the woodscrews to make assembly easier.
Check hardware against full
size illustration.
To make assembly easier use
candle wax on the screws.
ASSEMBLY INSTRUCTIONS FOR
THE ASHFORD JACK LOOM
Tools Required
Hints
More Information
The Wheel Magazine
Ashford’s annual fibrecraft magazine.
Spinning, weaving, felting, dyeing and
knitting projects, patterns and articles
from around the world. To receive
the glossy version delivered to you,
subscribe at:
www.ashford.co.nz/subscribe
How-to videos on You Tube
Watch our how-to videos on You Tube.
www.youtube.com/user/AshfordHandicrafts
Facebook
Join us on facebook.
www.facebook.com/ashford.wheels.looms
SpannerCandle wax Wood glue Oil
Screwdriver, hammer, candlewax, wood glue, light lubrication oil, adjustable spanner and a ruler.
3
OVERVIEW
HARDWARE CHECKLIST
1 – M8 x 50 Hex Head Bolt
6 – M6 x 80 Hex Head Bolt
2 – M6 x 100 Hex Head Bolt
2 – M6 x 65 Hex Head Bolt
1 – M8 x 100 Cup Head Bolt
4 – M6 x 50 Cup Head Bolt
1 – M6 x 40 Cup Head Bolt
9 – M6 x 65 Cup Head Bolt
2 – M6 x 75 Cup Head Bolt
3 – M6 x 70 Cup Head Bolt
29 – M6 X 16 Washer
6 – M6 x 22 Washer
1 – M8 x 19 Washer
48 – M8 x 25 Washer
8 – 8 x 2 Screw
4 – 8 x 1 ½ Screw
1 – 12 x 1 Pan Head Screw
2 – 6 x ½ Pan Head Screw
1 – M11 x 4 Brass Spacer
1 – 6.5 x 40 Cotter Pin
3 – Screw Hook
13 – M6 Hex Nut
1 – M8 Hex Nut
1 – M10 Hex Nut
1 – M8 Nylock Nut
3 – M6 Nylock Nut
16 – M11 Rubber Buffer
2 – M16 Rubber Buffer
16 – 3/32 Dome Caps
10 – M6 Barrel Nut
2 – M10 Spanner
1 – M13 Spanner
6 – M6 Nylon Knob
21 – Texsolv Straight Peg
16 – Harness Hook
1 – Heddle Hook - Double ended
1 – Heddle Hook - Metal
40 – Nylon Cord 60cm
14 – Texsolv Cord 80cm
8 – Texsolv Heddles 268, bundles of 100
6 – M8 x 170 Steel Rods - Lever Assembly
2 – 5/8 x 75 Steel Shaft - Cloth beam and
Warp Roller
2 – M6 x 180 Threaded Rod with Dome Nut

4
REAL SCALE HARDWARE
10 – M6 Barrel Nut
13 – M6 Hex Nut
4 – 8 x 1½ Screw
1 – 12 x 1 Pan Head Screw
1 – M10 Hex Nut
1 – M8 x 19 Washer
1 – M8 Nylock Nut
48 – M8 x 25 Washer
6 – M6 x 22 Washer
3 – M6 Nylock Nut
1 – M8 x 100 Cup Head Bolt
8 – 8 x 2 Screw
1 – M8 Hex Nut
16 – 3/32 Dome Cap
1 – 6.5 x 40 Cotter Pin
2 – M16 Rubber Buffer
16 – M11 Rubber Buffer
2 – 6 x ½ Pan Head Screw
9 – M6 x 65 Cup Head Bolt
1 – M8 x 50 Hex Head Bolt
6 – M6 x 80 Hex Head Bolt
2 – M6 x 65 Hex Head Bolt
2 – M6 x 100 Hex Head Bolt
4 – M6 x 50 Cup Head Bolt
1 – M6 x 40 Cup Head Bolt
2 – M6 x 75 Cup Head Bolt
3 – M6 x 70 Cup Head Bolt
29 – M6 X 16 Washer
1 – M11 x 4 Brass Spacer
21 – Texsolv Straight Peg

5
x 16
x 8
PARTS

6
M6 Barrel Nut
M6 X 16 Washer
M6 x 80 Hex Head Bolt
ASSEMBLY OF THE LOOM
1. Assemble the base using M6 x 80 Hex Head Bolt, M6 X 16 Washer and M6 Barrel Nut. Note the holes in rail BX are to the top.
Nylon bushes in parts Cand CX are on the inside.

7
2. Bolt castle side Eto the outside of base
rail A, and the castle side EX to the base
rail AX using M6 x 65 Cup Head Bolts, M6
X 16 Washer and M6 Hex Nut. Note the
nylon shaft guides are to the inside of
the frame and holes for the beater stops
face forward.
3. Secure the blocks Oto the inside of the
castle sides Eand EX with M6 x 65 Cup
Head Bolts, M6 X 16 Washer and M6 Hex
Nut
4. Secure one rail Mto blocks O
using two 8 x 2 Screws at each end.
Note the position of the holes for
the steel rods x.
5. Place the six M8 x 170 Steel Rods
into the rail M.
M6 x 65 Cup
Head Bolt
M6 x 65 Cup
Head Bolt
M6 x 16
Washers
M6 Hex Nut
M6 x 16
Washers
M6 Hex Nut
8 x 2 Screws
M8 x 170 Steel Rods

8
Back Rail M Lever Assembly N
M8 x 25 Washers
N NN N N N N N
M
H
M6 x 80
Hex Head
Bolt
M6 x 16
Washer
M6 Barrel
Nut
M6 Barrel
Nut
6. Using M8 x 25 Washers, place 5 washers onto the two lower steel rods followed by a lever assembly N. Place two washers
onto each lower steel rod followed by another lever assembly N. Repeat this procedure until all the lever assemblies are in
position, finishing with 5 washers. A drop of light oil on the rods will help make treadling easier.
7. Locate the second rail Monto the steel rods and secure to blocks Ousing two 8 x 2 Screws at each end.
8. Identify the cloth beam supports F(left) and FX (right). FX has a counter-bored hole on the outside.
9. Attach but do not tighten FX to DX with a M6 x 80 Hex Head Bolt, M6 X 16 Washer and M6 Barrel Nut and attach to EX with the M6 x
180 Threaded Rod with Dome Nut and M6 X 16 Washer. Repeat for the opposite side with F, Dand E. Keeping the nylon bushes to
the inside.
10. Slide the ratchet lever Gonto the steel shaft on the cloth beam Hand ensure the pawl engages the ratchet teeth.
11. Twist the cloth beam support FX up slightly and locate the cloth beam Hinto the nylon bush. Lower Hso the holes in Hand F
line up and then tap a 5/8 x 75 Steel Shaft through the nylon bush and into H. Then tighten the bolts securing Fand FX.
M6 x 16
Washer
M6 x 180 Threaded Rod
and Dome Nut

9
12. Insert the 12 x 1 Pan Head Screw into the inside of the front upright DX for a ratchet lever stop. When transporting the loom lift
and pull the lever sideways, then let it hang down.
13. Attach the ratchet dog hto the right cloth beam support FX using a M8 x 50 Hex Head Bolt, M10 Hex Nut, M8 x 19 Washer and
M8 Nylock Nut. Tap the head of the bolt into the counter-bored hole. Do not overtighten as the dog should move freely after
tightening the nut.
12 x 1 Pan
Head Screw
M10 Hex Nut
M8 x 50 Hex
Head Bolt
M8 x 19
Washer
M8 Nylock
Nut

10
14. Slide 5treadles Jonto the long steel rod with a round wooden
spacers kbetween. Add the centre block. Then add the next 5
treadles and round wooden spacers followed by the treadle blocks l
at either end. Note that the rod holes in the treadle blocks must be
towards the top. Then bolt all 3 blocks to BX with M6 x 70 Cup Head
Bolt, M6 X 16 Washer, and M6 Hex Nut.
15. Tap a M6 x 50 Cup Head Bolt through
the inside of back upright CX and then
attach spacer Pthrough the hole with
a M6 x 22 Washer and nylon knob. Note
the middle slot is used to hold the back
beam in the closed position. Repeat for
the other side.
16. Tap a M6 x 50 Cup Head Bolt through the
inside of castle side EX. Locate the slot
in spacer Ponto the bolt and secure
with a M6 x 22 Washer and nylon knob.
Repeat for the other side.
Steel Rod
M6 x 70 Cup
Head Bolt
M6 x 70 Cup
Head Bolt
M6 x 70 Cup
Head Bolt
M6 Hex
Nut
M6 x 16
Washer
M6 x 16
Washer
M6 Hex
Nut
M6 x 70 Cup
Head Bolt
M6 x 50 Cup
Head Bolt
M6 x 50 Cup
Head Bolt
TAP IN WITH
HAMMER
M6 x 22
Washer
M6 x 22
Washer Nylon Knob
Nylon Knob

11
M6 x 40
Cup Head Bolt
TAP IN
WITH HAMMER
M6 X 16
Washer
M6 X 16 Washer
M6 X 16
Washer
M6 x 65 Cup Head Bolt
M6 Hex Nut
M6 Nylock
Nut
17. Remove the wooden spacer Pfrom the castle Eto allow
the warp roller Zto fit between the uprights without
twisting them. Then place the warp roller between the
back uprights Cand CX by locating the shaft of the
warp roller into the nylon bush in CX. Secure the warp
roller by tapping a 5/8 x 75 Steel Shaft through the
nylon bush in Cand into Z.
18. Fully thread two screw hooks into the brake lever Wand
one screw hook into the hole underneath FX.
19. Push a M6 x 65 Cup Head Bolt through the castle side EX.
Place the brake lever W, a M6 X 16 Washer and then a M6
Nylock Nut onto the bolt. Don’t overtighten as the brake
lever must move freely.
20. Push the M6 x 40 Cup Head Bolt through the upright CX. Then locate a M6 x 16 Washer, Brass Spacer M11 x 4, the loop of the
brake cable, M6 X 16 Washer and M6 Hex Nut onto the bolt and tighten firmly. Now wind the cable around the brake drum in
the direction illustrated starting with the cable closest to the upright CX and attach the turnbuckle to the screw hook at the
end of the brake lever W.
21. Locate the spring between the screw hooks in FX and brake lever W. Adjust the turnbuckle until the cable grips the brake
drum and prevents it turning.
NOTE: If the brake does not easily release check the following:
a) That the wire rope is wound evenly on the brake drum and is not crossed over.
b) That the wire cable has been wound in the correct direction.
c) Adjust the tension on the turnbuckle until the brake holds but releases when the brake lever is depressed.

12
22. Attach the handle to the crank with a M8 x 100 Cup Head Bolt by
threading the bolt through the handle and crank and locking it with a
M8 Hex Nut. Then locate crank onto the shaft of warp roller Zand lock
in place with 6.5 x 40 Cotter Pin. Spread the ends of the pin slightly to
prevent it falling out.
NOTE: The cloth and warp roller must rotate in the direction shown.
24. Each shaft has holes on both edges of top and bottom rails. The hole
for the jack pin is exactly in the centre of the bottom rail to ensure it
lifts evenly and is marked with a small hole on the front of the shaft.
Do not use this hole for a hook.
Fit one Harness Hook into the top rail and the bottom rail of each shaft
and secure by pressing a 3/32 Dome Cap onto the hook. It is easier to do
this by supporting the hook on a corner of a table and pressing firmly
on the dome cap.
Spread the heddles evenly either side
of the Harness Hook and then clip the
stainless steel rods over the hooks. The
hooks prevent the bars from sagging
when being raised or pulling out when
the warp is being advanced.
M8 x 100
Cup Head Bolt
M8 Hex Nut
3/32 Dome Cap
Harness Hook
Harness Hook
Harness Hook
23. Your Ashford 8 Shaft Jack Loom has been supplied with Texsolv
Heddles. Each bundle contains 100 heddles which enable you to use
100 per shaft.
Take a bundle of heddles (DO NOT REMOVE THE PINK TIES).
Thread 2 round steel bars through the holes in a shafts, through the
gaps in the top and bottom of the bundles and into the holes in the
other end of the shaft. Then push M11 Rubber Buffer into the oval hole in
the outside of the shaft to lock the steel rod in place.
NOTE: ensure the M11 Rubber Buffer are pushed right to the bottom of
the holes so they do not protrude or drag on the nylon guides.
THEN remove the ties and spread the heddles evenly either side of the
centre hole.
The heddles can be used as is or can be cut with sharp scissors. Only
cut after the heddles have been loaded onto the steel rods.

13
25. Rub candlewax on the ends of the
shafts before loading them into the
nylon guides. Load the shafts and
locate the jack pin into the centre
hole in the shaft. If any of the shafts
are curved, to avoid them touching,
load them so that the curves are all
in the same direction.
26. Attach the castle top rails Tto the
castle sides Eand EX with 8 x 1½
Screws. Locate the shelf Vonto the
castle. It is easily removable for
access to the shafts.
27. Locate the front and back beams Y onto the tenons of uprights C, CX and D, DX. The beams are easily removable to allow
access to the shafts when warping.
NOTE: The back beam has a built in raddle with 10mm spacing. Fit the beam with the raddle pins facing up when warping,
otherwise fit it with the raddle facing down. Use the wooden cover strip to keep your warp in place.
8 x 1½
Screw
Y
CX

14
32. Tie a knot in the Nylon Cords leaving
approx. 15mm at the end.
NOTE: There are 8 parallel lams and 8
slots in each treadle. After determining
the pattern required, connect the
cord from each lam to the slot in the
treadle directly beneath it. The knots
in the cords locate into the holes in the
underside of the treadles.
M6 x 75 Cup Head Bolt
M6 x 22 Washer
M16 Rubber
Buffer
6 x ½ Pan
Head Screw
M6 Barrel Nut
(Hidden)
M6 x 16 Washer
M6 x 65 Hex Head Bolt
M6 Nylock Nut
M6 x 16 Washer
M6 x 16 Washer
M6 x 100
Hex Head Bolt
28. Tap the beater stops into the castle
sides Eand EX. Note the lead holes for
the screws face out. Use wood glue if
necessary. Then attach the M16 Rubber
Buffer to the stops with 6 x ½ Pan Head
Screws.
29. Assemble the beater by joining the sides
Qto the bottom rail Rwith M6 x 65 Hex
Head Bolts, M6 X 16 Washers and M6 Barrel
Nut. Note the shuttle race faces forward.
30. Place the reed into the groove in the
bottom rail R. Secure the top beater rail
Sto the sides with M6 x 75 Cup Head Bolts,
M6 x 22 Washers and nylon knobs.
31. Place the beater in position on the loom
frame and push a M6 x 100 Hex Head Bolt
and M6 X 16 Washer through the beater
side Q, through the hole in the spacer
block attached to the side Aand secure
with M6 X 16 Washer and M6 Nylock Nut.
Repeat for side AX
NOTE: Do not tighten bolts, the beater
must move freely.

15
Examples of tie ups
1 2 3 4 5 6 7 8 9 10
8
7
6
5
4
3
2
1
1 2 3 4 5 6 7 8 9 10
8
7
6
5
4
3
2
1
Illu No 27 Warp: 1-40 Weft: 1-40 Thursday, 27 January 2011 3:26 p.m.
Two x Two Twill with Tabby on treadles 1 and 10
Backed Twill

16
There are 5 warp sticks included with your Jack Loom.
FRONT ROLLER
To attach a warp stick to the front roller, thread 1 texsolv cord
through the first hole in the warp stick and back through the
second to end loop in the cord.
Then take the long end of the cord through the small hole in
the warp roller and out the large hole. Then push a texsolv peg
through the cord. The peg pulls down flat into the large hole.
BACK ROLLER
Thread 1 texsolv cord through the first hole in the warp stick
but leave 8 holes leaving approx. 10cm of Texsolv cord.
Then take the long end of the cord through the small hole in
the warp roller and out the large hole. Then push a texsolv peg
through the cord. The peg pulls down flat into the large hole.
Use the third warp stick for your end warp stick (refer to warp
instructions) and attach to the end of the Texsolv cord with a
Texsolv peg.
Table of contents