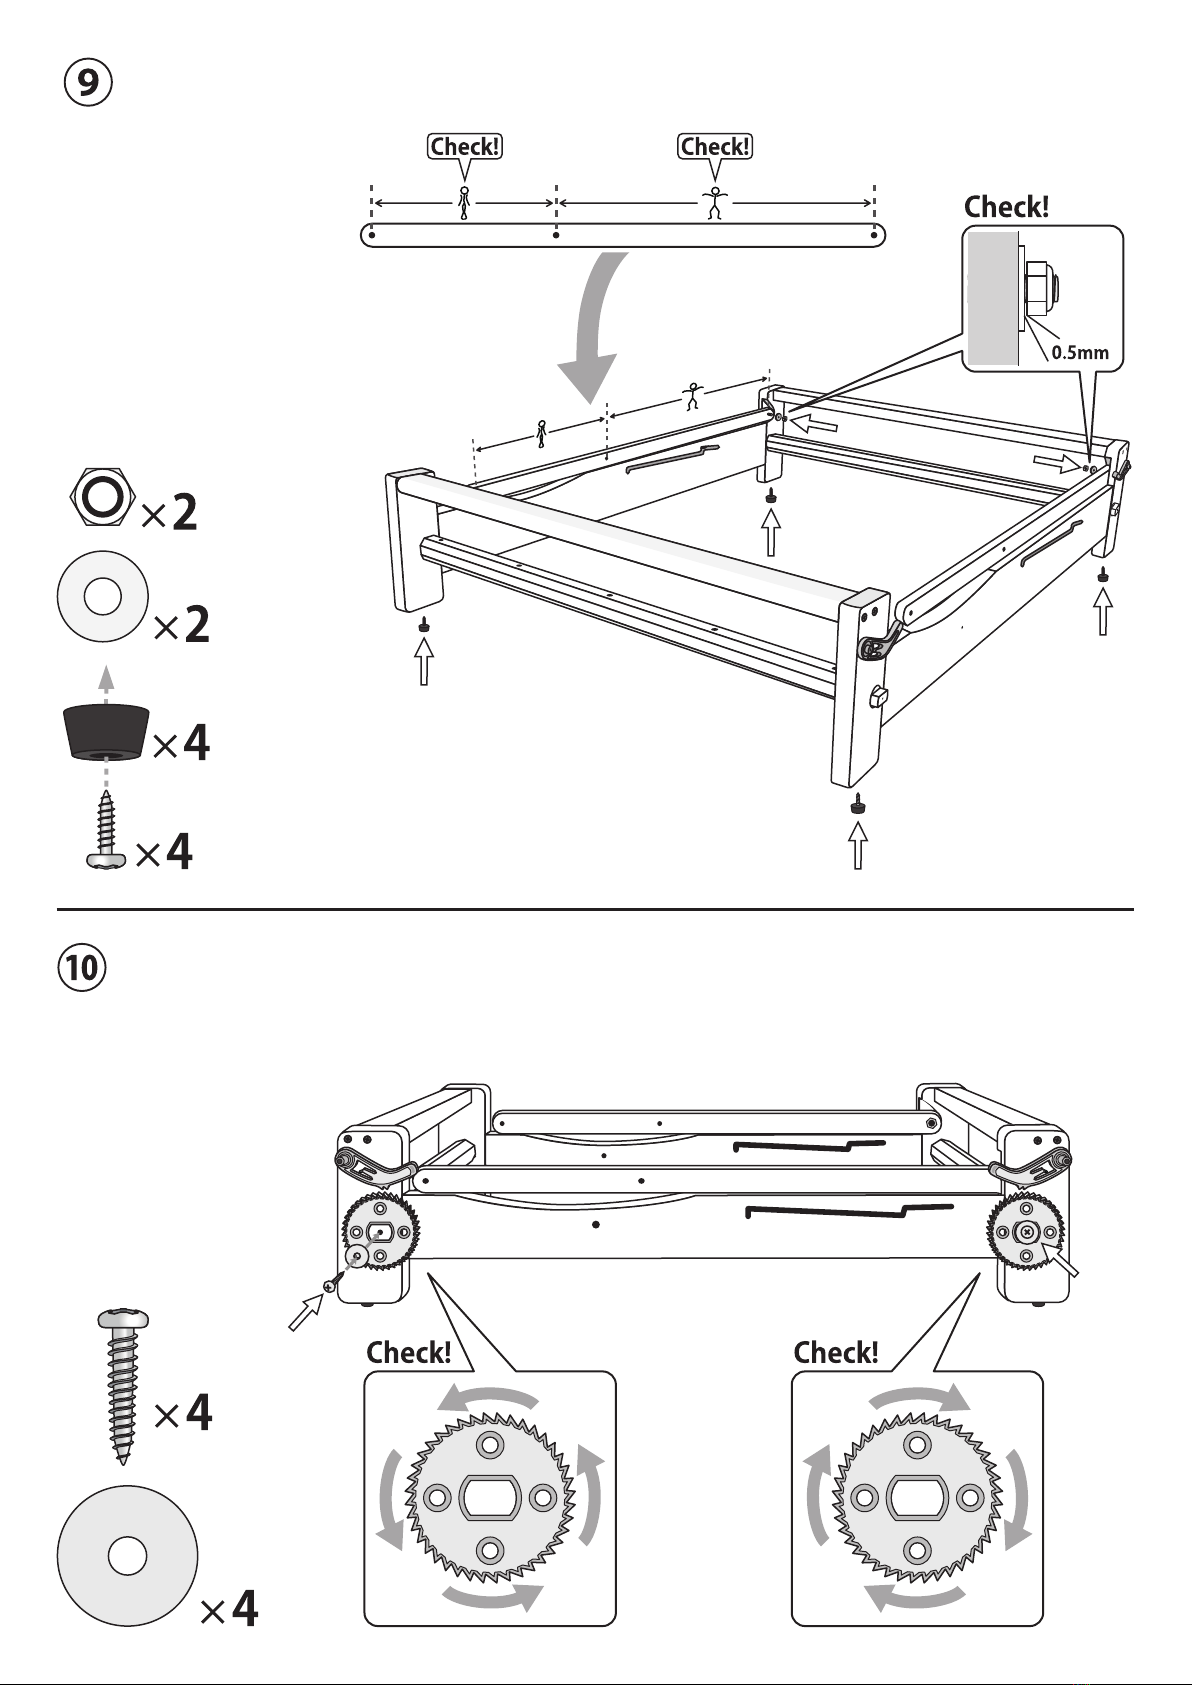
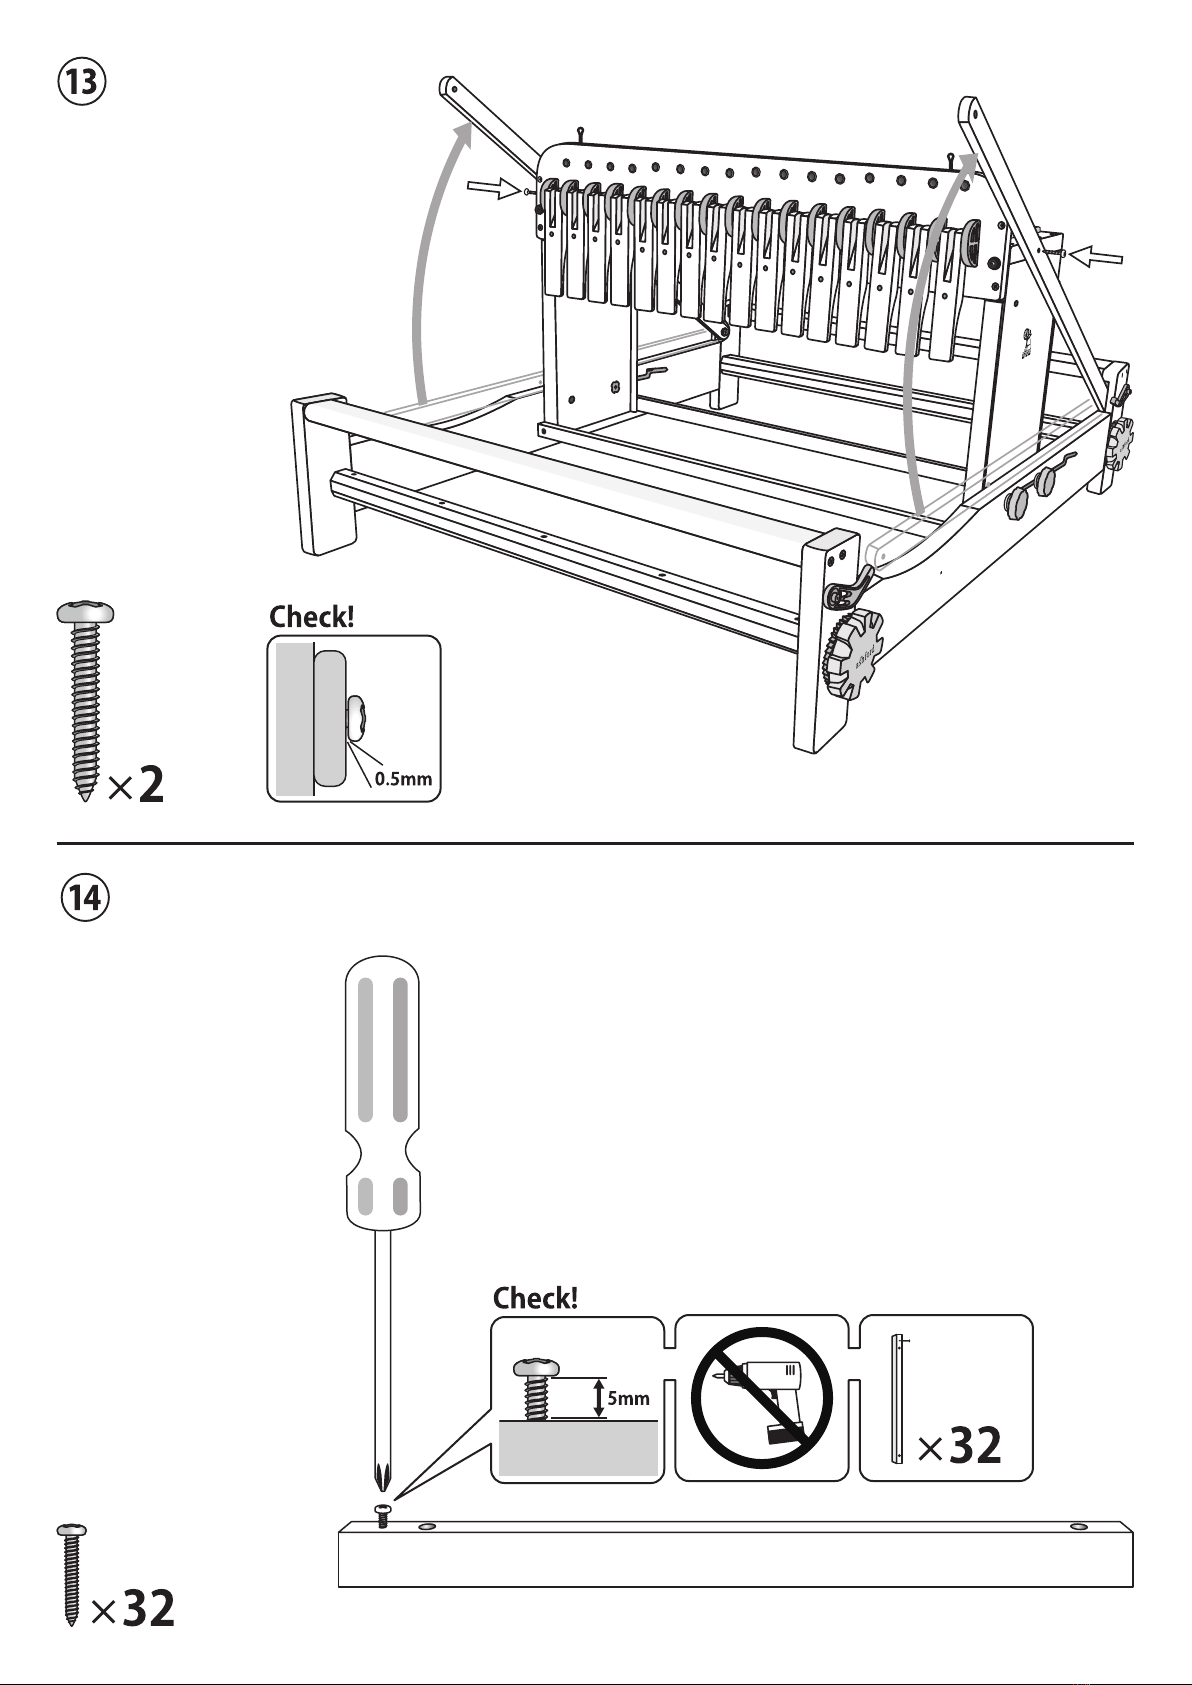
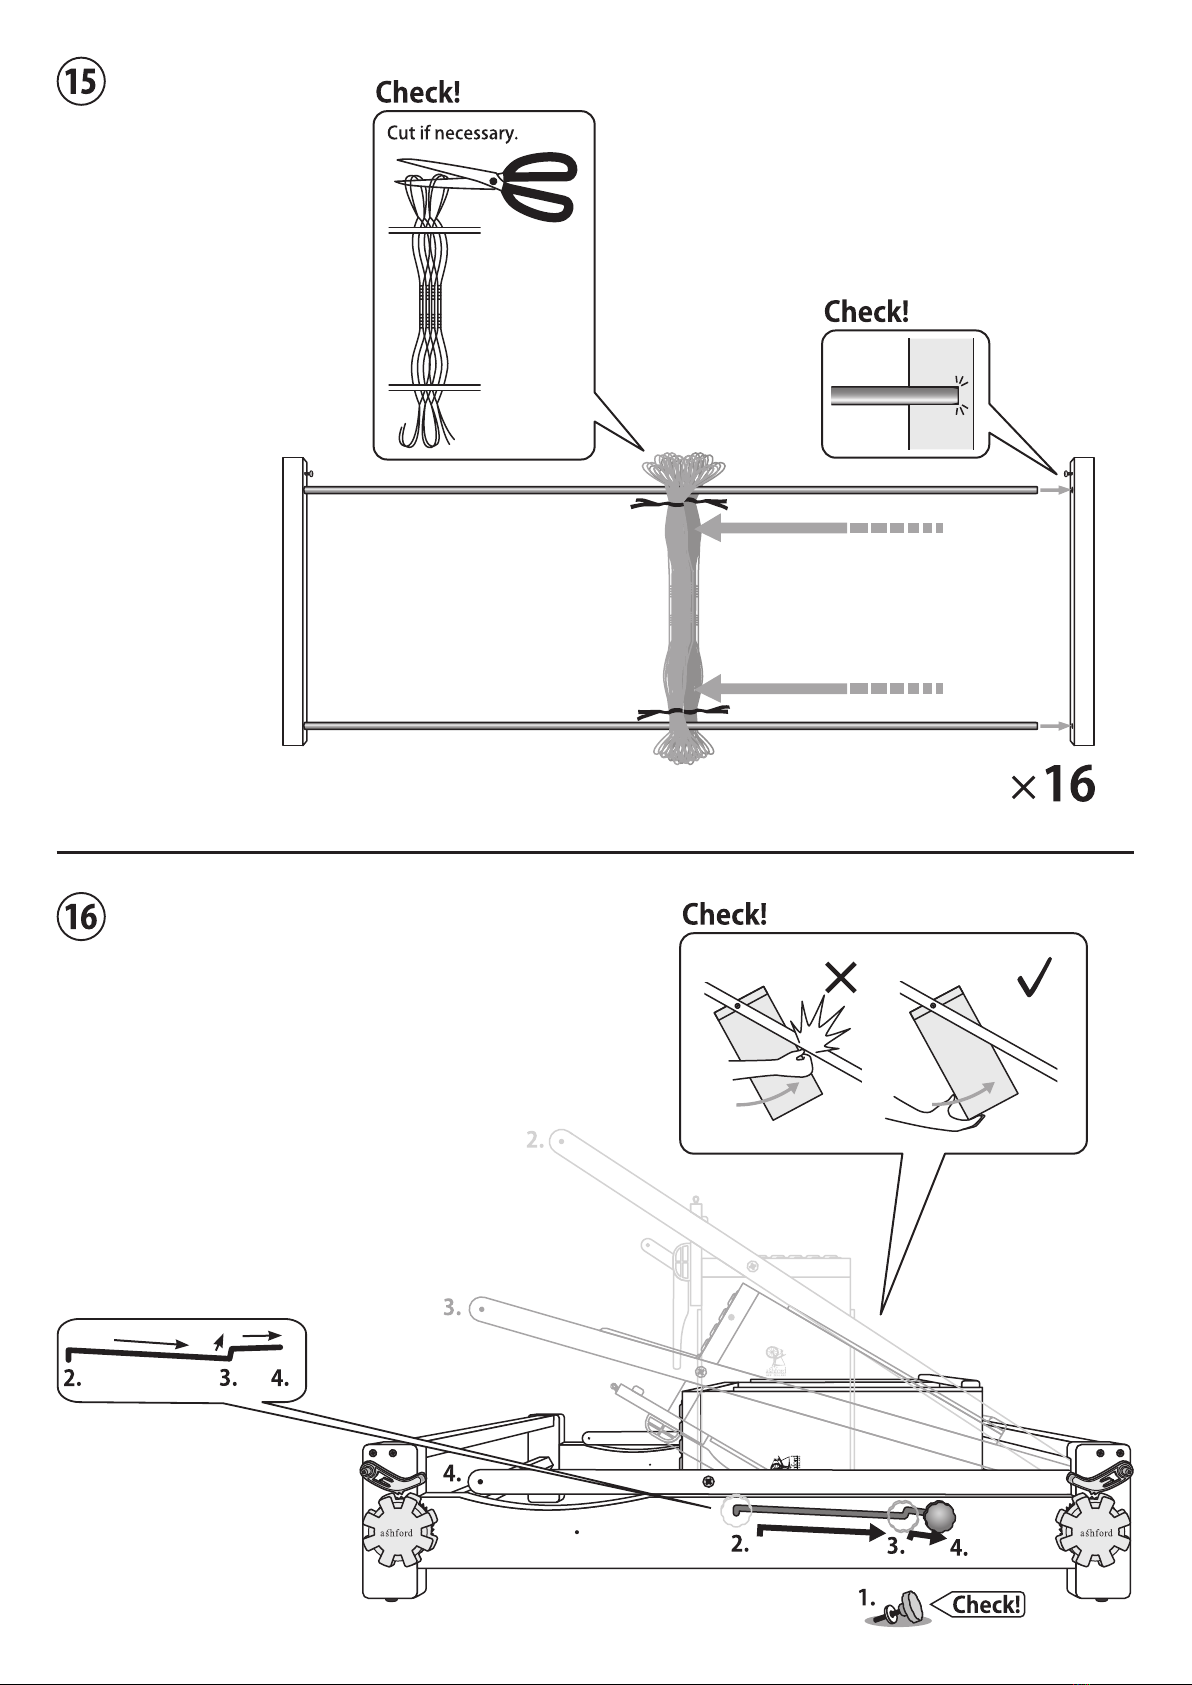
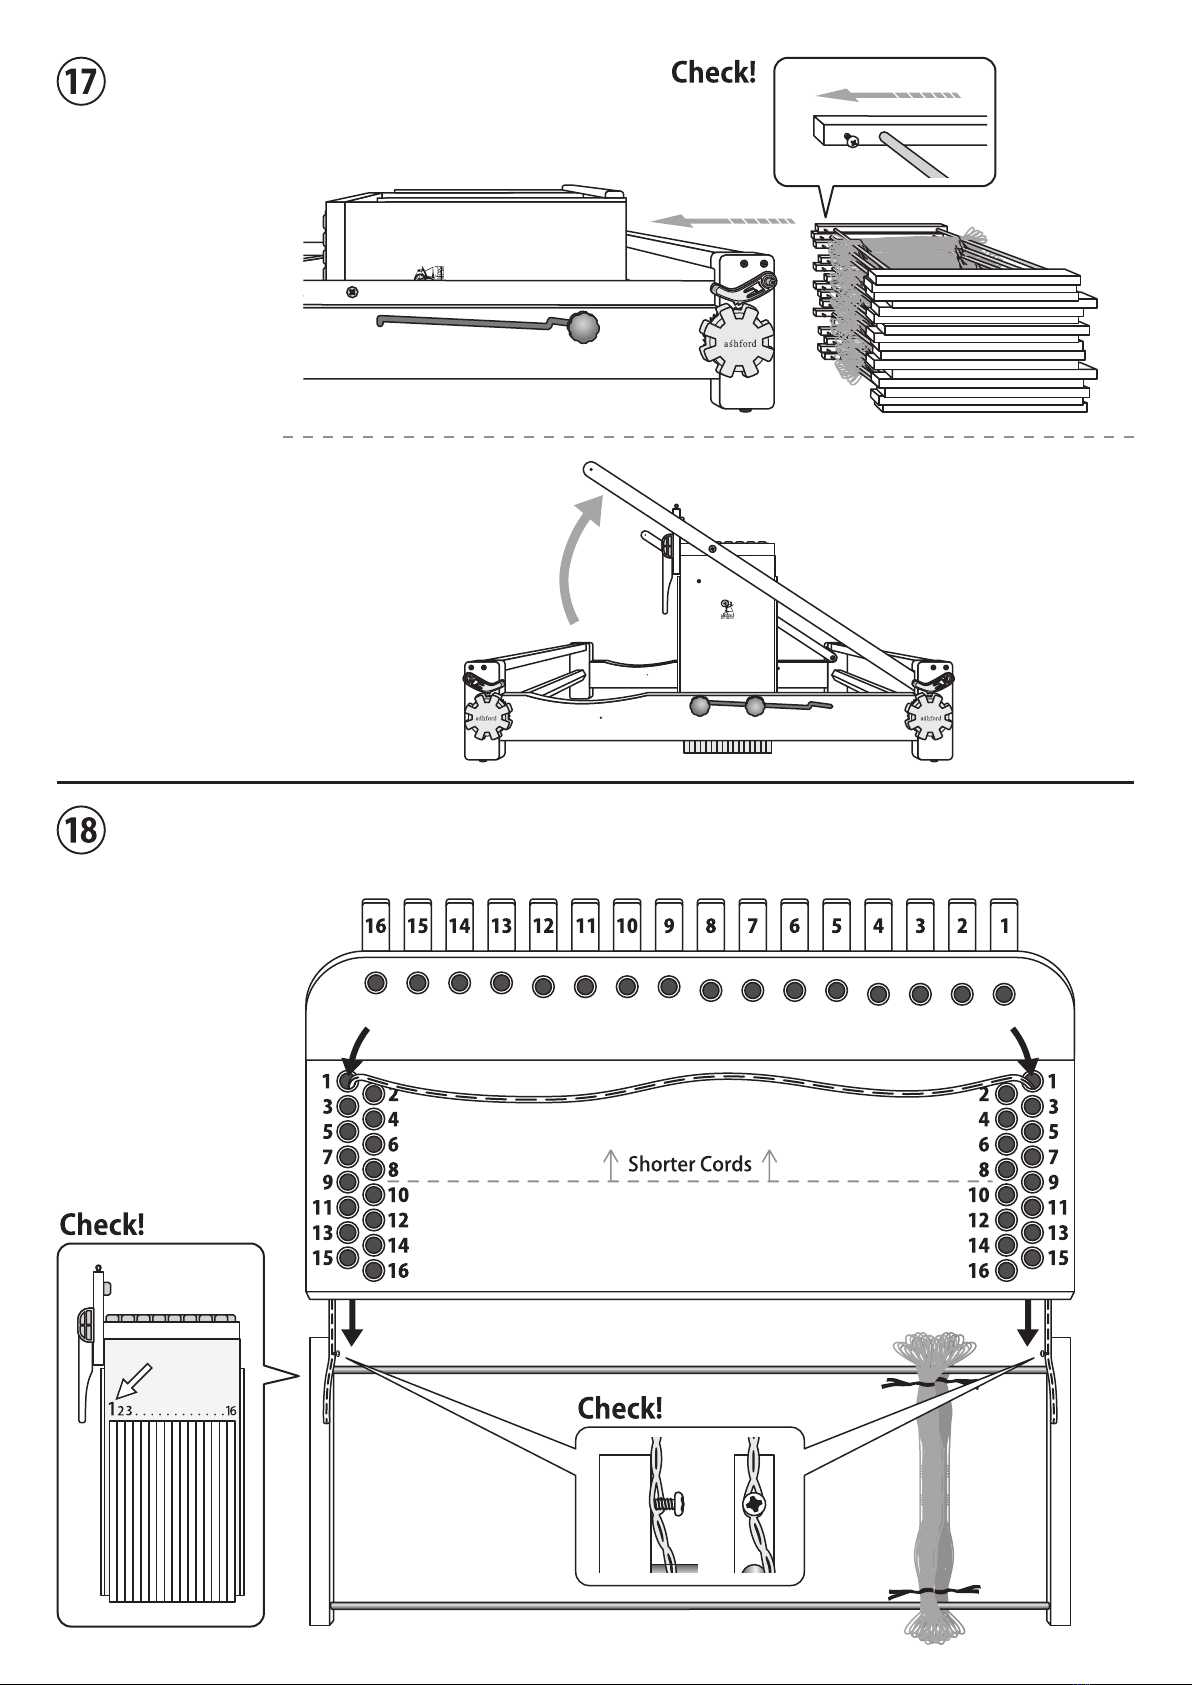
Ashford TABLE LOOM - SIXTEEN SHAFT User manual
Other Ashford Weaving manuals


Popular Weaving manuals by other brands


Schacht
Schacht CRICKET LOOM Assembly and Weaving Instructions

Schacht
Schacht FL3109 Assembly instructions

Schacht
Schacht FLATIRON BULKY PLYER FLYER HEAD Installation and use

Leclerc Looms
Leclerc Looms VOYAGEUR manual

Schacht
Schacht FL3053 Assembly instructions

Schacht
Schacht WOLF PUP 8.10 HEIGHT EXTENDER Assembly instructions