Aspira TWLRZ-38 User manual

TWLRZ-38
REFRIGERATOR
June 2013

Instructions for Installation
Cautions for Safety
Operation
Cleaning and Maintenance
Reversing the Door
2
3
4
5
6
CONTENTS
Parts and Features
Because ofproduct improvement,your refrigerator
may varyfrom thisuser manual
Please readthis usersoperation manualbefore using.
7
Troubleshooting 9
Warnings 10
Important Disposal Instructions 10
R600a Refrigerant
11

Parts and FeaturesParts and Features
Cool Zone
Cabinet
Thermostat Knob (at the rear)
Shelf
Hinge Cover
Door
Gasket
Adjustable Foot
Cool Zone Door
Door Bar

Instructions for InstallationInstructions for Installation
Do nottilt therefrigerator more than 45.
For optimum performance ensure correct ventilation spacearound the refrigerator.
1.
3.
Avoid direct sunlight, heat sourcesand very moist or humid places. Donot install this
refrigerator near flammable, combustible orexplosive materials.
Install the refrigerator on astrong, level floor. Do not install on soft materials
such as foam or plastic.
5.
The appliance should be left for 2 hours after installation before it is turned
on, in order to allow the refrigerant to settle.
6.
2.
Toensurethe cabinet does notbecome damaged,
do notapply force toany part ofthe refrigerator
such asthe condenser,the door andits handle.
Damage to thecabinet will result inpoor
refrigeration performance.
4.
Force
Avoid installing the appliance in very cold conditions as the performance ofthe a
ppliance will be impaired.
7.

1.
Ensure the voltage inthe power socket isthe same asthe rated voltage
of thisappliance.
Cautions for SafetyCautions for Safety
Do notsplash water onto therefrigerator, thismay cause amalfunction
or electric shock.
Do not store flammable materials such as petrol, LP gas and glue
etc, inside the refrigerator.
3.
4.
2.
The power plug should have its own separate outlet socket in order to
prevent the outlet socket from being overloaded by other plugs.
Chemical Material
If thepower supplycord isdamaged, itmust onlybe replacedby the
manufacturer,its serviceagent orsimilarly qualifiedpersons.
5.
Under nocircumstances shouldyou attemptto repairthe machine
yourself. Repairscarried outby inexperiencedpersons maycause
injury orserious malfunctioning.Contact yourlocal ServiceCentre.
6.

CautionsCautions
If the power supply is turned off for any reason, wait ten minutes before
switching the appliance on again.
The temperature of the refrigerator can be adjusted by turning the
thermostatic dial. Setting of the thermostat dial at3~4 is the most suitable
for general operation. The higher the number, the colder the temperature.
Do notoverload the refrigerator. Where possible
open thedoor less oftenin order tomaintain the
temperature of therefrigerator and save electricity.
3.
OperationOperation
2.
When operating the refrigerator for the firsttime, set thethermostat dial at 3,
connect to the electricity and turn it on without loading any food.
Then set the thermostat
dial to the desired setting and place foods into therefrigerator.
Wait for the
appliance to become cold, usually this takes 2 or 3 hours.
1.

Cleaning and Maintenance:Cleaning and Maintenance:
Detergent
When cleaning the refrigerator, first disconnect the appliance from the power
supply by removing the plug. Wipe the appliance carefully with a cloth and
neutral cleaning agent, then wipe it clean with fresh water.
1.
Never use acids, chemical solutions, thinners or the like to clean the refrigerator
because they may damage the paint work and plastic components of the refrigerator.
2.

The refrigerator has the capability of opening the door from either the left or the right side.
The unit is delivered to you with the door opening from the left side. To change the opening
direction, please follow these instructions.
Note: Before reversing the door, unplug the appliance from the mains or disconnect the
electrical power supply.
Reversing the Door:
7

8
Door opening from left side
Door opening from right side
1. Remove the upper hinge cover (6) first.
2. Remove the two screws (1) that hold the upper hinge (5) (right side)
to the frame. Take away the upper hinge (5).
3. Lift the door and place it on a padded surface to prevent scratching it.
4.
5. Remove the left front leg (4) and transfer it to the right side.
6. Remove the hole cover plate(7) to the right side.
7. Before placing this lower hinge (2), remove the bolt-pin (9) and
reverse the direction of the lower hinge (2). Then install the lower
hinge (2) onto the left side of the lower frame with two screws (8).
8. Insert the bolt-pin (9) to the lower hinge (2).
9.
10.
11. Install the upper hinge cover (6) on the upper hinge.
Remove the two screws (8) that hold the lower hinge (2) and
then remove the hinges (2).
Set the door into place making sure the door seals at the lower hinge (2).
Hold the door in the closed position and secure the top hinges (5)
to the top frame of the left side with the two screws (1).
Do not over tighten the two screws. Only tighten until the top of
the door is levelled with the counter top.
448833
77
22
99
1166
55
883399
2244
77
1166
55

If the refrigerator is not cool enough ensure that:
The thermostat is at the correct setting.
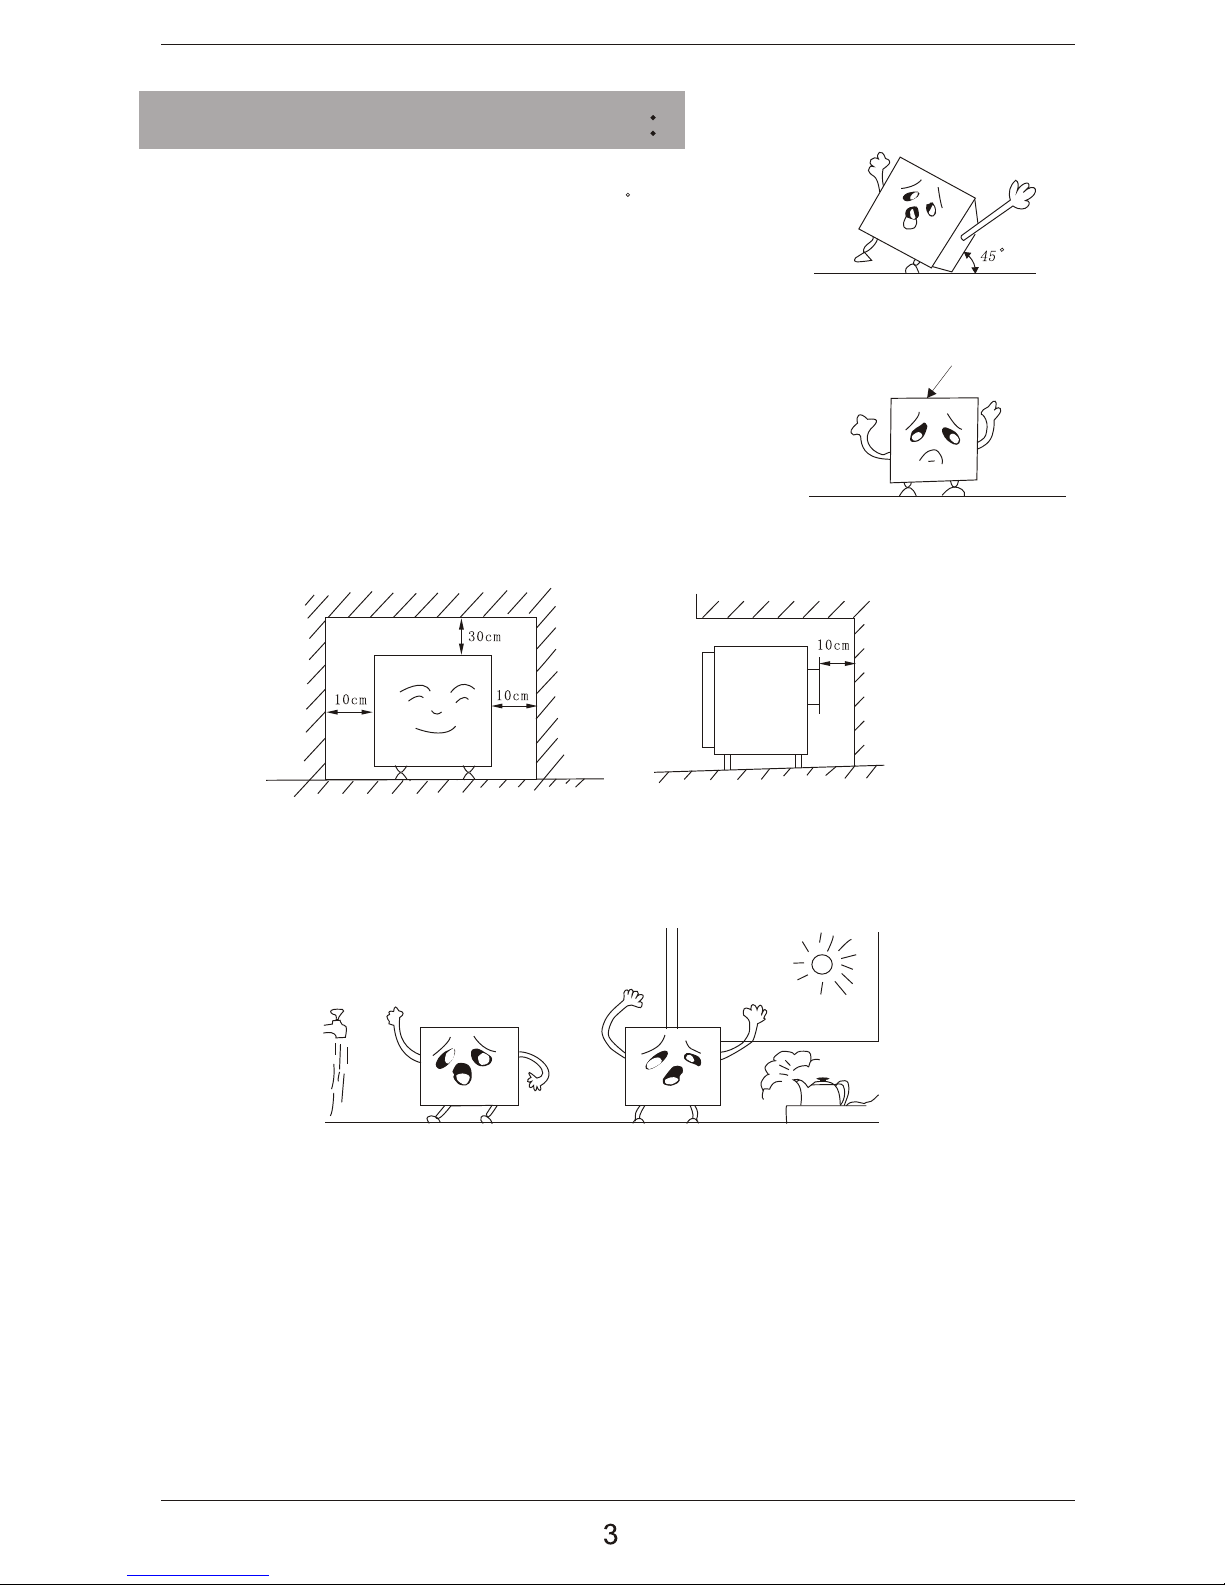
There is enough space around the refrigerator.
The doors are not opened too frequently and for too long.
The refrigerator is not overloaded and hot food has not been placed in the refrigerator.
The refrigerator is not in direct sunlight or placed near a heat source.
2.
If the food in the refrigerator is freezing ensure that:
The thermostat is at the correct setting.
There is not too much food in the refrigerator.
When the refrigerator operates too noisily ensure that:
The refrigerator is properly leveled.
The refrigerator is not touching objects around it.
The containers or solid packages stored inside are not touching each other.
During periods of high humidity, moisture may form on the surfaces of
the refrigerator.This is not a fault and maybe wiped away.
If after checking the above suggestions your refrigerator is still not
functioning properly, please contact Customer Services without delay.
Note:Note:
3.
4.
When the refrigerator does not operate ensure that:
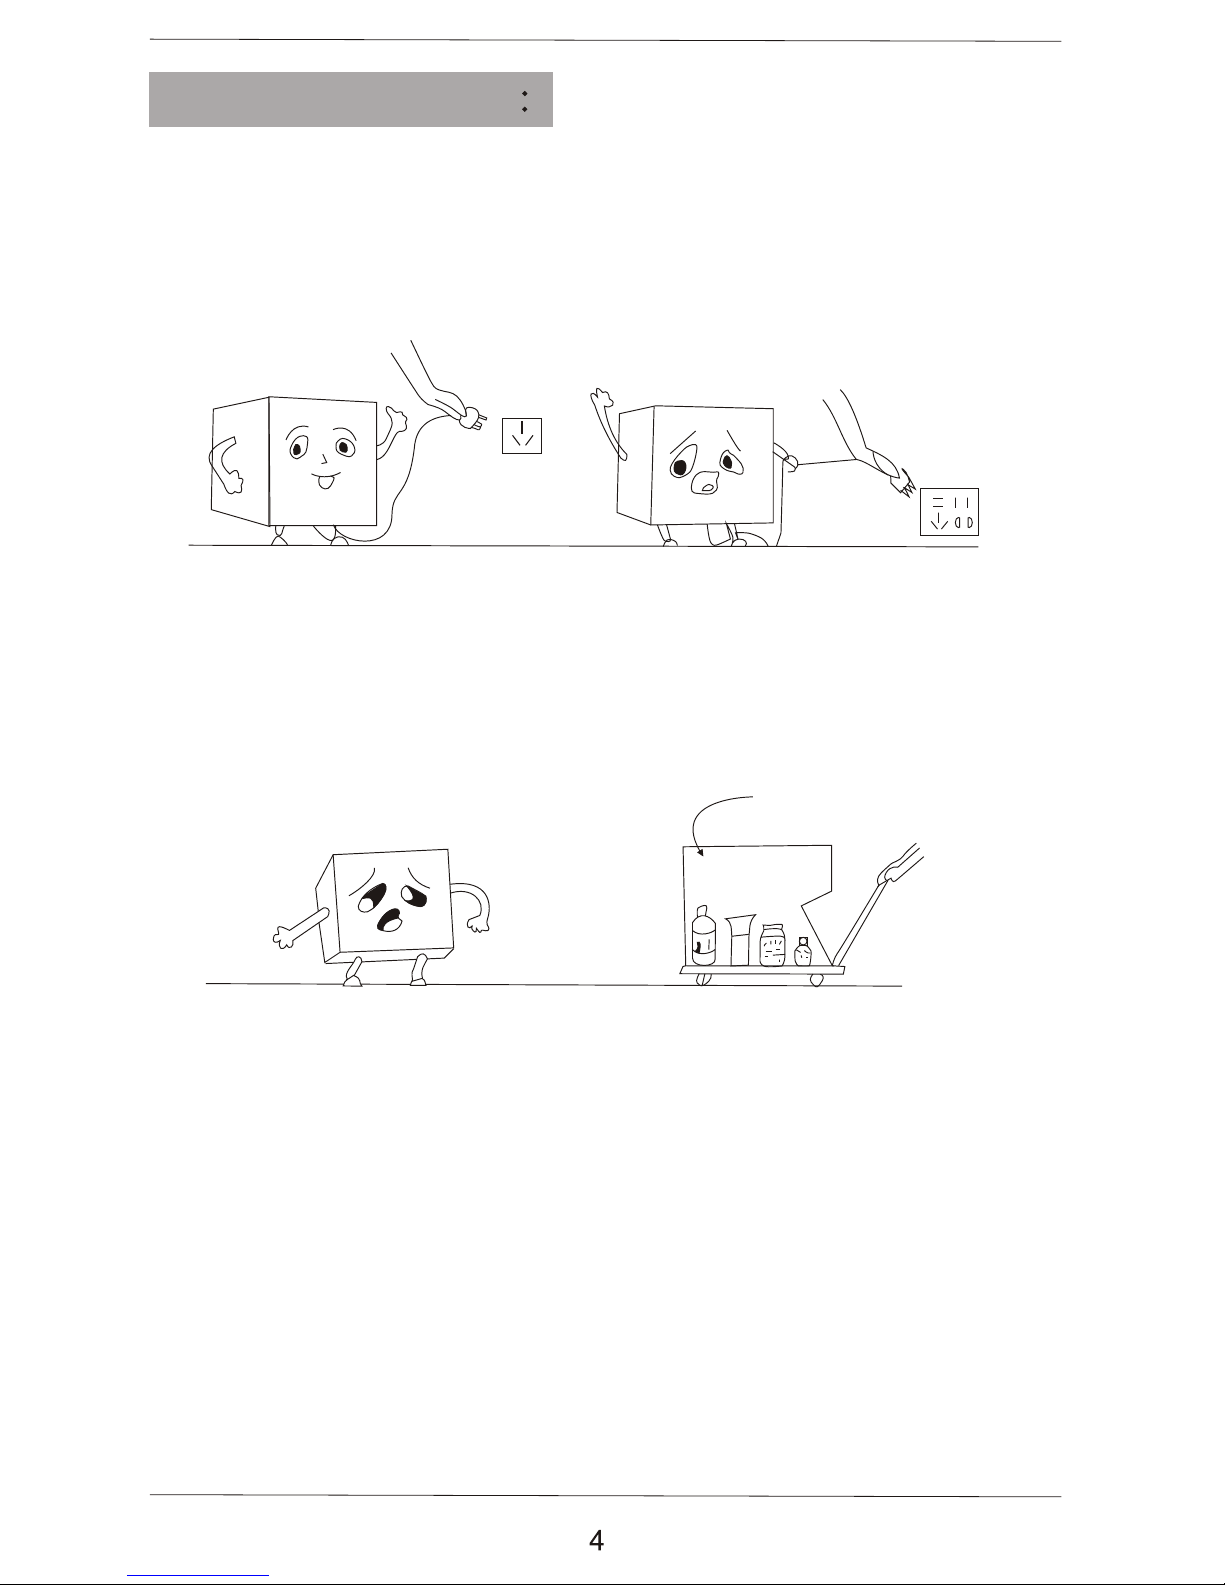
The electric power is supplied and the voltage is normal.
The fuse or circuit breaker is not out or tripped.
The power plug is plugged in firmly in the outlet socket.
blown
1.
Troubleshooting:
9

This applianceis notintended foruse bypersons (includingchildren) withreduced
physical, sensory, ormental capabilities,or lackof experienceand knowledge,unless
they havebeen givensupervision orinstruction concerninguse ofthe applianceby
a personresponsible fortheir safety.
Children shouldbe supervisedto ensurethat theydo notplay withthe appliance.
If thesupply cordis damaged,it mustbe replacedby themanufacturer,its service
agent orsimilarly qualifiedpersons inorder toavoid ahazard.
Keep ventilationopenings, inthe applianceenclosure orin thebuilt-in structure
clear ofobstruction.
Do notuse mechanicaldevices orother meansto acceleratethe defrosting
process, otherthan thoserecommended bythe manufacturer.
Do notdamage therefrigerant circuit.
Do notuse electricalappliances insidethe foodstorage compartmentsof the
appliance, unlessthey areof thetype recommendedby themanufacturer.
Warnings:
Important Disposal Instructions:
As aresponsible retailerwe careabout theenvironment.
As suchwe urgeyou tofollow thecorrect disposalprocedure foryour product
and packagingmaterials, thiswill helpconserve naturalresourses
and ensurethat itis recycledin amanner thatprotects healthand the
environment.
You mustdispose ofthis productand itspackaging accordingto locallaws
and regulations.Because thisproduct containselectronic componentsand
sometimes batteries,the productand itsaccessories mustbe disposedof
separately fromhousehold wastewhen theproduct reachesits endof life.
Contact yourlocal authorityto learnabout disposaland recycling.
The productshould betaken toyour localcollection pointfor recycling.
10
Remove theplug andensure thatany locksor catchesare removed,to
prevent youngchildren beingtrapped inside.

This appliance may contain a small quantity of environmentally friendly, but
flammable, non-synthetic R600a refrigerant:
Upon opening and installing your product, check that the tubing of the refrigerant
circuit is not damaged during transportation.
Leaking refrigerant may cause eye injuries or ignite.
The room for installing appliance must be at least 1m per 8g of refrigerant.
The amount of refrigerant in the appliance can be found on the rating plate the
back of the unit.
Keep ventilation openings in the appliance enclosure or in thebuilt-in structure
cleaer of obstruction.
Do not damage the refrigeration circuit.
If you are unsure of the refrigerant type check the rating plate on the back of the unit.
11
R600a Refrigerant:

CKAPR-A01

1. A5
2. 105g
70g
3.
Table of contents
Other Aspira Refrigerator manuals
Popular Refrigerator manuals by other brands

Zero Appliances
Zero Appliances VSRF60GE Installation, service and user instructions

KitchenAid
KitchenAid 2205264 Use and care guide

Delfield
Delfield 4472N-18M Specification sheet

EAS Electric
EAS Electric EMC2011GN instruction manual

Nordcap
Nordcap VAR-PC13 manual

Summit
Summit FF6BISSHH Dimensional drawing