Atom 506AV Installation instructions

PATENTED WORLD’S BEST
LAWN EDGERS
Model 506AV
Honda Powered 35cc 4-Stroke
Gasoline Model
OPERATOR/OWNER
MANUAL
●SafetyPrecautions
●Assembling
●Operating and
Edging Instructions
●Maintenance and
Workshop Manual
®
ATOM
AS WITH ANY
POWER TOOL
IMPROPER USE
CAN CAUSE
SERIOUS INJURY
MAKE SURE THIS
MANUAL IS READ
AND CAREFULLY
UNDERSTOOD
BEFORE STARTING
OR OPERATING
THISEQUIPMENT
NOTE:Forfull“Honda”engineinstructionsandmaintenancepleaserefertoseparate
“Honda Owners Manual” supplied.
IMPORTANT MANUAL – DO NOT THROW AWAY
Manual always to be available for reference or instructing new operators. Please fill
in details of purchase on back cover page.
ACN 000 583 924
✔

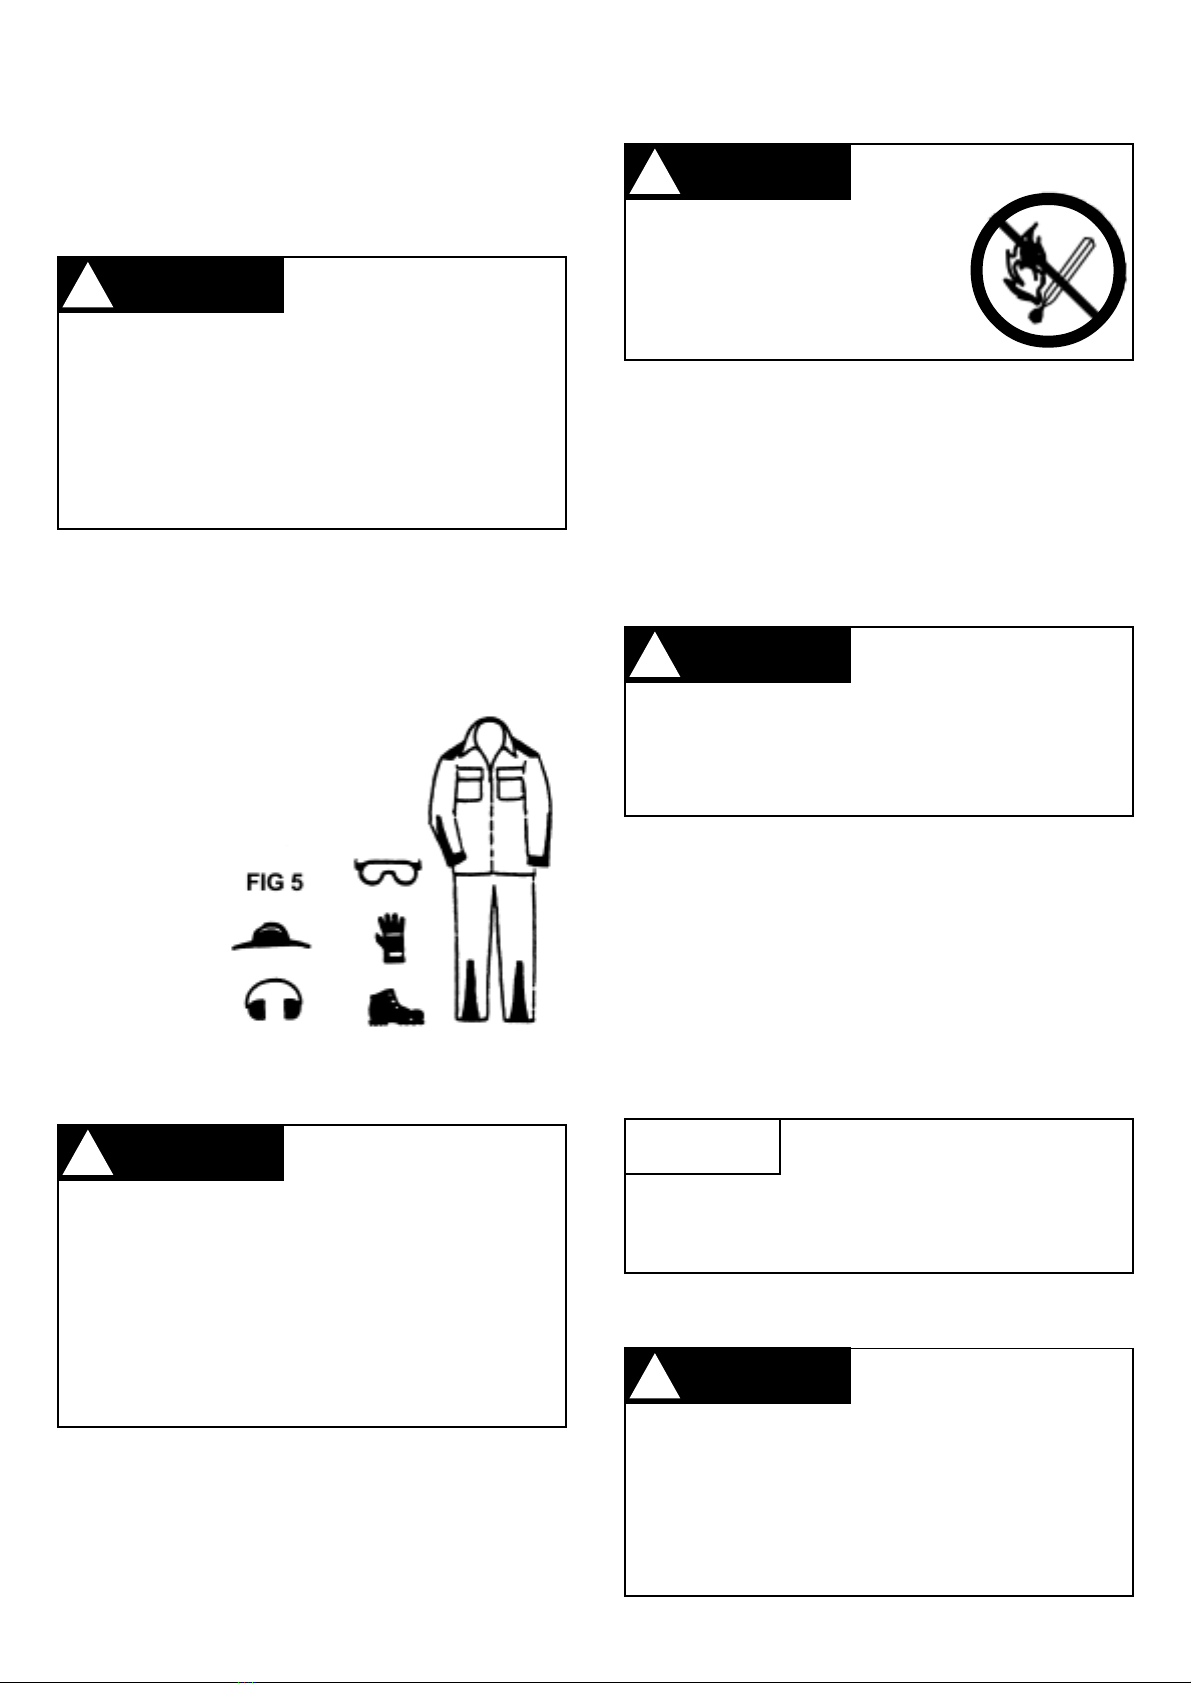
Failure to obey a safety
warning can result in
injury to yourself and others.
THE PURPOSE OF SAFETY WARNING AND NOTES IN THIS
MANUAL IS TO ATTRACT YOUR ATTENTION TO POSSIBLE
DANGERS AND THE EXPLANATIONS WITH THEM DESERVE YOUR CAREFUL ATTENTION AND
UNDERSTANDING. THE SAFETY WARNINGS IN THIS MANUAL AND ON THE EDGER DO NOT, BY
THEMSELVES, ELIMINATE ANY DANGER. THE INSTRUCTIONS OR WARNINGS THEY GIVE ARE NOT
SUBSTITUTES FOR PROPER ACCIDENT PREVENTION MEASURES.
INTRODUCTION
This Atom Gasoline Powered Lawn Edger is designed
to the highest standards to ensure you many hours of
uninterrupted service.
Pay special attention to the safety precautions outlined
on pages 2 to 5. Only persons who understand this
Manual are to operate the Lawn Edger.
Toreceivemaximumperformanceandsatisfactionfrom
your Lawn Edger, it is important that you read and
understand the maintenance and safety precautions
before using the edger. Contact yourAtom dealer or the
Atom distributor in your area if you do not understand or
cannot carry out any of the operating instructions in this
Manual.
Atom’s philosophy is to continually improve all of its
products. As a result, engineering changes and
improvements are made from time to time. If the
operating characteristics or the appearance of your
Atom Edger differs from those described in this
manual, please contact your Atom dealer for
information and assistance. Call (02) 9810 0194
(withinAustralia) for your nearest servicing dealer.
NOTE: OUTSIDE AUSTRALIA REFER TO BACK
COVERPAGE.
CONTENTS
Parts and Controls.................................................2-3
Safety Precautions ................................................3-5
Assembling the Lawn Edger .....................................6
Fuel and Oil..............................................................6
Starting and Stopping Instructions ..........................7-8
Edging Instructions
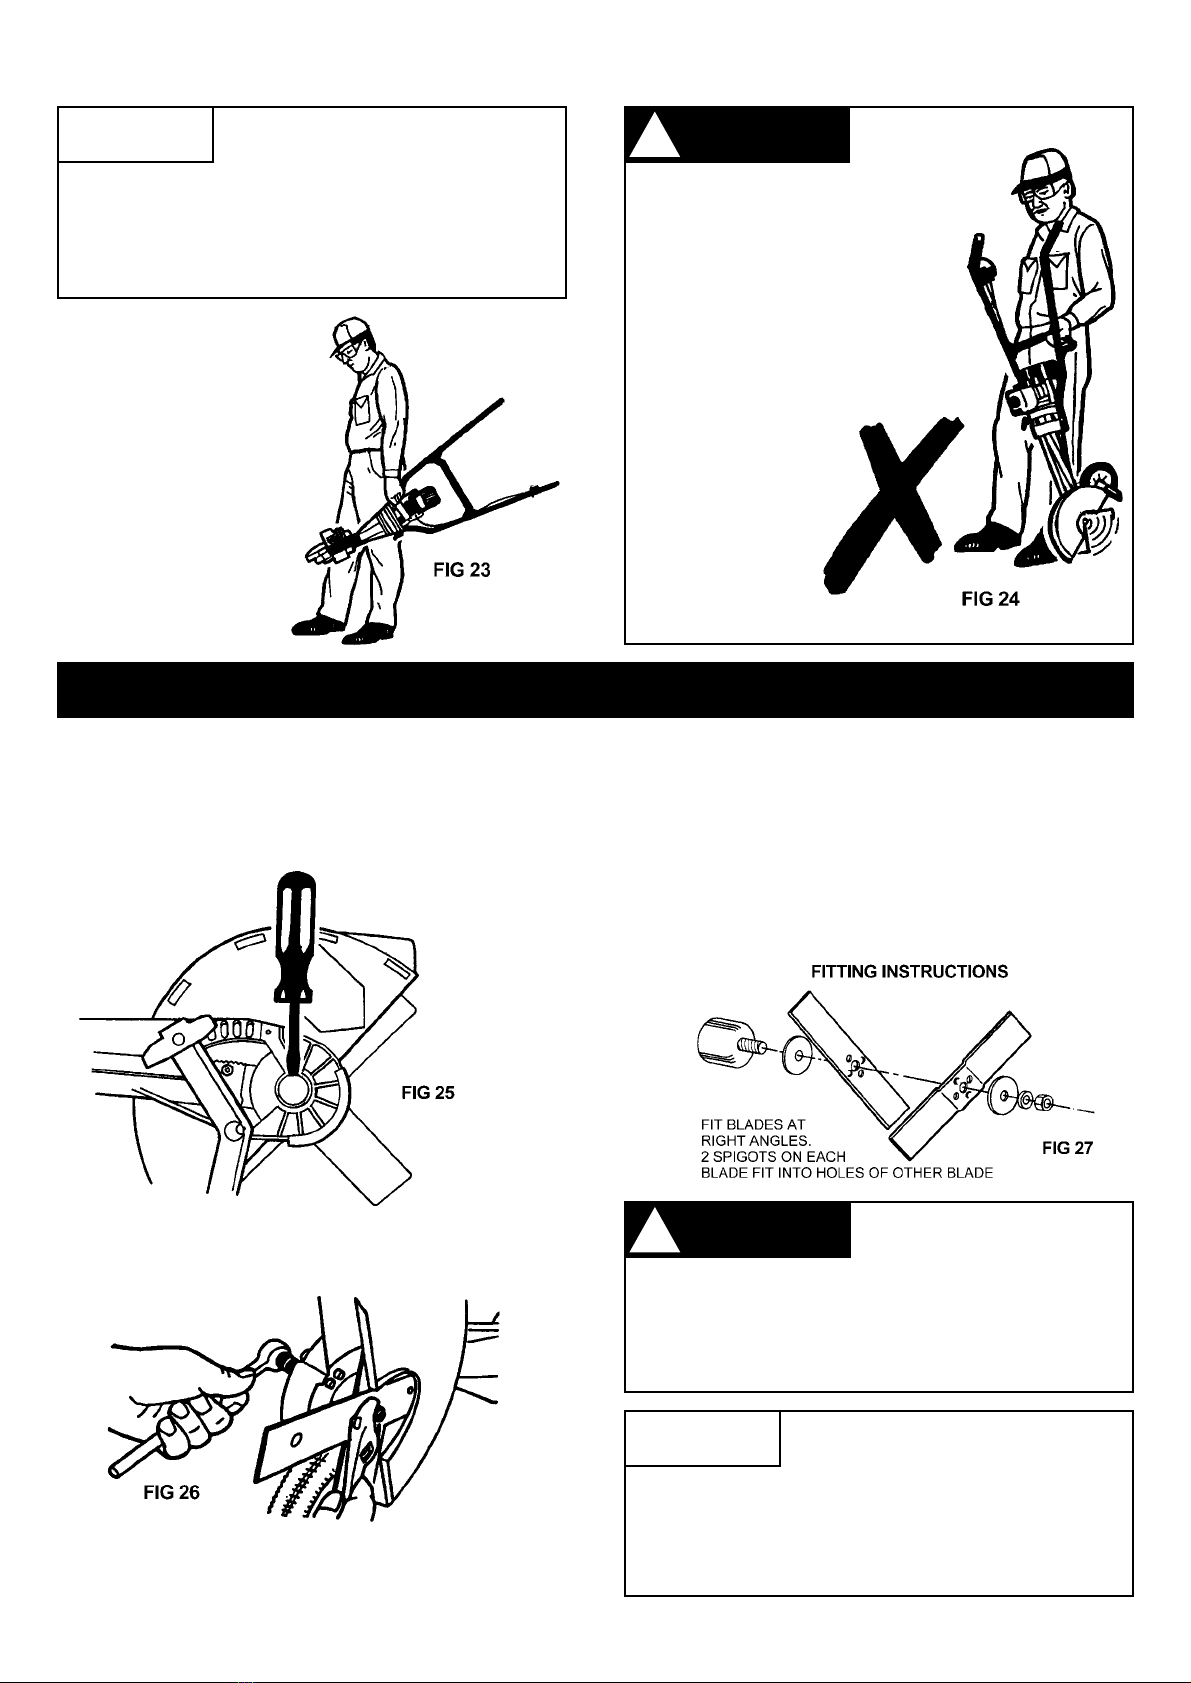
Blade Replacement.........................................10
Lubrication of Gears ........................................ 11
Spark Plug ...................................................... 11
AirFilterMaintenance...................................... 11
Removing Blade Cover ................................... 11
Carburettor Adjustment ...................................12
TroubleShootingTips......................................13
Parts List and Exploded View ............................14-15
At the rear of this manual is a workshop manual for the
lawnedgerbody.ForfullHondaengineinstructions and
maintenance, please refer to the separate “Honda
Owner’s Manual” supplied.All service and warranty on
your Honda engine can be done by your nearest
approved Honda dealer.....................................16-19
Warranty ................................................................20
PARTS & CONTROLS
1,2 The handles of the Lawn Edger are held by both
hands.
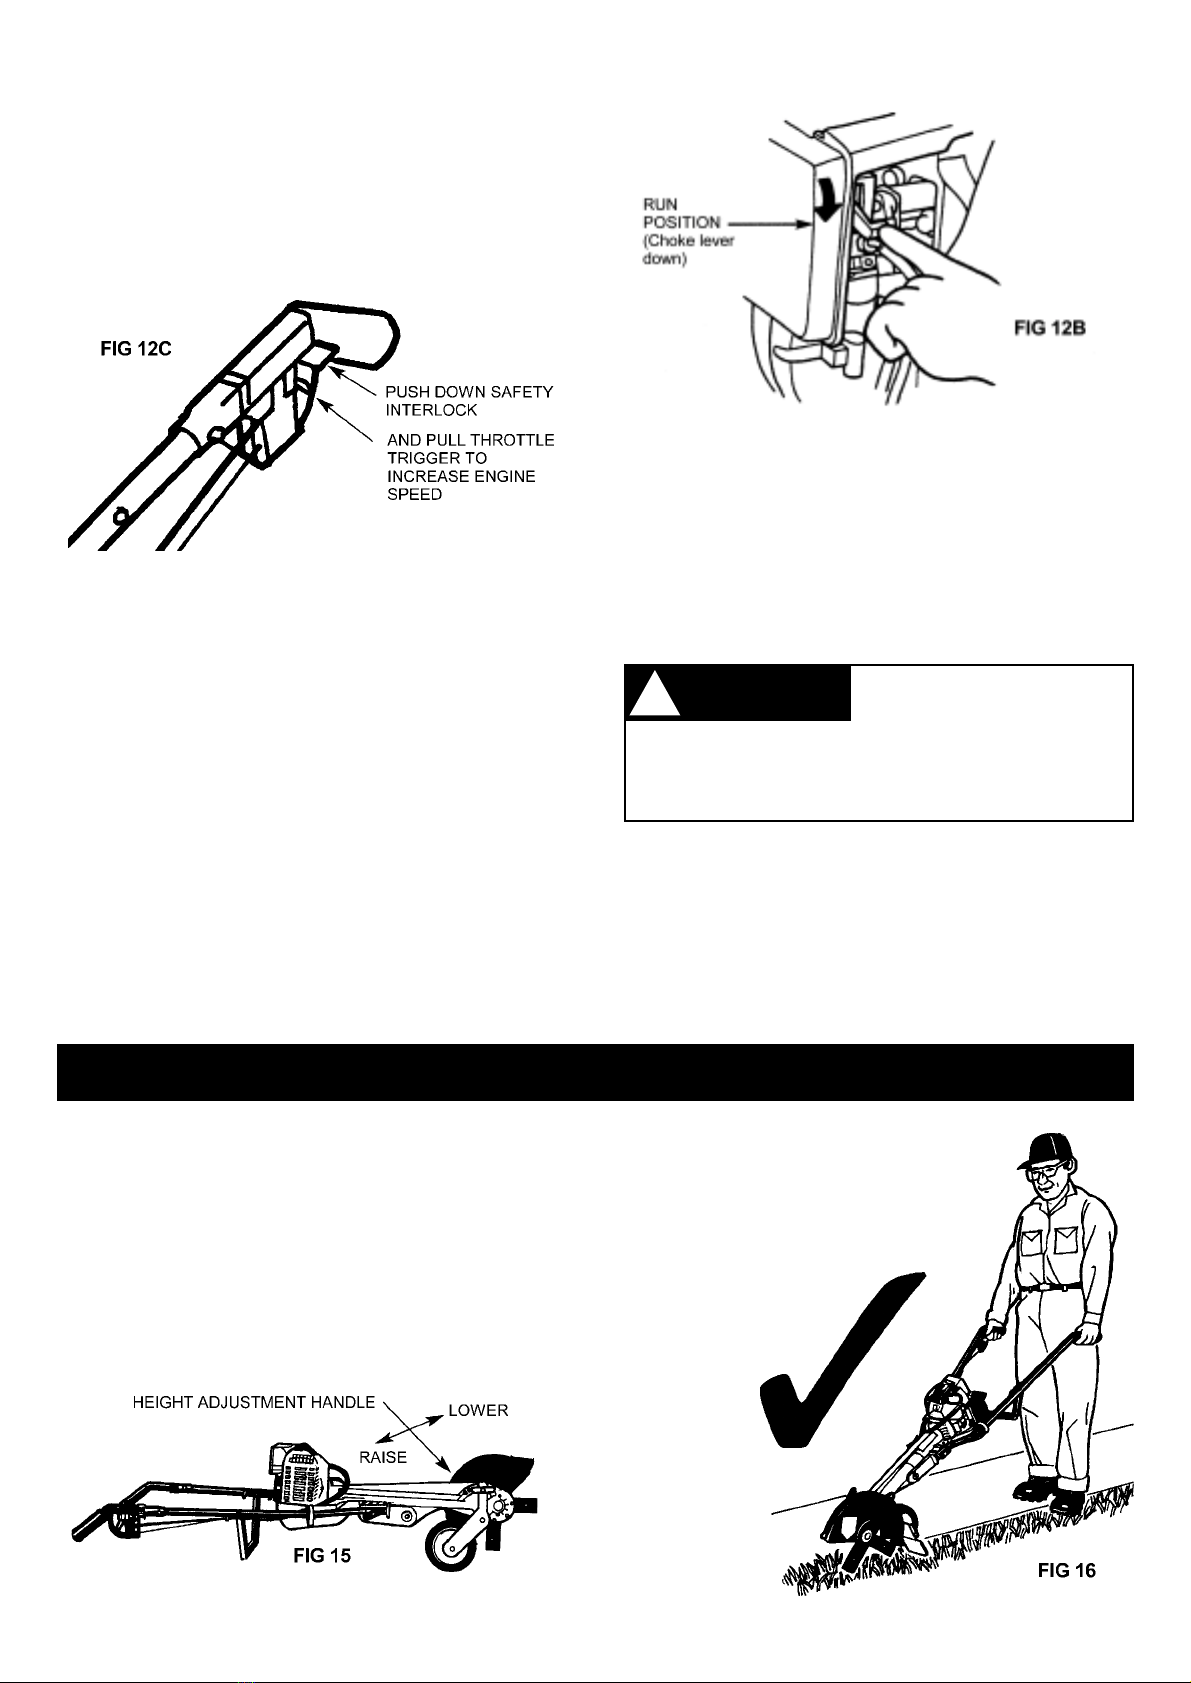
3 The throttle trigger which increases speed of
engine for automatic safety clutch to engage and
thus rotate blade.
4ON/STOP switch.
5Starter grip the grip of the pull starter which is the
device to start the engine.
6Handle nut for holding handles onto housing.
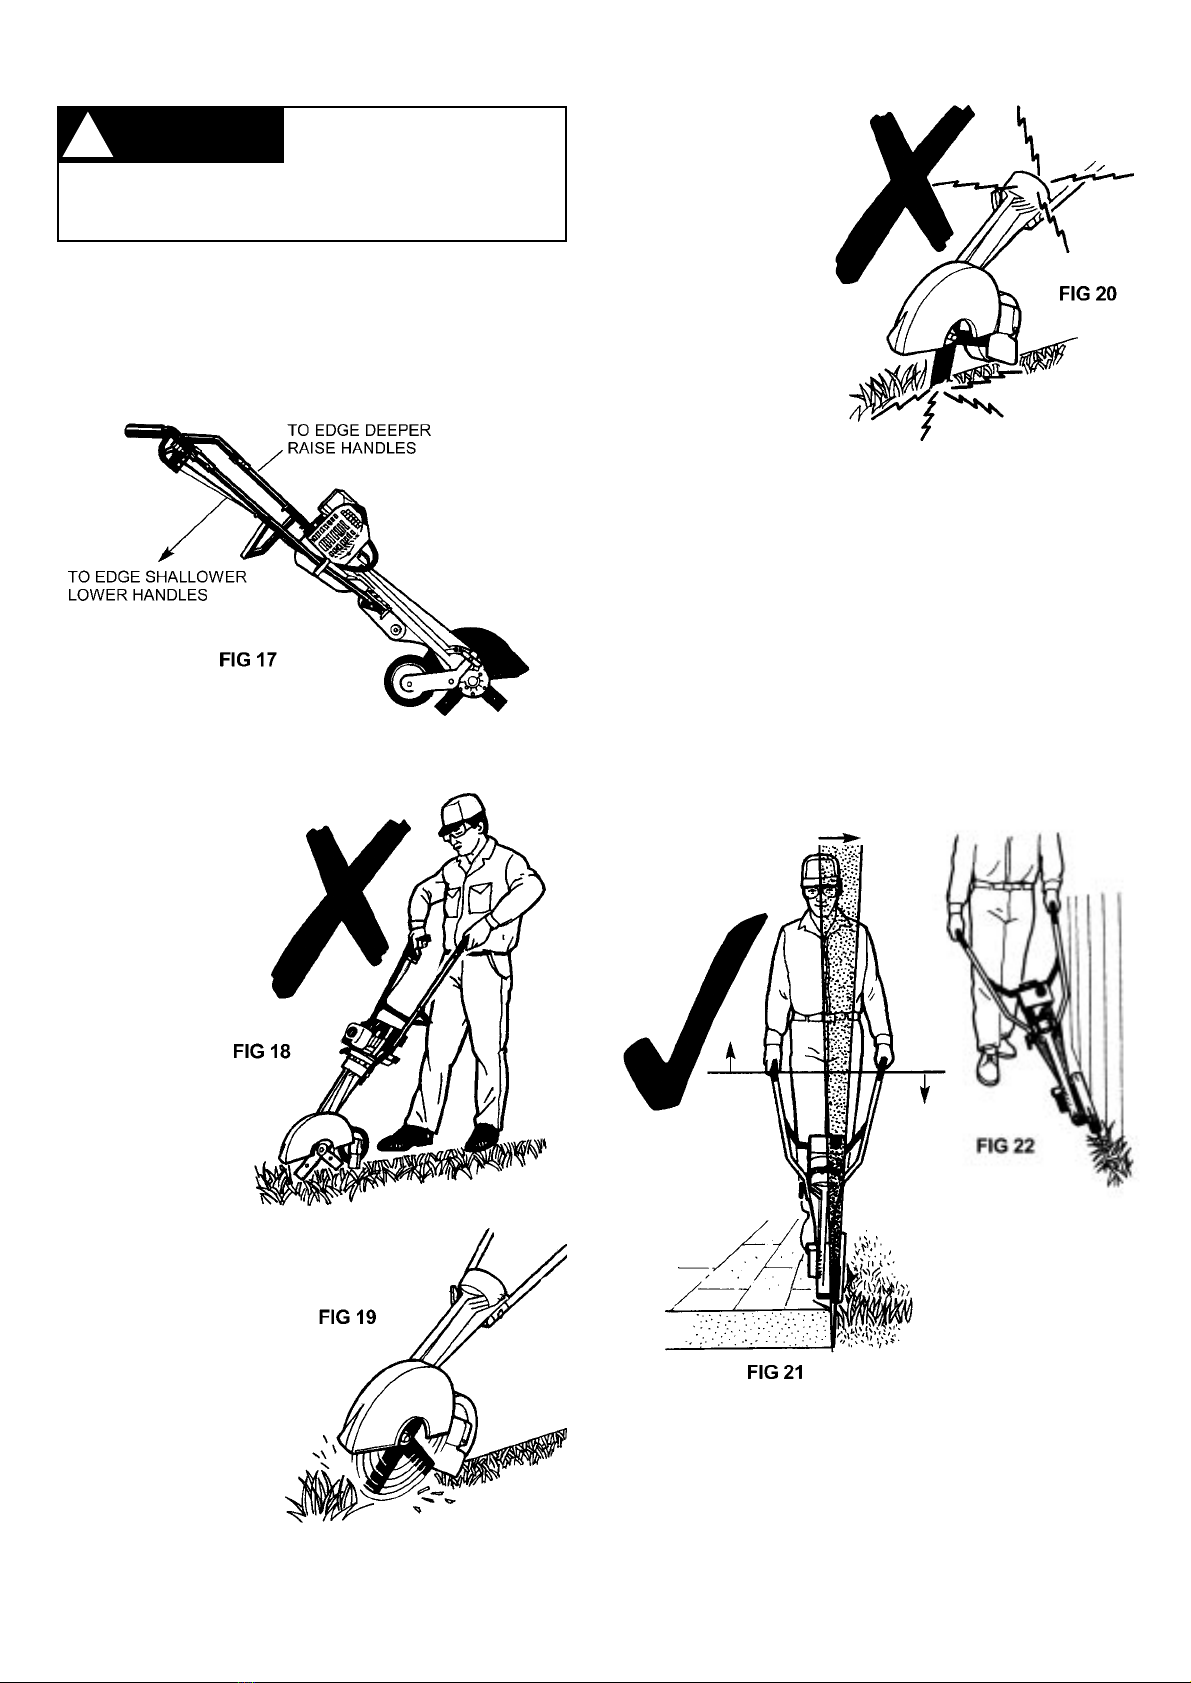
7Height adjustment for adjusting depth of cutting
blade.
8Blade cover reduces the risk of flying debris and
direct contact with the feet or hands.
9Sight guide for edging.
10 Cutter blades rotate when engine speed is
increased above idle.
11 Grass shield debris deflector reduces flyback of
stones and foreign material.
12 Wheel for moving and guiding edger.
13 Cross Brace, attaches downward on handle.
14 Left and right Handle Tubes.
15 Fuel cap, for sealing the fuel tank filler.
16 Fuel Tank.
17 Choke lever for cold engine starting.
18 Filter housing covers the air filter element.
19 Muffler reduces exhaust noises and diverts gases
away from operator.
20 Spark Plug terminal cap connects the spark plug
to the ignition wire.
21 Fuel pump primer under carburettor provides
additional fuel for starting.
22 Warning Label, on left handle.
23 Front Round Anti-Vibration Mounting.
24 RearRoundAnti-VibrationMounting(bothsides).
25 Twin Saddle AV Mounting (both sides).
26 Warning Label, on blade guard.
2
SAFETY WARNINGS
!
!WARNING !NOTE Advises you of information or
instructions vital to the
operation or maintenance of the equipment.

This Lawn
Edger must
not be operated by minors.
Bystanders, especially children
and animals, should not be
allowed in the area where a
machine is in use at least 15
metres (50 feet) away (Fig. 4). Never let the unit
run unattended.
As with any power tool,
the use of any lawn edger
may be dangerous. It is important that you read,
fully understand, and observe the following
safety precautions and warnings. Re-read this
operator’s manual and the safety instructions
periodically.
SAFETY PRECAUTIONS
3
PARTS & CONTROLS (CONTINUED)
Do not lend, rent or sell
this machine without the
operator’s manual. Be sure that anyone using
this unit understands the information contained
in this manual before use.
As with any power tool,
some special safety
precautionsmustbeobservedto reduce the risk
ofpersonalinjury. Careless or improperusemay
cause serious or even fatal injury.
Safe use of an Atom Lawn Edger involves:
1. The Operator
2. TheAtom Edger
3. The use of theAtom Edger
Electrical shock. Never
touch electrical wires or
components while the engine is running. They
are sources of high voltage and can give you
an electrical shock. Replace immediately any
faulty tension lead or spark plug cap.
THE OPERATOR
PHYSICAL CONDITION
Operator must be in good physical
condition and mental health, and not
under the influence of any substance
(drugs, alcohol, etc.) which might
impair vision, dexterity or judgement
(Fig. 3).
!WARNING
!WARNING
!WARNING
!WARNING
!WARNING
ROTATINGBLADE
DIRECTION OF ROTATION
WARNING
KEEP INSIDE OF BLADE GUARD CLEAN.
ESPECIALLY IN WET CONDITIONS A
CLOGGED GUARD CAN SLOW DOWN
OR STOP BLADE ROTATION AND MAY
CAUSE DAMAGE TO AUTOMATIC
SAFETY CLUTCH. ALWAYS OPERATE
BLADE AT HIGH SPEED WHEN EDGING.
DANGER
!
KEEP HANDS & FEET AWAY
22
WARNING – TO PREVENT SERIOUS INJURY
FOLLOW ALL SAFETY PRECAUTIONS IN OPERATOR MANUAL – IMPROPER USE CAN CAUSE SERIOUS OR FATAL
INJURY • OBJECTS MAY BE THROWN OR RICHOCHET IN ALL DIRECTIONS – ALWAYS WEAR EYE PROTECTION •
KEEPBYSTANDERS AT LEAST50FT(16M)AWAY•ALWAYS WEAREAR PROTECTION• WEARSNUG FITTINGCLOTHING
• MINORS SHOULD NEVER BE PERMITTED TO USE THIS EDGER • WEAR STURDY SHOES WITH NON-SLIP SOLES •
DO NOT LEND, RENT OR SELL THIS EDGER WITHOUT THE OPERATOR MANUAL.

4
SAFETY PRECAUTIONS (CONTINUED)
Prolonged use of any
hand-held powered
machine exposing the operator to vibrations
may produce whitefinger disease (Raynaud’s
phenomenon)orcarpal tunnelsyndrome.These
conditions reduce the hand’s ability to feel and
regulate temperature, produce numbness and
burning sensations, and may cause nerve and
circulation damage and tissue necrosis.
!WARNING
PROPER CLOTHING
Clothing must be sturdy and snug-fitting, but allow
complete freedom of movement (see Fig. 5). Avoid
loose-fitting jackets, flared or cuffed pants, or anything
that could trip the operator. Wear overalls or long
pants to protect your legs. DO NOT wear shorts. Use
of gloves when working with the Lawn
Edger is recommended.
Good footing is most important.
Wear sturdy shoes with nonslip
soles. DO NOT wear sandals
or operate with
bare feet. In hot or
sunny conditions,
always wear a hat
and long sleeve
shirt for protection
against skin
cancers. Use of
a good brand of
sunscreen cream is also recommended on exposed
skin surfaces.
Proper eye protection is
a must. The blade cover
maynotprotect the operatorfromallfast moving
foreign objects, even though the discharge is
directed away from the operator, as ricochets
and bouncebacks may occur during lawn
edging operations. Never operate an Atom
Edgerunlesswearinggogglesor properly fitting
safety glasses with adequate top and side
protection which comply with ANSI Z 87.1.
!WARNING
Replace immediately broken or cracked blade covers
and grass shield debris deflector.
Engine noise may damage your hearing. Wear sound
barriers(earplugsorearmufflers)toprotectyourhearing.
Continual and regular users should have their hearing
checked regularly.
SAFE FUELING INSTRUCTIONS
Gasoline is an extremely
flammable
and explosive fuel. Use
extreme caution when handling
gasoline. Do not smoke or
bring any fire or flame near the
fuel (Fig. 6).
!WARNING
Refuel outdoors only. Always switch off the engine
andallow ittocoolbeforerefueling.Relievefueltank
pressurebylooseningfuelcap slowly.Neverremove
fuel filler cap while engine is running.
Select bare ground for fueling, then move at least 3
metres(10 feet) fromthe fueling spot before starting the
engine.WipeoffanyspilledfuelbeforestartingyourAtom
Edger and check for leakage.
Always tighten fuel filler cap securely after fueling.
Do not operate the Edger when fatigued. Be alert – if
you get tired while operating the machine, take a break.
Tirednessmayresultinlossofcontrol.Workingwithany
power tool can be strenuous. If you have any condition
thatmightbeaggravatedbystrenuouswork,check with
your doctor before operating the machine.
Always allow engine to
cool before refueling.
Accidental spillage of gasoline over hot engine
could cause fire or explosion to occur with
consequent possible disfigurement or fatal
injury. Wash and clean hands after fueling.
!WARNING
The Atom Edger unit uses gasoline only for fuel (Refer
“Fuel and Oil,” page 6).
SAFE STARTING
You should always inspect your unit before starting it.
Make sure the controls and safety devices are working
properly.
Place the machine on firm ground or other solid surface
in an open area. Maintain good balance and secure
footing.
!NOTE When you pull the starter grip,
do not wrap starter rope around
your hand. Do not allow grip to snap back, but
guide starter rope slowly back to permit rope to
rewind properly.
Failure to follow this procedure may result in injury to
hand or fingers or may damage the starter mechanism.
The Atom Edger is a one-
person machine. To
reducetherisk of eye orotherinjury from thrown
objects, ensure that bystanders are at least 15
metres (50 feet) away during use. Replace
immediatelyanywornor broken debris deflector
shield or blade cover. If approached, release
throttle trigger to immediately de-accelerate the
engine.
!WARNING

5
SAFE WORKING INSTRUCTIONS
AND IMPORTANT ADJUSTMENTS
Neveroperateyourmachineifitisdamaged,improperly
adjusted or not completely and securely assembled.At
correctidlespeed,thebladeshouldnotturn.Donotuse
theAtomEdgerwithincorrectidlespeed(referAdjusting
the Carburettor instructions on page 12).
SAFE MAINTENANCE, REPAIR
AND STORING
Use only original Atom replacement parts for
maintenance and repair. Use of parts manufactured by
others will void warranty and/or may cause serious or
fatal injury.
SAFETY PRECAUTIONS (CONTINUED)
Always stop the engine,
make sure that the blade
is stopped, and disconnect the spark plug
before adjusting blade height, doing any
maintenance or repair work, or cleaning the unit
or blade.
!WARNING
Follow the maintenance instructions in the appropriate
sectionofthismanual.Anyrepairsshouldbecarriedout
by an authorized servcie dealer or person with suitable
servicing experience.
A worn or damaged
muffler is a fire hazard
and may cause loss of hearing. Check to see
that the muffler is in good condition. The lawn
edger must not be operated if the muffler is not
functioning properly, is damaged, or has been
removed. In order to reduce the risk of fire, do
not modify or remove any part of the muffler and
ensure it is not worn or broken.
!WARNING
Rememberthat the risk offorest or grass firesis greater
in hot weather.
Check fuel filler cap for leaks at regular intervals. Use
thespecifiedsparkplugandmakesureitandtheignition
lead are always in good condition.
Never touch a hot muffler
as burns will result.
!WARNING
StoreAtom Edger in a dry, high or blocked location and
out of reach of children.
Never store the machine
with gasoline inside a
building where fumes may reach an open flame
or spark (e.g. gas or oil-fired heater appliance,
electric motor, etc.).
!WARNING
Beforestoringforalongerperiod,alwaysemptythefuel
tank.
Keep the space behind and beside the engine clear at
alltimes to allow for the escape ofhot and toxic exhaust
fumes.
Operateyourmachineundergoodvisibilityanddaylight
conditions only. Work carefully.
The engine exhaust from
this product contains
chemicals known to the State of California to
cause cancer, birth defects or other
reproductive harm.
SAFE WORKING CONDITIONS
When working with the Atom Edger, always wrap your
fingers tightly around each handle. Keep your hands in
this position to have your machine under control at all
times. NEVER attempt to operate the Atom Edger with
one hand, as a loss of control may result in serious or
fatal injury.
Make sure the handle grips are in good condition and
free of moisture, pitch, oil or grease. Use both hands,
one on each handle, to operate and control the lawn
edger. Do not overreach. Keep proper footing and
balance at all times.
!WARNING
Do not touch hot engine
during and immediately
after use as you may burn yourself.
!WARNING
!WARNING Start and operate your
unit outdoors and in a
ventilated area.

DANGER!
FUEL IS EXTREMELY FLAMMABLE. HANDLE IT
WITH CARE. KEEP AWAY FROM IGNITION
SOURCES. DO NOT SMOKE WHILE FUELING
YOUR EQUIPMENT.
Always allow engine to
cool before refueling.
Accidentalspillageofgasolineover a hot engine
could cause fire or explosion to occur. See
Page 4 – Safe Fueling Instructions.
Running the engine with
insufficient oil can cause
serious engine damage. Be sure to check the
engine on a level surface, with the engine
stopped, at regular intervals.
YourAtom Edger is poweredbyafour-stroke,aircooled
enginewhichrequiresunleadedgasolineonlyinthefuel
tank.
NOTE: Do not mix oil with the gasoline.
Onlyusesufficientfuelforafewweeksworkandstorein
an approved safety type container.
Pressure may build up in
the canister. Remove fuel
cap slowly to avoid injury from fuel spray.
Replace fuel cap securely. Take care when
handling gasoline.Avoid direct contact with the
skin and avoid inhaling fuel vapor.
!WARNING !WARNING
!WARNING
!WARNING
ASSEMBLING THE lll ATOM LAWN EDGER
6
Beforefuelingtheedger,cleanthefiltercapandthearea
around it to ensure that no dirt falls into the tank.
ENGINE OIL LEVEL
1. Removetheoilfillercapandfilltankwithoilcontainer
supplied and check the oil level: it should reach the
top of the oil filler neck.
2. Ifthelevelislow,filltothetopoftheoilfillerneckwith
the recommended oil.
After every 10 hours use, check the engine oil level and
replenish oil up to the top of the oil filler neck.
FUEL AND OIL
1. Fit A.V. handle brace #1 to main body #2 (Fig. 7)
with screws and nuts provided. Use straight bladed
screwdriver or torx 25 driver.
2. Sliderighthandletube#3throughroundA.V.rubber
mount #4.
3. Slide left handle tube #5 through roundA.V. rubber
mount #6.
4. Point black female hex bolt retainer #7 forward
and insert the 150mm (6”) hex bolt #8 through
retainer, through left handle tube #5, through
leftA.V. rubber saddle #9, through main
body #2, through right A.V. rubber
saddle #10, through handle tube #3.
5. Screw on handle wing nut #11
sufficiently. DO NOT
OVERTIGHTEN wing nut as
A.V. becomes less effective.
6. Fit handle cross-brace #12
to handle tubes #3 and
#5. Use 2 screws #13
and 3 lock nuts #14
provided.
7. Insert trigger handle
#15 into right handle
tube #3 using one
screw #13 and one
nut #14 to hold into
place.
NOTE: Throttle cable/switch wire from engine
must be fitted under handle and clipped into
holding lugs of cross-brace #12. Do not loop
throttle/switch wire over handle.
8. Insert left handle #16 into left handle tube #5 using
one screw #13 and one nut #14 to hold in place.

Fill or add fuel to the tank
only when the edger is in
a horizontal position as shown (Fig. 9). Allow
enginetocooldownfor at least 5 minutesbefore
adding fuel. Use fuel funnel (not supplied) to
prevent spills.
STARTING & STOPPING INSTRUCTIONS
7
FUEL AND OIL (CONTINUED)
IMPORTANT NOTE
DO NOT use old or stale gasoline. Always use the
proper gasoline, otherwise your engine will suffer
rapid, permanent damage and you will void the
engine warranty.
!WARNING
Using nondetergent oil or
2 stroke engine oil could
shorten the engine’s service life.
!WARNING
3. Press and
release the
primer bulb
5 times
(Fig. 13).
4. Make sure
you have a
firm footing.
Hold down
motor with
left hand and
put one foot on the cross brace. With right hand
pull the starter grip slowly until you feel it engage –
and then give it a fast pull (Fig. 14).
1. Place lawn edger
on ground in
horizontal position
(see Fig. 14). Be
sure the ignition
switch is “ON”.
Push switch down
toward operator to
turn ON. Switch
located on top of
trigger handle
(See Fig. 10).
2. COLD START: Slide the choke level to full choke
position (Fig. 12A).
Use Honda 4-stroke, or an equivalent high detergent,
premium
quality
motor oil
certified to
meet or
exceed
U.S.
automobile
manufacturer’s
requirements for service
classification SG, SF. Motor
oils classified SG, SF will
show this designation on the container. SAE 10W-
30 is recommended for general, all temperature use.
Do not pull out starter rope more than 65cm (26”) – it
might break. Stand between handles to start. Do not let
starter grip snap back. Guide it back slowly so that the
starter rope can rewind slowly.

8
STARTING & STOPPING INSTRUCTIONS (CONTINUED)
1. TheAtomEdgerisveryeasyand simpletouse.For
some people, it may take a few edgings to become
use to it.
2. Thoroughly inspect the area where the edger is to
be used and remove all stones, sticks wires and
other foreign objects.
3. Adjust blade height (Fig. 15). With a new blade, try
the second hole closest to operator.
5. PULL THE STARTER ROPE BRISKLY until the
engine starts. Gradually move the choke lever to
the open position. Allow engine to warm-up until it
runs smoothly.
6. Throttle trigger (engine accelerator control) is
operatedbypushingdowninterlockwiththumband
pulling on trigger (Fig. 12C).
TO AVOID PERSONAL
INJURY, NEVER CARRY
THE EDGER WHILE THE ENGINE IS RUNNING.
Stay clear of the rotating blade. Stop the engine
prior to making adjustments and cleaning.
!WARNING
EDGING INSTRUCTIONS
7. HOTORWARMSTART:(Enginehasalreadybeen
started and warmed up). Switch ignition “ON”.
Make sure you have a firm footing with one foot on
the cross brace. Pull starter until motor runs, allow
to warm-up.
NOTE: A built in automatic centrifugal clutch
disengages the blade from rotating at engine idle
speed. The clutch engages the blade when the
engine speed is increased.
8. FLOODEDENGINE:(Enginewillnotstart).Ifsmoke
orfuelcomesfromexhaustandenginewillnotstart.
a) Check that ignition switch is “ON”, CHOKE
LEVER is on RUN position.
b) Pull starter rope up to 10 times to clear engine
of fuel so it can start.
c) If engine has excessive fuel that cannot be
cleared by (a) & (b) above, remove spark plug from
engine and from spark plug terminal, crank engine
to clear excess fuel, wipe and dry spark plug of all
fuel, re-install spark plug terminal, and restart as
above.
9. To stop engine push ignition switch down on top of
throttle trigger away from operator (Fig 10).
AFTERFINISHINGWORK
Storing for a short period: Keeptheunit in adry place
until you need it again. Do not store where open flame
or electrical machinery is operating.
Storing for a long period: Drain the fuel tank and run
engine until carburettor is dry.
4. With both arms extended
downwards, as in Fig. 16, hold
both handle grips firmly. With
the engine running, pull the
throttle trigger full on. Engine
must run at full speed.

9
EDGING INSTRUCTIONS (CONTINUED)
Only operate unit when
moving forward. DO NOT
operate walking backwards, as you may trip, fall
and injure yourself.
!WARNING
5. If blade is not deep enough, or if digging too deep,
adjustbladeheight,orslightlyraiseorlowerhandles
tosuitdepthrequired(Fig.17).However,itisalways
more comfortable and relaxed to have arms fully
extended downwards.
6. Do not lift handles by excessive bending of
elbows (Fig. 18). Always keep arms straight as
shown in Fig. 16.
Note:Whencuttingefficiently, engine speed should
be full throttle under load.
9. If blade jams or
stops in the
ground (Fig. 20),
lower handles or
release trigger
and recommence.
Engine speed
should be full
throttle under
load with blade
rotating.
10. Edging along
Concrete edge:
For position of
blade,alignedgeguide(atfrontofbladecover)with
edge of concrete. If blade hits concrete, lower
handles and re-position blade at side of concrete.
Even with the grass growing over the concrete and
you cannot see the edge, you can feel the edge
ofthe concretewith therotatingbladebyslightly
sideways tilting the handles of the edger away
fromtheconcreteso that thebladetiltstowards
the concrete and skims the concrete edge and
acts as a guide (Fig 21). Edger blades are made
from high tensile hardened spring steel and will last
alongtime.Oncetheedgeisestablishedthesecond
and subsequent times around are very fast.
11. Sideways Tilting: Lower either left or right handle
to achieve angle cutting (Fig 22).
12. Clutch: The Atom Edger is equipped with a
centrifugal clutch. DO NOT run edger at low
speeds (or, if blade is jammed, at high engine
speeds) as clutch shoes will prematurely wear
and cause damage if cutting blades do not
rotate.
7. As cutting action
begins, move the
lawn edger forward
so that the blade
can cut the edge as
you move forward
(Fig. 19).
8. Continue at a
moderate pace until
you are familiar with
the controls and the
handling of the
Atom Edger.

MAINTENANCE INSTRUCTIONS
EDGING INSTRUCTIONS (CONTINUED)
USEONLYATOMBLADES.
Other blades have larger
size holes (1/2”) which will cause out-of-balance
vibrations which will damage unit and cause
injury. Other blades can also break and cause
major injury.
BLADE REPLACEMENT
1. Stopengine.Cleanarea around dustcover #44042
and pry out with screwdriver (Fig. 25) exposing
14mm hex head for unscrewing blade nut.
!WARNING
!WARNING
10
!NOTE Keep inside of blade guard
clean, especially in wet
conditions. A clogged guard can slow down or
stop blade rotation and may cause damage to
automatic safety clutch. Always operate blade
at high speed when edging.
!NOTE Do not run engine without blade
tightened to blade shaft as gear
damage will occur. Always use two blades as
shown above. Never use a single blade. Do not
use other thicker blades as you will damage the
unit.
The Lawn edger can be
transported by pushing it
on it’s wheel, or carrying
it with engine switched
off as in Fig. 23.
2. Through dust cover hole, place 14mm socket and
place 17mm wrench on blade nut (Fig. 26).
3. Unscrew nut counter (anti) clockwise (normal right
hand thread).
4. Remove one small washer, one large washer and
two blades (Fig. 27). Before installing blade and
washers, clean all grit and grease.Assemble these
parts clean and dry. Fit large washer, new blades
withspiggotsofonebladeinterlockingwithholeson
oppositeblade,largewasher,onesmallwasher,and
nut. Tighten nut to 15-20 ft. lbs. (20-27Nm) or hand
tight with 8” (200mm) or longer spanner.
TO AVOID
PERSONAL
INJURY, NEVER
CARRY THE
EDGER WHILE
THE ENGINE IS
RUNNING.
Never hold the
handle cross
brace if the
engine is running
(Fig. 24). Stop the
engine prior to
lifting or
carrying.

MAINTENANCE INSTRUCTIONS (CONTINUED)
SPARK
PLUG
The following
information is a
guide only. For
more details,
refer to your
“Honda
Owner’s
manual”
supplied with
this unit.
!NOTE CLEAN AND RE-OIL THE AIR
FILTER EVERY 5 HOURS OF
OPERATION OR DAILY.
!NOTE Using spark plugs other than
those designated may result in
the engine failing to operate properly or in the
engine becoming overheated and damaged.
5. Clean plastic dust cap and housing; press back by
gently tapping into place. Clean inside blade cover
of any built up dirt.
TO REMOVE BLADE COVER LID
Remove 4
screws as shown.
Lift off cover. To
reinstall, reverse
procedure with
blade cover metal
support in place
#43109. Fig. 28.
LOOSE BLADE
Follow steps 1 and 2 of Blade Replacement and tighten
nut clockwise.
LUBRICATION OF GEARS
Thereisusuallysufficientgreasetolastatleast6months
or 125 hours for professional use before topping it up.
Thegreaseinthegearcase should be addedaccording
to use. Use a lightl, free-flowing lithium-based grease
such as Castrol EPL1 or its equivalent.This is available
in a handy to use squeeze pack with nozzle (#43227).
Remove two screws marked FILL and BLEED. Inject
grease into FILL screw hole and allow grease to begin
to eject from BLEED hole indicating gear box is 3/4 full
(Fig. 29). Refit and tighten BLEED screw and squeeze
in3to4morelotsofgrease.RefitFILLscrewandtighten.
NOTE: Do not use
light or heavy gear
oil as it might leak
out. If case joint is
damaged, clean
and dry and use a
gasket sealant.
Replace o-ring if
damaged.
Tighten all
screws.
Refill casing.
CHECKING THE SPARK PLUG
Remove engine cover by unscrewing 1x5mm hex bolt
at top of cover (Fig 30). Remove spark plug cap and
unscrewsparkplug.Ifengineislowonpower, difficultto
startorrunspoorlyatidlingspeed,checkthesparkplug.
●Allow engine to cool down.
●Remove spark plug.
●Clean dirty spark plug.
●Check electrode gap.
●Rectify faults which have caused fouling of spark
plug. Possible faults include:
– Incorrect carburettor setting.
– Too much oil in oil tank.
– Oldfuel.
– Dirtyairfilter.
– Unfavourable running conditions (e.g. operating
at part load).
Donotcleanthe sparkplug in anabrasivegrit spark
plug cleaner, as expensive damage to the engine
couldoccurthroughloose grit damaging chromein
cylinder bore.
Fit a new spark plug after approximately 100 operating
hours or earlier if electrodes are badly eroded.
AIR FILTER MAINTENANCE
The air filter (Fig 31) is one of the most important areas
to maintain. If it is not maintained, you will void the
warranty. Before cleaning, make sure the unit is turned
off.
11

MAINTENANCE INSTRUCTIONS (CONTINUED)
!NOTE Throttle cable wire is NOT to be
pulled tight (against trigger
throttle). Trigger to have small initial movement
before it pulls cable and carby throttle lever.
!NOTE Edger blade NOT to rotate when
engine is idling.
2. If filter torn or very dirty
replace.
3. Wash the filter in detergent
and water (Fig. 32). Rinse
the filter thoroughly and
allow it to dry.
4. Apply enough clean
SAE 30 oil to saturate the
filter when squeezed.
Squeeze the filter to spread
the oil and to remove
excess oil.
5. Reinstall the filter (Fig. 33A) air filter cover.
Note sequence of parts.
!NOTE CHECK TIGHTNESS OF
SCREWS at regular intervals
and retighten as necessary especially during
the first few hours of operation.
!NOTE If the unit is operated with dry
or dirty filter or without the air
filter and/or carburettor air filter cover, you will
void the warranty.
!NOTE Careless adjustments can
seriously damage the
carburettor and/or engine.
CARBURETTOR
This unit is equipped with a diaphragm-type carburettor
that has been carefully calibrated at the factory. In most
cases, no further adjustment will be required. The
condition of the air filter is important to the operation of
the edger. A dirty air filter will restrict the air flow, which
upsets the fuel-air filter mixture in the carburettor. The
resulting symptoms are often mistaken for an out-of-
adjustment carburettor. Therefore, check the condition
of the air filter before adjusting the carburettor. Refer to
Air Filter Maintenance on page 11. If the following
conditionsareexperienced,itmaybenecessarytoadjust
the carburettor:
●The engine will not idle.
●The engine hesitates or stalls on acceleration.
●The loss of engine power that is not corrected by
cleaning the air filter and muffler.
●The engine operates in an erratic or fuel-rich
condition (indicated by excessive exhaust smoke
from the muffler).
ADJUSTING THE CARBURETTOR
1. The idling screw adjustment is accessible without
removing the air filter cover. See Fig. 33B. To
increaseengineidle speed,turnIDLESCREW(#1)
clockwise (Refer Fig. 33B). To decrease engine
speed, turn IDLE SCREW counter (anti) clockwise.
Throttle trigger to be in idle position.
2. If air filter is dirty then correct idle adjustment can
not be made and air filter must be cleaned. Refer to
Air Filter Maintenance and Fig 31, 32 and 33A.
!NOTE No mixture screws for high or
low speed settings are fitted to
this carburettor. Use clean fuel and clean air
filter. No other adjustment is required due to
fixed jets fitted.
12
Thethrottlecablenormalplayis.040”to.080”(1to2mm)
when measured at the carburettor side. Re-adjust with
the cable adjuster (#2) as required and re-adjust the
idle screw (#1) on carburettor as required.

13
MAINTENANCE INSTRUCTIONS (CONTINUED)
FUEL FILTER
When the
engine runs
short of fuel
supply and the
tank has
gasoline in it,
clean the fuel
filter for
blockage
(Fig. 34).
!NOTE If debris causes blockage
around the intake air cooling
vent or between the cylinder fins, it may
cause the engine
to overheat, and
that in turn may
cause mechanical
failure on the part
of the Atom Edger.
Remove air
deflector to clean.
CHECKING EXHAUST MUFFLER
Tighten exhaust screws. If exhaust gasket is leaking,
replace gasket. If the engine is low on power, check the
muffler.Allow motor to cool down. Remove and scrape
outexcesscarbon(Fig. 35)onbothinletandexitexhaust
or have this done by a service dealer. Replace exhaust
spark arrestor if worn, broken or blocked (Fig 36).
For Engine Troubleshooting see page 18 and 19.
MAINTENANCE INSTRUCTIONS
Engine will not run or
runs and stops. 1. Ignition switch is OFF.
2. Choke ON.
3. Partially empty fuel tank.
4. Primer bulb not pushed enough times.
5. Engine is flooded.
1. Turn switch on.
2. Push choke to OFF position.
3. Fill tank.
4. Press primer bulb fully and slowly 5 times.
5. Use starting procedure without choke.
Cutting blade does not
turn when operating. 1. Blade cover filled with dirt/grass.
2. Clutch slipping.
3. Loose bladenut.
4. Choke partly on.
5. Washers missing.
6. Spacers or parts missing.
1. Clean.
2. Cut less depth. Check blades are rotating.
Edge at full throttle
3. Tighten bladenut.
4. Push choke to OFF position.
5. Re-fit washers.
6. Re-fit missing parts.
Gear case leaking 1. Loose screws.
2. Broken O-ring.
3. Grease too thin or oil used.
1. Tighten.
2. Replace.
3. Refill with correct grade grease. See pg 13.
Noisy gears 1. No lubricant in gearcase.
2. Loose bladenut or gear adjustment
incorrect.
1. Refill.
2. Reassemble parts correctly.
!NOTE

14
KEY # PART # DESCRIPTION
45 43953 R.H.AV MOUNT
46 43954 MAINHANDLE BRACKET
47 43955 HANDLEAV RUBBER
48 43961 PRO L.H HANDLE
49 43963 RH HANDLE SUIT RUBBER GRIP
50 43965 HONDAAIR DEFLECTOR(GX35)
51 43978 PRO SHAFT (USES FLANGED NUT)
52 43980 FLANGE BUSH SPACER
53 43990 MANUALHONDA MODEL 506
54 44003 HANDLE KNOB w/nut (44006 + 44075)
55 44010 PRO THROTTLE CABLEASSY
56 44012 CORRUGATED LOOM 400mm
57 44016 SPACER 8.35MM
58 44062 HANDLECROSS BRACE
59 44064 HANDLE BOLT HEX PIECE BLACK
60 44074 “HANDLE BOLT 1/4”” X 6"” BSW”
61 44075 BLACK HANDLE KNOB (refer Key #54)
62 44085 TRIGGER COVER W/OUT SLOT
63 44165 SWITCH WIRE 505/506 HONDA
64 44301 PROAV2 WHEELARM
65 44302 HTADJ PIN
66 44303 PROAV2 HTADJ HANDLE
67 44304 “WHEELAXLE BOLT 3/8”” x 5.5”
68 44305 SEALED BEARING 28x8x12.8mm
69 44307 WHEELAXLE TUBE SPACER 94.35mm
70 44308 PROAV2 DEBRIS LIMITER
71 44309 PROAV2 DEBRIS FLAP
72 44310 WHEEL HUB CAP
73 44311 PROAV2 MAIN CASING
74 44312 PRO CLUTCH DRUM CUP(32mm LONG)
75 48002 HONDAGX35 ENGINE
76 48010 HONDAEXHAUST OUTLET (GX35)
77 48100 OIL 100ml (for Honda GX-31)
78 44060 HANDLE TUBE RH
79 44061 HANDLE TUBE LH
80 44440 ROCKER ON/OFF SWITCH
81 50650 ATOM LAWN EDGER LABEL
82 43452 ADJUSTINGARMSPRING
83 44087 RIGHTHANDLE TRIGGERASSEMBLY
* 43935 CABLEADJUSTER PIN
* 44005 BRASS 6.3mm QC TERMINAL
* ITEMS NOT SHOWN ON DIAGRAM
KEY # PART # DESCRIPTION
1 40650 SCREW M5 x 36mm
2 40652 NUT NYLOC 5mm
3 40835 N.BEARING 32 x 10 x 12 W/SEAL
4 40838 HEX SCREW 6MM x 19MM
5 40906 “O” RING 64 x 1.75mm”
6 42111 SEALS NYLON OD27.2 x ID12.60
7 42112 FELT SEAL
8 43105 CUTTER BLADE SET (form & straight)
9 43108 BEARING 37 x 12 x 12
10 43109 BLADE COVER SUPPORT
11 43110 BLADE COVER
12 43112 BLADE DRUM
13 43114 BLADE SHAFT DRIVE
14 43115 BLADE WASHER SMALL
15 43116 BLADE WASHER LARGE
16 43122 CROWN GEAR L/E
17 43125 SPACER 15.5MM
19 43127 WARNING LABEL HOT MOTOR
20 43128 WARNING LABELBLADE COVER
21 43133 WARNING LABELHANDLE
22 43155 MAIN BODY SHIELD (N)
23 43163 FLANGE NUT 3/8 UNC
24 43172 NUT NYLOC 3/8
25 43173 NUT M12 X 1.75
26 43176 PINION GEAR LONG 25.4mm
27 43179 BEARING SCREW M5 X 39
28 43198 TRIGGERCOMP.SPRING
29 43199 “SPRING,SMALL”
30 43218 FLAT WASHER 9.77x19.05x1.6 Z/P
31 43288 THROTTLETRIGGER
32 43292 THROTTLEINTERLOCK
33 43406 LABELPROFESSIONAL
34 43419 LABEL MODEL 506
35 43484 WASHER 22.43 x 5.94 Z/P
36 43719 DEBRISDEFLECTORSPRING
37 43765 WHEELONLY
38 43790 SCREW 5.5mm for plastic
39 43860 BEARING 32x10x12 + 4mm
40 43910 DUST PLUG RED
41 43922 RUBBERHANDLE GRIP
42 43941 MAIN BODY COVER(new)
43 43951 PRO ROUNDAV RUBBER
44 43952 L.H.AV MOUNT
lll ATOM MODEL 506 LAWN EDGER PARTS LIST

15
lll ATOM MODEL 506 LAWN EDGER PARTS LIST

!NOTE This information is for persons with suitable experience should this unit ever require
workshop repair.
16
COMPLETE WORKSHOP MANUAL
!NOTE If shaft is difficult to knock out,
remove complete main body
bearing cover housing (see
p.17, Removing Gear Assembly Shaft).
TO REPAIR THROTTLE TRIGGER
ASSEMBLY
1. Remove
2 screws
holding side
cover and
remove cover
and all parts.
Reassemble
asfollows.
2. Fitthrottle
inter-lock
and
compression
spring
(Fig 37).
3. Fitthrottle
trigger with top
hook #43288
and throttle
trigger
compression
spring #43198,
fit trigger then
compression spring (Fig 38).
4. Hold trigger in place with finger until throttle cover
#44069isfitted(Fig 39).Itisthenreadyforscrewing
tight (with 2 screws. Ensure throttle cover rear lug
(arrowedFig. 39)engagesundersideofhandlewall.
TO REPLACE BLADE SHAFT
1. Afterremovingblades(ReferPg10,Figs25,26and
27) remove blade drum #43112, felt seal #42112
and spring level washers #43115. Inspect threaded
end of shaft and file off any rough surfaces so shaft
is round and smooth.
2. Hold unit as
shown in
Fig. 40 and
tap shaft
through using
a 3/8 bolt or
similar so that
bolt replaces
shaft and
maintains
alignment
and contains
washers,
spacer and
gear inside
housing –
DO NOTTURN HOUSING OVER.
3. Carefully push
new blade shaft
#43114 up into
bearing and tap
through carefully
so washers, crown
gear and spacer
remain in position
and the 3/8 bolt is
pushed out
(Fig. 41).
4. When blade shaft comes through, turn assembly
over. Tap blade shaft so head of shaft is against
bearing.
5. Re-assemble in reverse order all parts listed in 1.
above. Refit blade (as per instructions on Pg 10,
Figs 25, 26 and 27) and tighten up to 15-20 ft lbs
(20-27Nm) or hand tight with 8” (200mm) or larger
spanner. Head of blade shaft must pull up tight
against bearing, otherwise blade will become
loose during use.
TO REMOVE ENGINE
1. Remove
throttle cable
(Fig 33B,
page 16),
unclipswitch
wire from
motor.
2. Unscrewwith
8mm (5/16”)
socket
spanner,
4 screws around
clutch housing Fig 42.
TO REPLACE A.V. MOUNTS
1. Pull worn parts out
and replace with new
(Fig 52) on main
handle moutn.
2. To replace front
A.V. mount rubber –
Remove 2 screws A &
B, split handle
housing, replace
rubber mount and
reverse procedure to assemble Fig 45.

17
COMPLETE WORKSHOP MANUAL (CONTINUED)
TO REMOVE CLUTCH DRUM
1. Slide long thin screw through hole in clutch drum
andribsinbodycasing.Unscrewflangednutinanti-
clockwise direction Fig 46.
2. Replaceclutchdrumwithnewclutchdrumkitifworn
or out of round. Fit and retighten.
!NOTE WW
WW
Washer casher c
asher casher c
asher clearlear
learlear
learance underance under
ance underance under
ance under
ff
ff
flanglang
langlang
lange ne n
e ne n
e nut.ut.
ut.ut.
ut. If shaft end passes
through this washer, flanged nut will not tighten
clutch drum. See Fig 47 for correct installation.
Ifendofshaftshoulderclearancedoesnotallow
clutch drum to tighten add another washer.
TO REMOVE GEAR ASSEMBLY
AND MAIN DRIVE PINION SHAFT
1. Remove blade cover as shown in Fig 28, page 11.
2. Remove 6 screws holding main bearing housing
(Fig 48) shown marked. Remove bearing holding
screwA.
!NOTE DO NOT USEASTEELDRIFT as
a punch as you will damage the
pinion teeth.
3. Turn edger
over to
remove dust
cover (refer
Fig 25, page
10).
4. With a soft
punch, tap hex
end blade
shaft as in
Fig 49until
cover and
gear
assembly
pops out of
body
housing.
5. If service tool available, remove shaft after fixing to
main casing with existing screws and screwing out
(Fig 50).
6. Ifnoservicetoolavailable,useascrewdrivertolever
pinionback.Turnscrewdriveronendtoleverfurther.
Fig 51 & 52.
7. With a copper or
brass punch
(7/16” or 10mm
in diameter)
about 10” long,
hold housing and
tap pinion shaft
out Fig 53.

COMPLETE WORKSHOP MANUAL (CONTINUED)
18
!NOTE Bearing must be forward to
allow bearing locating screw to
be fitted, then pinion and bearing forced back
onto screw. If this is not done, pinion or crown
gear could be tight. Correct distance is 6mm
(.236”) Fig. 58.
TO REMOVE PINION
1. Hold shaft in vice
between two pieces of
aluminium so as not to
damage shaft.
2. To remove pinion, grip
shaft just behind
bearing in jaws of vice
(Fig. 54) and unscrew
pinion counter (anti)
clockwise (normal
thread) with vice grips.
If tight, heat to break
loctiteseal.
3. Fit new pinion with
fresh loctite on thread,
making sure it is tight up to spacer washer
#43229, (Fig. 55) and washer does not move.
4. With a soft hammer, tap casing down until it
bottoms on pinion bearing (Fig. 57).
5. Fit bearing location screw (See Fig. 48 marked A)
and leave nut loose.
6. Using a screwdriver, lever pinion firmly back onto
bearing locating screw and tighten nut (Fig. 52 &
53).
4. Toremoveclutchdrum,gripshaftjustbehindbearing
in aluminium vice jaws and impact off with 14mm
(9/16”) hex socket. See Page 17 for replacement of
drum.
ASSEMBLING MAIN HOUSING
1. Clean and dry bearing. Place oil resistant gasket
sealant (e.g. Fullerprene 303) around bearing as
inFig. 55.
2. Place and
lock-up a
15mm
diameter
(approx.)
brass drift
vertically in a
vice (Fig. 56).
3. Hold centre of
clutch drum
nut on top of
drift and slide
main body
housing down
over shaft
(Fig. 56).
7. Replace
crown gear
if teeth are
worn. See
sequence
of assembly
(Fig. 60).
8. Check and
renewO’
ring #40906 if necessary. Fit assembly into
housing. If bearing is loose in housing, smear
loctite around bearing before assembling.
Carefully drive down (making sure gears are
meshing) by gently tapping around bearing area
(Fig. 59) and turning clutch drum. Refit 6 screws
around shaft.
9. Fill or top up with
gear lubricant.
See Page 11
“LUBRICATION
OF GEARS”.
10. Fit blade (see
page 10) and
bearing cap and
check rotation
that gears are
not binding. It
should turn
smoothly from
clutch end.
Backlash at end
of blade about
2-4mm. Refit
blade cover lid,
engine, handles and test.

19
!NOTE Re-assemble with clutch shoe
arrows pointing anti-clockwise
in direction of rotation as viewed from front of
engine Fig. 61.
TO REPAIR CLUTCH
Replace these parts if the Clutch spring is broken, the
Clutch fibre is worn or the Clutch bolt or shoe holes are
worn.
COMPLETE WORKSHOP MANUAL (CONTINUED)

DATE OF PURCHASE:
PURCHASEDBY:
Address
State: Post/Zip Code:
SOLDBY:
Address:
State Post/Zip Code:
Atom warrants each newAtom Edger Model for ONE YEAR for residential use and 90
daysforcommercial usebasedon thefollowingterms.
Thewarranty extendstotheoriginalretailpurchaseronly andcommences onthe dateof
theoriginal retailpurchase.
AnypartoftheAtomEdgermanufacturedorsuppliedbyAtomandfoundinthereasonable
judgementofAtomtobedefectiveinmaterialorworkmanshipwillberepairedorreplaced
byanauthorizedAtom servicedealer without chargefor partsand labour.
TheAtomEdger,includingany defectivepart,mustbereturnedto anauthorized service
dealer within the warranty period. The expense of delivering the Atom Edger to the
dealerfor warrantyworkandtheexpense ofreturning itbacktotheowner afterrepairor
replacement will be paid for by the owner.Atom’s responsibility in respect to claims is
limitedtomakingtherequiredrepairsorreplacementsandnoclaim ofbreachofwarranty
shallbecause forcancellationor rescissionofthe Contract ofSale of anyAtom Edger.
Proof of purchase will be required by the dealer to substantiate any warranty claim.All
warrantyworkmust be performedbyan authorizedAtomservicedealer or byAtom.
Thiswarranty islimitedto NINETY(90)daysfrom thedate oforiginalretail purchasefor
any Atom Edger that is used for commercial purposes and ONE (1) month for rental
purposes.
Thiswarranty doesnotcover anyAtom Edgerthathasbeensubject tomisuse, neglect,
negligenceoraccident, orthathas beenoperatedin any waycontraryto theoperating
instructionsas specifiedin theAtomOperator’sManual.Thiswarrantydoesnotapplyto
anydamage totheAtomEdger thatis theresult ofimproper maintenanceor toanyAtom
Edgerthat hasbeenalteredormodifiedsoastoadversely affecttheproduct’soperation,
performanceordurabilityorthathasbeenaltered ormodifiedsoastochangeitsintended
use.Thewarrantydoes notextend torepairsmadenecessaryby normalwear orbythe
useofpartsoraccessorieswhichareeitherincompatiblewiththeAtomEdgeroradversely
affectitsoperation, performanceordurability.
Atom reserves the right to change or improve the design of any Atom Edger without
assumingany obligationtomodify anyproductpreviously manufactured.
ALL IMPLIED WARRANTIES ARE LIMITED IN DURATION TO THE ONE YEAR
WARRANTY PERIOD OR NINETY (90) DAYS FOR PRODUCTS USED FOR ANY
COMMERCIAL PURPOSE AND ONE (1) MONTH FOR RENTAL PURPOSES.
ACCORDINGLY, ANY SUCH IMPLIED WARRANTIES, INCLUDING
MERCHANTABILITY, FITNESSFORAPARTICULARPURPOSE,OR OTHERWISE,
ARE DISCLAIMED IN THEIR ENTIRETY AFTER THE EXPIRATION OF THE
APPROPRIATETWELVE (12)MONTHS ORTHIRTY(30)DAYWARRANTYPERIOD.
ATOM’SOBLIGATIONUNDERTHIS WARRANTYISSTRICTLYANDEXCLUSIVELY
LIMITEDTOTHEREPAIROR REPLACEMENTOF DEFECTIVEPARTSANDATOM
DOES NOT ASSUME OR AUTHORIZE ANYONE TO ASSUME FOR THEM ANY
OTHER OBLIGATION. SOME STATES DO NOT ALLOW LIMITATIONS ON HOW
LONG AN IMPLIED WARRANTY LASTS, SO THE ABOVE LIMITATION MAY NOT
APPLYTO YOU.
ATOMASSUMESNO RESPONSIBILITYFORINCIDENTAL, CONSEQUENTIALOR
OTHERDAMAGES INCLUDING,BUTNOTLIMITEDTO,EXPENSEOFRETURNING
THE ATOM PRODUCT TO AN AUTHORIZED SERVICE DEALER AND EXPENSE
OF DELIVERING IT BACK TO THE OWNER, MECHANIC’S TRAVEL TIME,
TELEPHONEORTELEGRAMCHARGES, RENTALOFALIKEPRODUCT, DURING
THE TIME WARRANTY SERVICE IS BEING PERFORMED, TRAVEL, LOSS OR
DAMAGE TO PERSONAL PROPERTY, LOSS OF REVENUE, LOSS OF USE OF
THE PRODUCT, LOSS OR TIME, OR INCONVENIENCE. SOME STATES DO NOT
ALLOWTHEEXCLUSIONOR LIMITATIONOFINCIDENTALOR CONSEQUENTIAL
DAMAGESSOTHEABOVELIMITATIONOREXCLUSION MAYNOTAPPLYTOYOU.
Thiswarrantygives youspecificlegal rights,andyou mayalsohave otherrightswhich
vary from state to state.
Thiswarrantyapplies toAtom Edger Modelmanufactured byAtom.
ForwarrantyprocedureforHondaenginepleaserefertoseparateenginewarrantyavailablefromyournearest authorised Honda dealerwhowillalsocarryout
anyengineservicerequired.
IMPORTANT: PLEASE FILL OUT THE INFORMATION BELOW ON PURCHASE
Atom Edgers are manufactured inAustralia and exported around the world.
Aust. Patent No. 678575.
US Patent No’s 5, 826, 667 & 6,116, 350.
OtherAustralian and US Patents pending. Patent Pending in Europe, Japan and elsewhere.
Design registrations granted inAustralia, USA, Japan and Great Britain.
Patents pending on Cross-Blade system.
Operator Manual. Part No. 43987. Printed in Australia.
Copyright © 2005 Atom Industries. All rights reserved
Atom Industries
9 Fred Street, Lilyfield NSW 2040 Australia
PO Box 513, Rozelle NSW 2039 Australia.
Phone: (02) 9810 0194 • International: (+61) 2 9810 0194
Fax: (02) 9810 6691 • International: (+61) 2 9810 6691
Email: [email protected]
Atom Industries is a division of Solo Industries Pty Ltd
(ACN 000 583 924).
Patents and registrations granted and pending.
webside:www.atomindustries.com.au
Atom Industries (NZ) Limited
PO Box 23500 Papatoetoe,Auckland New Zealand.
Freecall 0800 174 753
Freefax 0800 603 403
Email: [email protected]
Patents and registrations granted and pending.
webside:www.atomindustries.co.nz
Keepthismanualasproofofpurchase.Thisisyour
Lawn Edger machine model number. Should you
ever require any parts, please quote these
numbers.
Table of contents
Other Atom Lawn Mower manuals

Atom
Atom 103 Installation instructions

Atom
Atom 204AV Installation instructions

Atom
Atom 301 Installation instructions

Atom
Atom 560 Installation instructions

Atom
Atom 202 Operator's manual

Atom
Atom 205AV Installation instructions

Atom
Atom 205AV Installation instructions

Atom
Atom 415KZ26 Wiring diagram

Atom
Atom 440 Installation instructions

Atom
Atom 580 Installation instructions