IDENTIFICATION
IMPORTANT: All Power Wheel units and kits are shipped with a nameplate that includes the Auburn Gear part number and order code as shown.
Example: Power Wheel®
ORDER CODE: 6WB13156C
PART NO.: 6000236
SERIAL NO.: 143434
AUBURN, IN U.S.A.
2
In addition to the nameplate, Power Wheel drives are stamped with an identification number
which appears on the cover or hub flange as shown.
Example: 6000236-A-4-9
When ordering parts, the information included on the nameplate or the stamped identification
number is necessary to accurately identify the drive and obtain the correct replacement parts.
Once this information has been obtained, contact Auburn Gear for the appropriate parts list.
DISASSEMBLY OF POWER WHEEL
STEP 1
If brake portion of drive is to be serviced: SAEAand SAE B MOUNTBRAKES
–Remove motorfromplanetary drive.SAE BMOUNTBRAKES –Temporarily
installtwo 1/2-13 x1.25 screws intohydraulic motormounting holes andtorque
to50lb. ft.(67Nm).Thesemust be usedtohold springback-upplatein position
when parking brake assembly is removed from the drive. If the brake portion of
drive does not require service go to step 5.
STEP 2
SAE A MOUNT BRAKES – Remove the four socket head cap screws (27)
retaining the brake to the drive, leaving the two screws in line with the motor
mounting holes in place. These two screws hold the spring back-up plate in
position when the parking brake assembly is removed from the drive. SAE B
MOUNT BRAKES – Remove the four T-50 Torx head screws (27) holding the
parkingbrakeassemblyinposition.(Somemodelsmaybeequippedwithsocket
headcap screws).It may benecessary tolightly strikethe pistonassembly (26)
with a rubber mallet to loosen from spindle or cover.
STEP 3
Removediscpack(25)fromdriveonlyifnecessary.Becarefultomaintaindiscs
in order.
STEP 4
If brake piston assembly (26) has been removed slide the coupling (23) and
retaining ring (24) from splines on input shaft (15). Remove sleeve bearing (22)
only if replacement is required.
STEP 5
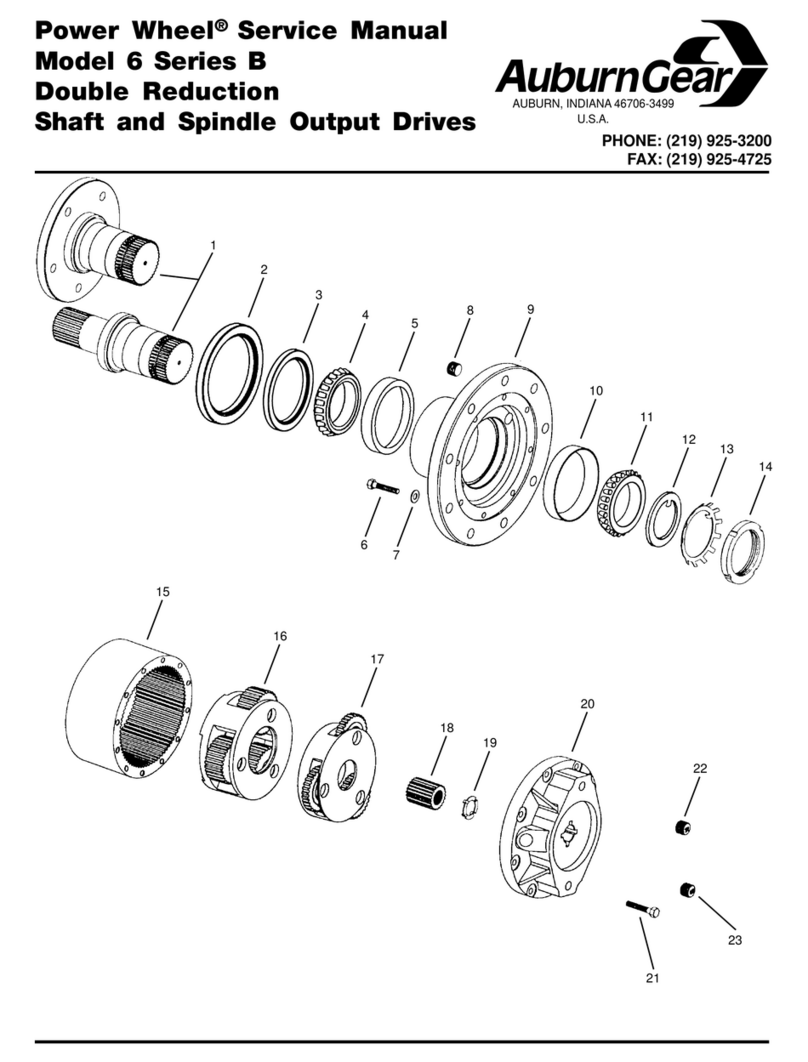
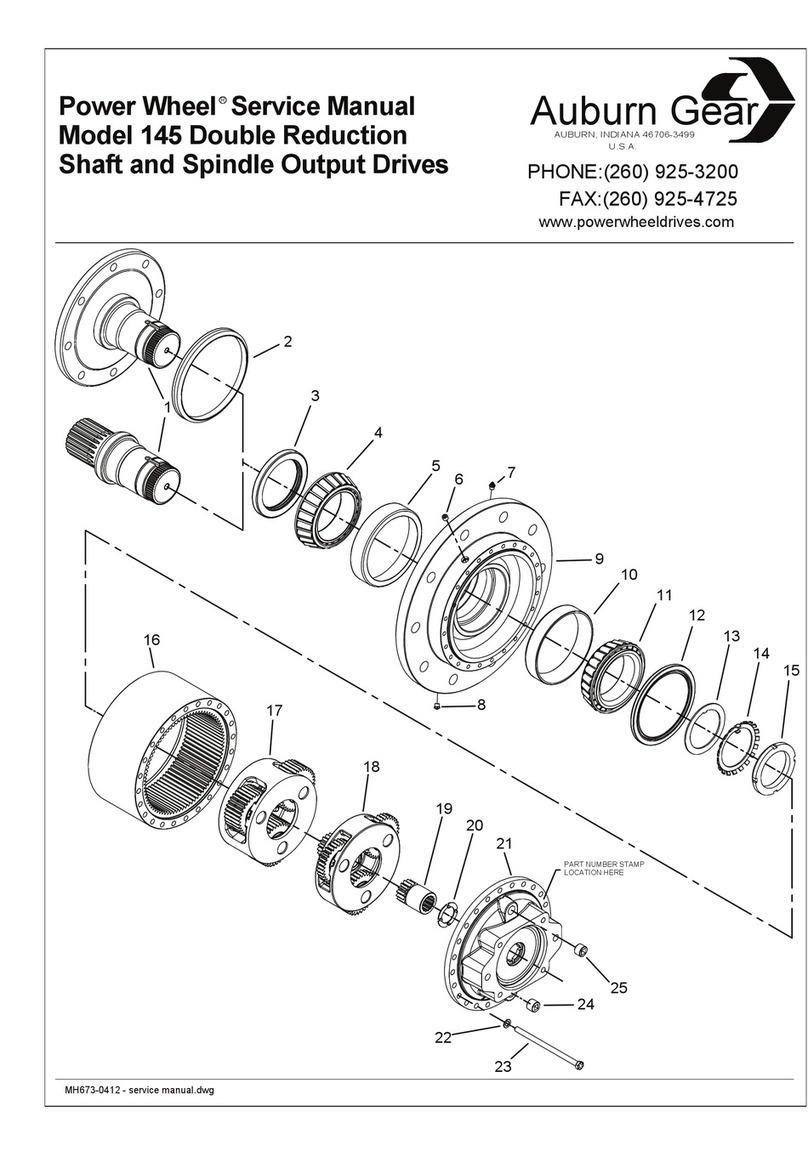
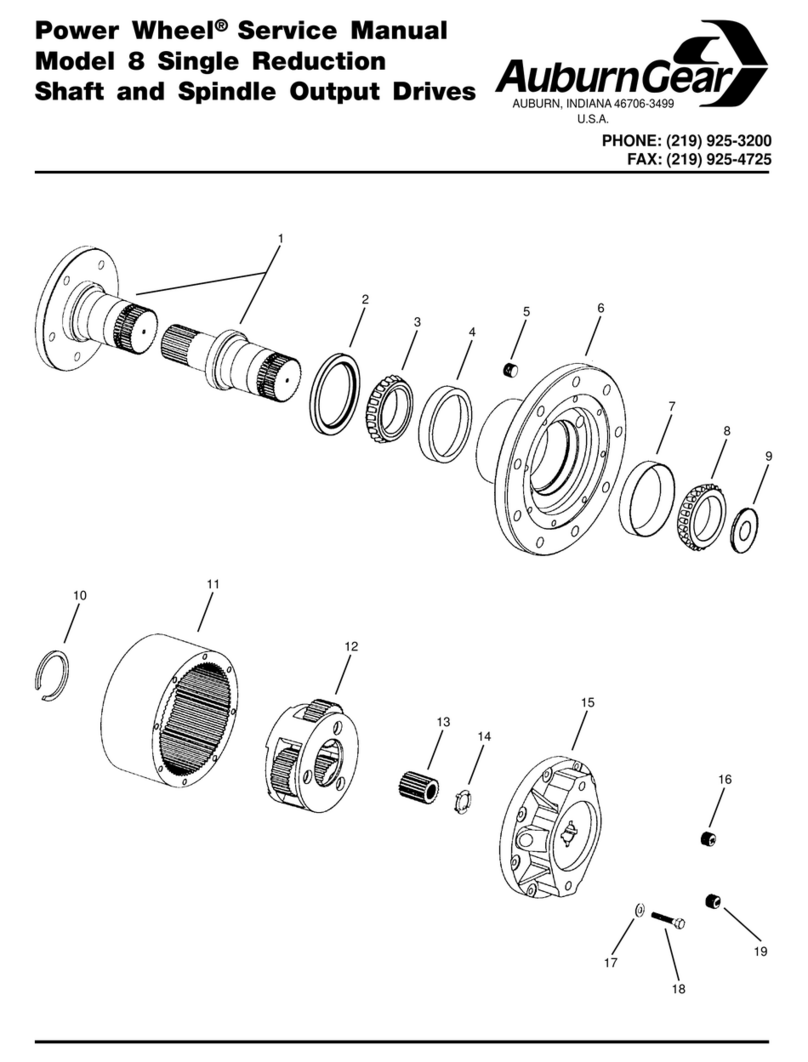
Remove eight hex head bolts (19) and flat washers (18) from cover (16). Lift
cover (16) from assembly.Thrust washer (14) usually remains with cover (16).
STEP 6
Removethe splinedinput shaft (15)and liftsun gear(13) fromcarrier assembly
(12).
STEP 7
Remove carrier assembly (12) from ring gear (11).
STEP 8
Remove six hex head bolts (5) and flat washers (6) from hub (8). Pull ring gear
(11) from remaining assembly. It may be necessary to strike ring gear (11) with
rubber mallet to loosen from hub (8).
STEP 9
Remove retaining ring (10) from groove in output shaft (1). Pull output
shaft (1) from hub (8). NOTE:To remove retaining ring (10), use retaining
ring expander tool.
STEP 10
Remove oil seal (2) and bearing cones (3 & 9) from hub (8). Inspect bear-
ing cups (4) in hub (8) and remove only if replacement is required.
ASSEMBLY OF POWER WHEEL
STEP 1
Press new bearing cups (4) in each side of the hub (8). It is recommended that
bearing cups (4) and cones (3 & 9) be replaced in sets.
STEP 2
Assemble bearing cone (3) into cup (4) at seal end of hub (8) and press a new
seal (2) into hub (8).
STEP 3
Lubricate lips of oil seal (2) and lower hub (8) onto output shaft (1). Hub (8)
shouldbecenteredasitisloweredoveroutputshaft(1)topreventsealdamage.
STEP 4
Assemble bearing cone (9) over output shaft (1) and into bearing cup (4). If
bearing (3, 4 & 9), hub (8) or output shaft (1) is replaced, a new retaining ring
(10) is required for proper bearing setting. Do not re-use snap ring after it has
beeninstalled andremoved fromunit. Selectthe thickestretaining ring(10) that
can be assembled into ring groove of the splined end of output shaft (1) above
bearingcone(9).Bearingshouldhavefrom.000–.006inches(0.00–0.15mm)
of end play when proper retaining ring (10) is installed.
STEP 5
Clean mating surfaces and apply a bead of silicone sealant to face of hub (8)
that mates with ring gear (11). (See instructions on sealant package).
STEP 6
Assemble ring gear (11) to hub (8) being careful to align all the bolt holes.
STEP 7
Installsix grade 8hex head bolts(5) andflat washers (6).Torquebolt to 52– 60
lb.ft. (70 –81 Nm).
STEP 8
Place carrier assembly (12) into ring gear (11) aligning the gear teeth. Carrier
splines mesh with splines on output shaft (1).
STEP 9
Install sun gear (13) into carrier assembly. Sun gear (13) should turn freely by
hand when assembled.Assemble splined input shaft (15) into sun gear (13).
STEP 10
Apply a bead of silicone sealant to cover face of ring gear (11). Secure thrust
washer (14) with tangs engaged in cover (16). NOTE:Washer (14) can be se-
curedto cover(16) witha smallamount ofgrease orsilicone sealant.Assemble
cover (16) to ring gear (11). Align cover (16) with hub (8) such that pipe plug
holes on cover (16) align with mounting holes in hub (8).
STEP 11
Install sleeve bearing (22) in cover (16).Assemble retaining ring (24) to adapter
coupling (23) and place into sleeve bearing (22) in cover (16). It may be neces-
sary to rotate coupling to align splines.
STEP 12
Installeightflatwashers(18) and hexheadbolts(19)andtorque to 20–25lb.ft.
(27 – 34 Nm) with dry threads. Lubed threads torque to 16 – 21 lb. ft. (22 – 28
Nm).


