Auraland DC-31UC User manual
DIGITAL & PC CAMERA
USER’S GUIDE
MODEL: DC-31UC

- 1 -
First Things First
Unpack the Camera and Accessories
1. Digital Camera
2. USB Serial Cable
3. Camera Stand
4. User’s Guide
5. Image Editing Software (optional) & Driver Software CD-ROM
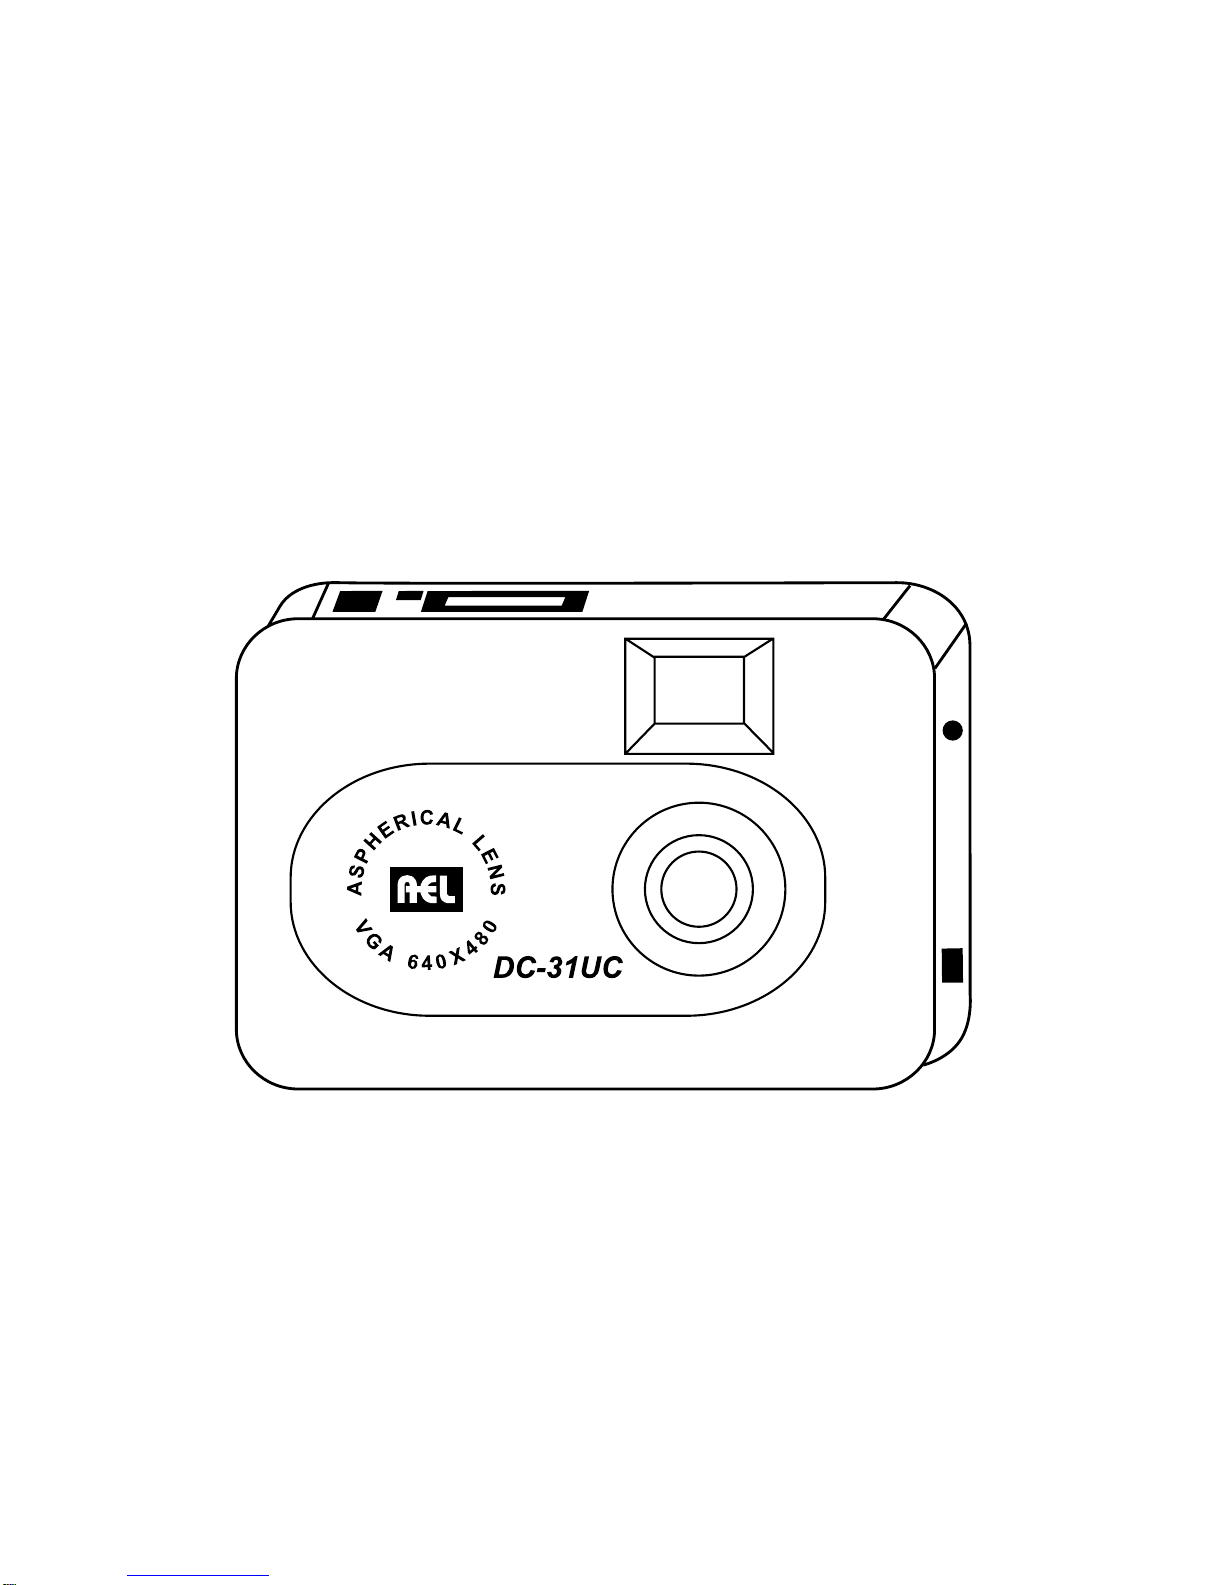
Camera Details

- 2 -
Power Supply
The DC-31UC digital Camera features two ways to supply power to it, either using
4 batteries (size AAA) or via the USB connector when attached to a Computer.
Make sure that battery switch is on. The battery switch is located on the bottom of
the camera, next to the battery compartment cover. If the LCD is blank, then
pressing the Mode button will switch the camera on. The camera will beep tone. The
LCD will briefly indicate the camera mode.
Inserting Batteries
• Turn Off Battery Switch
• On the bottom of the camera, press and slide the Battery chamber cover out
toward the direction of the large arrow to open it. A click can be heard when the
compartment is released.
• Insert four (4) AAA batteries. Make sure to match the positive and negative ends
of the batteries to the markings on the underside of the battery chamber cover
(+ and -).
• Close the battery chamber cover by pushing down firmly and sliding it back until
the latch closes with a click. Secure the battery chamber door in place with the
small lock switch indicated on the bottom of the camera, next to the battery
cover.
Important Operation Notes:
• Never turn off the Battery Switch or open the battery chamber cover when you
have pictures remaining in the camera. Doing so will cause all of the pictures to be
lost!
• Low battery warning: When the LCD display “ ” icon will blink and buzzer
sound. While power of battery is empty, system will stop capturing and power off
at once, please upload all of pictures in the camera to your computer as soon as
possible. Not doing so may cause all of the pictures to be lost!
• Never use manganese batteries.
• The camera will not work if the batteries are inserted incorrectly.
• Don’t use rechargeable batteries.
• Never mix old batteries with new ones.
• Never mix batteries of different types.
• Never destroy batteries or dispose of them by fire. Doing so can cause an
explosion or leak caustic materials into the environment.
Auto Power Off
To conserve energy, the camera goes into “standby” mode automatically if no
buttons are pressed for about 20 seconds, the LCD will go blank. Pressing the
Mode button on the top of the camera will turn it back on and any pictures taken
will remain. The camera is restarted now.

- 3 -
Taking Pictures
• Frame the image to be taken by looking through the optical viewfinder. Use the
edge of frame indicators visible through the viewfinder to enclose the image you
want to take. The actual picture captured will be about equal to or slightly larger
than what you see in the optical viewfinder.
• Pressing the Mode button repeatedly cycles through additional features as
displayed on the LCD. When a given feature is displayed it may be selected by
pressing the shutter button.
• If an option is not selected within 5 seconds the display will revert to showing the
number of available pictures.
• When you are ready, press the shutter button to take a picture. The camera will
beep.
Resolution & number of pictures table
Model Hr Mode/Pictures Lr Mode/Pictures
DC-31UC 640 X 480 / 75 320 X 240 / 300
Tip
• Mixing the storage of ‘Hr’ & ‘Lr’ pictures is OK in the same picture taking session.
LCD display
1. Self-timer: self timer for a period delay to take a snap shot.
2. Continuous snap shot:continuous snap shot.
3. Hi/Low quality:no icon for hi-quality, just show “LQ” for low quality. Hi quality
for full resolution, low quality for half resolution.

- 4 -
4. AVI:Video record about 7 frame for all resolution.
5. Battery detection:Low battery detection and 3 steps. Auto alarm to showing low
battery message and then stops capturing.
6. 50/60:50 for 50Hz electrical power frequency, 60 for 60Hz electrical power
frequency. Correct setting will not cause flicker on image.
return back to standby
7. Delete last/all: “ ” for delete last picture, “ ” for delete all.
8. Picture number/pc/memory full:It will show picture number at DSC mode, and
show “PC” when pc mode. When memory full at DSC mode will show “FUL” and
alarm sound.
OPERATION
1. Press the mode button for a while until power up.
2. Press shutter button can take a picture, or press mode button quickly can enter
mode setting.
3. The mode setting operation is a cycle loop, so press shutter button every time
enter the other mode, the loop is

- 5 -
4. When enter mode change, if no buttons pressed for a while, will escape from
mode change to standby.
5. If change mode by mode button, the LCD will blink, if press shutter button will
enter (select) this mode.
6. When standby press shutter button can take a picture.
7. When standby press mode button can enter mode change
press shutter button to enter this mode
Now enter self-timer.
8. When standby press mode button twice to mode: continuous snap shot mode.
now “ ” blinking, press shutter button
to enter this mode after “ ” not blinking. Press shutter button taking 3 pictures.
9. If enter “LQ” mode, means low resolution will show
now re-enter the standby and wait
shutter button or mode button.

- 6 -
10.If enter “Video” mode
press shutter button and don’t release will recorded, release shutter button or
memory full to stop. If memory full will show
and alarm sound.
11.If enter the 50/60 mode, press shutter button to select either one mode. The 50
or 60 select match the nation power frequency is necessary to avoid flicker on
picture.
12.If enter delete last mode will show
and delete last picture then quit this mode.
13.If enter delete all mode will show
enter this mode the picture number will

- 7 -
blink and wait shutter button press, if press shutter button for a while will hear
sound tone from low to high then the picture number will reset to zero. It completes
the “delete all” execution steps. If no button pressed for a while, return back to
standby.
14.If connect to PC and enter P-cam mode, will show
Software
Introduction to camera’s TWAIN Driver
A TWAIN driver is a standard software protocol and API for communication
between Windows software applications and image acquisition devices (digital
cameras and scanners). The TWAIN driver is the software that transfers photos
from the digital camera into image-editing software.
Installing TWAIN Driver & Application Software
First, you need to install the TWAIN driver before you can use the camera with
your Computer.
TWAIN Driver
WINDOWS 98 & 2000
• Put the installation CD in the CD-ROM driver, the windows will automatically run
the setup program, or you can run the AUTORUN.EXE manually.
• Select “INSTALL TWAIN DRIVER” to install the camera driver.
Application Software
WINDOWS 98 & 2000
• Select“INSTALL APPLICATION”
• Enter the destination directory to which you want to install. The default
destination directory is C:\Program Files\AuraCam.

Tip
• The camera driver is the base component, you must install this component,
otherwise your camera will not work correctly with Windows.
• The camera requires only standard USB and TWAIN drivers to work with any
WINDOWS 98 or above standard compliance video and imaging application.
Uploading pictures from the camera to your Computer
For use with a USB connection, WINDOWS 98 or better is required to upload
pictures from the camera to the computer. Stored pictures may be uploaded to a
computer at any time whether or not the camera is full.
• Connect USB Cable between your computer and the camera, the camera will
beep tone.
• Double click the AuraCam icon which on desktop to start the application
software.
• Select “Select Source” in “File” item
• Select “AuraCam S1.0”
• Select “Get Pictures” in “File” item to upload pictures to the computer.
Tip
Plugging the USB connector into the camera will cause it to reset and issue
a double beep but all stored pictures will remain. When the USB connector
is unplugged the camera will switch itself off. When connected to the
Computer again, the camera may still be used in the normal way.
References
Specifications
Product Type: Digital Camera
Imaging Device: 1/3-Inch CMOS
Take Picture Mode: Single/Self-Timer/Continuous/PC Camera/Capture & AVI files
Image Quality: Fine/Normal
Image Resolution: 640x480 pixels (VGA)
PC Camera Resolution: 640x480 pixels (VGA)
320x240 pixels (QVGA)
Recording System: Digital (24 Bit Color RGB Bmp based)
Recording Medium: 8 Mbytes SDRAM
Erase Function: Clear all Images
Computer Interface: USB
Focal Length: 6.57mm
Aperture: f=3.2
- 8 -

Focus Range: 0.65m ~ infinity
Shutter Speeds: 1/20 ~ 1/1000 second (Auto)
LCD Monitor: B/W indicator
Power Source: 4x1.5V AAA-size batteries
Operation temperature range: 5 ~ 40°C
Weight: about 100g without batteries
Dimensions: 62(H) x 92(W) x 26(D) mm max.
• Design and specifications are subject to change without notice.
Troubleshooting
Q: The camera doesn’t come on when I turn on the Battery switch.
A: The batteries are missing, dead, or are not loaded correctly. Correctly load new
batteries into the battery chamber.
Q: The camera’s power supply suddenly turned off.
A: Most likely, the batteries you have are getting too weak to sustain operation of
the camera. Please replace old batteries with new.
Tips
• Check the LCD display. If the number of pictures is flashing upload all pictures
to your computer as soon as possible and replace old batteries with new.
• Make sure that you are not using rechargeable batteries. Replace rechargeable
batteries with normal batteries immediately.
Taking care of your camera
Your camera is a precision designed instrument, If cared for and properly handled,
the camera should give years of trouble free Imaging. In order to avoid damaging
the unit:
Do Not
• Drop or bang the camera.
• Drop into water or expose the camera to excess moisture, rain or splashing. Your
camera is not waterproof and is particularly susceptible to water damage.
• Subject the camera to extreme high or low temperature and/or humidity. Your
camera’s batteries will not function properly in extreme conditions. Excessive
temperature and humidity may cause serious damage.
• Subject a camera to excessive vibrations. When you travel, always make sure
to use the carrying case, and pack the camera where It will not be subjected to a
lot of jarring movement. This could loosen screws or damage internal camera
components.
- 9 -

Do
• Make sure any tripod used has a screw that fits the camera’s tripod mount
appropriately. A longer tripod screw could puncture and damage the camera’s
casing and internal structure.
- 10 -
Table of contents


