Automotive Data Solutions Rockford Fosgate DSR1 User manual

NOTICE: Automotive Data Solutions Inc. (ADS) recommends having this installation performed by a certified technician. Logos and trademarks used here in
are the properties of their respective owners.
WARNING
Pressing the printer icon or “quick printing” this document will print
all of the guides in this compilation.
Open the Bookmarks menu and find your vehicle OR scroll
down until you find the install guide for your vehicle.
Print only the pages for your vehicle using the advanced
options in the Print menu.
Install your DSR1 module according to the guide for your
vehicle.
HOW TO USE THIS INSTALL GUIDE
1
2
3
SELECT VEHICLE
PRINT PAGES NEEDED

OPTIONAL ACCESSORIES
PROGRAMMED FIRMWARE
ADS-DSR1-CHR03
PRODUCTS REQUIRED
Rockford Fosgate DSR1
iDatalink Maestro aCH2 Installation Harness
INSTALL GUIDE
CHRYSLER 200
20152016
ENABLE A SEAMLESS AFTERMARKET AMPLIFIER INSTALLATION,
WITHOUT CHANGING YOUR RADIO.
NOTICE: Automotive Data Solutions Inc. (ADS) recommends having this installation performed by a certified technician. Logos and trademarks used here
in are the properties of their respective owners.

ADS-DSR1-CHR02B-AR maestro.idatalink.com
CHRYSLER 200 2015-2016
Automotive Data Solutions Inc. © 2019 2
WELCOME
NEED HELP?
Congratulations on the purchase
of your iDatalink Maestro /
Rockford Fosgate DSR1 Amplifier
replacement solution. You are
now a few simple steps away from
enjoying your new car amplifier.
Before starting your installation,
please ensure that your module
is programmed with the correct
firmware for your vehicle and that
you carefully review the install
guide.
1 866 427-2999
maestro.idatalink.com/support
www.12voltdata.com/forum
TABLE OF CONTENTS
Installation Instructions 3
Wiring Diagram 4
Vehicle Wire Reference Chart 5
maestr[email protected]

ADS-DSR1-CHR02B-AR maestro.idatalink.com
CHRYSLER 200 2015-2016
Automotive Data Solutions Inc. © 2019 3
INSTALLATION INSTRUCTIONS
STEP 1
• Remove the factory amplifier (refer to wire chart for
amplifier location).
• Configure the 2 pin connectors on the aCH2 T-harness as
shown on the wiring diagram.
STEP 2
• Connect the factory amplifier harnesses to the aCH2
T-harness.
STEP 3
• Connect the wires from the aCH2 T-harness to the
aftermarket amplifier.
Note 1:
If you are running your own speaker wires from the
amplifier to the speakers, this step is not necessary.
Note 2:
The amplifier output colors and labels on the aCH2
T-harness do not correspond to the vehicle. For vehicle
specific wiring designation, see the wiring chart.
• Plug the RCA cables in the aftermarket amplifier.
STEP 4
• Connect all the harnesses to the DSR1 module.
CHIME ADJUSTMENT
This is only needed when the vehicle supports chimes (ex:
Parking assist, Blind spot detection, Lane sense, etc.).
• Set the audio source to OFF (if there is no way to turn the
radio OFF, set the source to AUX).
• The OEM radio will have 3 volume settings for parking
assist (Low/Med/High), it is recommended to choose
medium volume.
• Activate any chime (ex: rear parking assist).
• Adjust the chime volume using the volume knob.
• For technical assistance call 1-866-427-2999 or e-mail
com/support” and “www.12voltdata.com/forum/”
1

ADS-DSR1-CHR02B-AR maestro.idatalink.com
CHRYSLER 200 2015-2016
Automotive Data Solutions Inc. © 2019 4
1
LEFT FRONT 1
RIGHT FRONT 1
LEFT REAR 1
RIGHT REAR 1
LEFT FRONT 2
RIGHT FRONT 2
LEFT REAR 2
RIGHT REAR 2
SUB 1
SUB 2
SUB 3
CENTER 1
LEFT FRONT OUT 1LEFT FRONT OUT 1
RIGHT FRONT OUT 2RIGHT FRONT OUT 2
LEFT SPARE OUT 3LEFT SPARE OUT 3
RIGHT SPARE OUT 4RIGHT SPARE OUT 4
LEFT REAR OUT 5LEFT REAR OUT 5
RIGHT REAR OUT 6RIGHT REAR OUT 6
LEFT SUB OUT 7LEFT SUB OUT 7
RIGHT SUB OUT 8RIGHT SUB OUT 8
CONNECTIONS NOT REQUIRED
WIRING DIAGRAM
STEP 1
STEP 2STEP 3
aCH2 T-HARNESS
FACTORY AMPLIFIER
HARNESSES
AMPLIFIER
WIRES FROM
VEHICLE
WHITEWHITE
GREENGREEN
GRAYGRAY
BLUE
PURPLEPURPLE
RED
N.C.
N.C.
WHITE
WHITE/BLACK
GRAY
GRAY/BLACK
GREEN
GREEN/BLACK
PURPLE/BLACK
GRAY/RED
WHITE/RED
GRAY
GREEN
GREEN/RED
PURPLE
WHITE
PURPLE
PURPLE/RED
BLACK
BLACK/WHITE
BLACK
BLACK/RED
BLACK
BLACK/YELLOW
ORANGE
ORANGE/BLACK
STEP 4 DSR1 MODULE
RCA CABLES

ADS-DSR1-CHR02B-AR maestro.idatalink.com
CHRYSLER 200 2015-2016
Automotive Data Solutions Inc. © 2019 5
VEHICLE WIRE REFERENCE CHART
T-Harness Wires Vehicle Wires
Wire
Tag
Wire
Color Speaker Wire Description
LEFT FRONT 1 White Left Front Mid (+)
White/Black Left Front Mid (-)
LEFT FRONT 2 White Left Front Tweeter (+)
White/Red Left Front Tweeter (-)
RIGHT FRONT 1 Gray Right Front Mid (+)
Gray/Black Right Front Mid (-)
RIGHT FRONT 2 Gray Right Front Tweeter (+)
Gray/Red Right Front Tweeter (-)
LEFT REAR 1 Green Left Rear Mid (+)
Green/Black Left Rear Mid (-)
LEFT REAR 2 Green Subwoofer 1 (+)
Green/Red Subwoofer 1 (-)
RIGHT REAR 1 Purple Right Rear Mid (+)
Purple/Black Right Rear Mid (-)
RIGHT REAR 2 Purple Subwoofer 2 (+)
Purple/Red Subwoofer 2 (-)
CENTER 1 Orange Left Rear Tweeter (+)
Orange/Black Left Rear Tweeter (-)
SUB 1 Black n/a
Black/White n/a
SUB 2 Black Right Rear Tweeter (+)
Black/Red Right Rear Tweeter (-)
SUB 3 Black n/a
Black/Yellow n/a
Amplifier location: Right end of dash
Note: The amplifier output colors and labels on the AR-CH2 T-harness do not correspond to the vehicle. For vehicle specific
wiring designation, follow this wiring chart.

OPTIONAL ACCESSORIES
PROGRAMMED FIRMWARE
ADS-DSR1-CHR03
PRODUCTS REQUIRED
Rockford Fosgate DSR1
iDatalink Maestro aCH2 Installation Harness
INSTALL GUIDE
CHRYSLER 300
20122016
ENABLE A SEAMLESS AFTERMARKET AMPLIFIER INSTALLATION,
WITHOUT CHANGING YOUR RADIO.
NOTICE: Automotive Data Solutions Inc. (ADS) recommends having this installation performed by a certified technician. Logos and trademarks used here
in are the properties of their respective owners.

ADS-DSR1-CHR02B-AR maestro.idatalink.com
CHRYSLER 300 2012-2016
Automotive Data Solutions Inc. © 2019 2
WELCOME
NEED HELP?
Congratulations on the purchase
of your iDatalink Maestro /
Rockford Fosgate DSR1 Amplifier
replacement solution. You are
now a few simple steps away from
enjoying your new car amplifier.
Before starting your installation,
please ensure that your module
is programmed with the correct
firmware for your vehicle and that
you carefully review the install
guide.
1 866 427-2999
maestro.idatalink.com/support
www.12voltdata.com/forum
TABLE OF CONTENTS
Installation Instructions 3
Wiring Diagram 4
Vehicle Wire Reference Chart 5
maestr[email protected]

ADS-DSR1-CHR02B-AR maestro.idatalink.com
CHRYSLER 300 2012-2016
Automotive Data Solutions Inc. © 2019 3
INSTALLATION INSTRUCTIONS
STEP 1
• Remove the factory amplifier (refer to wire chart for
amplifier location).
• Configure the 2 pin connectors on the aCH2 T-harness as
shown on the wiring diagram.
STEP 2
• Connect the factory amplifier harnesses to the aCH2
T-harness.
STEP 3
• Connect the wires from the aCH2 T-harness to the
aftermarket amplifier.
Note 1:
If you are running your own speaker wires from the
amplifier to the speakers, this step is not necessary.
Note 2:
The amplifier output colors and labels on the aCH2
T-harness do not correspond to the vehicle. For vehicle
specific wiring designation, see the wiring chart.
• Plug the RCA cables in the aftermarket amplifier.
STEP 4
• Connect all the harnesses to the DSR1 module.
CHIME ADJUSTMENT
This is only needed when the vehicle supports chimes (ex:
Parking assist, Blind spot detection, Lane sense, etc.).
• Set the audio source to OFF (if there is no way to turn the
radio OFF, set the source to AUX).
• The OEM radio will have 3 volume settings for parking
assist (Low/Med/High), it is recommended to choose
medium volume.
• Activate any chime (ex: rear parking assist).
• Adjust the chime volume using the volume knob.
• For technical assistance call 1-866-427-2999 or e-mail
com/support” and “www.12voltdata.com/forum/”
1

ADS-DSR1-CHR02B-AR maestro.idatalink.com
CHRYSLER 300 2012-2016
Automotive Data Solutions Inc. © 2019 4
1
LEFT FRONT 1
RIGHT FRONT 1
LEFT REAR 1
RIGHT REAR 1
LEFT FRONT 2
RIGHT FRONT 2
LEFT REAR 2
RIGHT REAR 2
SUB 1
SUB 2
SUB 3
CENTER 1
LEFT FRONT OUT 1LEFT FRONT OUT 1
RIGHT FRONT OUT 2RIGHT FRONT OUT 2
LEFT SPARE OUT 3LEFT SPARE OUT 3
RIGHT SPARE OUT 4RIGHT SPARE OUT 4
LEFT REAR OUT 5LEFT REAR OUT 5
RIGHT REAR OUT 6RIGHT REAR OUT 6
LEFT SUB OUT 7LEFT SUB OUT 7
RIGHT SUB OUT 8RIGHT SUB OUT 8
CONNECTIONS NOT REQUIRED
WIRING DIAGRAM
STEP 1
STEP 2STEP 3
aCH2 T-HARNESS
FACTORY AMPLIFIER
HARNESSES
AMPLIFIER
WIRES FROM
VEHICLE
WHITEWHITE
GREENGREEN
GRAYGRAY
BLUE
PURPLEPURPLE
RED
N.C.
N.C.
WHITE
WHITE/BLACK
GRAY
GRAY/BLACK
GREEN
GREEN/BLACK
PURPLE/BLACK
GRAY/RED
WHITE/RED
GRAY
GREEN
GREEN/RED
PURPLE
WHITE
PURPLE
PURPLE/RED
BLACK
BLACK/WHITE
BLACK
BLACK/RED
BLACK
BLACK/YELLOW
ORANGE
ORANGE/BLACK
STEP 4 DSR1 MODULE
RCA CABLES

ADS-DSR1-CHR02B-AR maestro.idatalink.com
CHRYSLER 300 2012-2016
Automotive Data Solutions Inc. © 2019 5
VEHICLE WIRE REFERENCE CHART
T-Harness Wires Vehicle Wires
Wire
Tag
Wire
Color Speaker Wire Description
LEFT FRONT 1 White Left Front Speaker (+)
White/Black Left Front Speaker (-)
LEFT FRONT 2 White Left Front Tweeter (+)
White/Red Left Front Tweeter (-)
RIGHT FRONT 1 Gray Right Front Speaker (+)
Gray/Black Right Front Speaker (-)
RIGHT FRONT 2 Gray Right Front Tweeter (+)
Gray/Red Right Front Tweeter (-)
LEFT REAR 1 Green Left Rear Speaker (+)
Green/Black Left Rear Speaker (-)
LEFT REAR 2 Green Left Rear Tweeter (+)
Green/Red Left Rear Tweeter (-)
RIGHT REAR 1 Purple Right Rear Speaker (+)
Purple/Black Right Rear Speaker (-)
RIGHT REAR 2 Purple Right Rear Tweeter (+)
Purple/Red Right Rear Tweeter (-)
CENTER 1 Orange Center Speaker (+)
Orange/Black Center Speaker (-)
SUB 1 Black Subwoofer 1 (+)
Black/White Subwoofer 1 (-)
SUB 2 Black Subwoofer 2 (+)
Black/Red Subwoofer 2 (-)
SUB 3 Black Subwoofer 3 (+)
Black/Yellow Subwoofer 3 (-)
Amplifier location: Left end of dash
Note: The amplifier output colors and labels on the AR-CH2 T-harness do not correspond to the vehicle. For vehicle specific
wiring designation, follow this wiring chart.

OPTIONAL ACCESSORIES
PROGRAMMED FIRMWARE
ADS-DSR1-CHR03
PRODUCTS REQUIRED
Rockford Fosgate DSR1
iDatalink Maestro aCH2 Installation Harness
INSTALL GUIDE
DODGE CHALLENGER
20152017
ENABLE A SEAMLESS AFTERMARKET AMPLIFIER INSTALLATION,
WITHOUT CHANGING YOUR RADIO.
NOTICE: Automotive Data Solutions Inc. (ADS) recommends having this installation performed by a certified technician. Logos and trademarks used here
in are the properties of their respective owners.

ADS-DSR1-CHR02B-AR maestro.idatalink.com
DODGE CHALLENGER 2015-2017
Automotive Data Solutions Inc. © 2019 2
WELCOME
NEED HELP?
Congratulations on the purchase
of your iDatalink Maestro /
Rockford Fosgate DSR1 Amplifier
replacement solution. You are
now a few simple steps away from
enjoying your new car amplifier.
Before starting your installation,
please ensure that your module
is programmed with the correct
firmware for your vehicle and that
you carefully review the install
guide.
1 866 427-2999
maestro.idatalink.com/support
www.12voltdata.com/forum
TABLE OF CONTENTS
Installation Instructions 3
Wiring Diagram 4
Vehicle Wire Reference Chart 5
maestr[email protected]

ADS-DSR1-CHR02B-AR maestro.idatalink.com
DODGE CHALLENGER 2015-2017
Automotive Data Solutions Inc. © 2019 3
INSTALLATION INSTRUCTIONS
STEP 1
• Remove the factory amplifier (refer to wire chart for
amplifier location).
• Configure the 2 pin connectors on the aCH2 T-harness as
shown on the wiring diagram.
STEP 2
• Connect the factory amplifier harnesses to the aCH2
T-harness.
STEP 3
• Connect the wires from the aCH2 T-harness to the
aftermarket amplifier.
Note 1:
If you are running your own speaker wires from the
amplifier to the speakers, this step is not necessary.
Note 2:
The amplifier output colors and labels on the aCH2
T-harness do not correspond to the vehicle. For vehicle
specific wiring designation, see the wiring chart.
• Plug the RCA cables in the aftermarket amplifier.
STEP 4
• Connect all the harnesses to the DSR1 module.
CHIME ADJUSTMENT
This is only needed when the vehicle supports chimes (ex:
Parking assist, Blind spot detection, Lane sense, etc.).
• Set the audio source to OFF (if there is no way to turn the
radio OFF, set the source to AUX).
• The OEM radio will have 3 volume settings for parking
assist (Low/Med/High), it is recommended to choose
medium volume.
• Activate any chime (ex: rear parking assist).
• Adjust the chime volume using the volume knob.
• For technical assistance call 1-866-427-2999 or e-mail
com/support” and “www.12voltdata.com/forum/”
1

ADS-DSR1-CHR02B-AR maestro.idatalink.com
DODGE CHALLENGER 2015-2017
Automotive Data Solutions Inc. © 2019 4
1
LEFT FRONT 1
RIGHT FRONT 1
LEFT REAR 1
RIGHT REAR 1
LEFT FRONT 2
RIGHT FRONT 2
LEFT REAR 2
RIGHT REAR 2
SUB 1
SUB 2
SUB 3
CENTER 1
LEFT FRONT OUT 1LEFT FRONT OUT 1
RIGHT FRONT OUT 2RIGHT FRONT OUT 2
LEFT SPARE OUT 3LEFT SPARE OUT 3
RIGHT SPARE OUT 4RIGHT SPARE OUT 4
LEFT REAR OUT 5LEFT REAR OUT 5
RIGHT REAR OUT 6RIGHT REAR OUT 6
LEFT SUB OUT 7LEFT SUB OUT 7
RIGHT SUB OUT 8RIGHT SUB OUT 8
CONNECTIONS NOT REQUIRED
WIRING DIAGRAM
STEP 1
STEP 2STEP 3
aCH2 T-HARNESS
FACTORY AMPLIFIER
HARNESSES
AMPLIFIER
WIRES FROM
VEHICLE
WHITEWHITE
GREENGREEN
GRAYGRAY
BLUE
PURPLEPURPLE
RED
N.C.
N.C.
WHITE
WHITE/BLACK
GRAY
GRAY/BLACK
GREEN
GREEN/BLACK
PURPLE/BLACK
GRAY/RED
WHITE/RED
GRAY
GREEN
GREEN/RED
PURPLE
WHITE
PURPLE
PURPLE/RED
BLACK
BLACK/WHITE
BLACK
BLACK/RED
BLACK
BLACK/YELLOW
ORANGE
ORANGE/BLACK
STEP 4 DSR1 MODULE
RCA CABLES

ADS-DSR1-CHR02B-AR maestro.idatalink.com
DODGE CHALLENGER 2015-2017
Automotive Data Solutions Inc. © 2019 5
VEHICLE WIRE REFERENCE CHART
T-Harness Wires Vehicle Wires
Wire
Tag
Wire
Color Speaker Wire Description
LEFT FRONT 1 White Left Front Speaker (+)
White/Black Left Front Speaker (-)
LEFT FRONT 2 White Left Front Tweeter (+)
White/Red Left Front Tweeter (-)
RIGHT FRONT 1 Gray Right Front Speaker (+)
Gray/Black Right Front Speaker (-)
RIGHT FRONT 2 Gray Right Front Tweeter (+)
Gray/Red Right Front Tweeter (-)
LEFT REAR 1 Green Left Rear Speaker (+)
Green/Black Left Rear Speaker (-)
LEFT REAR 2 Green Left Rear Mid (+)
Green/Red Left Rear Mid (-)
RIGHT REAR 1 Purple Right Rear Speaker (+)
Purple/Black Right Rear Speaker (-)
RIGHT REAR 2 Purple Right Rear Mid (+)
Purple/Red Right Rear Mid (-)
CENTER 1 Orange Center Speaker (+)
Orange/Black Center Speaker (-)
SUB 1 Black Subwoofer 1 (+)
Black/White Subwoofer 1 (-)
SUB 2 Black Subwoofer 2 (+)
Black/Red Subwoofer 2 (-)
SUB 3 Black n/a
Black/Yellow n/a
Amplifier location: Left end of dash
Note: The amplifier output colors and labels on the AR-CH2 T-harness do not correspond to the vehicle. For vehicle specific
wiring designation, follow this wiring chart.

OPTIONAL ACCESSORIES
PROGRAMMED FIRMWARE
ADS-DSR1-CHR03
PRODUCTS REQUIRED
Rockford Fosgate DSR1
iDatalink Maestro aCH2 Installation Harness
INSTALL GUIDE
DODGE CHARGER
20122017
ENABLE A SEAMLESS AFTERMARKET AMPLIFIER INSTALLATION,
WITHOUT CHANGING YOUR RADIO.
NOTICE: Automotive Data Solutions Inc. (ADS) recommends having this installation performed by a certified technician. Logos and trademarks used here
in are the properties of their respective owners.

ADS-DSR1-CHR02B-AR maestro.idatalink.com
DODGE CHARGER 2012-2017
Automotive Data Solutions Inc. © 2019 2
WELCOME
NEED HELP?
Congratulations on the purchase
of your iDatalink Maestro /
Rockford Fosgate DSR1 Amplifier
replacement solution. You are
now a few simple steps away from
enjoying your new car amplifier.
Before starting your installation,
please ensure that your module
is programmed with the correct
firmware for your vehicle and that
you carefully review the install
guide.
1 866 427-2999
maestro.idatalink.com/support
www.12voltdata.com/forum
TABLE OF CONTENTS
Installation Instructions 3
Wiring Diagram 4
Vehicle Wire Reference Chart 5
maestr[email protected]

ADS-DSR1-CHR02B-AR maestro.idatalink.com
DODGE CHARGER 2012-2017
Automotive Data Solutions Inc. © 2019 3
INSTALLATION INSTRUCTIONS
STEP 1
• Remove the factory amplifier (refer to wire chart for
amplifier location).
• Configure the 2 pin connectors on the aCH2 T-harness as
shown on the wiring diagram.
STEP 2
• Connect the factory amplifier harnesses to the aCH2
T-harness.
STEP 3
• Connect the wires from the aCH2 T-harness to the
aftermarket amplifier.
Note 1:
If you are running your own speaker wires from the
amplifier to the speakers, this step is not necessary.
Note 2:
The amplifier output colors and labels on the aCH2
T-harness do not correspond to the vehicle. For vehicle
specific wiring designation, see the wiring chart.
• Plug the RCA cables in the aftermarket amplifier.
STEP 4
• Connect all the harnesses to the DSR1 module.
CHIME ADJUSTMENT
This is only needed when the vehicle supports chimes (ex:
Parking assist, Blind spot detection, Lane sense, etc.).
• Set the audio source to OFF (if there is no way to turn the
radio OFF, set the source to AUX).
• The OEM radio will have 3 volume settings for parking
assist (Low/Med/High), it is recommended to choose
medium volume.
• Activate any chime (ex: rear parking assist).
• Adjust the chime volume using the volume knob.
• For technical assistance call 1-866-427-2999 or e-mail
com/support” and “www.12voltdata.com/forum/”
1

ADS-DSR1-CHR02B-AR maestro.idatalink.com
DODGE CHARGER 2012-2017
Automotive Data Solutions Inc. © 2019 4
1
LEFT FRONT 1
RIGHT FRONT 1
LEFT REAR 1
RIGHT REAR 1
LEFT FRONT 2
RIGHT FRONT 2
LEFT REAR 2
RIGHT REAR 2
SUB 1
SUB 2
SUB 3
CENTER 1
LEFT FRONT OUT 1LEFT FRONT OUT 1
RIGHT FRONT OUT 2RIGHT FRONT OUT 2
LEFT SPARE OUT 3LEFT SPARE OUT 3
RIGHT SPARE OUT 4RIGHT SPARE OUT 4
LEFT REAR OUT 5LEFT REAR OUT 5
RIGHT REAR OUT 6RIGHT REAR OUT 6
LEFT SUB OUT 7LEFT SUB OUT 7
RIGHT SUB OUT 8RIGHT SUB OUT 8
CONNECTIONS NOT REQUIRED
WIRING DIAGRAM
STEP 1
STEP 2STEP 3
aCH2 T-HARNESS
FACTORY AMPLIFIER
HARNESSES
AMPLIFIER
WIRES FROM
VEHICLE
WHITEWHITE
GREENGREEN
GRAYGRAY
BLUE
PURPLEPURPLE
RED
N.C.
N.C.
WHITE
WHITE/BLACK
GRAY
GRAY/BLACK
GREEN
GREEN/BLACK
PURPLE/BLACK
GRAY/RED
WHITE/RED
GRAY
GREEN
GREEN/RED
PURPLE
WHITE
PURPLE
PURPLE/RED
BLACK
BLACK/WHITE
BLACK
BLACK/RED
BLACK
BLACK/YELLOW
ORANGE
ORANGE/BLACK
STEP 4 DSR1 MODULE
RCA CABLES
This manual suits for next models
1
Popular Car Amplifier manuals by other brands

Planet Audio
Planet Audio AC1000.2 user manual

Rockford Fosgate
Rockford Fosgate Power Elite T20001bd Installation and operation
Bryston
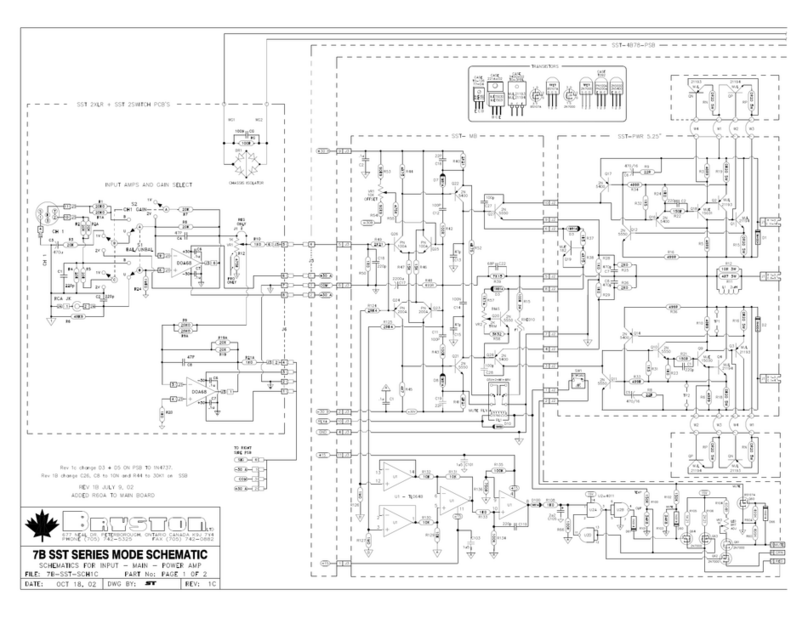
Bryston C Series 7B SST Schematic diagram
BOSSCO
BOSSCO Chaos Exxtreme CX2000 user manual
Sony
Sony XM-504Z - Stereo Power Amplifier operating instructions
Focal
Focal Power Symmetric High-Cap user manual
