4
Scanning for Stations
If you wish to find new DAB
stations or you move your radio
to a new location, you can
search using the SCAN key.
To view the signal strength, press the INFO button
repeatedly until the display shows the signal bar
at the bottom of the screen.
Signal
Battery Power Indicator
There is a battery power icon at the top of the
radio display. When the battery power is high,
the rectangle frame is full.
When the power is extremely low, the rectangle
becomes empty and the out frame flashes,
the radio will be switched “off ” automatically
and the batteries need to be replaced.
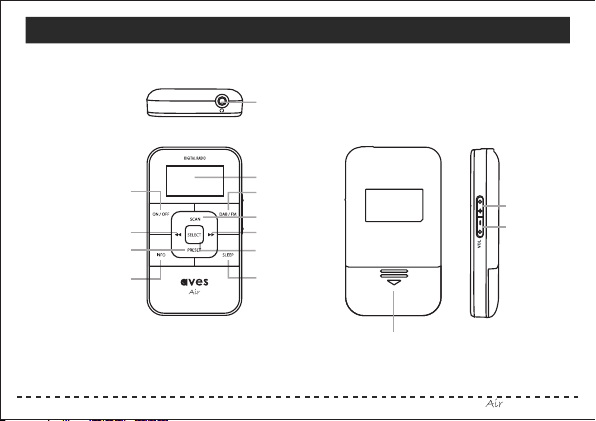
Getting Started
Place two AAA size (UM-4,R03) batteries into
the battery compartment at the back of your
DAB/DAB+/FM radio. Make sure the “+” and “-” on the
batteries correspond to those on the inside of
the battery compartment.
Plug in your earphones to work as an wire antenna.
Press the ON/OFF button to switch on your radio. A brief
“Welcome” message will appear and automatically
tune into all available DAB stations.
The display will advise you of all available DAB
stations found. If there are no DAB stations
available in your area the display will show:
“No Service” and with scrolling text showing:
“No DAB signal available”.
All available stations will be saved for future use.
You can switch between DAB and FM using the
DAB/FM button.
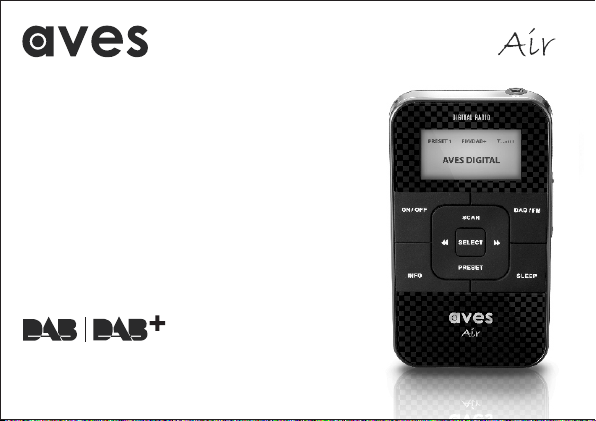
Instruction Book