METHOD B:
USING THE AZUGA
FLEET WEB APP
OBD-II INSTALLATION GUIDE
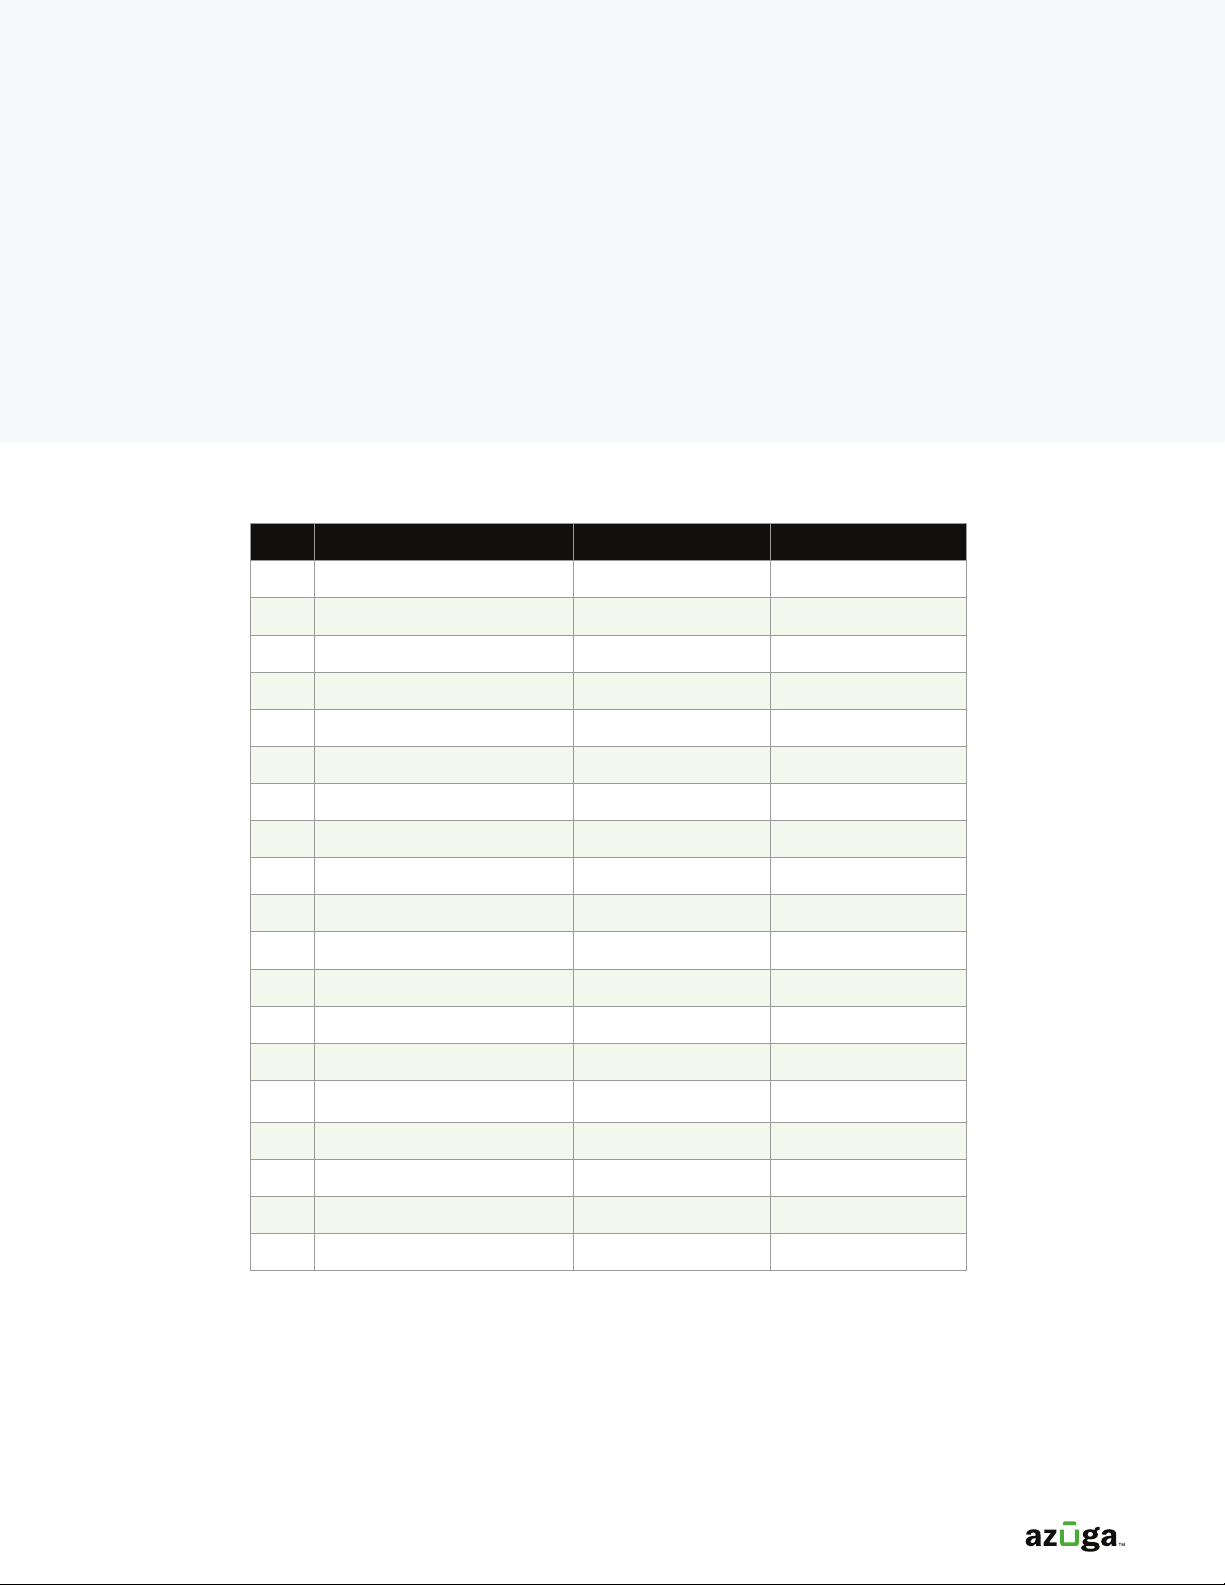
NO. PLANNED INSTALL DATE SERIAL NUMBER VEHICLE NAME
ѹ
рѵ **&//# 1$ /#/4*0- $1 )'*/ /# . -$')0( -ѵ# 1$
. -$')0( -$.0)$,0 рпҊ$"$/)0( -ѵ
сѵ -$/ /#$.*2)$)/# "/&)2*"/*'0()$)/# /' '*2ѵ
тѵ )/$!4 2#$# 1 #$' /#$. 1$ 2$'' $)./'' *)and give it a ‘friendly
)( Ѿѵor example, ‘John’s F150’. Write this in the "%& )"*"*'0()$)/#
/' '*2ѵ' . & +/# . 1 #$' )( ..#*-/ѵ
(See Appendix for a single clean sheet with this table which you can print and copy.)
уѵ # )++"!+01))1"# '+.4*0.# 0' 2# )4*0+')/*#1 4*0--$1 -.&$)/# *!!$ !*-/#
1$ $)./''/$*)ѵ!*0-. Ѷ/# .**) -4*0$)./''Ѷ/# .**) -4*0)./-/.1$)"(*) 4) '$1 -$)"
// -0./*( -. -1$ 2$/#50"Ѻ
фѵ + //#$../ +!*-'' 1$ ./#/4*0#1 2$/#4*0ѵ#*/**+4/#$.+" $!.*/#/4*0)*(+' / /#
+-* ..!*-4*0- )/$- !' /ѵ
хѵ *"$)/*/# 50"' /2 ++'$/$*)) ).0- /#//# 1 #$' )( $.0-/ ѵ# '*"$)$.
#//+.ѷҝҝ++.ѵ50"ѵ*(ѵ*0-'*"$)- )/$'.2*0'#1 ). )//*4*0 -'$ -ѵ**&!*-) ($'!-*(
*Ҋ)*/Ҋ- +'4ҽ50"ѵ*($)4*0-$)*3җ# &4*0-!*' -Ҙ/*" /4*0-0. -)( )+..2*-ѵ
цѵ **- $/1 #$' .Ѷ"*/*/# !*&+ۛ"%& )"0+" ѵ
чѵ 4+ /# . -$')0( -*!/# 1$ 4*0- #*'$)"$)/# . -#-ѵ*02$'')*/$ /#//# 1 #$' )(
$./# .( ./# . -$')0( -ѵ50"* ./#$.4 !0'/2# )/# 1$ .- $)$/$''4/ ./ ѵ
шѵ Change the vehicle name and give it a ‘friendly name’ (e.g. ‘John’s Ford FҊ150’, ‘Parts Van’). This name
) ./* 0)$,0 ѵ*0))*/#1 /2*1 #$' .2$/#/# .( )( ѵ'.*Ѷ!$''$)/# ()/*-4!$ '.
җ(-& 2$/#ҡҘѵ
рпѵ '$&-!1""%& )"/*.1 /# 1 #$' - *-ѵ
ррѵ + //# . ./ +.!*-/# - ($)$)"1 #$' .ѵ*/ /#//# 1 #$' )( .) /* 0)$,0 ѵ
4. The Planned Install Date helps you schedule when
you plan to have your drivers back in the ofce for
the device installation. Of course, the sooner you
install, the sooner you can start saving money and
delivering better customer service with Azuga!
5. Repeat this step for all devices that you have
with you. Photocopy this page if so that you can
complete the process for your entire eet.
6. Log in to the Azuga Fleet web application and
ensure that the vehicle name is accurate. The
login URL is https://apps.azuga.com. Your login
credentials would have been sent to you earlier.
in your inbox (check your SPAM folder) to get your
username and password.
1. Look at the device that you received and locate the serial number. The device serial number is a unique 10-digit
number.
2. Write this down in the Serial Number column in the table below.
3. Identify which vehicle this device will be installed on and give it a ‘friendly name’. For example, ‘John’s F150’.
Write this in the Vehicle Name column in the table below. Please keep these vehicle names short.
7. To add or edit vehicles, go to the Admin >
Vehicles page.
8. Type the serial number of the device you are
holding in the search bar. You will notice that the
vehicle name is the same as the serial number.
Azuga does this by default when the devices are
initially tested.
9. Change the vehicle name and give it a ‘friendly
name’ (e.g. ‘John’s Ford F-150’, ‘Parts Van’).
This name needs to be unique. You cannot have
two vehicles with the same name. Also, ll in the
mandatory elds (marked with a *).
10. Click Update Vehicle to save the vehicle record.
11. Repeat these steps for the remaining vehicles.
Note that the vehicle names need to be unique.
(See Appendix for a single clean sheet with this table which you can print and copy.)