2. Check the battery charge and the level of
water in the cells, if necessary, top up
with distilled water only.
3. Clean any oxidation off the two battery
poles.
Operations after 100 hours of work
Check the oil level in the two reduction gears (see
Par. 7.8).
Once the power trowel guarantee has expired, the
machines should be subjected to a complete check-
up once a year. You can address to all our
authorized dealers all around the world.
Barikell srl will refuse all responsibility in case of
incident whenever the check-ups won’t be done.
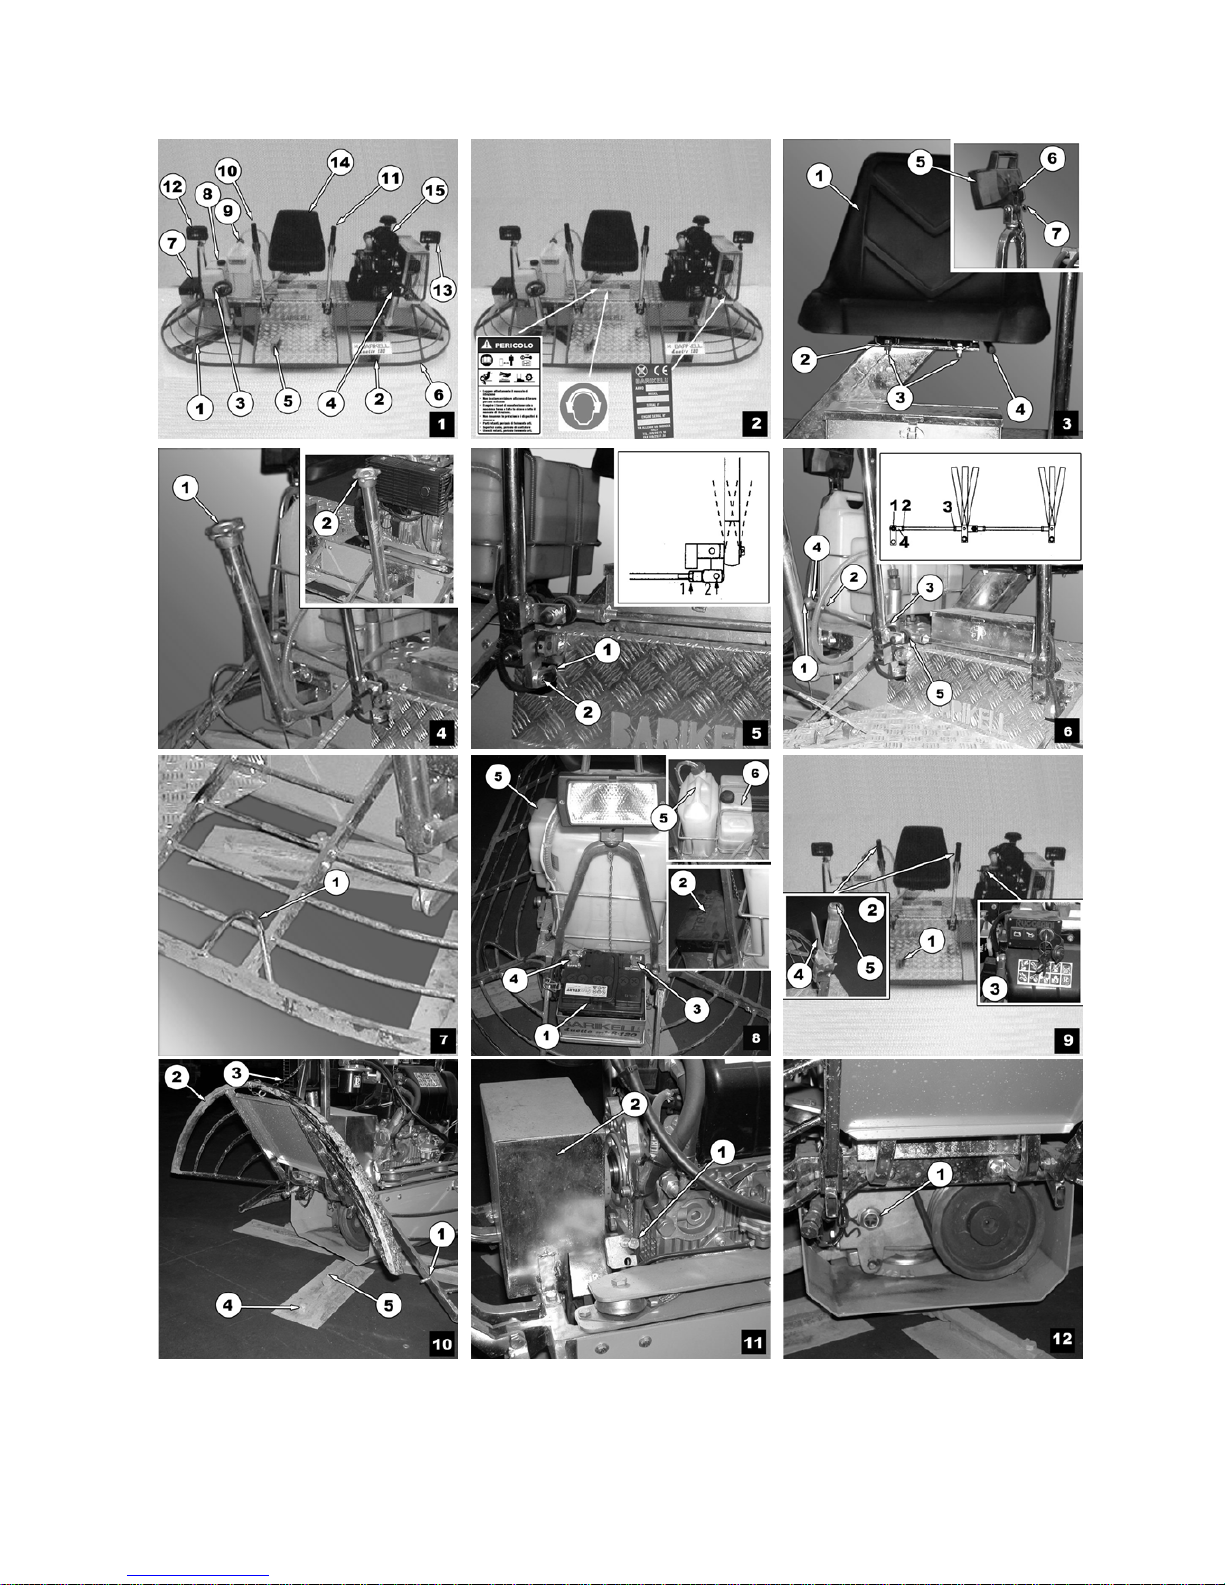
7.3. Battery
If the machine is not used for a long period of
time, disconnect the battery removing the cable
terminal from the positive pole (Fig.9 No.4). For
maintenance consult the instruction and use
leaflet of the battery.
with the regulations in force in the
country of use.
7.4. Cleaning the machine
Clean the float machine at the end of each
working day to prevent that cement hardens and
forms encrustations on the machine. Wash the
dirty parts with a brush and water. Wet the parts
exposed to cement with “stripping” oil (never fuel
oil). Do not oil the rubber moving parts (belts,
etc.).
7.5. Replacing the floats
Be careful when installing the machine: one rotor
turns clockwise and the other anticlockwise,
therefore you need to check that the various
components have been properly arranged.
Before mounting the floats, check that the blades
are clean, i.e. that there are no traces or residues
of cement mixes. The blades must be placed in
horizontal position using the knobs (Fig.4 No.1
and 2).
To replace the floats proceed as follows:
Slightly lift the float machine off the ground (about
10 cm).
Mount the floats on the blades checking the
correct direction of rotation.
When the floats have been mounted, reposition
the float machine on the ground.
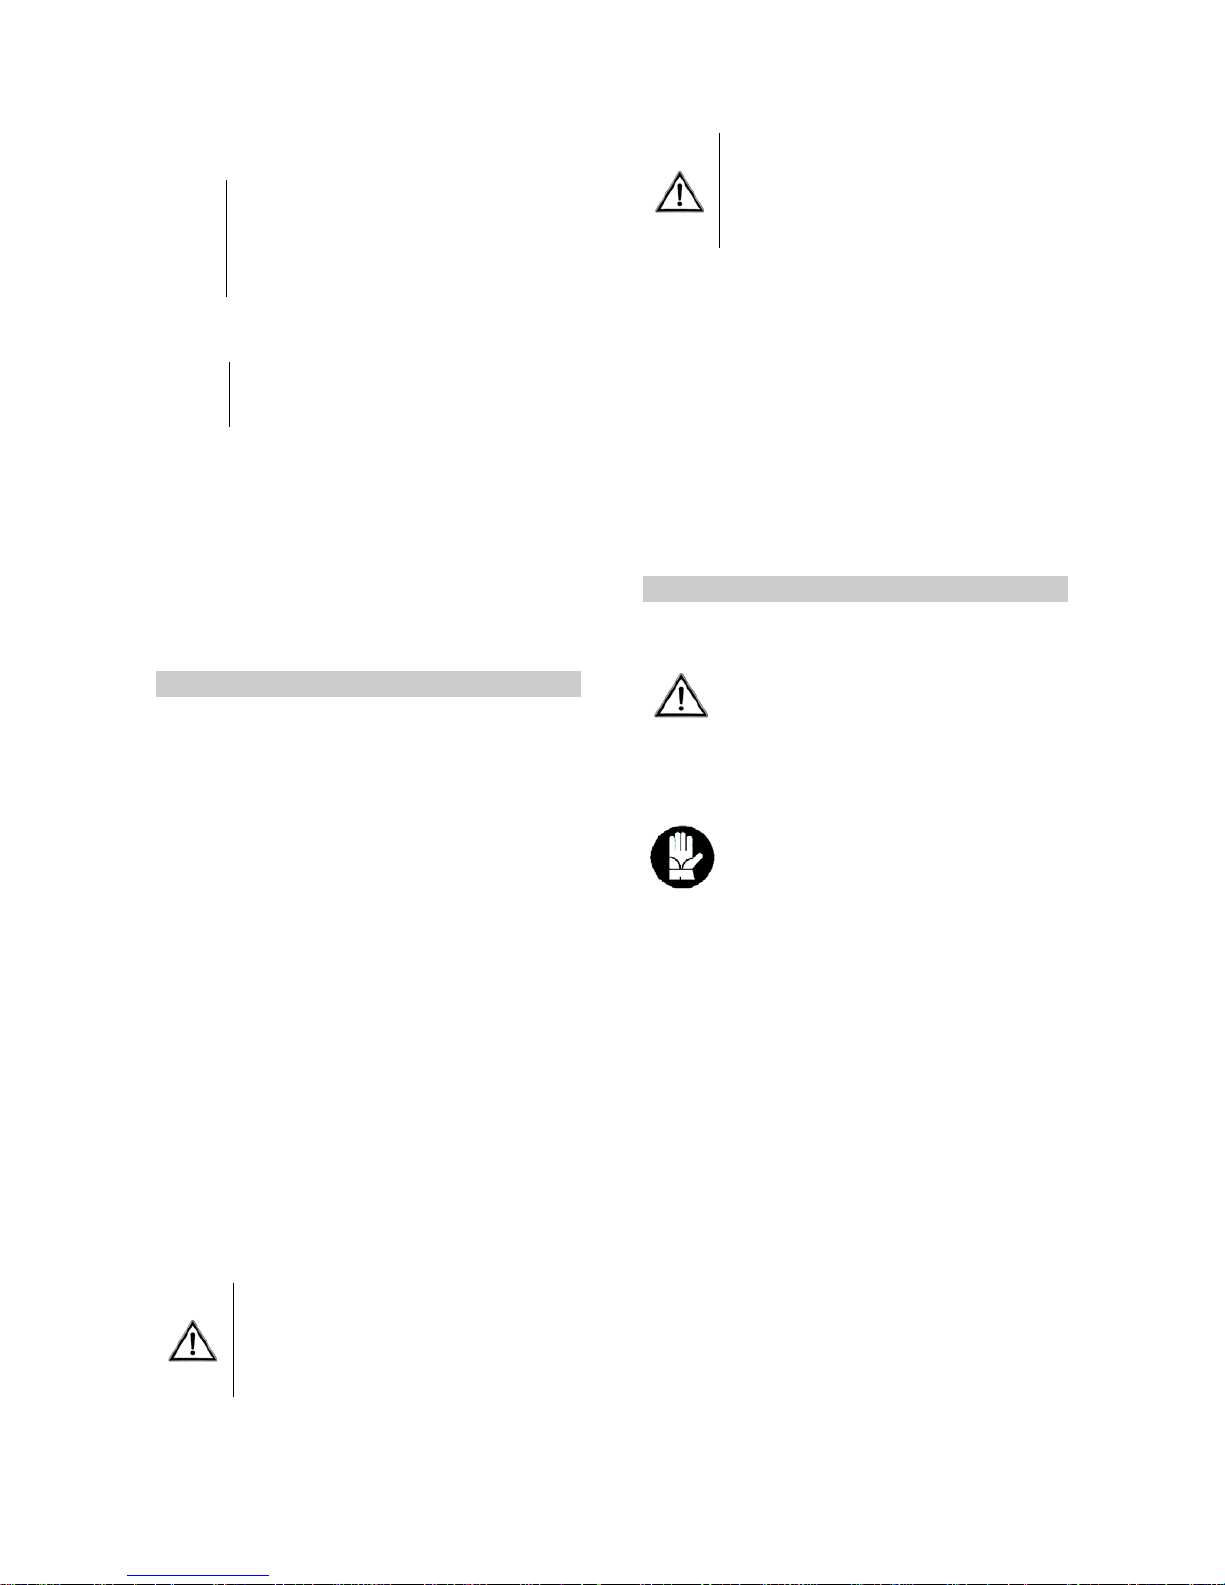
7.6. Replacing the blades
Always check the state of wear of the blades and
if they are damaged or bent, replace them. For
proper functioning they need to be replaced
entirely.
To replace them proceed as follows (Fig.10):
−Clean any working residue off the
float machine.
−Open the guard (2) by unscrewing
the two fixing bolts (1) and hook the guard to
the chain (3).
−Slightly lift the float machine off the
ground (about 10 cm).
−Remove the fixing bolts (5) of the
blades (4) on each arm.
−Mount the new blades fixing the bolts
with the respective split washers (check the
state of the bolts and replace them if
necessary).
−When the blades have been
mounted, reposition the float machine on the
ground.
−Reposition the guard (2) and tighten
the bolts (1).
7.7. Replacing the belts
(Fig.11) To replace the belts, operate as follows:
−Dismantle the belt protection guard
(2).
−Slightly lift the float machine off the
ground (about 10 cm) in order to be able to
freely turn the pulley and the clutch and thus
easily remove and replace the belts.
−Remove the worn belts and replace
them with others of the same size.
−Reposition the float machine on the
ground.
−Reposition the guard (2).