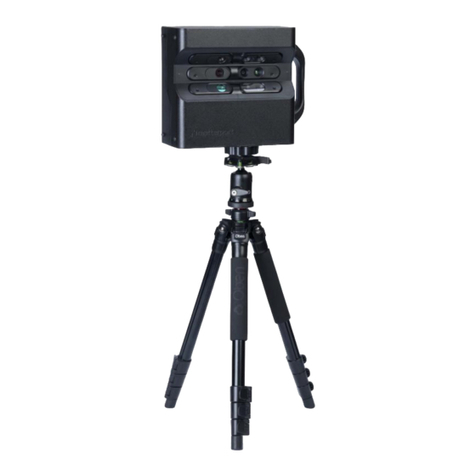
Becom Argos3D-P23X User manual

Argos3D-P23X
Quick Start Guide
Version 2

© BECOM Systems 2019
Quick Start Guide - Argos3D-P23X
Last change: 30 January 2019/Version 2
2| 15
BECOM Systems GmbH
Gutheil-Schoder-Gasse 17
1230 Wien
AUSTRIA
office.systems@becom-group.com
http://systems.becom-group.com
Argos3D-P23X –Quick Start Guide
Document No.: 900-308 / A
Publication date: January 30, 2019
Subject to change without notice. Errors excepted.
This document is protected by copyright. All rights reserved. No part of this document may be reproduced or transmitted
for any purpose in any form or by any means, electronically or mechanically, without expressly written permission by
BECOM Systems.
Windows is a registered trademark of Microsoft.

© BECOM Systems 2019
Quick Start Guide - Argos3D-P23X
Last change: 30 January 2019/Version 2
3| 15
Table of Contents
1Unboxing......................................................................................................................................................................................................................................5
1.1 In the box...............................................................................................................................................................................................................................5
1.2 Connecting your Argos3D–P23x ..................................................................................................................................................................5
1.3 Connector Overview..............................................................................................................................................................................................5
1.3.1 Connecting the break-out board ..........................................................................................................................................................6
1.3.2 Connecting the power supply.................................................................................................................................................................6
1.3.3 Connecting the Ethernet Cable.............................................................................................................................................................. 7
2Downloading the Evaluation Software .............................................................................................................................................................8
2.1 Support website........................................................................................................................................................................................................8
2.2 Start-up screen ...........................................................................................................................................................................................................9
2.3 Prepare your Network Interface Card (NIC) ....................................................................................................................................10
3Start using your Argos3D–P23x with ‘BltTofSuite’ ..................................................................................................................................11
4System Requirements & Support.........................................................................................................................................................................12
4.1 Support............................................................................................................................................................................................................................12
5Product History .................................................................................................................................................................................................................... 13
5.1 Argos3D-P230 ............................................................................................................................................................................................................ 13
5.1.1 Version Information........................................................................................................................................................................................ 13
5.1.2 Anomalies................................................................................................................................................................................................................ 13
6Document Revision History .......................................................................................................................................................................................14
AList of Figures and Tables ............................................................................................................................................................................................15

© BECOM Systems 2019
Quick Start Guide - Argos3D-P23X
Last change: 30 January 2019/Version 2
4| 15
© BECOM Systems GmbH 2019
All Rights Reserved.
The information herein is given to describe certain components and shall not be considered as a guarantee of
characteristics.
Terms of delivery and rights of technical change reserved.
We hereby disclaim any warranties, including but not limited to warranties of non-infringement, regarding circuits,
descriptions and charts stated herein.
BECOM Systems makes and you receive no warranties or conditions, express, implied, statutory or in any communication
with you. BECOM Systems specifically disclaims any implied warranty of merchantability or fitness for a particular purpose.
BECOM Systems takes no liability for any damages and errors causing of the usage of this board. The user of this board is
responsible by himself for the functionality of his application. He is allowed to use the board only if he has the
qualification. More information is found in the General Terms and Conditions (AGB).
Information
For further information on technology, delivery terms and conditions and prices please contact BECOM Systems
www.becom-group.com
Warning
Due to technical requirements components may contain dangerous substances.

© BECOM Systems 2019
5| 15
Quick Start Guide - Argos3D-P23X
Last change: 30 January 2019/Version 2
1Unboxing
1.1 In the box
•Argos3D–P23x
•CAT5/7 Ethernet Cable
•Interface Breakout-Board
•Quick Start Guide
•Power Supply
Note
The power supply’s operating temperature is specified from 0 to +40°C. This represents not
the effective working temperature of the Argos3D–P23x sensor!
1.2 Connecting your Argos3D–P23x
1.3 Connector Overview
The Argos3D-P23x uses one common connector for power and interfaces. For test purposes the KIT contains a
breakout-board to have individual access to the interfaces of the Argos3D-P23x.
The break-outboard has three main interfaces:
a. Power Connector
b. Ethernet
c. Argos3D-P23x common connector
a
b
c
Figure 1-1: Argos3D–P23x break-out board front and rear view

© BECOM Systems 2019
6| 15
Quick Start Guide - Argos3D-P23X
Last change: 30 January 2019/Version 2
Note
Please follow the next steps in the right order to get your ‘Argos3D-P23x’ up and running
correctly.
1.3.1 Connecting the break-out board
Please connect the break-out board to the Argos3D-P23x common connector first.
Figure 1-2: Argos3D–P23x common connector
1.3.2 Connecting the power supply
To ensure, that your Argos3D–P23x works correctly, connect the ‘Argos3D’ to a 12-30V DC power supply using
connector (a) and wait for approximately 20 seconds until the camera boots up.
Pin assignment on the power connector (a): Pin #1: +12V to +30V, Pin#2: GND
Note
The power supply connector is protected against wrong polarity but the ‘Argos3D’ will not
work in case you don’t use the correct polarity! If the Argos3D–P23x doesn’t work please
check the power supply polarity first!

© BECOM Systems 2019
7| 15
Quick Start Guide - Argos3D-P23X
Last change: 30 January 2019/Version 2
1.3.3 Connecting the Ethernet Cable
Plug in the Ethernet cable (b) and connect your Argos3D–P23x to your PC.^
Figure 1-3: Argos3D–P23x connected to power and Ethernet

© BECOM Systems 2019
8| 15
Quick Start Guide - Argos3D-P23X
Last change: 30 January 2019/Version 2
2Downloading the Evaluation Software
Please log in to our support website at https://support.bluetechnix.com/ and download the Argos-P23x customer
software package. This package also includes the Bluetechnix ToF-Suite.
2.1 Support website
Select ‚free access‘
Figure 2-1: Download Evaluation Package

© BECOM Systems 2019
9| 15
Quick Start Guide - Argos3D-P23X
Last change: 30 January 2019/Version 2
2.2 Start-up screen
Figure 2-2: Start-up screen
Please select your product Argos3D-P23x.
Please follow the instructions on the website.

© BECOM Systems 2019
10 | 15
Quick Start Guide - Argos3D-P23X
Last change: 30 January 2019/Version 2
2.3 Prepare your Network Interface Card (NIC)
Once you have connected your Argos3D–P23x to a Network Interface Card (NIC) of your PC give this NIC the IP-
Address 192.168.0.1 with a subnet mask of 255.255.255.0.
No driver must be installed on your PC!
The Argos3D–P23x uses IP-Address 192.168.0.10 with subnet mask 255.255.255.0.

© BECOM Systems 2019
11 | 15
Quick Start Guide - Argos3D-P23X
Last change: 30 January 2019/Version 2
3Start using your Argos3D–P23x with ‘BltTofSuite’
Browse to the directory where you previously saved the BltTofSuite software zip file. Unzip the software.
Using this software, you can simply display the depth image and the amplitude image of the Argos3D–P23x. For a
detailed introduction to the software, please read the ‘ToF Suite - Quick Start Guide’
Place the Argos3D–P23x on your desk approximately 50 cm in front of you.
Go to the directory where you unzipped the software and start the “
BltTofSuite.exe
”. On how to use the ToF
Suite, please refer to the user manual included in the software support package.

© BECOM Systems 2019
12 | 15
Quick Start Guide - Argos3D-P23X
Last change: 30 January 2019/Version 2
4System Requirements & Support
An Argos3D–P23x enabled application is required in order to use this ‘Argos3D’ device.
Connect to a system with:
•Operating System: Microsoft Windows 7/8/10/Vista
•32 bit (x68) or 64 bit (x64) processor
•Dual-core 2 GHz or faster CPU
•Dedicated Ethernet port
•2GByte RAM
4.1 Support
For answers to common questions, troubleshooting steps and further documentation visit our Bluetechnix
support website or using the direct link: https://support.bluetechnix.com/wiki/Argos_3D-P23x

© BECOM Systems 2019
13 | 15
Quick Start Guide - Argos3D-P23X
Last change: 30 January 2019/Version 2
5Product History
5.1 Argos3D-P230
5.1.1 Version Information
Version
Type
Release date
V1.0.0
X-Grade
January 2019
Table 5.1: Overview Argos3D–P230 product changes
Additional information can be found at http://support.bluetechnix.com
5.1.2 Anomalies
Version
Date
Description
1.0.0
11.01.2019
- Modulationfrequencies >40MHz are not working correctly.
- Firmware update not working as intended. Workaround available.
Table 5.2: Product anomalies
Additional information can be found at http://support.bluetechnix.com

© BECOM Systems 2019
14 | 15
Quick Start Guide - Argos3D-P23X
Last change: 30 January 2019/Version 2
6Document Revision History
Version
Date
Document Revision
1
11.01.2019
First draft
2
29.01.2019
New layout, updated pictures

© BECOM Systems 2019
15 | 15
Quick Start Guide - Argos3D-P23X
Last change: 30 January 2019/Version 2
AList of Figures and Tables
Figures
Figure 1-1: Argos3D–P23x break-out board front and rear view.................................................................................................................................. 5
Figure 1-2: Argos3D–P23x common connector .......................................................................................................................................................................... 6
Figure 1-3: Argos3D–P23x connected to power and Ethernet .......................................................................................................................................7
Figure 2-1: Download Evaluation Package ..................................................................................................................................................................................... 8
Figure 2-2: Start-up screen .......................................................................................................................................................................................................................... 9
Tables
Table 5.1: Overview Argos3D–P230 product changes .........................................................................................................................................................13
Table 5.2: Product anomalies ....................................................................................................................................................................................................................13
Table 6-1: Revision history ................................................................................................................................................. Error! Bookmark not defined.
Table of contents
Other Becom 3D Camera manuals


