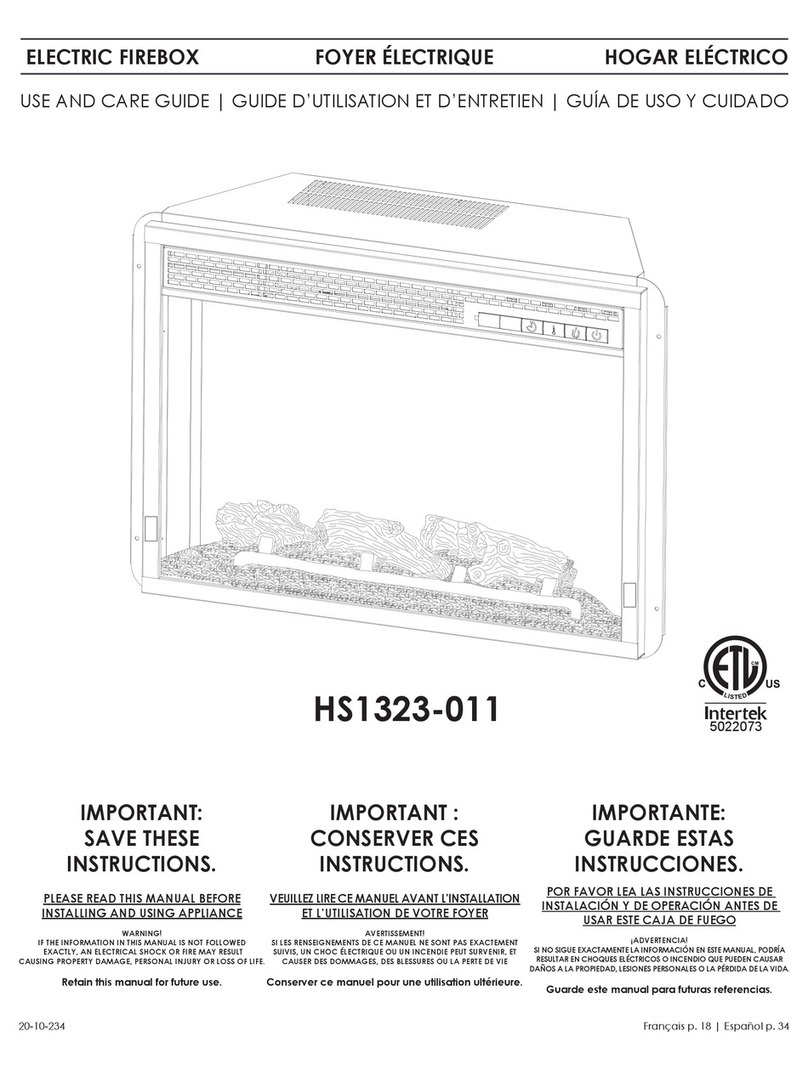
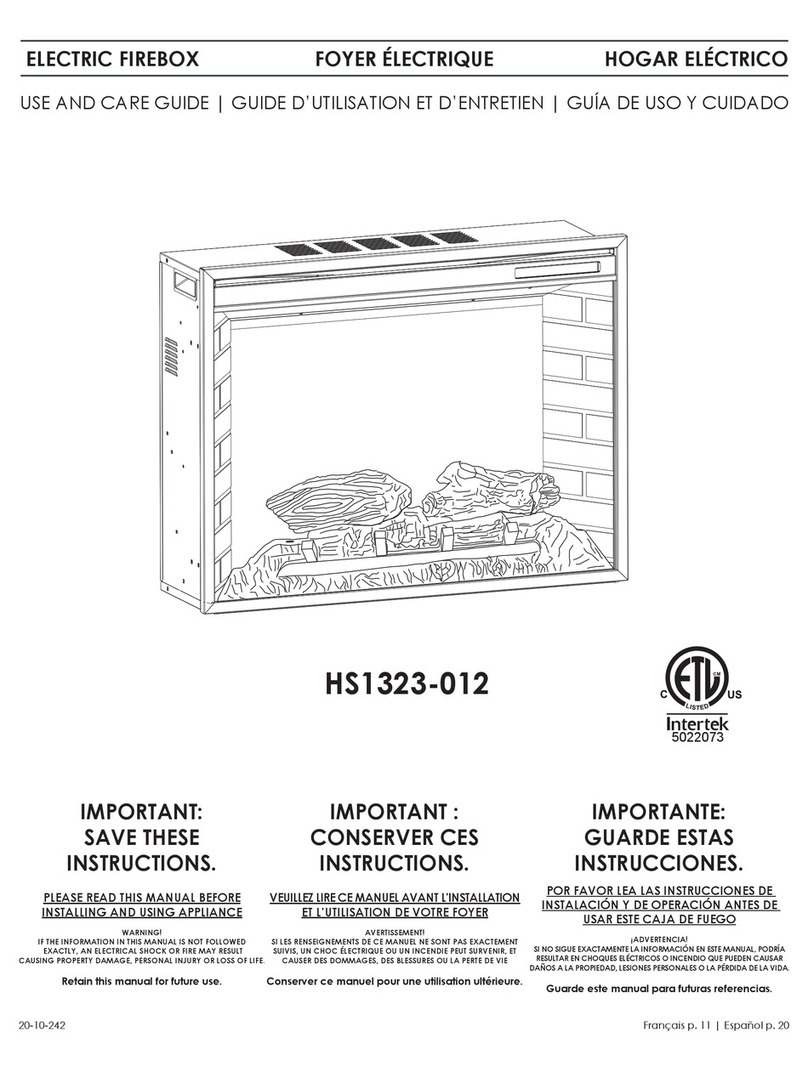
BED BATH & Beyond HS1326-011 User manual

PLEASE READ THIS MANUAL BEFORE
INSTALLING AND USING APPLIANCE
WARNING!
IF THE INFORMATION IN THIS MANUAL IS NOT FOLLOWED
EXACTLY, AN ELECTRICAL SHOCK OR FIRE MAY RESULT
CAUSING PROPERTY DAMAGE, PERSONAL INJURY OR LOSS OF LIFE.
Retain this manual for future use.
VEUILLEZ LIRE CEMANUEL AVANT L’INSTALLATION
ET L’UTILISATION DE VOTRE FOYER
AVERTISSEMENT!
SI LES RENSEIGNEMENTS DE CE MANUEL NE SONT PAS EXACTEMENT
SUIVIS, UN CHOC ÉLECTRIQUE OU UN INCENDIE PEUT SURVENIR, ET
CAUSER DES DOMMAGES, DES BLESSURES OU LA PERTE DE VIE
Conserver ce manuel pour une utilisation ultérieure.
Français p. 11 | Español p. 2020-10-234
POR FAVOR LEA LAS INSTRUCCIONES DE
INSTALACIÓN Y DE OPERACIÓN ANTES DE
USAR ESTE CAJA DE FUEGO
¡ADVERTENCIA!
SI NO SIGUE EXACTAMENTELA INFORMACIÓN EN ESTE MANUAL, PODRÍA
RESULTAR EN CHOQUES ELÉCTRICOSO INCENDIO QUE PUEDEN CAUSAR
DAÑOSA LA PROPIEDAD, LESIONES PERSONALES O LA PÉRDIDA DE LA VIDA.
Guarde este manual para futuras referencias.
HS1326-011
USE AND CARE GUIDE | GUIDE D’UTILISATION ET D’ENTRETIEN | GUÍA DE USO Y CUIDADO
ELECTRIC FIREBOX FOYER ÉLECTRIQUE HOGAR ELÉCTRICO
IMPORTANT:
SAVE THESE
INSTRUCTIONS.
IMPORTANT :
CONSERVER CES
INSTRUCTIONS.
IMPORTANTE:
GUARDE ESTAS
INSTRUCCIONES.

2
Table of Contents
Safety Information
1. Read all instructions before using this heater.
2. This heater is hot when in use. To avoid burns, do not let bare skin touch hot surfaces. If provided, use
handles when moving this heater. Keep combustible materials, such as furniture, pillows, bedding, papers,
clothes, and curtains at least 3 feet (0.9 meters) from the front of the heater and keep them away from the
sides and rear.
3. Extreme caution is necessary when any heater is used by or near children or invalids and whenever the
heater is left operating and unattended.
4. Always unplug heater when not in use.
5. Do not operate any heater with a damaged cord or plug or after the heater malfunctions, has been
dropped or damaged in any manner. Return heater to authorized service facility for examination,
electrical or mechanical adjustment, or repair.
6. Do not use outdoors.
7. This heater is not intended for use in bathrooms, laundry areas and similar indoor locations. Never locate
heater where it may fall into a bathtub or other water container.
8. Do not run power cord under carpeting. Do not cover power cord with throw rugs, runners, or the like.
$UUDQJHSRZHUFRUGDZD\IURPWUDIÀFDUHDDQGZKHUHLWZLOOQRWEHWULSSHGRYHU
9. To disconnect heater, turn controls to off, then remove plug from outlet.
10. Connect to properly grounded outlets only.
11. Do not insert or allow foreign objects to enter any ventilation or exhaust openings as this may cause an
HOHFWULFVKRFNRUÀUHRUGDPDJHWKHKHDWHU
12. 7RSUHYHQWDSRVVLEOHÀUHGRQRWEORFNÀUHER[DLULQWDNHVRUH[KDXVWLQDQ\PDQQHU'RQRWRSHUDWHÀUHER[
on soft surfaces, like a bed, where openings may become blocked.
13. A heater has hot and arching or sparking parts inside. Do not use in areas where gasoline, paint, or
ÁDPPDEOHOLTXLGVDUHXVHGRUVWRUHG
14. Use this heater only as described in this manual. Any other use not recommended by the manufacturer
PD\FDXVHÀUHHOHFWULFDOVKRFNRULQMXU\WRSHUVRQV
15. Always plug heaters directly into a wall outlet/receptacle. Never use with an extension cord or relocatable
power tap (outlet/power strip).
16. 7KLVHOHFWULFÀUHSODFHLVQRWGHVLJQHGIRU´]HURµFOHDUDQFHZDOODQGRUFDELQHWPLOOZRUNLQVWDOODWLRQV
Accessibility for servicing and maintenance must be possible without disturbing building structures and/or
FDELQHWPLOOZRUNÀQLVKHV
17. SAVE THESE INSTRUCTIONS
Table of Contents ...........................2
Safety Information...........................2
User Instructions ............................3
Grounding Instructions ......................3
Locating Your Fireplace .....................3
Mantel Installation..........................3
)LUHER[6SHFLÀFDWLRQV.......................3
Electrical Connection.......................3
Remote Control............................4
Warranty...................................5
Pre-Installation ..............................6
Planning Installation........................6
7RROV5HTXLUHG ............................6
Hardware Included ........................6
Package Contents.........................6
Operation. . . . . . . . . . . . . . . . . . . . . . . . . . . . . . . . . . 7
Maintenance...............................8
Glass information. . . . . . . . . . . . . . . . . . . . . . . . . . . 8
Maintenance of Motors .....................8
Battery Replacement .......................9
Circuit Diagram .............................9
Care and Cleaning. . . . . . . . . . . . . . . . . . . . . . . . . . 9
Troubleshooting............................10
Service Parts...............................11

3
Safety Information (continued)
USER INSTRUCTIONS
1.
2.
be replaced with original “OEM” (original equipment manufacturers) parts only.
3.
IMPORTANT: Always unplug the power cord before cleaning the unit. Do not use any abrasive cleaners on
the unit.
4.
GROUNDING INSTRUCTIONS
connecting three-blade grounding-type plugs to two-slot receptacles. The
green grounding lug extending from the adapter must be connected to a
permanent ground such as a properly grounded outlet box. The adapter
should not be used if a three-slot grounded receptacle is available.
(Note: Grounding adapter use prohibited in Canada)
LOCATING YOUR FIREPLACE
MANTEL INSTALLATION
Please refer to the detailed instructions that came
with the mantel that you purchased.
ELECTRICAL CONNECTION
A 15 Amp, 120 Volt, 60 Hz circuit with a properly grounded outlet is required to operate this appliance. Preferably,
breaker to trip or the fuse to blow when the heater is in operation. The unit comes standard with a 6 ft (1.8 m)
cord. Always plug heaters directly into a wall outlet/receptacle. Never use with an extension cord or relocatable
power tap (outlet/power strip).
SPECIFICATIONS
Fireplace Insert dimensions
(w x d x h)
27.75” x 8” x 17.25”
70.4 cm x 20.2 cm x 44 cm
Voltage 120 V
Frequency 60 Hz
Watts • Amps. 1440W • 12A
Grounding Pin
Cover of Grounded Outlet Box
Adapter
Grounding Lug
Metal Screw
Cover of Grounded Outlet Box
B
C
A
DO NOT STORE OR USE GASOLINE
OR OTHER FLAMMABLE VAPORS
OR LIQUIDS IN THE VICINITY OF
THIS OR ANY OTHER APPLIANCE.
WARNING: Electrical outlet wiring must comply with local building codes and other applicable
electrical system which has been under water.

4
Safety Information (continued)
REMOTE CONTROL
This device complies with Industry Canada license-exempt RSS standard(s). Operation is subject to the following
two conditions: (1) this device may not cause interference, and (2) this device must accept any interference,
including interference that may cause undesired operation of the device.
This Class (B) device complies with Part 15 of the FCC Rules and Canadian ICES-003. Operation is subject to the
following two conditions:
(1) This device may not cause harmful interference, and (2) this device must accept any interference received,
including interference that may cause undesired operation. There is no guarantee that interference will not occur
in a particular installation. If this equipment does cause harmful interference to radio or television reception, which
can be determined by turning the equipment o and on, the user is encouraged to try to correct the interference
by one or more of the following measures:
• Reorient or relocate the receiving antenna.
• Increase the separation between the equipment and receiver.
• Connect the equipment into an outlet on a circuit dierent from that to which the receiver is connected.
• Consult the dealer or an experienced radio/TV technician for help.
This remote control requires 1 Lithium Coin Cell Battery (size CR2025), which is included.
CAUTION: Changes or modications to this unit not expressly approved by the party responsible for compliance
could void the user’s authority to operate the equipment.
DO NOT mix old and new batteries.
DO NOT use rechargeable silver oxide cell batteries with remote control unit.
DO NOT mix alkaline, standard (Carbon-Zinc), or rechargeable (Nickel-Cadmium) batteries.
WARNING: Never attempt to disassemble or alter the product in any way not instructed by this manual.
This Product can expose you to chemicals including Diisononyl phthalate (DINP) which is known
to the State of California to cause cancer and Di-isodecyl phthalates (DIDP) which is known to
the State of California to cause birth defects or other reproductive harm.
WARNING

5
WHAT IS COVERED
period of one year from date of purchase, subject to the following conditions and limitations.
with the product. Any alteration, willful abuse, accident, or misuse of the product shall nullify this warranty. This
warranty is non-transferrable, and is made to the original owner, provided that the purchase was made through
an authorized supplier of the manufacturer.This warranty is limited to the repair or replacement of part(s) found to
be defective in material or workmanship, provided that such part(s) have been subjected to normal conditions
its discretion, fully discharge all obligations with respect to this warranty by refunding the wholesale price of the
defective part(s).
WHAT IS NOT COVERED
Any installation, labor, construction, transportation, or other related costs/expenses arising from defective part(s),
repair, replacement, or otherwise of same, will not be covered by this warranty, nor shall the manufacturer
assume responsibility for same. Further, the manufacturer will not be responsible for any incidental, indirect, or
consequential damages, except as provided by law.
All other warranties - expressed or implied - with respect to the product, its components and accessories, or any
obligations/liabilities on the part of the manufacturer are hereby expressly excluded. The manufacturer neither
assumes, nor authorizes any third party to assume, on its behalf, any other liabilities with respect to the sale of this
product. The warranties as outlined within this document do not apply to nonmanufacturer accessories used in
conjunction with the installation of this product.
Make sure you have your warranty, your sales receipt, and the model/serial number of your product.
DO NOT ATTEMPT TO DO ANY SERVICE WORK YOURSELF. PLEASE CONTACT CUSTOMER SERVICE AT:
1 Year Warranty
UNINEO.INC
E-mail: [email protected]

6
Pre-Installation
PLANNING INSTALLATION
7RDYRLGVFUDWFKLQJWKHÀQLVKDVVHPEOHWKHSURGXFWRQDVRIWQRQDEUDVLYHVXUIDFHVXFKDVFDUSHWRUFDUGERDUG
$VVHPEO\RIWKLVSURGXFWPD\UHTXLUHPRUHWKDQRQHSHUVRQ
HARWARE INCLUDED
Note: Hardware not shown to actual size.
PACKAGE CONTENTS
AA
A B
Safety Goggles Phillips screwdriver
TOOLS REQUIRED
PART DESCRIPTION QUANTITY
AA Screws (ST4) 4
PART DESCRIPTION QUANTITY
A Fireplace Insert 1
B Remote Control 1

7
Operation
127(:KHQWKHKHDWIXQFWLRQLVXVHGIRUWKHÀUVWWLPHDVOLJKWRGRUPD\
be present. This is normal and should not occur again unless the heater is
not used for an extended period of time.
USING THE CONTROL PANEL
1. Check that the heater outlet grill is not covered or obstructed in
anyway, and make sure the power to the unit is switched on.
2. 7KHÀUHSODFHFDQEHDFFHVVHGLQWZRZD\V8VLQJWKHWRXFKSDG
control panel, or using the multifunction remote control unit.
3. 3UHVVWKHDSSURSULDWHEXWWRQWRRSHUDWH\RXUÀUHSODFH
1. Main Power Button: This button supplies power to
DOORIWKHÀUHSODFHIXQFWLRQV,WPXVWEHWXUQHGRQ
IRUWKHÀUHSODFHWRZRUN
2. Heater Control Button: This button controls the
heater ON/OFF. When the temperature unit is
VHWDV¶)µRU´&µWKHWHPSHUDWXUHVFRSHDUHDV
follows:
´)µ )DKUHQKHLWWHPSHUDWXUH))))
)))))))))
´&µ &HOVLXVWHPSHUDWXUH&&&&
&&&&&&&&
&&
3. Flame Control Button: This button controls the
EULJKWQHVVRIWKHÁDPHHIIHFWZLWKVHWWLQJVDW
+LJK0HGLXPDQG/RZ:KHQWKHORJVHWLVÀUVW
WXUQHGRQWKHÁDPHZLOOFRPHRQDWWKHKLJKHVW
VHWWLQJ7KHORJVHWZLOOUHPHPEHUWKHODVWÁDPH
VHWWLQJXVHGDQGLQODWHUXVHWKHÁDPHEULJKWQHVV
will start at that setting, unless power to the unit
KDVEHHQLQWHUUXSWHG(DFKWLPHWKHÁDPHEXWWRQ
LVSUHVVHGWKHÁDPHEULJKWQHVVGHFUHDVHV7KH
RQO\ZD\WRWXUQRIIWKHÁDPHHIIHFWFRPSOHWHO\LV
to turn off the main power button (1).
4. Timer Button: This button controls the ON/OFF
and 8-time setting from 1 H to 8 H. When the
7LPHULVÀUVWWXUQHGRQLWZLOOFRPHRQDWWKH
shortest time setting (1 H). Each time the Timer
button is pressed, the time increases 1 hour,
up to the longest setting (8 hours). Once the
VHWWLPHH[SLUHVDOOÀUHSODFHIXQFWLRQVZLOOEH
automatically turned off.
5. Fahrenheit/Celsius Display: This button displays F
(Fahrenheit) or C (Celsius) depending on how the
WHPSHUDWXUHPRGHLVVHW:KHQWKHÀUHSODFHLV
turned on, the Fahrenheit (F) temperature will be
displayed. To switch from Fahrenheit to Celsius, or
vise-versa, when the HEATER is ON, hold HEATER
&21752/EXWWRQIRUVHFRQGV7KHÀUHSODFH
will remember the last temperature mode
setting, and in later use, the display will start at
that setting, unless power to the unit has been
interrupted.
6. Temperature/Timer Display: This LED display
shows the set point for the temperature and
timer functions. When either of these functions
LVDFWLYDWHGWKHGLVSOD\UHÁHFWVWKHVHWSRLQW
IRUÀYHVHFRQGVDQGWKHQIDGHVWREODFN$Q\
change in the set point of the temperature or
timer will reactivate the display, which again
IDGHVDIWHUÀYHVHFRQGV
1
4
3
2
65 4231

8
Maintenance
DANGER: Disconnect power before servicing.
:$51,1*$Q\HOHFWULFDOUHZLULQJRIWKLVDSSOLDQFHPXVWEHGRQHE\DTXDOLÀHGHOHFWULFLDQ7KLV
wiring must be done in accordance with local codes and/or in Canada with the current CSA C22.1
Canadian Electrical Code, and for US installations, the National Electrical Code ANSI/NFPA NO 70.
WARNING: If repairing or replacing any electrical component or wiring, the original wire routing, color
coding and securing locations must be followed.
GLASS INFORMATION
1. Under no circumstances should this product be operated with a broken or chipped glass panel.
2. Do not strike or slam the glass.
3. Do not use abrasive cleansers to clean the glass. Make sure the glass is cool to the touch.
4. This product uses tempered glass. Replacement of the glass supplied by the manufacturer should be done
E\TXDOLÀHGDXWKRUL]HGVHUYLFHSHUVRQQHORQO\
MAINTENANCE OF MOTORS
1. Always disconnect the appliance from the main power supply and allow it to cool before any servicing
operation.
2. 7KHPRWRUVXVHGRQWKHIDQKHDWHUDQGÁDPHEORZHUDUHSUHOXEULFDWHGIRUH[WHQGHGEHDULQJOLIHDQG
UHTXLUHQRIXUWKHUOXEULFDWLRQ+RZHYHUSHULRGLFFOHDQLQJYDFXXPLQJRIWKHDSSOLDQFHDURXQGWKHDLU
intake and exhaust, as well as the fan heater is reccomended. For heavy or continous use, periodic
FOHDQLQJPXVWEHGRQHPRUHIUHTXHQWO\,IWKHKHDWHUEORZVDOWHUQDWLQJFROGDQGZDUPDLUFKHFNWKHIDQ
IRUIUHHPRYHPHQWDQGIRUGHEULVUHVWULFWLQJDLUÁRZ,IWKHIDQGRHVQRWPRYHIUHHO\WKHXQLWEHWXUQHGRII
and fan replaced immiediately in order to prevent further damage to the unit.
REMOTE CONTROL INFORMATION
The infrared remote control relies on a line of sight and must be
SRLQWHG DW WKH ÁDPHVFUHHQ RI WKH ÀUHSODFH WR ZRUN 7KH UHPRWH
FRQWUROXQLWKDVWKHFRQWUROVUHTXLUHGWRWXUQ212))ERWKWKHPDLQ
power and the heater. If you prefer to use the touchpad control on
WKHÀUHSODFHXQLWLWVHOIRSHQWKHFRQWUROSDQHOVOLGLQJFRYHUWRDFFHVV
the touchpad buttons. The layout of the buttons on touchpads and
remote control unit can be seen on the previous page.
The plastic tab inside the battery
compartment MUST be removed
before the remote control will operate.
(Pull Tab)

9
Maintenance (continued)
Circuit Diagram
Care and Cleaning
DANGER: Disconnect power before servicing.
1. Always turn the heater OFF and unplug the power cord from the outlet before cleaning.
2. &OHDQLQJRIWKHFRQWUROSDQHOORFDWHGLQWKHXSSHUULJKWKDQGFRUQHURIWKHÀUHSODFHLVWREHGRQHRQO\
using a soft cloth, slightly dampened in water (if needed, a small amount of dish soap can be added to
the water) and dried using a clean, dry soft cloth. Cleaning of the screen diffuser is to be done using only
water and lint free cloth. DO NOT use any abrasive on the controls or the diffusing screen.
BATTERY REPLACEMENT
Please dispose of the used battery per municipal or provincial/state law.
BATTERY REPLACEMENT PROCEDURE: (SIZE CR2025)
THIS PRODUCT CONTAINS BATTERIES. IF SWALLOWED,
IT COULD CAUSE SEVERE INJURY OR DEATH IN JUST 2
HOURS. SEEK MEDICAL ATTENTION IMMEDIATELY.
Battery replacement instruction
CR2025
OPEN
PUSH
RELEASE

10
Troubleshooting
PROBLEM POSSIBLE CAUSE SOLUTION
not operate.
A circuit breaker is tripped or a fuse blown.
The ON/OFF switch is defective.
There is loose wiring.
120V outlet.
Check additional appliances on the circuit; ideally
circuit.
The power light is
effect is not visible. Light bulbs are not functioning.
Loose wiring
Refer to the operating instructions.
Refer to Replacing the Light Bulbs
The heater is not
operating.
Incorrect operation.
The heater switch is defective.
The heater assembly is defective.
There is loose wiring.
The vents are dirty or clogged.
Refer to the operating instructions.
Unplug the unit. Clear the vent area of dust and
debris. Wait ten minutes, plug the unit in again and
turn on the heater
There is excessive
noise when the
heater is operating.
Dirty or clogged blower.
The heater assembly is defective.
Refer to Maintenance of Motors in Care and Maintenance.
The power light is
ON but the ember
Light bulbs are not functioning.
Loose wiring.
Refer to Replacing the Light Bulbs
There is excessive
noise when the
heater is OFF.
against the housing.
servicing.

11
Service Parts
Part Description Part #
12 EF27900012AC
13 Logset EF27900013AC
14 Heater EF24900007AC
15 Synchronous Motor EF27900015AC
16 Power Cord & Connector EF27900016AC
17 Main Board EF27800017AC
18 Flame - LED EF27900018AC
19 Embedded - LED Strip EF27900019AC
20 Control Panel Circuit Board EF27900020AC
21 Remote Control EF33510AS-15
Part Description Part #
1 Top Panel EF27900001AC
2 Left Side Panel Assembly EF27900002AC
3 Right Side Panel Assembly EF27900003AC
4 Back Panel EF27900004AC
5 Trim Assembly EF27900005AC
6 Flame Panel EF27900006AC
7 Left Brick Side Panel EF27900007AC
8 Right Brick Side Panel EF27900008AC
9 Screen EF27900009AC
10 Handle EF27900010AC
11 Control Panel EF27900011AC

12
Table des matières
Mesures de sécurité
1. Lire toutes les instructions avant d’utiliser cet appareil de chauffage.
2. &HWDSSDUHLOGHFKDXIIDJHHVWFKDXGORUVTX·LOHVWXWLOLVp3RXUpYLWHUOHVEUOXUHVQHSDVWRXFKHUDX[VXUIDFHVFKDXGHV
GHO·DSSDUHLOjPDLQVQXHV$XEHVRLQXWLOLVHUOHVSRLJQpHVSRXUGpSODFHUO·DSSDUHLO*DUGHUOHVPDWLqUHVFRPEXVWLEOHV
comme les meubles, les oreillers, la literie, le papier, les vêtements et les rideaux à au moins 3 pi (0,9m) du pourtour de
O·DSSDUHLODYDQWF{WpVDUULqUH
3. ,OIDXWXVHUG·XQHH[WUrPHSUXGHQFHORUVTXHO·DSSDUHLOHVWXWLOLVpSDUGHVHQIDQWVRXGHVSHUVRQQHVKDQGLFDSpHVRX
ORUVTXHFHVGHUQLHUVVRQWjSUR[LPLWpHWTXHO·DSSDUHLOHVWODLVVpVDQVVXUYHLOODQFH
4. 'pEUDQFKHUWRXMRXUVO·DSSDUHLOORUVTX·LOQ·HVWSDVXWLOLVp
5. 1HSDVXWLOLVHUXQDSSDUHLOGHFKDXIIDJHSRXUYXG·XQFRUGRQG·DOLPHQWDWLRQRXG·XQHÀFKHHQGRPPDJpVQLDSUqV
XQHGpIDLOODQFHGHO·DSSDUHLOQLVLO·DSSDUHLOHVWWRPEpDXVRORXV·LODpWpHQGRPPDJpGHTXHOTXHIDoRQ5HWRXUQHU
O·DSSDUHLOGHFKDXIIDJHjXQDWHOLHUGHVHUYLFHDXWRULVpSRXUIDLUHHIIHFWXHUXQHYpULÀFDWLRQXQDMXVWHPHQWGHVV\VWqPHV
pOHFWULTXHVHWPpFDQLTXHVRXSRXUWRXWHUpSDUDWLRQ
6. 1HSDVXWLOLVHUjO·H[WpULHXU
7. &HWDSSDUHLOGHFKDXIIDJHQ·DSDVpWpFRQoXSRXUrWUHXWLOLVpGDQVXQHVDOOHGHEDLQXQHVDOOHGHODYDJHQLSRXUWRXW
DXWUHHQGURLWVLPLODLUHjO·LQWpULHXU1HMDPDLVSODFHUFHWDSSDUHLORLOSRXUUDLWRPEHUGDQVODEDLJQRLUHRXXQFRQWHQDQW
rempli d’eau.
8. 1HSDVDFKHPLQHUOHFRUGRQVRXVXQWDSLV1HSDVFRXYULUOHFRUGRQG·XQHPRTXHWWHRXG·XQWDSLVRXGHWRXWDXWUH
PDWpULDXVLPLODLUH'LVSRVHUOHFRUGRQjERQQHGLVWDQFHGHV]RQHVGHSDVVDJHjXQHQGURLWRLOQHULVTXHSDVG·rWUHXQ
obstacle.
9. 3RXUGpEUDQFKHUO·DSSDUHLOWRXUQHUODFRPPDQGHHQSRVLWLRQG·DUUrW2))SXLVGpEUDQFKHUODÀFKHGHODSULVHPXUDOH
10. Brancher à des prises mises à la terre seulement.
11. 1HODLVVHUDXFXQREMHWpWUDQJHUSpQpWUHUGDQVOHVRXYHUWXUHVGHYHQWLODWLRQRXG·pFKDSSHPHQWSRXUpYLWHUXQH
GpFKDUJHpOHFWULTXHXQLQFHQGLHHWOHVGRPPDJHVjO·DSSDUHLO
12. 3RXUpYLWHUOHVULVTXHVG·LQFHQGLHQHSDVREVWUXHUOHVSULVHVG·DGPLVVLRQG·pFKDSSHPHQWGHO·DLU1HSDVXWLOLVHUOH
PDQWHDXGHIR\HUVXUGHVVXUIDFHVVRXSOHVFRPPHXQOLWSRXUpYLWHUG·REVWUXHUOHVRXYHUWXUHV
13. 8QDSSDUHLOGHFKDXIIDJHHVWSRXUYXGHSLqFHVLQWHUQHVSURGXLVDQWGHVDUFVpOHFWULTXHVRXGHVpWLQFHOOHV1HSDVXWLOLVHU
O·DSSDUHLOGDQVXQHSLqFHRXGHO·HVVHQFHGHODSHLQWXUHRXGHVOLTXLGHVLQÁDPPDEOHVVRQWXWLOLVpVRXHQWUHSRVpV
14. Utiliser cet appareil de chauffage en suivant les instructions du manuel. Toute autre utilisation du produit non
UHFRPPDQGpHSDUOHIDEULFDQWSRXUUDLWrWUHjO·RULJLQHG·XQLQFHQGLHG·XQHGpFKDUJHpOHFWULTXHRXGHEOHVVXUHV
15. Toujours chauffe brancher directement dans une prise de courant / de la prise murale. Ne jamais utiliser avec une
rallonge ou du robinet d’alimentation relocatable (bande de sortie / puissance).
16. &HIR\HUpOHFWULTXHQ·HVWSDVFRQoXSRXUPXU´]pURµGHMHXHWRXLQVWDOODWLRQVDUPRLUHPHQXLVHULH$FFHVVLELOLWpSRXU
O·HQWUHWLHQHWODPDLQWHQDQFHGRLWrWUHSRVVLEOHVDQVSHUWXUEHUOHVVWUXFWXUHVGHFRQVWUXFWLRQHWRXÀQLWLRQVDUPRLUH
menuiserie.
17. CONSERVER CES INSTRUCTIONS
7DEOHGHVPDWLqUHV .........................12
0HVXUHVGHVpFXULWp ........................12
Instructions d’utilisateur ....................13
Instructions de mise à la terre ...............13
Positionnement de foyer ...................13
Installation du manteau de foyer ............13
6SpFLÀFDWLRQVGHIR\HU.....................13
%UDQFKHPHQWpOHFWULTXH ...................13
7pOpFRPPDQGH...........................14
Garantie..................................15
3UpLQVWDOODWLRQ .............................16
3ODQLÀFDWLRQGHO·LQVWDOODWLRQ................16
2XWLOVUHTXLV..............................16
0DWpULHOLQFOXV............................16
Contenu ................................16
Fonctionnement ...........................17
Maintenance..............................18
Information sur la verre.....................18
Entretien des motors .......................18
Remplacement de pile ....................19
6FKpPDpOHFWULTXH .........................19
Entretien et nettoyage ......................19
'pSDQQDJH...............................20
3LqFHVGHUHFKDQJH........................21

13
Mesures de sécurité(suite)
INSTRUCTIONS D’UTILISATEUR
1. Toute réparation de cet appareil doit être effectuée par un per
2. service d’entretien doivent être remplacées des pièces d’origine seulement.
3. Le manteau de foyer doit être nettoyé avec un chiffon humide seulement.
IMPORTANT : Toujours débrancher le cordon d’alimentation avant de nettoyer l’unité. Ne pas utiliser de
détergents abrasifs pour nettoyer l’appareil.
4. Toujours débrancher l’appareil lorsqu’il n’est pas utilisé.
INSTRUCTIONS DE MISE À LA TERRE
Cet appareil fonctionne sous une tension de 120 volts. Le cordon
de l’adaptateur doit être raccordée à une mise à la terre permanente
(prise de courant mise à la terre). L’adaptateur ne doit pas être utilisé si
une prise à trois fentes mise à la terre est disponible. (Notez: Utilisation d’un
adapteur est interdit au Canada)
POSITIONNEMENT DE FOYER
Lors du choix de l’emplacement de votre nouveau foyer, s’assurer d’observer les recommandations générales
suivantes. De même, pour une apparence optimale, ne pas exposer le foyer directement au soleil. Il est sécuritaire
de placer le manteau de foyer électrique à bonne distance de toute matière combustible.
INSTALLATION DU MANTEAU DE FOYER
Prière de consulter les instructions détaillées qui
accompagnent votre manteau de foyer.
BRANCHEMENT ÉLECTRIQUE
de cet appareil. De préférence, le manteau de foyer doit être un circuit indépendant et dédié, car les autres
appareils sur un même circuit risqueraient de déclencher le disjoncteur lors du fonctionnement de l’appareil
de chauffage. L’unité propose de série un cordon d’alimentation de 6 pi (1,8 m) raccordé derrière le manteau
directement dans une prise de courant / de la prise murale. Ne jamais utiliser avec une rallonge ou du robinet
d’alimentation relocatable (bande de sortie / puissance).
SPÉCIFICATIONS
Manteau de foyer
dimension (w x d x h)
27.75” x 8” x 17.25”
70.4 cm x 20.2 cm x 44 cm
Tension 120 V
Fréquence 60 Hz
Puissance • Intensité 1440W • 12A
Broche de
miseàlaterre
Couvercle d’une boîte
de prises mises àlaterre
Adaptateur
Éléments de mise
àlaterres
Vis àmétal
Couvercle d’une boîte
de prises mises àlaterre
B
C
A
NE PAS ENTREPOSER NI
UTILISER DE L’ESSENCE OU TOUTE
AUTRE SUBSTANCE OU VAPEUR
INFLAMMABLE À PROXIMITÉ DE CET
APPAREIL.
AVERTISSEMENT : La construction et le câblage de la prise électrique doivent être conformes aux
codes du bâtiment locaux et autres règlements applicables pour réduire le risque d’incendie, de
choc électrique et de blessures aux personnes.
AVERTISSEMENT : Ne pas utiliser l’appareil si l’un de ses composants a été en contact avec de l’eau.
pièce du système électrique ayant été en contact avec de l’eau.

14
Mesures de sécurité(suite)
TÉLÉCOMMANDE
Le présent appareil est conforme aux CNR d’Industrie Canada applicables aux appareils radio exempts de
licence. L’exploitation est autorisée aux deux conditions suivantes : (1) l’appareil ne doit pas produire de
brouillage, et (2) l’utilisateur de l’appareil doit accepter tout brouillage radioélectrique subi, même si le brouillage
est susceptible d’en compromettre le fonctionnement.
Ce dispositif est conforme aux regles de Ia FCC Partie 15 fonctionnement est soumis aux deux conditions suivantes:
(1) Ce dispositif ne peut pas provoquer d’interferences nuisibles, et (2) cet appareil doit accepter toute interference
regue, y compris les interferences qui peuvent provoquer un fonctionnement indesirable. il n’existe aucune
garantie contre des interférences se produisant dans le cadre d’une installation particulière. Si l’équipement
engendre des interférences nuisant à la réception radio ou télévisuelle (ce qui peut être déterminé en le mettant
hors tension, puis en le remettant sous tension), vous êtes encouragé à tenter d’y remédier en ayant recours à
l’une des mesures suivantes:
• Réorienter ou déplacer l’antenne réceptrice.
• Augmenter la séparation entre l’équipement et le récepteur.
• Brancher l’équipement à une prise sur un circuit différent de celui sur lequel le récepteur est branché.
•Consulter le revendeur ou un technicien radio/TV expérimenté pour obtenir de l’aide.
La télécommande nécessite 1 pile au lithium (type CR2025), qui est incluse.
l’entite responsable de Ia conformite pourraient annuler l’autorisation de l’utilisateur a utiliser l’equipement.
N’UTILISEZ PAS de vieilles piles avec des piles neuves.
N’UTILISEZ PAS de piles rechargeables à oxyde d’argent-cadmium avec la télécommande.
N’UTILISEZ PAS de piles alcalines, ordinaires (carbone-zinc)ou rechargeables (nickel-cadmium)ensemble.
NE JETEZ PAS les piles au feu. Une mise au rebut inadéquate pourrait causer une fuite ou faire exploser les piles.
AVERTISSEMENT: N’essayez jamais de démonter ou changer le produit de quelque façon non
instruit par ce manuel.
Ce produit peut vous exposer à des agents chimiques, dont le phtalate de diisononyle (DINP),
reconnu par l’État de Californie comme pouvant causer le cancer, ainsi que les phtalates
diisodécyle (DIDP) reconnus par l’État de Californie comme pouvant causer des anomalies
congénitales et autres dommages au système reproducteur.
AVERTISSEMENT

15
GarantieLimitée D’un An
CE QUI EST COUVERT
Le fabricant garantit que votre nouveau foyer électrique est exempt de défauts de matériau et de fabrication
pour une période d’un an à compter de la date d’achat, sous réserve des conditions et limitations suivantes.
Ce foyer électrique doit être installé et fonctionner en tout temps conformément aux instructions fournies avec
le produit. Toute altération, abus volontaire, accident ou mauvais usage du produit annulera cette garantie.
Cette garantie n’est pas transférable et est faite au propriétaire d’origine, à condition que l’achat a été
effectué par l’intermédiaire d’un fournisseur agréé du fabricant.Cette garantie est limitée à la réparation ou au
remplacement de la pièce qui comporte un défaut de matériel ou de fabrication, à condition que cette pièce
l’inspection du fabricant. Le fabricant peut, à sa discrétion, assumer pleinement toutes ses obligations à l’égard
de cette garantie en remboursant le prix de gros de la pièce défectueuse.
CE QUI N’EST PAS COUVERT
Tous frais d’installation, de main-d’œuvre, de fabrication, de transport ou tous frais ou dépenses connexes
occasionnés par des pièces défectueuses, leur réparation, leur remplacement ou toute autre action de nature
similaire, ne sont pas couverts par cette garantie, et le fabricant ne peut en aucun cas en être tenu responsable.
En outre, le fabricant ne pourra être tenu responsable de tous dommages immatériels ou indirects, sauf dans les
cas prévus par la loi.
Toutes les autres garanties - expresses ou implicites - en ce qui a trait au produit, ses composants et accessoires,
ou toutes les obligations ou responsabilités de la part du fabricant sont expressément exclues. Le fabricant
n’assume, ni n’autorise aucun tiers à assumer en son nom toute autre passif à l’égard de la vente de ce produit.
Les garanties décrites dans le présent document ne s’appliquent pas aux accessoires, autres que ceux du
fabricant, utilisés en conjonction avec l’installation de ce produit.
Cette garantie ne couvre pas les ampoules incluses avec le foyer.
autres produits chimiques nuisibles; le foyer est soumis à des périodes prolongées d’humidité ou de condensation;
Assurez-vous d’avoir votre garantie, votre reçu de vente et le modèle/numéro de série de votre produit.
NE PAS TENTER DE FAIRE TOUT TRAVAIL D’ENTRETIEN VOUS-MÊME. COMMUNIQUEZ AVEC LE SERVICE À LA
CLIENTÈLE AU NUMÉRO SANS FRAIS SUIVANT:
UNINEO.INC
E-mail: [email protected]

16
Pré-installation
PLANIFICATION DE L’INSTALLATION
3RXUpYLWHUG·HQGRPPDJHUFHSURGXLWDVVHPEOHUVXUXQHVXUIDFHGRXFHQRQDEUDVLYHFRPPHGXWDSLVRXGX
FDUWRQ/·DVVHPEODJHGHFHSURGXLWSHXWQpFHVVLWHUSOXVG·XQHSHUVRQQH
/XQHWWHVGHVpFXULWp Tournevis Phillips
OUTILS REQUIS
MATÉRIEL INCLUS
0DWpULHOQRQUHSUpVHQWpjODWDLOOHUpHOOH
CONTENU
AA
PIÈCE DESCRIPTION QUANTITÉ
AA Vis (ST4) 4
PIÈCE DESCRIPTION QUANTITÉ
A)R\HUpOHFWULTXH 1
B7pOpFRPPDQGH 1
A B

17
Fonctionnement
5(0$548(/RUVTXHODIRQFWLRQGHFKDXIIDJHHVWXWLOLVpSRXUODSUHPLqUH
IRLVXQHOpJqUHRGHXUSHXWrWUHSUpVHQWH&HFLHVWQRUPDOHWQHGHYUDLW
SDVVHSURGXLUHjQRXYHDXjPRLQVTXHOHFKDXIIDJHQHVRLWSDVXWLOLVp
SHQGDQWXQHSpULRGHGHWHPSVSURORQJpH
UTILISATION DU PANNEAU DE COMMANDE
1. 9pULÀHUTXHOHJULOGHVRUWLHGHO·DSSDUHLOGHFKDXIIDJHQ·HVWSDV
FRXYHUWRXREVWUXpGHTXHOTXHIDoRQHWV·DVVXUHUTXHO·DSSDUHLO
HVWDOOXPp
2. /HIR\HUSHXWrWUHDFFHVVLEOHGHGHX[PDQLqUHVO·DLGHGX
SDYpWDFWLOHGXSDQQHDXGHFRPPDQGHRXjO·DLGHGHOD
WpOpFRPPDQGH
3. $SSX\HUVXUOHERXWRQDSSURSULpSRXUIDLUHIRQFWLRQQHUYRWUH
foyer :
1. ,QWHUUXSWHXUJpQpUDO&HERXWRQDOLPHQWHWRXWHV
OHVIRQFWLRQVGXIR\HU,OGRLWrWUHDFWLYpSRXUTXH
le foyer fonctionne.
2. Bouton de commande de l’appareil de
chauffage : Ce bouton commande le
FKDXIIDJH212))/RUVTXHO·XQLWpGH
WHPSpUDWXUHHVWGpÀQLHFRPPH´)µRX´&µOD
SRUWpHGHODWHPSpUDWXUHVRQWOHVVXLYDQWHV
´)µ 7HPSpUDWXUH)DKUHQKHLW)))
)))))))))
)
´&µ 7HPSpUDWXUH&HOVLXV&&&
&&&&&&&&
&&&
3. %RXWRQGHFRPPDQGHGHODÁDPPH&HERXWRQ
GHFRPPDQGHSHUPHWGHUpJOHUO·LQWHQVLWp
OXPLQHXVHGHVÁDPPHVpOHYpHPR\HQQHHW
IDLEOH/HVÁDPPHVVRQWUpJOpHVVXUO·LQWHQVLWp
OXPLQHXVHPD[LPDOHORUVGHODSUHPLqUHPLVH
HQPDUFKHGXMHXGHEFKHV/HMHXGHEFKHV
FRQVHUYHVRQUpJODJHGHÁDPPHHQPpPRLUH
HWLOXWLOLVHODPrPHLQWHQVLWpOXPLQHXVHORUVGX
prochain usage, à moins d’une coupure de
FRXUDQW,OHVWSRVVLEOHGHGLPLQXHUO·LQWHQVLWp
OXPLQHXVHGHVÁDPPHVHQDSSX\DQWVXUFH
bouton. Seul l’interrupteur principal (1) permet
G·pWHLQGUHFRPSOqWHPHQWOHVÁDPPHV
4. Bouton de minuterie : Ce bouton commande
OHVIRQFWLRQVGHPDUFKHHWG·DUUrWDLQVLTXH
UpJODJHVG·KHXUHDOODQWGH+j+/RUVTXH
vous mettez la minuterie en marche pour la
SUHPLqUHIRLVOHUpJODJHHVWGpÀQLjKHXUH
&KDTXHIRLVTXHOHERXWRQGHPLQXWHULHHVW
HQIRQFpOHUpJODJHDXJPHQWHGHKHXUH
MXVTX·DXUpJODJHOHSOXVORQJKHXUHV8QHIRLV
ODGXUpHDWWHLQWHWRXWHVOHVIRQFWLRQVGHIR\HU
VHURQWDXWRPDWLTXHPHQWGpVDFWLYpHV
5. $IÀFKDJH)DKUHQKHLW&HOVLXV&HERXWRQDIÀFKH
F (Fahrenheit) ou C (Celsius) en fonction du
UpJODJHGXPRGHGHWHPSpUDWXUH/RUVTXH
OHIR\HUHVWDOOXPpODWHPSpUDWXUH)DKUHQKHLW
)V·DIÀFKH3RXUEDVFXOHUGH)DKUHQKHLWj
&HOVLXVRXYLFHYHUVDORUVTXHO·$33$5(,/'(
CHAUFFAGE est en marche, maintenir le bouton
GH&200$1'('8&+$8))$*(HQIRQFp
pendant 10 secondes. Le foyer conserve son
GHUQLHUUpJODJHGHWHPSpUDWXUHHQPpPRLUHHW
jPRLQVG·XQHFRXSXUHGHFRXUDQWGpPDUUHj
FHUpJODJHjODSURFKDLQHXWLOLVDWLRQ
6. $IÀFKDJHGH7HPSpUDWXUH0LQXWHULH&HW
DIÀFKHXU'(/DIÀFKHOHSRLQWGHFRQVLJQHSRXU
OHVIRQFWLRQVGHWHPSpUDWXUHHWGHPLQXWHULH
/RUVTXHO·XQHRXO·DXWUHGHFHVIRQFWLRQVHVW
DFWLYpHO·DIÀFKDJHUHÁqWHOHSRLQWGHFRQVLJQH
SHQGDQWFLQTVHFRQGHVSXLVV·HVWRPSH7RXW
changement dans le point de consigne de
ODWHPSpUDWXUHRXGHODPLQXWHULHUpDFWLYHUD
O·DIÀFKDJHTXLV·HVWRPSHUDDSUqVFLQT
secondes.
1
4
3
2
65 4231

18
Maintenance
'$1*(5'pEUDQFKHUO·DOLPHQWDWLRQpOHFWULTXHDYDQWG·HIIHFWXHUOHVWUDYDX[G·HQWUHWLHQ
$9(57,66(0(177RXWUHFkEODJHGHFHWDSSDUHLOGRLWrWUHHIIHFWXpSDUXQpOHFWULFLHQDJUpp9HLOOH]j
FHTXHOHFkEODJHVRLWHIIHFWXpFRQIRUPpPHQWDX[FRGHVORFDX[RXDX&DQDGDjODSOXVUpFHQWH
version du Code canadien de l’électricité, CSA C22.1 ou,dans le cas des installations aux É.-U., au
code national de l’électricité, ANSI/NFPA N° 70.
$9(57,66(0(17(QFDVGHUpSDUDWLRQRXGHUHPSODFHPHQWG·XQFRPSRVDQWRXG·XQFkEOHpOHFWULTXH
UHVSHFWH]O·DFKHPLQHPHQWGHVFkEOHVOHVFRGHVGHFRXOHXUHWOHVHPSODFHPHQWVGHÀ[DWLRQG·RULJLQH
INFORMATION SUR LA VERRE
1. ,OQHIDXWHQDXFXQFDVTXHFHSURGXLWIRQFWLRQQHDYHFOHYHUUHFDVVp
2. 1HSDVIUDSSHURXFODTXHUOHYHUUH
3. Ne pas utiliser de produits abrasifs pour le nettoyage du verre.
4. &HSURGXLWXWLOLVHGXYHUUHWUHPSp/HUHPSODFHPHQWGXYHUUHIRXUQLSDUOHIDEULFDQWGRLWrWUHHIIHFWXpH
SDUXQWHFKQLFLHQTXDOLÀp
ENTRETIEN DES MOTEURS
1. 7RXMRXUVGpEUDQFKHUO·DSSDUHLOGHO·DOLPHQWDWLRQpOHFWULTXHSULQFLSDOHHWOHODLVVHUUHIURLGLUDYDQWWRXW
entretien.
2. /HVPRWHXUVXWLOLVpVVXUOHUDGLDWHXUGXYHQWLODWHXUHWODVRXIÁDQWHGHÁDPPHRQWpWpSUpJUDLVVpVSRXU
SURORQJHUODGXUpHGHVURXOHPHQWVHWQ·H[LJHQWDXFXQDXWUHJUDLVVDJH,OHVWWRXWHIRLVUHFRPPDQGpGH
QHWWR\HUO·DSSDUHLOHWGHSDVVHUO·DVSLUDWHXUSpULRGLTXHPHQWDXWRXUGHODSULVHG·DLUGHODVRUWLHG·DLUHWGX
UDGLDWHXUGXYHQWLODWHXU1HWWR\HUSOXVIUpTXHPPHQWO·DSSDUHLOHQFDVG·XWLOLVDWLRQLQWHQVLYHRXFRQWLQXH
6LO·DSSDUHLOGHFKDXIIDJHSURSXOVHHQDOWHUQDQFHGHO·DLUIURLGHWGHO·DLUFKDXGYHXLOOH]YpULÀHUVLOH
YHQWLODWHXUWRXUQHOLEUHPHQWRXVLGHVGpEULVREVWUXHQWODFLUFXODWLRQG·DLU6LOHYHQWLODWHXUQHWRXUQHSDV
OLEUHPHQWPHWWUHO·DSSDUHLOKRUVIRQFWLRQSXLVUHPSODFHULPPpGLDWHPHQWOHYHQWLODWHXUSRXUpYLWHUWRXW
DXWUHGRPPDJHjO·pTXLSHPHQW
INFORMATIONS SUR LA TÉLÉCOMMANDE
/D WpOpFRPPDQGH LQIUDURXJH IRQFWLRQQH DYHF XQH OLJQH GH YLVpH
HWGRLWrWUHSRLQWpHVXUODÁDPPHpFUDQGXIR\HUSRXUIRQFWLRQQHU
/DWpOpFRPPDQGHGLVSRVHGHVFRPPDQGHVUHTXLVHVSRXUDFWLYHU
GpVDFWLYHUO·DOLPHQWDWLRQSULQFLSDOHHWOHFKDXIIDJH6LYRXVSUpIpUH]
XWLOLVHUOHSDYpWDFWLOHVXUOHIR\HURXYUH]OHFRXYHUFOHFRXOLVVDQWGX
SDQQHDXGHFRPPDQGHSRXUDFFpGHUDX[ERXWRQVGXSDYpWDFWLOH
/DGLVSRVLWLRQGHVERXWRQVVXUODSDYpWDFWLOHHWODWpOpFRPPDQGHVH
UHWURXYHVXUODSDJHSUpFpGHQWH
,O)$87UHWLUHUODODQJXHWWHHQSODVWLTXH
GXFRPSDUWLPHQWGHODSLOHSRXUTXHOD
WpOpFRPPDQGHIRQFWLRQQH
(Tirer sur la languette)

19
Maintenance (suite)
6FKpPDpOHFWULTXH
'$1*(5'pEUDQFKHUO·DOLPHQWDWLRQpOHFWULTXH
avant d’effectuer les travaux d’entretien.
Entretien et nettoyage
1. 7RXMRXUVPHWWUHOHFKDXIIDJHj$55È7HWGpEUDQFKHUOHFRUGRQG·DOLPHQWDWLRQGHODSULVHVHFWHXUDYDQWGH
le nettoyer.
2. /HQHWWR\DJHGXSDQQHDXGHFRPPDQGHVLWXpGDQVOHFRLQVXSpULHXUGURLWGXIR\HUGRLWXQLTXHPHQW
rWUHHIIHFWXpDYHFXQFKLIIRQGRX[OpJqUHPHQWLPELEpG·HDXVLQpFHVVDLUHXQHSHWLWHTXDQWLWpGHVDYRQ
GHYDLVVHOOHSHXWrWUHDMRXWpjO·HDXHWVpFKpHQXWLOLVDQWXQFKLIIRQSURSUHVHFHWGRX[/HQHWWR\DJH
GHO·pFUDQGHGLIIXVLRQGRLWrWUHXQLTXHPHQWHIIHFWXpDYHFGHO·HDXHWXQFKLIIRQQRQSHOXFKHX[1(3$6
XWLOLVHUG·DEUDVLIVVXUOHVFRPPDQGHVHWO·pFUDQGHGLIIXVLRQ
REMPLACEMENT DE PILE
6HLOYRXVSODvWMHWH]SDVODSLOHXWLOLVpHSDUODORLPXQLFLSDORXSURYLQFLDOpWDW
PROCÉDURE DE REMPLACEMENT DES PILES : (FORMAT CR2025)
CET ARTICLE CONTIENT LES PILES. DE GRAVES BLESSURES
OU LA MORT POURRAIENT SUIVRE DANS LES DEUX
HEURES SUIVANT L’INGESTION. DEMANDER L’AIDE DE
PROFESSIONNELS DE LA SANTÉ SUR LE CHAMP.
Instructions de remplacement de pile
CR2025
OUVRIR
POUSSER
RELÂCHER

20
Dépannage
PROBLÈME CAUSE POSSIBLE SOLUTION
Le foyer ne
fonctionne pas.
Le foyer n’est pas branché.
Un disjoncteur est déclenché ou un fusiblea
sauté.
L’interrupteur MARCHE/ARRÊT est défectueux.
Le câblage est desserré.
S’assurer que le foyer est branché dans une prise
standard de 120 V.
même circuit. Idéalement, le foyer doit être installé
sur un circuit dédié de 15 A.
Le voyant d’alimentation
est ALLUMÉmais l’effet
Le foyer ne fonctionne pas correctement.
Les ampoules ne fonctionne pas.
Câblage desserré.
Consulter le mode d’emploi.
Se référer à la section remplacement des ampoules.
Le chauffage ne
fonctionne pas.
Fonctionnement incorrect.
L’interrupteur du chauffage est défectueux.
L’ensemble de chauffage est défectueux.
Le câblage est desserré.
Lesévents sont sales ou bouchées.
Consulter le mode d’emploi.
Débrancher l’appareil. Vider les évents de toute
poussière et de débris. Attendre dix minutes,
brancher l’appareil à nouveau et mettre l’élément
de chauffage en marche.
Il y a trop de bruit lors du
fonctionnement du
chauffage.
Ventilateur sale ou bouché.
L’ensemble de chauffage est défectueux.
Se référer à la section Entretien des moteurs dans
Soins et entretien.
Le voyant d’alimentation
est ALLUMÉmais l’effet
Les ampoules ne fonctionne pas.
Câblage desserré.
Se référer à la section remplacement des ampoules.
Il y a du bruit excessif
active mais le chauffage
est éteint.
contre le boîtier.
est défectueux.
Ouvrir l’arrière du boîtier de foyer et repositionner
tension avant de procéder à l’entretien.
Table of contents
Languages:
Other BED BATH & Beyond Indoor Fireplace manuals
Popular Indoor Fireplace manuals by other brands
mFi
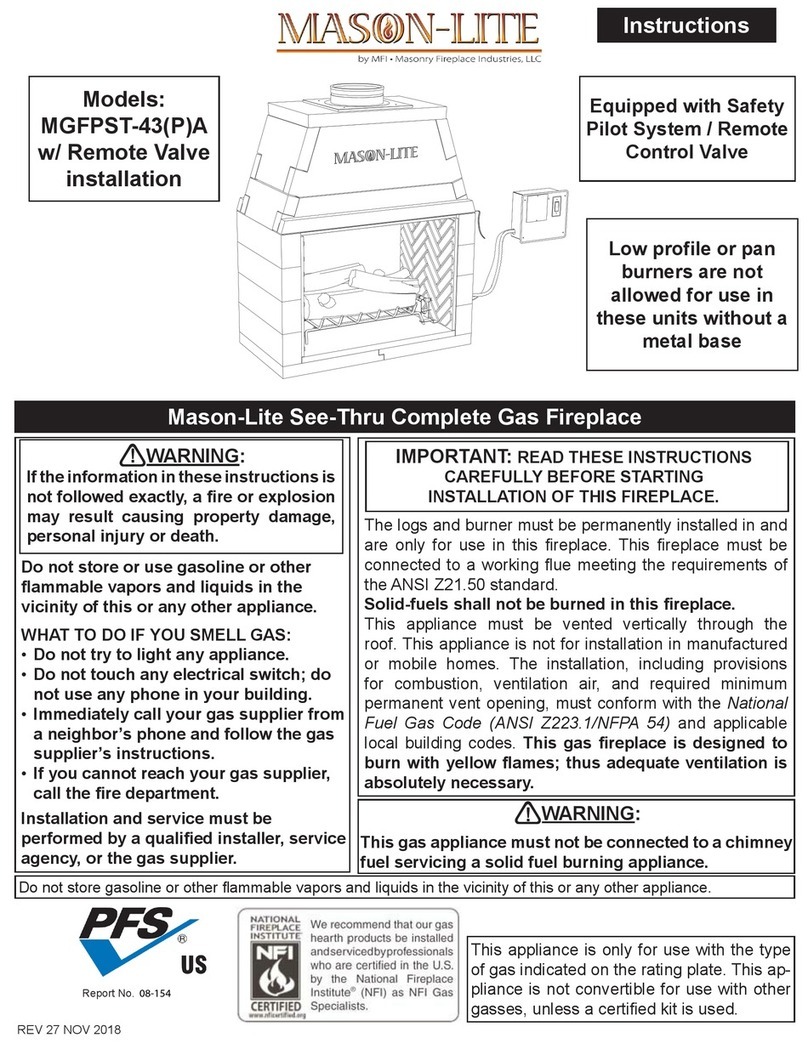
mFi Mason-Lite MGFPST-43PA instructions
Lennox
Lennox Country Winslow PI40 Installation and operation manual

Outdoor Lifestyles
Outdoor Lifestyles MONTANA MONTANA-36 owner's manual

Masuria
Masuria Juno 600 user manual

Superior Fireplaces
Superior Fireplaces WCT6840WS Installation and operation instructions
Element4
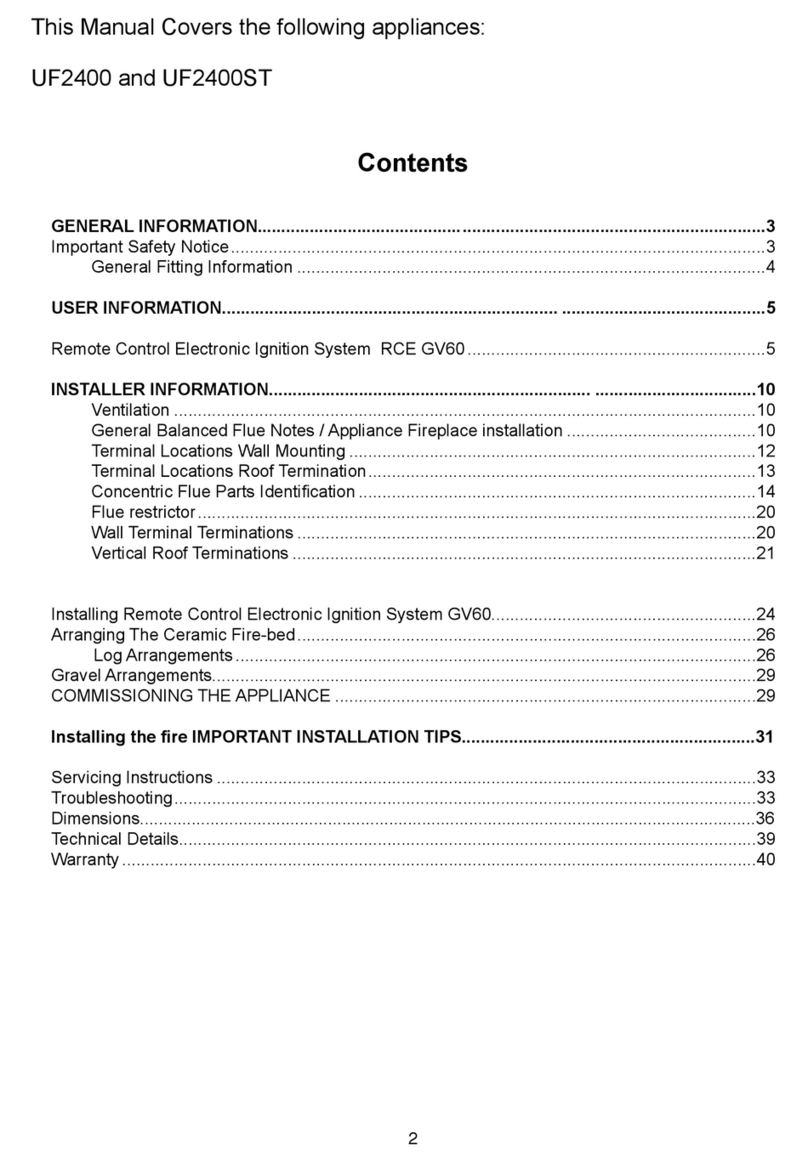
Element4 UF2400 manual
Regency
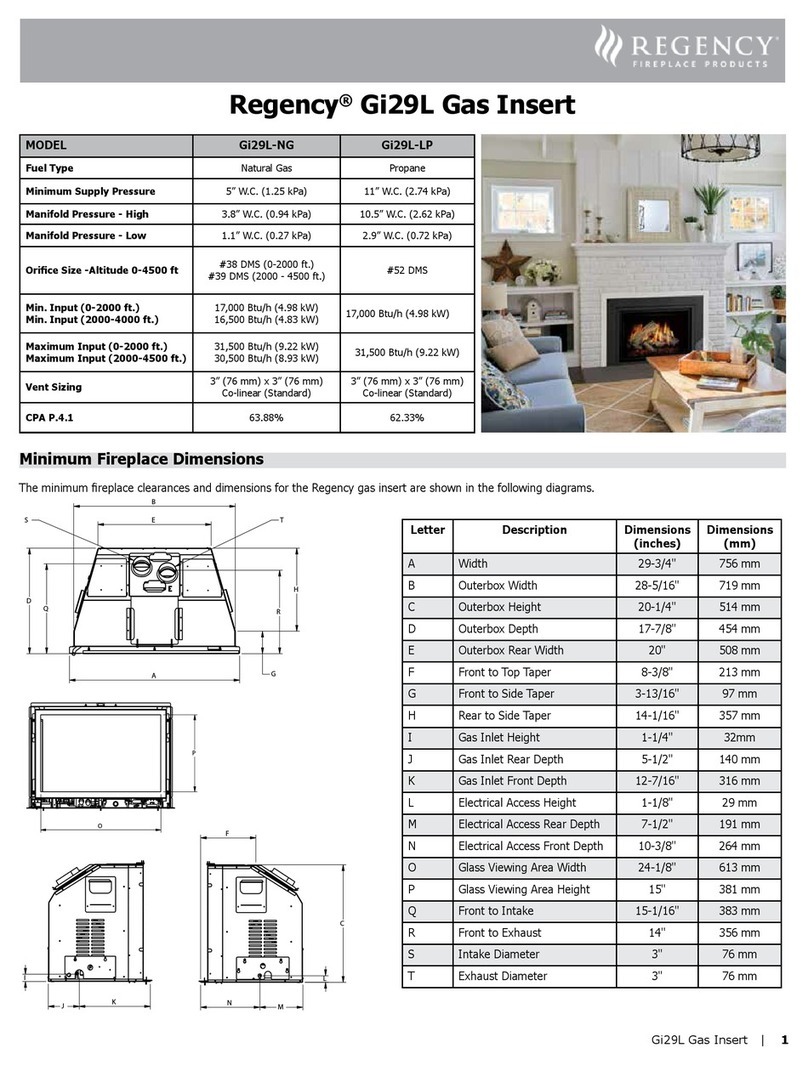
Regency Gi29L Series manual
decorflame
decorflame M100-25FAO instruction manual

Blaze King
Blaze King The Princess PI 1010A user manual

Lund
Lund EF480-E Installation and operating instructions
Martin
Martin SF42 Series Installation, operation and maintenance manual

European Home
European Home HVF-60-P Installation & operation owner's manual
