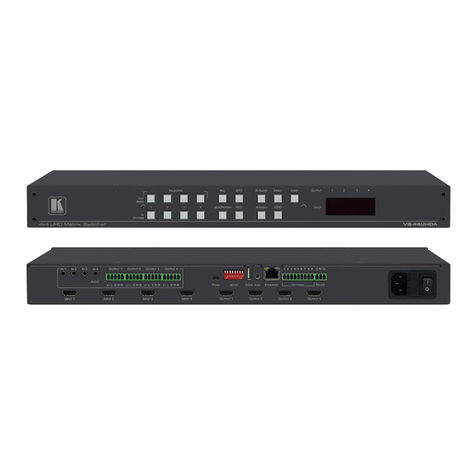
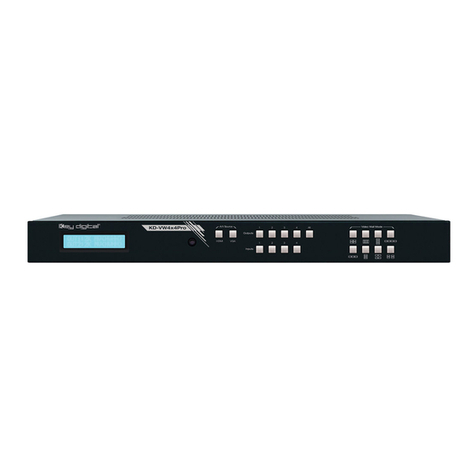
BEEK BS-1616HB User manual

4K HDMI Matrix Switch
Packing Contents
The complete matrix switcher package consists of the following
components:
1. 1x Matrix switcher
2. 1x power cable
3. 1x Power adapter
4. 1x RS232 serial communication line
5. 1x manual
6. 1x data CD
7. 1x certificate of conformity
8.1x warranty card
Please check to make sure that our products have not been damaged
during transportation. If there is any damage, please contact your
dealer directly.
Please read this manual thoroughly before use. Please use it
carefully during installation and installation to prevent damage to
the matrix switcher.

To ensure reliable use of equipment and the safety of personnel,
please observe the following when installing, using and maintaining:
1. Use a single-phase three-wire power supply with a protective
ground and ensure that the entire system uses the same
protective ground. The final grounding point of the matrix
should be connected to the ground and its grounding resistance
should be less than 1 ohm. The unprotected power supply
cannot be used and the grounding pin of the power cord cannot
be destroyed. Without perfect grounding, it is easy to cause
signal interference and instability, and may also cause
personal accidents due to leakage.
2. Do not use a two-pin plug to ensure that the input power of
the device is 220V50Hz AC.
3. When equipment movement or other work that requires power
failure is required, turn off all power, including turning off the
external power outlet and unplugging the power supply.
4. Non-professionals, please do not attempt to disassemble
the equipment case without permission. Do not repair it
yourself to avoid damage to internal precision parts, or
accidents or damage to the equipment.
5. When plugging in or unplugging the signal cable from the
device, the device needs to be powered off to avoid breaking
through the circuit. Damage caused by hot plugging is not
covered by the warranty.
6. Pay attention to moisture and dust, and the ambient temperature
should not be too high or too low.
7. Do not press heavy objects on the machine to avoid damage.
8. If you encounter any problems, please refer to this instruction
first. If you cannot solve the problem, please contact us.
Safe Operation Guide Contents
1.Overview......................................................................1
2.The panel button operation instructions..........................4
3.The software description...............................................9
4.Remote operation instructions......................................15
5.Common faults and maintenance..................................16

The HDM matrix switcher is a high-performance professional
switching device with embedded intelligent control, which is used
to switch each audio and video input signal synchronously or
asynchronously to any output channel of audio and video.
The unique processing method is adopted, which greatly improves
the switching speed of the device. Flexible control mode, long-life
button panel operation, large-screen dot-matrix LCD screen displays
various information, provides standard RS-232 communication
interface, convenient for users and various remote control devices
(such as Crestron, AMX, CREATOR, etc.) In conjunction with the
infrared remote control device (optional).
HDMI matrix switchers are mainly used in radio and television
engineering, multimedia conference halls, large-screen display
engineering, television teaching, command and control centers
and other places.
1.Overview
HDMI Matrix Panel Description
1) Number keys
Input and output channel selection keys for setting the input
and output channels of audio and video signals or for status
recall or for numbers saving, etc.
2) Function keys
●SAVE——LCD display save button
Press the SAVE key to save the corresponding relationship
between the input channel and the output channel of the
LCD display.
● RECALL - call the select button
Call the saved input and output correspondence.
●EDID——EDID learning button
Connect the screen that needs to be learned to the last output
interface (OUT interface), press the EDID button, the button
panel will automatically prompts the input source that can
be learned.
For example: to learn the EDID information of a certain screen
to the first input
1. Connect the screen that needs to be learned to the last
output of the machine.
2. Press the EDID button;
3. Press the input 1 button, (you can select multiple inputs
at the same time, support Simultaneously learn to all the inputs)
4. Wait for the EDID button stop flashing automatically.
5.learning is complete, restart the machine
●MENU——Menu button
Buzzer sound switch, host address code, language setting, etc.
●ALL - "All" command execution button
Switch selection, execute all switching commands

●OTO - shortcut corresponding display button
When the OTO button is pressed, the input channel and the
output channel are displayed one-to-one (for example, the
first port is displayed on the first screen).
●Display
System Monitor - A liquid crystal display that displays the
current information of the host.
●Interface
INPUT-- HDM video input port, using HD-15Pin interface,
used to connect HD-15Pin video interface peripherals, such
as PC, DVD, HD player.
OUT PUT-- HDMI Video output port, using HD-15Pin interface
, used to connect HD-15Pin video interface peripherals, such
as monitors, Tv , projectors, etc.
The HDM connectors at both ends of each signal line must
correspond, otherwise there will be color loss or no signal
output.
RS232-N/RS232-OUT - Provides two independent RS-232
interfaces for connecting to a computer or central control
device to control the matrix system.
AC220v 50/60Hz—System power input port, supporting
AC100~240V 50/60Hz input.
●Other
IR—multi-function infrared remote control receiver port.
2.The Panel Button Operation Instructions
This manual uses the HDMI0808 matrix as an example to
explain the usage. For other model matrix, please refer to the
instructions of HDMI0808.
Use the front panel buttons to quickly switch audio and
video on the HDMI matrix (for details on each button function,
please refer to “Front Panel Key Function Description”). The
operation method is as follows:
Input channel +Output channel
Input channel
The channel to which the source to be switched is currently
connected
The INPUT “1~8” button on the front panel represents 1~8
input channels respectively.
Output channel
The channel to which the peripheral device is connected. The
OUT PUT "1~8" button on the front panel represents 1~8
output channels respectively.
Switching example
Example 1: Synchronously switching the first audio and video
signals to the third output channel, the steps are as follows:
1. Press the input channel “1” button, and its LCD screen
displays as follows:

2. Press the output channel“3” button,The LCD screen displays
as follows:
3. After the switch is successful, if you need to perform the next
step, press the next input interface directly.
The operation of switching 1 channel of audio and video signals
to multiple output channels synchronously (such as outputting
1-4 channels), after completing the first step, directly
press the output "1, 2, 3, 4" keys.
If you need to switch to all output channels, press the “ALL”
button after completing the first step.
1.2.2 Storage and Calling Examples
Example 1: The operation of synchronously switching
the first audio and video signals to all output channels
(for example, all the outputs are 8 channels) is stored
as number 01, and the steps are as follows:
1. Press the “SAVE” call button and its LCD screen displays:
2. Press the output channel “1” button, and its LCD screen will
display as shown below:
3. After the operation is successful, the LCD screen returns to
display the corresponding channel.
Example 2: Call the above stored content, the steps are as
follows:
1. Press the “RECALL” call button, and its LCD screen will
display as shown below:
2. Press the output channel “1” button, and its LCD screen will
display as shown below:

3. After the operation is successful, the LCD screen returns to
display the corresponding channel.
Matrix system setup
Press the “MENU” menu button and its LCD screen will
display as shown below:
a) Buzzer settings
1. As shown in Figure 1, press the input channel "1" button to
enter the buzzer setting. The LCD screen displays the
following picture:
2. Press the input channel “1” button to switch the buzzer
switch. After the operation is successful, the LCD screen
returns to the corresponding channel.
b) The identification code is the number of the matrix
1.As shown in Figure 1, press the input channel "2" button to
enter the identification code settings, the LCD screen
shown below:
2. Press the input channel "1", "2", "3" and "4" keys to switch
the matrix identification code freely.
3. After the operation is successful, the LCD screen returns to
display the corresponding channel.
The matrix identification code set must be the same as the
address when using the serial port control matrix.
c) Language settings
1. As shown in the interface of Figure 1, press the input
channel “3” to enter the language setting. The LCD screen
displays the following picture:
2. Press the input channel “1” to switch between Chinese and
English. After the operation is successful, the LCD returns
to the corresponding channel.

Software settings
1.Double-click "Matrix Controller" to open the application, as
shown below:
2. Click “Settings” to enter the connection between the matrix
and the software. For example, the computer serial port is
“com1” and the matrix identification code is “1” ,like the
follow figure shown:
The baud rate is 9600.
The serial port address you set must be the same as the port
address of the connected computer.
The matrix identification code you set must be the same as
the address when using the serial port control matrix.
2. After the operation is completed, click “Settings” to confirm,
then click “Connect” to establish contact with the matrix.
Software control input and output channel correspondence
a) One By One: Quick corresponding display button (equivalent
to OTO button)
After clicking, the input channel and the input channel are
displayed correspondingly (for example, the 3rd input
channel is displayed on the 3rd screen).
3.Software Operation

b) One To All l: all command execution buttons
After selecting the input channel, click to display this channel
on all screens (for example, the 3rd input channel is displayed
on all screens).
c) One To Many: Specify display button
After selecting the input channel, click on the desired output
channel to display 1 channel of video on one or multiple screens
(for example, the 3rd input channel is displayed on the 3rd,
4th, and 5th screens).
d) Close One: Close the display screen
Turn off the output screen that does not need to be displayed
e) Close All: Turn off all displayed screens
Control display operation
1. Click “Switch” (take the 1st input display to output “1, 2, 3,
4” as an example), select the input channel “1” and output
channel “1, 2, 3, 4”, click "One To Many", as shown below:
Synchronously switch 1 channel of audio and video signals to
all output channels (if all outputs are 8 channels), select the
input channel to be displayed and click “One To All”directly.
Make the pictures one-to-one correspondingly display, and
click one to one directly.
2. For the screen that does not need to be displayed again,
click the corresponding output channel, and then click
“Close One” as shown below:
Close all displays and click "Close All".
Save and retrieve channel correspondence
Example:Synchronously switch the first audio and video
signals to the first, second, and third output channels, and the second
signal is switched to the fourth, fifth, and sixth output
channels, saving and recalling operations.
1. Click on “Input Channel 1” - “Output Channel 1, 2, 3” - “One
To Many” in turn, as shown below:

2. After the operation is successful, click “Input Channel 2” -
“Output Channel 4, 5, 6” - “One To Many”in turn, as shown below:
3. After the operation is successful, click “Scene”, (Take
saving into Case 1 as an example), click Save Status “1” as
shown below:
4. To recall the display of the correspondence between the
input and output, directly click on the corresponding
Loading Scenario.
Channel naming
1. Click on Caption as shown below:

2. Click and directly to enter the scenario and input and
output channels for which you want to change the name, as
shown in the following figure:
3. When the operation is complete, click Save.
●1 cut 1 operation steps: 1-AV-1
●1 cut 12 operation steps: 1-AV-AUDIO-1-2
●12 cut 1 operation steps: AUDIO-1-2-AV-1
●12 cut 13 operation steps: AUDIO-1-2-AV-AUDIO-1-3
●1 cut 1, 2, 3 steps: 1-AV-1-2-3
●1 cut 10,11,12 operation steps: 1-AV-AUDIO-1-0-AUDIO-
1-1-AUDIO-1-2
●12 cut 1, 2, 3 operation steps: AUDIO-1-2-AV-1-2-3
●12 cut 11, 12, 13 operation steps: AUDIO-1-2-AV-AUDIO-
1-1-AUDIO-1-2-AUDIO-1-3
●Storage scene mode 1 operation steps: SAVE-1
●Storage scene mode 11 operation steps: SAVE-AUDIO-1-1
● Recalling the scene mode 1 operation steps: RECALL-1
● Recalling the scene mode 11 operation steps: RECALL-
AUDIO-1-1
●EDID learning the first route operation steps: F1-1
●EDID learning the 11th route operation steps: F1-AUDIO-
1-1
1. Large signal interference: check whether the signal connection
cable and plug are good, whether the cable meets the requirements
of the specification, whether the system grounding is good,
and whether the AC power grounding system between the
devices is consistent;
2. When there is color loss or no video signal output, it may be
that the connectors at the two ends of the signal line are not
connected properly;
3. When the serial port (refer to: computer or central control
serial port) cannot control the matrix, please check whether
the port number of the software serial port is correct.
4. If the matrix input and output signals can be switched but
there is no BB sound, it may be that you turn off the buzzer
sound;
5. When the matrix is switched, the buzzer sounds, but there
is no corresponding image transmission:
1) See if there is a signal at the corresponding input. (Can
be detected by oscilloscope or multimeter) If there is no
signal input, it may be that the input wiring is broken, or
the connector is loose,replace the connected cable can be ok;
2) See if there is a signal at the corresponding output. (Can
be detected by oscilloscope or multimeter) If there is no
signal output, it may be that the output is broken, or the
connector is loose, ,replace the connected cable can be ok.
4. Remote Operation Instructions
5.Common faults and maintenance

3) After the above two conditions are replaced, it still not
work. The internal unit may be faulty. Please send it to a
professional for repair.
6. If the LCD has no display, the operation does not respond,
may be power supply’ abnormal.
7. When connecting the connector, if the static electricity come
to be strong, the power ground wire may not be connected
to the ground. Please connect it properly, otherwise it will
easily damage the host and shorten the life of the host.
8. When the matrix panel buttons, serial port and remote control
cannot be controlled, the internal host may be damaged.
Please send it to a professional for repair.
