BEETEL BG65 User manual

1
BEETEL BG65
Quick Guide
BEETEL TELETECH LTD,
Regd. Ofce: 1st Floor, Plot No 16,Udyog Vihar Phase-IV
Gurgaon-122015,Haryana,India.

2
LEGAL INFORMATION
Copyright © 2011 BEETEL TELETECH LTD.
All rights reserved.
No part of this publication may be excerpted, reproduced, translated
or utilized in any form or by any means, electronic or mechanical,
including photocopying and microlm, without the prior written per-
mission of BEETEL TELETECH LTD.
The manual is published by BEETEL TELETECH LTD. We reserve
the right to make modications on print errors or update specica-
tions without prior notice.
Version No. : R1.0

3
Quick Guide
Introduction
BEETEL BG65 is a 3G/2G device, working in GSM/GPRS/EDGE/
WCDMA/HSPA network. This device could connect via USB or Wi-
Fi interface. The device supports data and SMS services, enabling
you to communicate anytime and anywhere.
This quick guide provides instructions on how to install and get
started with the product. For information about connection of ser-
vices, please consult your service provider.
Specication
Data Service
HSPA: DL 7.2Mbps
UL 5.76Mbps
WCDMA CS: 64kbps UL/DL
WCDMA PS: 384kbps UL/DL
Interface USB and Wi-Fi
Wi-Fi Standard 802.11b/g
Wi-Fi Security WEP/WPA/WPA2
USB Version USB 2.0 HIGH SPEED
USB Interface Type Mini USB-B
Weight 65g
Dimensions (W×H×D): 99.7mm*53.7mm*13.9mm
4
microSD card Support up to 32GB microSD card
Power Adapter 5V/700mA
Battery 1500mAh
*Standby time 100hours
*Working time 4hours
Operate system Windows 7, Windows Vista, Windows
XP (SP2 or later), MAC 10.4 or later
Web Browser
IE (7.0 or later), Firefox (3.0 or later),
Opera (10.0 or later), Safari (4.0 or
later), Chrome (5.0 or later)
Operating temperature 0°C~ +35°C
Storage temperature -20°C ~ +50°C
Charging temperature 0°C ~ +45°C
Humidity 5%~ 95%
Notes:
microSD is a trademark of SD Card Association.
The device’s standby and working time are only for your reference,
and based on ideal working environment.
Getting to Know Your Device
The following gure shows the appearance of the device, it is only
for your reference. The actual device may be different.

5
Interface and Buttons
1.Power Hold the Power button to switch on/off the
device.
2.Memory card slot
(microSD card)
It is where you insert the memory card (mi-
croSD card).
3.WPS
This button is used to start Wi-Fi Protected
Setup authentication process and enable/
disable the Wi-Fi function.
Hold it for three seconds to activate the
WPS process.
Press it to enable/disable Wi-Fi function.
4.Charger/USB port
Charge your device.
Connect the client to your device via USB
cable.
6
Notes:
Hold the WPS and Power buttons simultaneously until all LEDs are
off, and then release the buttons. The device will restart automati-
cally and restore to the factory default settings.
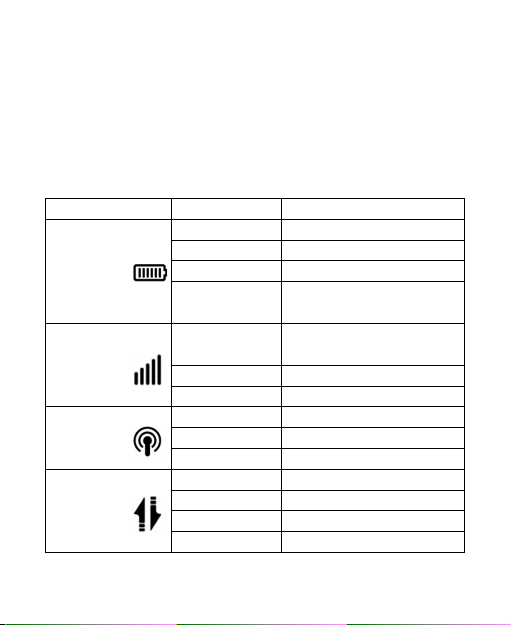
LED Indicator
It indicates the status of your device.
When the device is powered on:
Indicator Status Description
Battery
indication
Red blinking Please charge the battery
Red solid Voltage of battery is low
Green blinking Charging
Green solid Voltage of battery is
full(Charging completed)
Signal strength
indication
Red solid ERROR or NO signal or NO
network service
Green blinking Signal is ok
Green solid Signal is good
Wi-Fi
indication
Blue blinking Wi-Fi is active
Blue solid WPS is active
LED off Wi-Fi is inactive
Network
indication
Red blinking 2G data transferring
Red solid Register on 2G network
Green blinking 3G data transferring
Green solid Register on 3G network

7
When the device is powered off and charging:
Indicator Status Description
Battery
indication
Green blinking Charging
LED off Voltage of battery is
full(Charging complete)
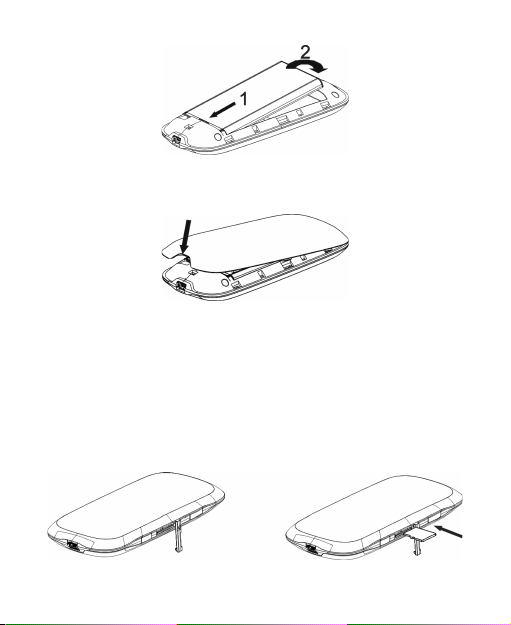
Hardware Installation
Inserting SIM Card and Battery
1. Use the thumb catch at the bottom of the device to open the
battery cover.
2. Insert the SIM card into the SIM card holder.
3. Insert the battery as shown with the contacts located against the
metal springs, and press the battery down into the case.
8
4. Line the battery cover up correctly and press gently to close the
case.
Inserting microSD Card
1. Pull the microSD cover out of the card slot.
Notes:
Do not pull the cover rudely, as it is connected with the device.
2. Insert the microSD card into the microSD slot. The following pic-
ture shows the correct inserting direction. You will hear a click
when the microSD card locks in place.
9
3. Close the microSD cover.
Switching On/Off Your Device
Hold the Power button to switch on/off the device.
Notes:
The device is powered on when the signal strength indication lights
up.
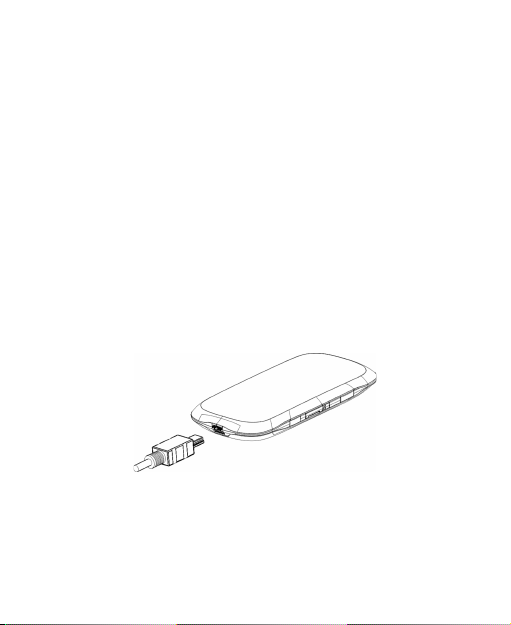
Charging Your Device
You can charge your device by using USB cable or adapter.
1. Insert the charger lead carefully with the plug arrow facing the
bottom of the device.
2. The plug only ts one way. Do not use excessive force to insert
the plug.
3. Make sure the plug is the right way round and lined up correctly
and insert it gently.
10
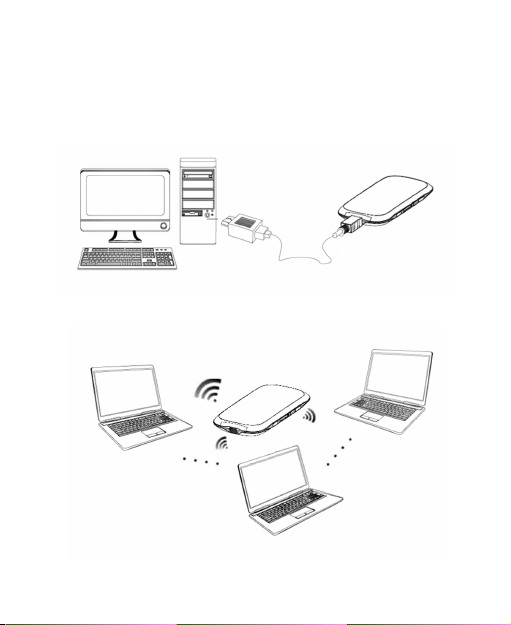
Working Mode
Your device supports three working modes. For the client, we only
use PC or laptop as the example in this document.
USB Mode: Connect to the device with the USB cable.
Wi-Fi Mode: Connect to the device via Wi-Fi.
Table of contents


