Beko P7 User manual

P7 PDP TV
SERVICE MANUAL

CONTENTS PAGES
SafetyInstuctions 2-5
TechnicalSpecification 6-7
UserInstruction 8-29
BackAppearanceofTV 30
InterconnectionDiagram 31
BlockDiagram 32
BlockDiagramofPowerSupply 33
Service Mode 34-35
DataSheetofimportantIC’sand parts 36-46
Frequencylistofchannel 50-52
ATTACHMENT1: PanelServiceManual
LG-PDP42V6
ATTACHMENT2: PanelServiceManual
Samsung 42”S3
ATTACHMENT3: CircuitDiagrams

SAFETY PRECAUTIONS
GENERAL GUIDELINES
1. It is advised to insert an isolation transformer in the
AC supply before servicing a hot chassis.
2. Always use the manufacturer’s replacement safety
components. The critical safety components marked
with on the schematics diagrams should not be
by other substitutes. Other substitute may create the
electrical shock , fire or other hazards. Take
attention to replace the spacers with the originals.
Furthermore where a short circuit has occurred ,
replace those components that indicate evidence of
overheating.
3. After servicing , see that all the protective devices
such as insulation barriers, insulation papers, shields
and isolation R-C combinations are correctly
installed.
4. When the receiver is not being used for a long time
of period of time , unplug the power cord of the
Adaptor from the AC outlet.
PDP Module is very sensitive
both electrically and physically.Users,
therefore, are requested to follow the
“Guidance of handling color PDP
Module”on the followings.
1-Be careful not to make scratch on the
polarizer.
Surface of polarizer is soft and can be physically
damaged easily.Please do not touch, push or rub
polarizer surface with materials over HB hardness.
2 - Keep clean the surface.
Please wear rubber glove when touch the surface of
PDP screen. Please use soft and anti-static material
as cleaner.
3 -Keep out of water.Water on/in the PDP may
cause electrical short or corrosion. Please wipe out
dry or water carefully.
4 -Prevent swift Temperature & Humidity
change.Instantaneous temperature and/or humidity
change can make dew or ice which cause
nonconformance such as malfunction.
5 - High temperature & high humidity
reduce the life-time.
PDP is not proper to be used at high temperature
and high humidity. Please keep specified
temperature and humidity condition.
6 - Keep out of Corrosive Gas.Corrosive gas
effect the polarizer and the circuit chemically and
cause defects accordingly.
7 - Electrostatic discharge can make
Damage
There are electro-static sensitive components
in PDP Module. Please earth human
body when handle the PDP.In addition, please do
not touch the interface connector pinwith bare.
8 - Do not operate for a long time under
the same pattern
Operating PDP for a long time under the same
pattern can cause image persistence and can
damage it. Please follow following guidance.
1. Turn the power off when do not use.
2. Change the pattern periodically.
LEAKAGE CURRENT COLD CHECK
1. Unplug the AC cord and connect a jumper
between the two prongs of the plug.
2. Turn the receiver’s power switch.
3. Measure the resistance value with an ohmmeter,
between the jumpered AC plug and each exposed
metallic cabinet part on the receiver. When the exposed
metallic part a return path to the chassis the reading
should be between 4Mohm and the 20Mohm. When the
exposed metal does not have a return path to the chassis,
the reading must be infinite.
LEAKAGE CURRENT HOT CHECK
1. Plug the AC cord directly in to the AC outlet. Do
not use an isolation transformer for this check.
2. Connect a 2Kohm 10W resistor in series with an
exposed metallic part on the receiver and an earth,
such as a water pipe.
3. Use an AC voltmeter with high impedance to
measure the potential across the resistor.
4. Check each exposed metallic part and check the
voltage at the each point.
5. Reverse the AC plug at the outlet and repeat each of
the above measurements.
6. The potential at the any point should not exceed 1.4
Vrms. In case a measurement is outside the limits
specified , there is the possibility of a shock hazard ,
and the receiver should be repaired and rechecked
before it is returned to the customer.
HOT CHECK CIRCUIT
AC-Voltmeter
TO INSTRUMENTS
EXPOSED
METALLIC PARTS Water pipe
(earth)
2 K Ohm

Important information
Read and heed the notes on safety so that no hazard to your health arises during contractual use. Errors during
installation and connection can damage the device or subsequently related devices.
Always keep the operating instructions within reach. Heed the warnings on the device and in the operating
instructions.
• General reference
Before you connect the plasma display, please carefully
read throught the general notes on safety and the
operating instructions. Only in this manner can you
utilise all functions safely and reliably.
As far as possible, keep the operating instructions
together with the device so that you can use it to look
up information.
Heed the warnings on the device and in the operating
instructions.
Never allow children to utilise electrical devices without
supervision.
• Operation
The plasma TV acquired by you, meets the highest
quality codes and standards to be found in this
business segment. A plasma display consists of a
multitude of so called pixels. One pixel consists
of 3 elements (red, green and blue). Even using
the highest quality control practices during the
manufacture of the displays, it can not be 100 %
excluded that some pixels or pixel elements will
be defective. These defects may appear as
permanent illuminated pixels, non illuminating
pixels or unstable pixels (flickering) respectively.
We therefore ask for your understanding when
we declare that these defects are not covered
under the warranty liability. This is valid insofar
that the sum of all defective pixels or pixel elements
does not exceed 0,01 % of the total amount.
The brightness and contrast of plasma displays
decreases with time.
Plasma displays are phosphor based and under
certain operating conditions, so-called “Burn-
In” effect may occur. This is in fact a degrigation
of the phosphor and is a natural process in plasma
technology.
Such operating conditions are:
- static images being displayed for long periods
- continues display of the same background
- use of a non full screen format (e.g. 4:3) for a long
periods.
Once Burn-In has occurred it is normally irreversible.
To avoid or to reduce the Burn-In effect, please
follow the listed recommendations:
- Please use moving images or continuous moving
static images in full screen format (slide show)
during the first 100 hours of operation
- Please use your plasma TV in a full screen format
(16:9)
- In case the plasma display is used as a PC monitor,
please use moving images
- Always switch the screen off, if it is not in use
- Decrease contrast and brightness as much as
possible
- If possible display images with maximum colour
depth and scale
Certain conditions may cause a humming noise in the
displays electonics. This is usually caused by the mains
power supply having different ground wires. One
remedy for solving this problem is to insert a filter
between antenna cable and antenna input. These filters
are available at all specialised trade outlets.
If the plasma display is connected to an external
antenna, it has to be grounded to protect against
electrical hazards and static discharges. The grounding
must conform and be in accordance with the actual
regulations in force.
• Environmental conditions
Never operate the plasma display under
environmental conditions which differ from those
of the technical data. Divergent conditions can lead
to endangerment, fire or breakdown of the device.
Protect the plasma display against moisture. This
pertains to permanent high humidity, the proximity
ta water, water drops and water splashes as well
as rain. Do not place any water-filled containers
(e.g. vases) on the device.
Protect the device against heat. Avoid the proximity,
to fire, heating devices, ovens or permanent exposure
to direct sunlight.
Protect the display against heat accumulation. Do
not cover the ventilation slots. Maintain a distance
of at least 10 cm above and below the ventilation
from sides 4 cm from rear 4 cm slots as well as
laterally to furniture and to the ceiling. Do not furnish
the device with curtains.
The display is designed for mounting in landscape
format on walls or installations.
• Mains connection
The mains input and the mains switch are located
on the rear side. The mains input is located on the
upper right and the mains switch is placed in the
upper middle. For safe disconnection of the display
from the mains voltage, the mains switch is to be
turned off and the mains cable is to be removed
from the mains input module.
Connect the plasma display only to a socket with
earthing contacts installed according to regulations,
and whose main voltage conforms with the device’s
technical data. See to it that the mains plug and
the socket are accessible at all times. Install the
mains cable in such a fashion that nobody can get
caught in it. Use only the supplied mains cable.
Protect it against damages, and do not make any
alterations to it. Never use a damaged mains cable.

• Signal inputs
Always turn the plasma display and the signal
source off before you establish a connection between
both devices.
• Disturbances
In the event of damages to the mains cable or the
device, immediately pull the mains plug from the
socket.
Under no circumstances should you attempt to open
and/or to repair the device yourself. Instead,
contact our Service Hotline or another suitable
professional workshop.
• Batteries
Batteries can be life-threatening when swallowed.
That’s why you should safeguard batteries from
the reach of small children. Immediate medical
assistance should be utilised if a battery has been
swallowed.
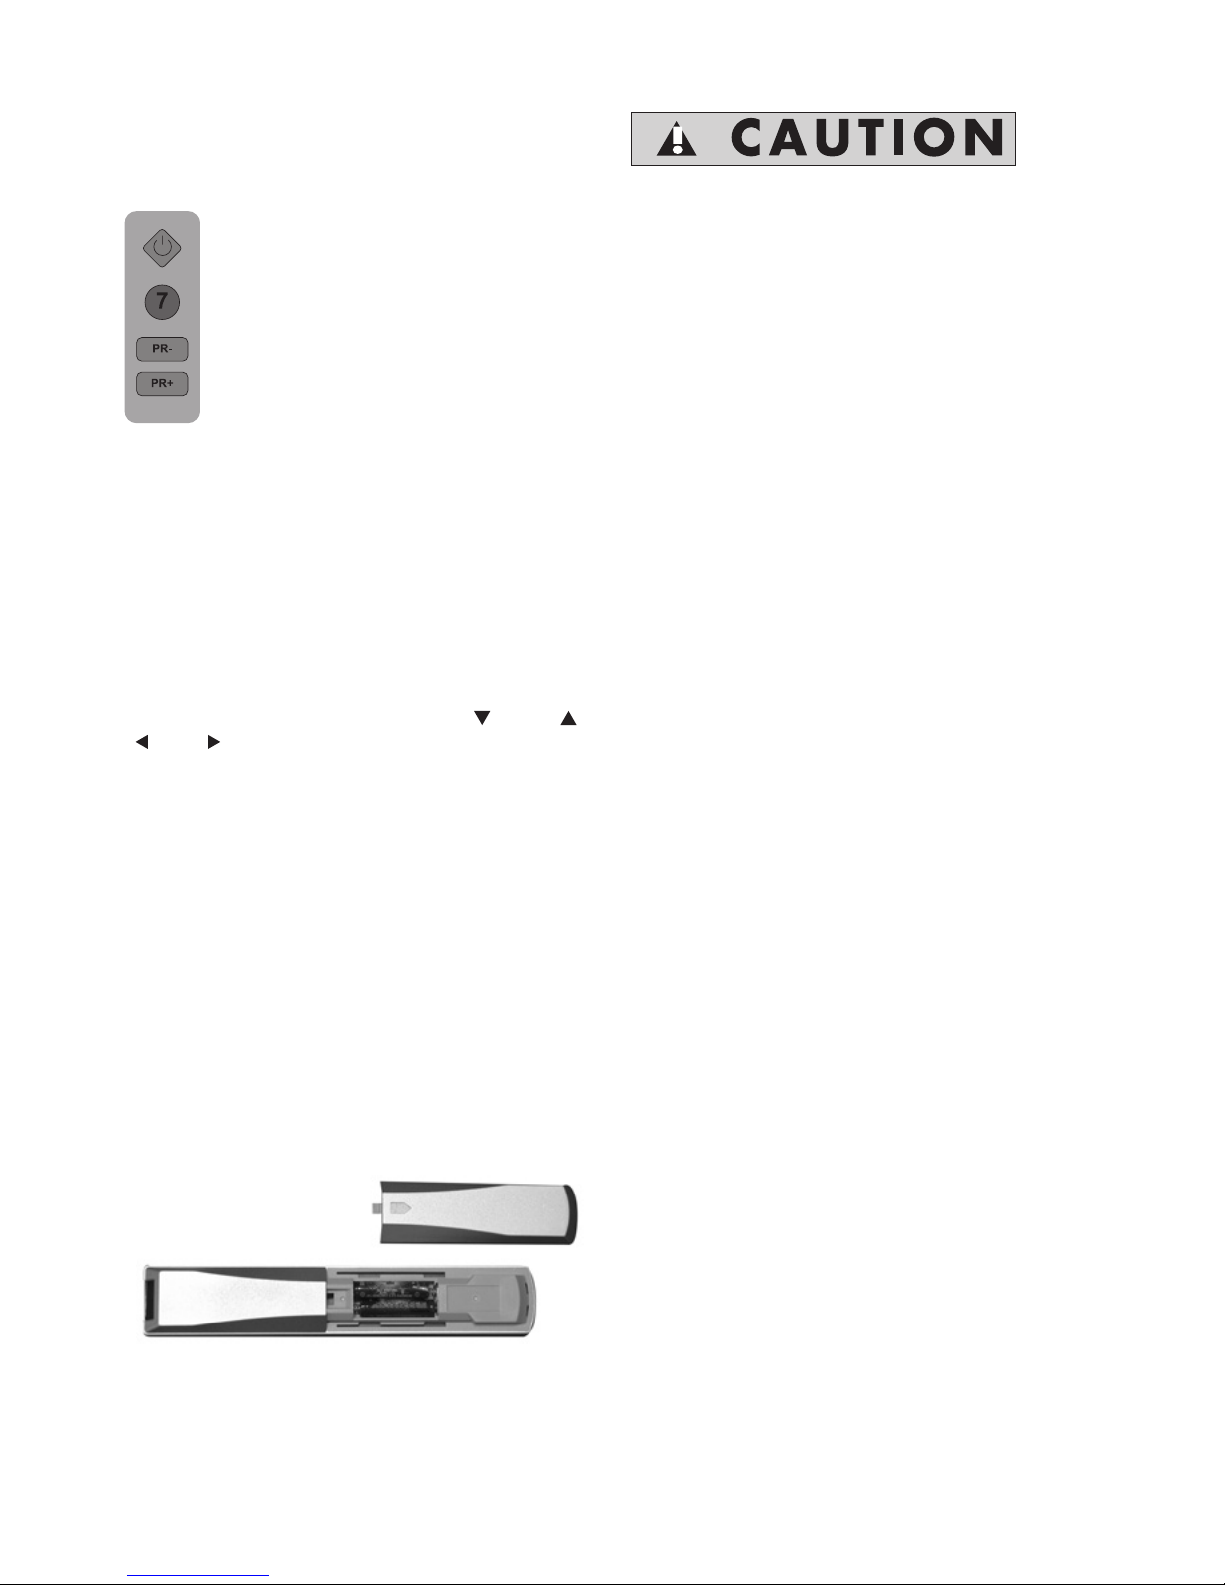
Always take the exhausted batteries out of the
remote control immediately, since these leak and
can cause damage as a result.
The enclosed batteries may not be charged or
reactivated by other means, not taken apart, thrown
in fire or short-circuited.
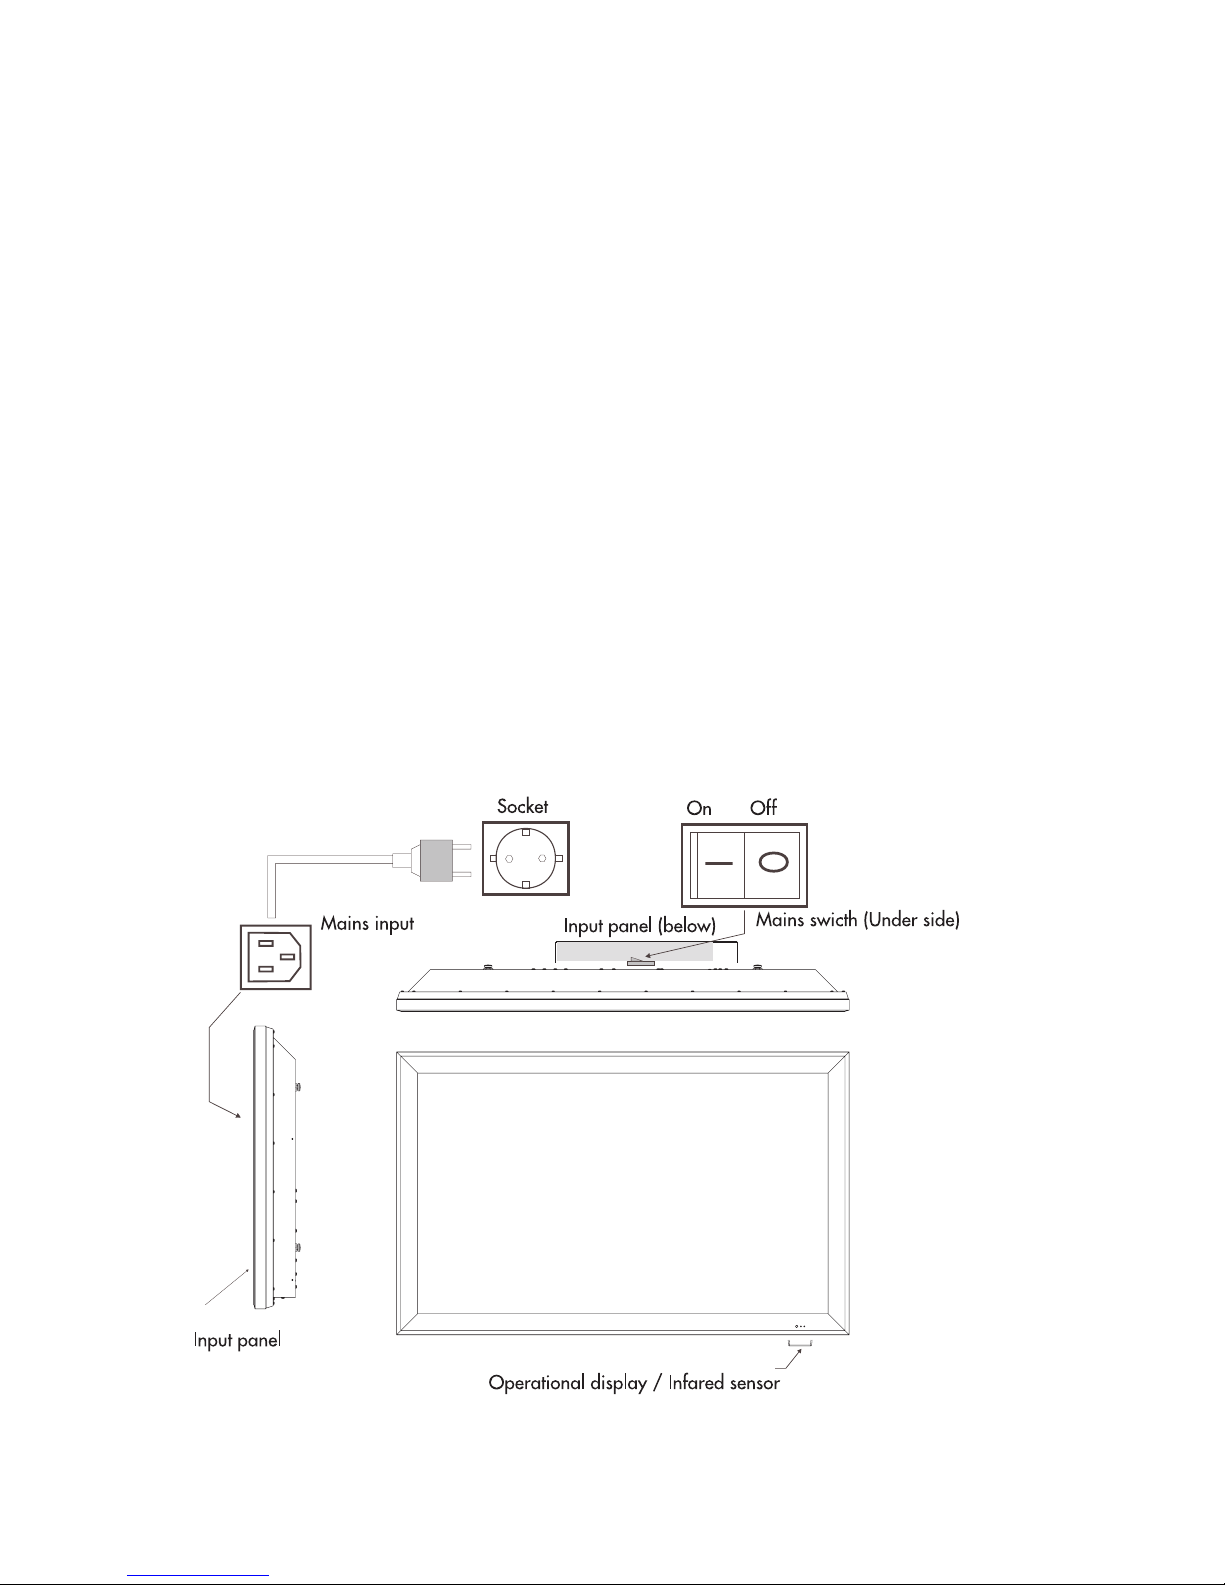
TO FULLY DISCONNECT THE TV, SWITCH OFF
THE MAINS SOCKET AND REMOVE THE
POWER PLUG.
Exhausted batteries do not belong in household
waste. The batteries must be disposed of at the
collection points provided for this purpose.
• Cleaning and maintenance
Before cleaning, turn the device off, and pull the
mains plug from the socket. Wait a few minutes
so that the capacitors in the device can be
completely discharged.
Use only a slightly dampened, soft cloth for cleaning.
You should avoid chemical solvents and cleaning
agents, because these can damage the surfaces.
• The plasma display generates high voltage internally
for the gas discharge. Turn the device off and pull
the mains plug from the socket during installation,
maintenance and repairs. Wait a few minutes so
that the capacitors in the device can be completely
discharged.
• In case foreign elements such as water, liquids,
metal parts, etc. get into the plasma display, pull
the mains plug out immediately. Never attempt to
touch anything inside the device with any kind of
objects. The danger of an electric shock or accident
exists.
• Pull out the mains plug immediately if smoke,
unpleasant odour or unusual noises are emitted
from the device. Also proceed in the same manner
if the display is no longer able to present an image
after being turned on or during operation. Never
attempt to continue operating the display in this
condition.
• In the event of lengthy absence or during
thunderstorms, pull the mains plug from the socket,
and pull the house antenna socket from the antenna
jack.
• Never plug-in or pull-out the mains plug with wet
hands. Never operate the mains switch with wet
hands.
• Utilise only the supplied mains cable. Protect it
against damages, and do not make any alterations
to it. Never use a damaged mains cable.
• The plasma display has a glass surface. Should
the device be subjected to excessive loading (e.g.
through shock, vibration, bending and heat shock),
the glass surface can break. Do not subject the
glass surface to any pressure or shock. Should the
glass be broken, immediately pull the mains plug
and do not touch the broken glass with bare hands.
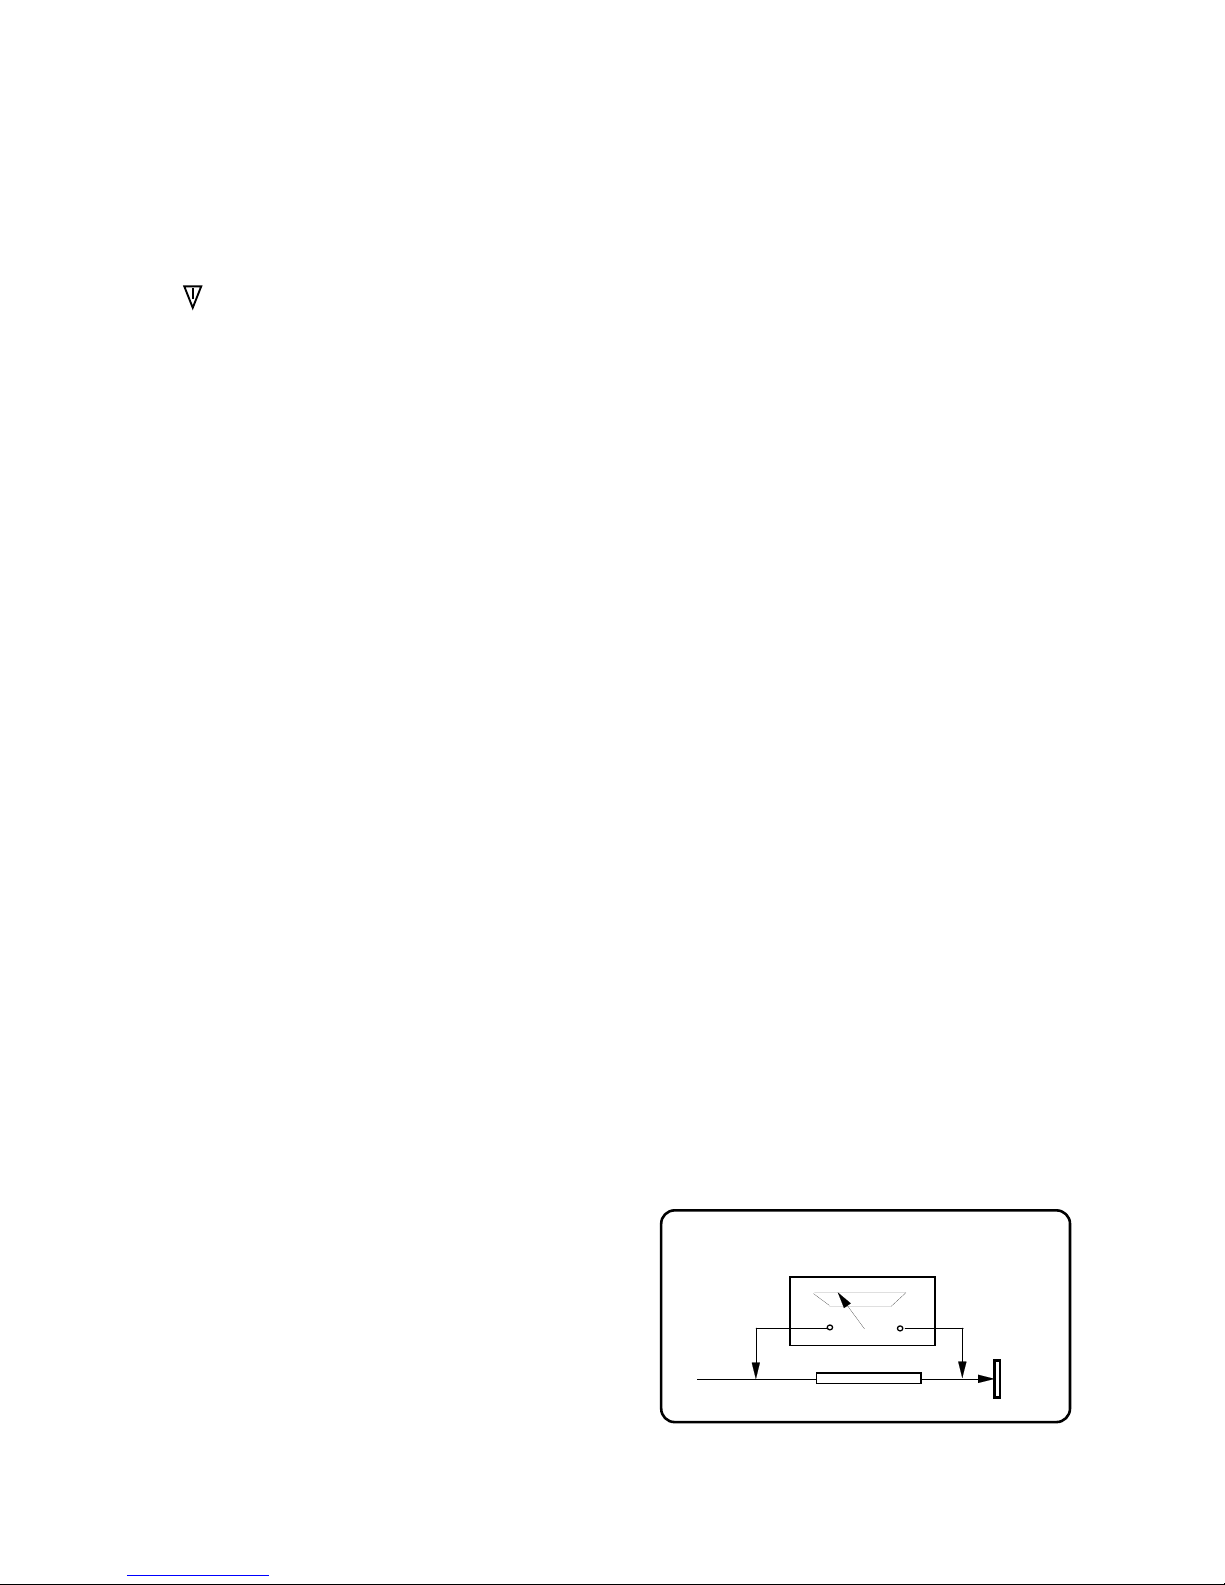
• When the plasma display has been switched to
the stand-by mode it is still connected to the mains.
You must switch the mains switch into the 0 position
or pull the mains plug from the socket for complete
disconnection.
• For ergonomic reasons it is recommended to avoid
using red and blue fonts or symbols on dark
backgrounds. Such a display causes poor
readability due to the lower contrast, and
prematurely fatigues the eyes. Therefore, please
use high-contrast displays as much as possible,
e.g. black font on a white background.
• During the connection of external laudspeakers,
pay attention to the loudspeaker output technical
data. In the event of insufficient dimensioning of
the loudspeaker, the loudspeaker and/ or the built-
in amplifier can be damaged.
• Packaging and packing resources which are no
longer needed are able to be recycled, and should
always be turned in for recycling.
• Place the carton upright with the underside on firm
ground. You will recognise the top side by the
direction of the arrowheads on the longitudinal
side
• The plasma display may only be mounted on
vertical (plumb) walls by means of the wail
mounting unit. Before beginning the mounting,
make sure that the display is turned off and the
mains cable and signal cable are unplugged.
The backgraund has to be firm and structurally
able to carry a load. Appropriate materials are
to be utilised for varying wall superstructures,
such as wooden walls or hollow-space walls. If
there’s any doubt, contact your responsible sales
or service department.

• Clean the TV Screen using a slightly damp cloth or chamois leather. Never use abrasive
cleaning agents like liquid or aerosol cleaners.
• Remove the mains plug from the socket outlet while cleaning.
• Never apply pressure on the screen when cleaning.
• Never put your screen on hard objects. Your PDP screen may be damaged.
• If you wish to place the television on a shelf or in a wall unit always ensure there is a
minimum air gap of 10 cm around the top, sides and rear of the television, to assist
ventilation.
• Your TV set is designed to operate with mains voltages 230V AC; 50Hz. Do not connect
your TV set to power sources other than the mains supply.
• If you don't use the television for a long period, please remove the mains plug from wall
socket outlet.
• Your TV set is designed as a CLASS I apparatus, the TV set has to be connected to a
mains socket outlet with a protective earthing connection.
•To fully disconnect the TV, the mains plug is used as a disconnecting device and therefore
shall be readily operable.
Safety instructions
Read all the safety instructions before first use of your TV.
!
• Position the television so that direct light does not fall on the screen. Excessive light
will cause a washed out effect.
• Position the power supply lead and other leads so that they are not likely to be walked
on or pinched by things placed on or against them.
• Do not place objects filled with liquid such as vase or flower pot near the television.
• Do not expose the TV to dripping or splashing of liquids.
• Do not place naked flame sources such as lighted candles on the TV set.
• Make sure that no naked flame sources, such as lighted candles, are placed on top
of the appliance.
• Do not place the television near heat sources such as radiators, ovens, stoves, etc.
• The heat built up in the set escapes through ventilation holes, so do not cover the set
by drapes, clothes etc. that may block air circulation. Do not place the television on
carpet or soft furnishings.
• Never let children push anything into the holes or slots on the case.
• Do not push, hit or screw the screen of your product.
Your safety and the safety of others is important. Please, therefore, ensure you read the Safety
instructions before you operate this television.
Important notes on safety!
230
10
cm

PC FORMATS DOS Modes 640 x 400 and 720 x 400
VGA (640 x 480) @ 50Hz - 90Hz repetition rate
SVGA (800 x 600) @ 50Hz - 90Hz repetition rate
WVGA (848 x 600) @ 50Hz - 90Hz repetition rate
XGA (1024 x 768) @ 50Hz - 90Hz repetition rate
IMAGE FORMATS 4:3, 16:9, auto, zoom, letterbox, subtitle
INPUTS/VIDEO Mini DIN................Y/C / Hi 8 (PAL, SECAM, NTSC)
Cinch.....................CVBS Video In (PAL, SECAM, NTSC)
SCART 1 ................CVBS, RGB (PAL, SECAM, NTSC)
CVBS output
SCART 2 ................CVBS, RGB (PAL, SECAM, NTSC)
CVBS output
RF Tuner.................VHF/UHF/HYPERBAND for terrestrial
antennas or cable networks (47MHz to 861 MHz)
(PAL, SECAM)
PC DVI (D)...................VGA/SVGA/WVGA/XGA
Digital (DVI)
AUDIO INPUTS Y/C (S-Video) - CVBS
SCART 1
SCART 2
PC
OUTPUTS Cinch.....................L/R Audio Output
loudspeaker............2 x 7W sine @ 4 Ω
Cinch.....................CVBS Output
CONTROL On-Screen Display Menu.......24 languages
IR remote control
VIDEOTEXT TOP FLOF...............800 pages of memory
control with special keys on the remote control
OPERATING VOLTAGE RANGE 170V - 240V AC alternating voltage
50Hz
POWER CONSUMPTION 275 W

Special Features
• 42’’ PDP VGA Panel
• 852x480 pixels
• 16,722,216 color (8 byte)
• Available for Cable Channels (A decoder may be required)
• 3000:1 contrast ratio
• 2x7 W Stereo sound (With detachable speakers)
• 800-Page Teletext Feature
• PIP (Picture in Picture) Feature
• Wide angle perspective
• SCART socket, AV Socket and external sound system connection
• S-VHS and Cinch inputs for S-Video connection
• DVI connection
• PC connection
• AVL – Automatic Volume Limiting
• ATS – Automatic Tuning System
• Programmed power off
• Graphic equalizer
• Color Transfer sharpness feature (CTI)
• Black-White Transfer sharpness feature (LTI) and picture sharpness
• Compound Filter (Digital Comb Filter) Feature for clear images
• On screen viewing of all control commands, program numbers and additional features
• Manual Fine Tuning
• 100 Program memory
• Infrared Remote Control
• Child lock (this feature works like a Panel Lock)
• Ability to watch NTSC broadcasts through SCART input
• East handling through an advanced menu system. Abiltiy to choose from 24 languages.

Connection of Mains Cable
Always utilise the enclosed mains cable in order to
guarantee optimal image quality.
First of all, insert the main cable into the input panel,
and only thereafter into the socket.
• Never utilise a damaged mains cable!
• Use only sockets with a protective eathing conductor
system to ensure safe operation.
A line filter and switches for sabilisation of the supply
voltages ensure safe operaion within normal mains
voltage variations. In case the mains voltage lies
beyond the stated limits, please contact your responsible
sales office. In the event the mains cable cannot be
utilised on account of differing standards in your
country, please see to it that you utilise a mains cable
commensurate with the country-specific standards
which are listed in the following:
•USA UL
• Germany VDE
• Canada CSA
• Switzerland SEV
• Great Britain BASE/BS
• Japan MITI
This list is not complete. For reasons of safety it may
be necessary to select a different safety standard.
At any rate, the mains cable has to consist of three
wire conductors of at least 10A/0.75 mm2 in order
to avoid an accident as a result of electric shock. One
of the three wires is impemented on both ends of the
cable as an earthing contact connection.

Operating Modes
Operating mode at the beginning of utilisation
Due to the functionality of the Plasma-TV please pay
attention, that particularly during the first 100 to 150
operation hours the display has to operate with a full
screen format adjustment (see submenu Display, Picture
Format). This prevents the formation of brightness
differences in the display areas. As an alternative to
the picture format 4:3 the adjustment Video NLS should
be selected.
Further on, in order to prevent the formation of permanent
shadows in the displayed image, please avoid to show
fixed-images of any kind (PC mode, teletext pages,
Photo CD image etc.) during the first operation hours.
If the Plasma-TV will be used as a PC monitor, the
utilisation of a screensaver is recommended.
PC mode
For optimal image reproduction, we recommend the
848 x 480, 640 x 480 or 720 x 400 pixel resolutions.
The 848 x 480 pixel resolution corresponds to the
display matrix, and offers the best image reproduction.
You can obtain the driver for this resolution on the
Internet pages of mont of the well-know manufacturers
of graphics cards.
In contrast to applications with CRT monitors, with flat
displays it is not necessary to select a high image
refresh for a flicker-free presentation. A refresh of
60Hz is recommended.
Video recorder mode
The utilisation of Y/C (S-Video) inputs is recommended
for enhancement of image quality - if your recorder
offers playback in Y/C (S-Video) format.
DVD player mode
The application of the RGB operating mode, which
can be connected to the SCART 1 input, is
recommended for optimal utilisation. In case your
player does not offer this operating mode, please use
the Y/C (S Video) signal mode.
Image sticking
The manufacturer would like to point out to you that
during lengthy viewing of freeze pictures (e.g. PC
playback), the image is still slightly visible in the full
mask for a few minutes during the subsequent playback
of a different source. This is known as “image sticking”
This “vanishing” residual image is caused by the
system, and does not represent a flaw. Therefore it
can not be considered as a case for warranty claim.
Video cable
A high-quality 75Ω coaxial cable should be utilised
for the connection of the video signal. Poor quality
signal cable can result in strong disturbances and
formation of shadows in the displayed image, as well
as exceeding the permissible EMC level. The
mechanical interlocks of the individual plug-and-socket
connectors are necessary for perfect and safe operation
of the device.
•Press a numeric button or the Program
Up / Program Down button on the
remote handset or PR+ / PR- or MENU
button on the front panel of the TV to
switch the TV on. The standby indicator
turns into green. The picture will appear
after a few seconds.
Press the Standby button to switch the
TV to standby. The standby indicator turns
into red.
The batteries
Remove the back cover to reveal the battery
compartment and make sure you insert the batteries
the right way round.
Suitable battery types for this remote are UM-4, IEC
R03 or AAA 1.5V.
Do not combine a used, old battery with a new one
or mix battery types.
The performance of the remote control will deteriorate
beyond a distance of 8 metres or outside an angel
of 30 degrees from the centre of the TV.
Turning On the Plasma Display
You can only control your plasma display with the
remote control when the device is in stand-by mode.
Switch the mains switch in the input panel into Position I.
The operational display on the front side of the display
screen lights up red.
• The plasma display is always connected to the
power supply network in stand-by mode. You must
switch the mains switch into position 0 and pull the
mains plug from the socket for complete disconnection.
• Display has a mains adapter, and can be operated
with a supply voltage of 230V AC and 50HZ.
Note 1: Your TV will go to stand-by mode in five
minutes if there is no broadcast signal.
Note 2: Your TV is equiped to operate with front
panel buttons, “MENU”, “SOURCE”, “ PROG ”,
“VOL ” in case your R/C is broken or the
batteries are exhausted.

Control Unit
1.
2.
3.
4.
5.
6.
7.
8.
9.
10.
11.
12.
13.
Remote control
Stand-by
Power on / off
Scart 1
Scart 2
Antenna input
Video input CINCH connector
Audio RCA input (L)
Audio RCA input (R)
Video output CINCH connector
Audio RCA output (L)
Audio RCA output (R)
S-VHS
14.
15.
16.
17.
18.
19.
20.
21.
22.
23.
24.
25.
Speaker out (L)
Speaker out (R)
PC sound input
VGA
DVI-D
Power Input
Source Select
Menu button
Program down
Program up
Volume down
Volume up
ANT VIDEO L R VIDEO L R
SPEAKER OUT
AV IN AV OUT SVHS
PC
AUDIO IN VGA PC DVI - D
SCART - 2
SCART - 1
419
5
3
12
6 7 8 9 10 11 12 13 16 17 18
14 15
Please note
• Do not use Video RCA and S-Video connections at the same time, otherwise they will effect the
picture each other.
• RGB inputs from scart will give you better picture quality.
252423222120
PROGMENUSOURCE VOL

Remote control
1
2
3
4
5
6
8
9
10
11
12
13
15
16
7
14
17
18
19
20
21
22
23
24
25
26
27
28
29
30
31
32
33
34
35
36
1. Picture Format choice button ( )
2. Temporary sound mute button ( )
3. Equalizer selection button ( )
4. PIP Position choice button
5. PIP/PAP On-Off button
6. AV modes select button
7. Numeric buttons
8. ZOOM mode choice button
9. Program down button ( )
10.Upward movement ( ) (Menu)
11.Volume down button ( )
12.Left movement ( ) (Menu)
13.Confirmation and Temporary
picture freezing button (Freeze) ( )
14.Info / Txt index page button ( )
15.Down button ( ) (Menu)
16.Txt Question/Answer button (Reveal) ( )
17.Red Fastext Button ( )
18.Teletext enlarge button (Double) ( )
19.Blue Teletext Button ( )
20.Teletext / Mix choice buttons ( )
21.UPDATE Button ( )
22.Yellow teletext Button ( )
23.Stand-by On/Off button ( )
24.Picture mode choice button ( )
25.PAT (Picture and Teletext) Mode
On-Off button
26.PIP size button
27.PC mode input button
28.TV mode input button
29.Return to Selected Program Button (SWAP) ( )
30.Program Up button ( )
31.Volume Up button ( )
32.Right button ( ) (Menu)
33.MENU button
34.Txt Stop Button (Hold) ( )
35.Green teletext button ( )
36.SUB PAGE Button ( )

If you wish to return to the previous
program that you were watching then
you have the ability to return with a
single function, by pressing the ( )
button. Regardless of whether you are
in AV, or any other program, by using
the SWAP function allows you to swap
between the program you were
watching and the last selected program. If you
hit the same button again, you will return to the
program or AV you were watching before.
When you press the red ( ) stand-by
button (temporary on-off function) located
on the upper right hand side of your
remote control of your television when
it is switched on;
indicator of your television will light red.
To switch your television back on, either
press the same button, any of the number
buttons or one of the ( )/( )buttons.
Using the TV
Turning on for the first time and Tuning
TV controls
To temporarily mute the sound of your
television, press the ( ) button, where
the ( ) on screen display will appear
on screen as an indication of the
application.
When you press the same button again, the
sound will return. During mute, when you press
the ( ) button the volume will decrease and
automatically get out of the mute function, if you
press the ( ) button the volume will increase
and automatically get out of the mute function.
Temporary On-Off (STAND-BY)
PR 01 PR 11 PR 01
Return to Selected Button
Program (SWAP)
Mute
There are certain settings which you must make
when setting up the television.
When you first switch it on, the Language menu
appears.
1. Select the menu language by pressing ( ) or
( ).
2. Select Country with ( ) or ( ) and then select
the country where you are located with ( ) or
( ).
3. Select Station search with ( ) or ( ) and press
() to start the search.
• The automatic station search starts. This may last
a minute or longer, depending on the number
of television stations received.
• After the search, the station list appears.
You can delete any stations which have been
saved more than once. You can also move stations
to a different preset position, and change or
enter the station names.
Programme selection
Press the ( )/( )buttons on your
remote control, or by selecting a numeric
button in order to get the desired channel
on your television. In order to select a
program whose number is greater than
9, you can use the numeric buttons,
punching in the desired numbers as
required. For example, to select program
12, press the numeric buttons 1 and 2
one after another.
Caution!
If you are not going to use your television
for a long period of time, make sure to
switch it off from the main power button.

Press the ( ) button Press the right move
button ( ) to select the Adjustment menu.
You can reach this menu directly by
pressing the Blue ( ) button. Using the
Up/down ( )/( ) buttons select the
ATS line and press the ( ) button, the
screen will show the ATS menu. At the
Country line select the country you want
to watch by using the Right-left ( )/( )
buttons.
Afterwards press the down ( ) button
to select the autoprogram heading and
press the ( ) or the Right/left ( )/( )
buttons. The screen will show a warning
before the Automatic Tuning.
To start Autoprogram press the ( )
button; the channels will be searched
automatically and those with broadcasting will
be saved from the first program into memory.At
this point, the autoprogram warning menu
appears showing an indicator that displays the
present situation of the Automatic Tuning process.
To stop the process at any given time, press the
() button.
After the automatic search the screen will show
the Program Table. The program numbers that
have been stored are reflected in the Program
Table, giving you the ability to assign any
program number to the channel of your choice.
The ATS (Automatic Tuning System) on your
television enables the automatic finding and
sequencing of channels.
Sequencing is done according to the selected
country channels, which broadcast Teletext and
channel names; followed by all channels with
Teletexts without channel names and then by
channels without Teletext, to be concluded by
foreign channels broadcasting Teletext with
channel names.
Tuning the television
You can either tune the programs automatically
or manually storing them in your television.
Please Note
In the case that your television does not receive
any broadcast signals for 5 minutes it will
automatically go on stand-by. The 5 minute
countdown OSD will be on screen.
Automatic tuning and storing of
the television program channels
with ATS
Control Menu
Press the ( ) button. You will see the
MENU with all the headings of the
different controls on screen. The Right/left
buttons ( )/( ) enable you to move
between the different control menu title where
you can indicate your choice by pressing the
() or Up/down ( )/( ) button.
In the event that you wish to exit the application
at any given stage, simply press the MENU or
TV button.
To quit the station list, press the ( ) button.

Press the ( ) button. Press the right move
button to select the Adjustment menu.
You can reach this menu directly by
pressing the ( ) button.
Using the Up/down ( )/( ) buttons
select the Set-Up line and press the ( )
button, the screen will show the Set-Up
menu. Select the program you want to
Set-Up by using the Right-left ( )/( )
buttons or the numeric keys. Choose
the system in which do a search among
the system lines.
Enter the System line using the down
button( ).Here your TV can be set to
one system, you can also select from
()/( ) more than one systems. Move
to the Band line using the down button
(). Using the right-left ( )/( ) buttons
on your remote control select “C” for
the cable channels received through the
“S” antena.
Manual tuning and storing of the
television channels
If you already know the Channel
number
Using the Up ( ) button select the Channel line
and enter the channel number by using the
numeric keypad or right-left buttons. If the channel
on screen is in the quality you desire and you
want to store it into memory, select the Saving
line with the down ( ) button.
Afterwards press the ( ) button, after a moment
you will see a Stored sign. The channel will be
stored according to the program number of your
choice. In order to store other channels, simply
repeat the above process. In the event that you
wish to exit the Channel Settings, simply press
the ( ) button

Fine tuning
If the current channel requires fine tuning,
select the Manual Fine Tuning bar by
using the down ( ) button in the
Manual Tuning menu. Using the right-
left movement ( )/( ) buttons on your
remote control you will have the ability
to get the exact quality of tuning
required. Under normal conditions you
will not need Fine Tuning. Your television
will automatically lock channels, which
need AFC values. However, in the event
that the TV transmitters do not work,
then you may need to use this process. For
storing the settings to the memory press ( )
button.
If you do not know the Channel
number
Press the ( ) button. Press the right move
() button to select the Adjustment
menu.
You can reach this menu directly by
pressing the ( ) button.Using the
Up/down ( )/( ) buttons select the
Set-Up line and press the ( ) button, the
screen will show the Set-Up menu.
Select the program you want to Set-Up
by using the Right-left ( )/( ) buttons or
the numeric keys. Choose the system in
which to do a search among the system
lines. Enter the System line using the
down button( ).Here your TV can be
set to one system, you can also select
from ( )/( ) more than one systems.
(option) Move to the Band line using the down
button ( ).
Using the right-left ( )/( ) buttons on your remote
control select “C” for the cable channels received
through the “S” antena. Use the down ( ) button
to select the Search line, and scan the channels
using the right ( ) button to increase and the
left ( ) button to decrease. Select the Saving
line if you found the channel in the quality you
desire.
Afterwards press the ( ) button to store into
memory. For the other channels using the Program
No line, select the program numbers you want
and repeat the same process.
If you want to Fine Tune or name the channel
you found, please refer to the concerning sections.
ENGLISH -18-

Skipping a program that has been
stored
In the event that you do not wish to come
across certain programs while going up
and down between channels using the
()/( )buttons, then you can use
the following function. Select the program
to be stored by using the Up-down
()/( ) button or Right-left ( )/( )
button. Press the Red ( ) colored button.
To the right of the name of the program
to be skipped will appear the letter “S”
in red. You have the option of applying
this method on more than one program
channel.
In order to see the program numbers
that are to be skipped, write down the
number of the concealed program
directly. To cancel the program skipping
function press the Red ( ) button again.
The red “S” to the right of the program name
will disappear, an the skipping will be cancelled.
To name the programs
The programs in the table might show the channel
names automatically with ATS, but could also
show the channel number instead of the name.
You can name any or all of the programs
with names that have a maximum of
five characters.
Select the program you want to name
using the Up-down ( )/( ) or Right-
left ( )/( ) buttons.Press the Yellow ( )
button. The screen will show the number,
volume type and name information for
the channel you want to name. Using
the Up-down ( )/( ) buttons to select
the desired letter, number or sign.
the second letter use the Right-left ( )/( )
button and again use the Up-down
()/( ) buttons to select the desired
letter, number or sign. After entering all
the letters press the ( ) button to store
the name.
To write names for any of the other programs,
simply repeat the above procedure. In the event
that you wish to exit the application, simply press
the ( ) button.
If no name is enter for any program, the program
number will be automatically displayed.
Program Table
Switching the locations of the
program channels that have
already been stored
Select the program you want to switch
by using the Up-down ( )/( ) or Right-
left ( )/( ) button. Press the Green ( )
colored button.
number and name will appear green.
Using the Up-down ( )/( ) or Right-
left ( )/( ) buttons carry it to other
program location you want to switch.
To finish the switching press the Green
() button. The first channel program
number indicated can be moved to the
second channel program number, which
in turn moves the initial channel program
number that has been indicated.
Deleting a program that has been
stored
Select the program you want to delete
by using the Up-down ( )/( ) button
or Right-left ( )/( ) button. Press the
Blue ( ) colored button. The screen will
show the confirmation menu. You can
press the Green ( ) button to delete or
the Red ( ) button to exit the menu.
When you press the Green ( ) button,
the selected channel will be deleted and
all following channels will move up in
their position accordingly.
Press the ( ) button. Press the right move
button to select the Adjustment menu.
You can reach this menu direclty by
pressing the ( ) button. The screen will
show the program table when you select
the program table line with Up/down
()/( ) and press the ( ) button.

Balance: To adjust the volume balance between
the left and right speakers to the desired level,
select the Balance bar using the down ( ) button.
Using the right/left movement ( )/( ) buttons
adjust the balance.
Sound Type: The program you watch might be
stereo or in two different languages. Using the
right/left keys ( )/( ) in this menu you can select
Mono/Stereo or Dual-I/Dual-II language.
Equalizer: Selecting the Equalizer mark press
() or ( ) button. The equalizer setting function
will be displayed. You can selected with the
right/left ( /) buttons, pre-programed,
unchangeable sound enhancing Music, Sport,
Cinema and Speech, User settings for the
programs you are watching. These can be adjusted
by you in the User selection. To adjust the User
selection; select the User selection and press the
() button.You can adjust the frequency levels
with the ( ) and ( ) buttons. You can select
120Hz, 500Hz, 1.5KHz, 5KHz and 10KHz
frequency bands with ( ) and ( ) buttons. Storing
the adjustment levels in memory press the menu
button to exit the user option.
You can exit the equalizer function pressing
the( )button again.
Please note: You can choose the equalizer
position directly from the ( ) button of your
remote control.
You can exit the equalizer function pressing the
() button at any time.
The setup of your television:
Setting up the Sound Menu
You can set the volume with the “ VOL+” and
“VOL -“ buttons on the television or the ( ) , ( )
buttons on the remote control.
You can control the other sound settings by
entering the Sound menu For this application all
you need to do is press the ( ) button of your
remote control. Select the Sound menu with the
direction ( ) button. You can reach this menu
directly by pressing the Red ( ) button. Select
the functions from the headings in this menu.
Effect: If you want to add depth to the sound of
the program you watch, select Spatial with the
() button.
Television transmitters have different sound levels.
This can be noticed from the different volume
levels that can be heard while switching from one
program to another. Using the right/left movement
()/( ) buttons switch to Open. The AVL
(Automatic Volume Limiting) function maintains
the same sound level as you switch from program
to program. To cancel choose Closed.

By pressing the ( ) button on your
remote control please enter the Picture
menu. You can enter this menu directly
by pressing the ( ). Select the setting
function you want using the Up and
down buttons ( )/( ) and adjust their
levels with the right and left
()/( ).
The picture brightness, contrast, color
and sharpness levels can all be adjusted
according to your desire. The changes
you make in the picture settings will be
automatically stored without any further
transactions necessary being your
Personal settings.
Static Reduction: Using this feature you can
reduce static by selecting Normal, Soft, Softest,
Sharpest and Sharp function.
Smart Picture: This is one of the pre-installed
and unchangeable features, to select
this feature use your ( )/( ) buttons.
Soft, Natural and Rich are constant
values. User are the values you stored
into memory. Furthermore, you can select
one of the non-adjustable default settings in the
memory (Picture Mode) by pressing the “ “
button on your remote control.
Picture Format: This feature enables you to
watch any broadcast image in the format
you desire. These are; Auto, 16:9
Subtitle, Letterbox, 4:3 and Zoom. You
can do the selection without entering
the picture menu by using the ” “
format selection button.
Color Tint: When NTSC video is used in SCART,
Color Tint settings can be made. If you do not
use such a video type the Color Tint choice is
not seen in the menu. If NTSC video is used in
SCART this choice becomes active and can be
seen in the menu.
Picture Setup (Green button) Depending on the type of broadcast being
transmitted, programmes can be viewed in a
number of formats. Press the ” “ button
repeatedly to select between Zoom, Letterbox,
Subtitle, Auto, 16:9, and 4:3.
Please note: Whenever the MENU button is
pressed the picture size setting will change while
the menus are ON the screen. This is to ensure
that the menus do not overlap the edges of the
viewable area.
This setting will entarge the image
to fit the screen by streching the
image horizontally, holding the
correct proportions at the centre
of the image. Some distrotion may
occur.
Use this setting when watching a
widescreen DVD, widescreen video
tape or a 16:9 broadcast (when
available). Due to the range of
widescreen formats (16:9, 14:9,
20:9 etc.) black bars may be
visible on the top and bottom of
the screen. Letterbox format
removes blck bars or makes it much
less visible.
When subtitles are included on a
letterbox format broadcast, this
setting will raise the picture to
ensure that all the text is displayed.
Some channels may send
automatic screen formatting. If you
wish to swich automatically to this
format select Auto.
The TV will outomatically switch
to detected format from the scart
inputs.
Use this setting when wathching
a widescreen DVD, widescreen
video tape or a 16:9 broadcast
(when available). Due to tre range
of widescreen formats (16:9,
14:9, 20:9 etc.) black bars may
be visible on the top and bottom
of the screen.
Use this setting to view a trie 4:3
broadcast.
Using the special functions to change the size of the
displayed image (i.e. changing the height/width ratio) for
the purposes of public display or commercial gain may
infringe on copyright laws.
Auto
16:9
Subtitle
Letterbox
4:3
Zoom

Child Lock: If you switch this feature On, the
buttons on the TV will not work when the TV is
in Stand-by mode or on and screen will show
a Child Lock warning.
Language: Select the menu language line and
press ( ) or the right ( ) button. The
screen will show the menu languages.
Select the desired language using the
Up-down ( )/( ) and Right-left ( )/( )
buttons. Press the ( ) button again. Your
television will now feature the language
you have choosen for all the adjustment
indicators.
Features Menu (Yellow Button)
Press the ( ) button on your remote
control. Select the Function menu line
with the ( ) button.
You can reach this menu directly by
pressing the Yellow ( ) button. You
can select the headings you want to
adjust in this menu by using the
Up/down ( )/( ) buttons.
Menu Background: Using this feature you
can adjust the background of the viewable menus
and other OSDs as Transparent or Opaque.
Stand-by Control: Your television features an
automatic stand-by feature which can be enabled
between 15 and 120 minutes. If you
want your television to autmatically go
into stand-by, please select the Stand-
by Control line. Select the desired
duration with the Right ( ) and left ( )
button.
At the end of the choosen duration the
screen will show a 30 second countdown
before switching off the screen and
entering into stand-by. To cancel the
automatic stand-by select “0” at the Stand-by
Control.
VCR mode: Using this feature you can avoid
image distortions from the device or the magnetic
tape while watching. For this you have to swtich
the VCR mode to ON.
Please note: This feature is only active for the
AV inputs. This feature will not be seen in Function
menu while watching programs or in PC mode.
This feature becomes automatically active in the
”0” numbered program.When you store the “0”
numbered channel as video device antena output,
you will be able to avoid image distortions from
the device or the magnetic tape while watching.
ZOOM: To activate this feature you have to
press the ( ) button on your remote
control while watching a program.
When you enter this menu you will see
in the lower right corner of the screen
the Zoom sub-menu. Using the Up/down
()/( ) buttons you can enlarge or
shrink the image in 16 steps. During the
Zoom process the image will be enlarge
focused on the center.
want to move the image up/down or
right/left ( )/( ) press the ( ) button
on your remote.
buttons to move around.
In the event that you wish to exit the
Zoom menu, simply press the ( ) button.
Please Note: The Zoom function is not
available during PIP.
Other manuals for P7
2
Table of contents
Other Beko Plasma TV manuals