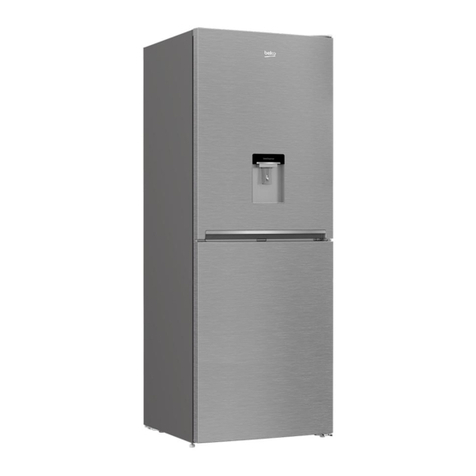
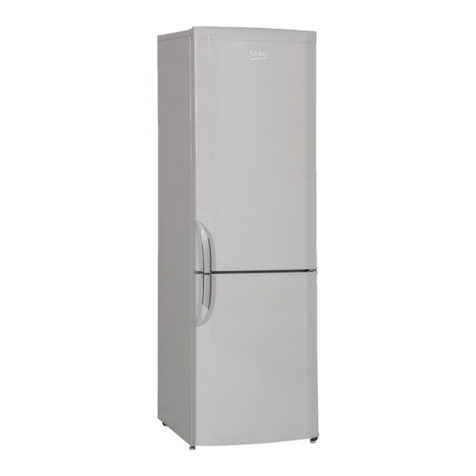
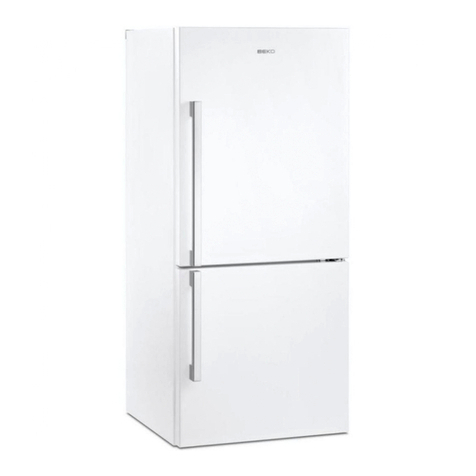
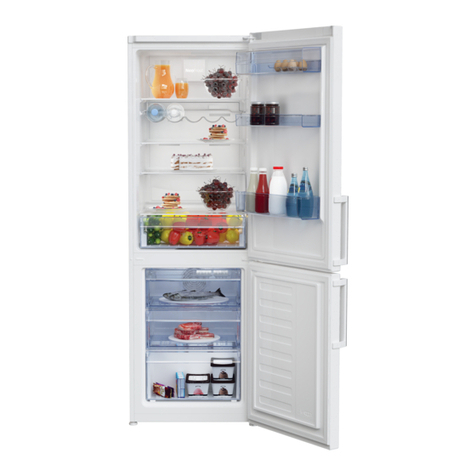
Beko GNE 25807 User manual

No Frost GNE 25807 S

Contents
Technical specifications of your refrigerator > 3
Prior to operating your refrigerator
Safety precautions........................................5
Installing Your Refrigerator ...........................6
Operating your refrigerator ...........................9
Why No-Frost? .............................................9
Using your refrigerator
Keeping food in the refrigerator ....................12
Using the accessories ..................................12
Placing the food............................................18
Things to be done for saving energy ............19
Changing the illumination lamp ....................19
Cleaning your refrigerator
Service
> 4
> 11
> 19
> 20
> 20
Fast-Freeze information
1EN

The Refrigerator
Freezer compartment
Fridge compartment
Freezer compartment glass shelf
Icematic
Drawer in the freezer compartment
Adjustable front legs
Lower ventilation cover
Crisper -0°C adjustment button
Crisper
Storage container
Crisper cover
Butter & Cheese shelf
Fridge compartment glass shelf
Egg holder
Fridge compartment door shelf
Banisters
Water spring
Multi-purpose shelf
Fridge compartment illumination lamp
Bottle holder
• Figures that take place in this instruction manual are schematic and may
not correspond exactly with your product. If the subject parts are not
included in the product you have purchased, then it is valid for other models.
2
1
2
3
4
5
6
7
8
9
10
11
12
13
14
15
16
17
18
19
20
EN
2
1
3
3
4
5
5
811
14
12
15
15
9
17
18
20
13
19
10
16
15
76 6
3
3

(Power failure safety; it is recommended not to consume
the food in freezer compartment after this period.)
Refrigerator/deep-freeze for domestic use
Product Category
Energy Class
Annual Energy Consumption
(kWh/year)
Fridge Compartment Volume (Net-lt)
Frozen Food Compartment Volume
(Net-lt)
Star Class
Cooling System
Temperature Increasing Time (hour)
Freezing Capacity (kg/24 hours)
Climate Class
Noise Level (dB(A))
Total Net Volume (lt)
(H) Height (cm)
(W) Width (cm)
(D) Depth (cm)
Weight (kg)
Total Power (W)
Electric Supply (V/Hz)
(Actual consumption varies depending on
where and how the appliance is used)
A
556
375
179
8
13
46
554
177,5
92,5
74
150
230/50
NO-FROST
SN
125
• Technical specifications can be changed to increase the product quality
without being subject to prior notice.
• Values stated on the markings on the product or in the printed materials
supplied with the product are the values obtained in laboratory in accordance
with relevant standards. Such values may vary depending on the usage of
the product and the ambient conditions.
• You can find the information about the cabin size of the refrigerator in
section “Installing your refrigerator”.
Technical specifications of your refrigerator
1
3EN

Prior to operating your refrigerator
2
• Please remember that the manufacturer shall not be held liable if the
information given in the instruction manual is not observed. This product is
designed for domestic use.
Prior to operating your refrigerator, please read the instruction manual carefully that
includes important information such as installation, usage and maintenance of your
product.
Things to be done
• Your refrigerator should be installed at least 30 cm away from heat sources such as hobs,
ovens, central heater and stoves and at least 5 cm away from electrical ovens and should
not be located under direct sunlight.
• The ambient temperature of the room where you install your refrigerator should at least be
10°C. Operating your refrigerator under cooler conditions than this is not recommended with
regard to its efficiency.
• Please care to keep the inside of your refrigerator clean.
• If two refrigerators are to be installed side by side, there should be at least 2 cm distance
between them.
• Your refrigerator must run smoothly without any vibration. To ensure this, maintain the
balance of your refrigerator on the floor by turning the adjustable front legs clockwise or
counterclockwise. This should be done before the food is placed in the refrigerator.
• When you operate your refrigerator for the first time, please observe the following instructions
during the initial six hours.
- Temperature adjustment button should not be turned off.
- The door should not be opened frequently.
- It must be operated empty without any food in it.
- Do not unplug your refrigerator. If a power failure occurs out of your control, please see
the warnings in section “Things to be done before calling the authorized service”.
• Original packaging and foam materials should be kept for future transportations or moving.
Points to be considered when transporting the product:
1.Your refrigerator must be emptied and cleaned prior to any transportation.
2. Shelves, accessories, crisper and etc. in your refrigerator must be fastened securely by
adhesive tape against any jolt before repackaging.
3. Packaging must be tied with thick tapes and strong ropes and the rules of transportation
printed on the package must be followed.
Please remember…
Every recycled material is an indispensable source for the nature and for our national
resources.
If you wish to contribute to recycling the packaging materials, you can get further information
from the environmental bodies or local authorities.
4EN

Safety precautions
5EN
make any repair on electrical appliances.
Repairs performed by incompetent persons
may create a risk for the user.
• In case of any failure or during a
maintenance or repair work, disconnect your
refrigerator's mains supply by either turning
off the relevant fuse or unplugging your
appliance.
• Be careful not to pull from the cable when
pulling the plug out.
• Electrical safety of your refrigerator shall be
guaranteed only if the earth system in your
house complies with standards.
• Do not allow children play with your
refrigerator. They might harm themselves
and the refrigerator. (E.g. do not allow them
hang from the door.)
• Place the beverage with higher proofs tightly
closed and vertically.
• Flammable items or products that contain
flammable gases (e.g. spray) as well as the
explosive materials should never be kept
in the appliance.
• Do not use mechanical devices or other
means to accelerate the defrosting process,
others than those recommended by the
manufacturer.
• Moving parts such as blades in a
housing at the ice outlet of the
dispenser and in cube ice
compartment, must not be touched to
avoid injury.
This appliance is not intended for use by
persons (including children) with reduced
physical, sensory or mental capabilities,
or lack of experience and knowledge,
unless they have been given supervision
or instruction concerning use of the
appliance by a person responsible for
their safety.
Children should be supervised to ensure
that they do not play with the appliance.
Electrical Safety
This product is designed for indoor use. It is
not appropriate to use it outdoor even if the
place is covered with a roof.
Exposing the product to rain, snow, sun and
wind is dangerous with respect to electrical
safety.
If the connection cable is damaged, it must
be changed by the manufacturer or customer
services in order to avoid potential risks to
you.
This product, included in the newest product
line is particularly environment friendly. Your
product is equipped with a natural cooling
system (R600a) which does not contain CFC
and HFC gases. This gas is flammable.
Therefore, pay attention to not damaging the
cooling system and piping during usage and
transportation. In the event of damage, do not
dispose the product in fire; keep your product
away from potential fire sources that can cause
the product catch a fire and ventilate the room
in which the unit is placed.
• When you want to dispose/scrap the product,
we recommend you to consult the authorized
service in order to learn the required
information and authorized bodies.
• Do not damage the cooling circuit.
• Do not use any electrical tools other than
those recommended by the manufacturer
inside the food storage compartments of the
product.
• Consult your authorized service for all your
questions and problems related to the
refrigerator. Do not intervene or let someone
intervene to the refrigerator without notifying
the authorized services.
• Do not eat cone ice cream and ice cubes
immediately after you take them out of the
freezer compartment! (This may cause frostbite
in your mouth.)
• Do not put bottled and canned liquid
beverages in the freezer compartment.
Otherwise, these may burst.
• Do not touch frozen food by hand; they may
stick to your hand.
• Vapor and vaporized cleaning materials
should never be used in cleaning and
defrosting processes of your refrigerator. In
such cases, the vapor might get in contact
with the electrical parts and cause short circuit
or electric shock.
• Never use the parts on your refrigerator
such as kick plate or door as a means of
support or step.
• Do not use electrical devices inside the
refrigerator.
• Do not operate a damaged refrigerator.
Consult your service if you have any doubts.
• Do not damage the parts, where the
refrigerant is circulating, with drilling or cutting
tools. The refrigerant that might blow out
when the gas channels of the evaporator,
pipe extensions or surface coatings are
punctured may cause skin irritations and eye
injuries.
• Do not cover or block the ventilation holes
on your refrigerator with any material.
• Only authorized service personnel may

Usage area measures
Following figure shows the required place to allow you use your refrigerator most efficiently.
Placing and Installation
Caution: Never plug the refrigerator in to the wall outlet during installation. Otherwise,
risk of death or serious injury may arise.
If the entrance door of the room where the refrigerator will be installed is not wide enough
for the refrigerator to pass through, than call the authorized service to have them remove
the doors of your refrigerator and pass it sideways through the door.
1. Install your refrigerator to a place that allows ease of use.
2. Keep your refrigerator away from heat sources, humid places and direct sunlight.
3. There must be appropriate air ventilation around your refrigerator in order to achieve
an efficient operation. If the refrigerator is to be placed in a recess in the wall, there must
be at least 5 cm distance with the ceiling and at least 5 cm with the wall.
If the floor is covered with a carpet, your product must be elevated 2.5 cm from the floor.
4. Place your refrigerator on an even floor surface to prevent jolts.
5. Do not keep your refrigerator in ambient temperatures under 10°C.
Installing Your Refrigerator
6
117 cm
154 cm
W
G
EN
At least
5 cm. At least
5 cm.

Floor balance adjustment
If your refrigerator is unbalanced;
1. You can balance your refrigerator by turning the front legs of it as illustrated in the
figure. The corner where the leg exists is lowered when you turn in the direction of
black arrow and raised when you turn in the opposite direction. Taking help from
someone to slightly lift the refrigerator will facilitate this process.
4
1 2 3
2. After the balance issue is remedied, install back the ventilation cover and fasten the
screws provided that there is no misalignment between the doors. If there is a
misalignment between the doors, install back the ventilation cover only after performing
the steps indicated in section “Height adjustment” in the following page.
3. Remove the screws fastening the lower ventilation cover using a Philips screwdriver
in the order shown in the figure.
7EN

Door height adjustment
Door can be raised vertically. This process can be performed easily using an Allen wrench
as illustrated in the figure. Door shelves should be empty when adjusting the door height.
• Remove the lower ventilation cover as described in the previous page. (1)
• Loosen the 3 screws of the lower door hinges using a screwdriver. (Do not remove completely)
(2)
• If the freezer compartment door is lower than the fridge compartment door, bring them to
the same level by turning the turning the elevation screw on the freezer compartment side
in the direction of arrow using a M6 Allen wrench as illustrated in Step (3).
• If the freezer compartment door is higher than the fridge compartment door, bring them to
the same level by turning the turning the elevation screw on the fridge compartment side in
the direction of arrow using a M6 Allen wrench as illustrated in Step (3).
After bringing the doors to the same level by elevating the front part with the aid of the
elevation screws, doors of the refrigerator shall close properly. If the doors do not close
properly, this might adversely affect the efficiency of the refrigerator.
8
1
2
Allen wrench
3
EN

• The factory setup temperature during the first operation is 4°C for fridge compartment and
-18°C for freezer compartment.
• Your refrigerator's compressor will start running approximately 1 minutes after the
refrigerator is plugged in during first usage. After startup of the compressor, compartment
temperatures will reach to the setup temperatures in 24 hours depending on the ambient
temperature and load status of your refrigerator.
• Pay attention to the following points during the first 12 hours, or 24 hours depending on
the ambient temperature.
- Do not open the doors frequently.
- Do not overload your refrigerator.
Operating your refrigerator
• No-Frost refrigerators are quite different from other refrigerators with respect to their
operating principles. In normal fridges, the humidity that rushes into the refrigerator and the
humidity brought by the food causes ice formation in the freezer compartment. This ice is
melted and cleaned with certain intervals.
• However, in No-frost refrigerators no ice or snow formation occurs inside the usable areas
of the refrigerator.
• No-Frost refrigerators also show very different characteristics from other refrigerators with
respect to their cooling systems. A No-Frost refrigerator provides equal cooling down of all
the food in it thanks to the cool air being circulated in it continuously.
• Therefore, your No-Frost refrigerator provides you a great comfort in usage.
Why No-Frost?
9EN

-18°C 4°C This is the normal usage condition. Freezer compartment is running as a
deep-freezer.
-20,-22 or -24°C 4°C This is recommended adjustment level when the ambient temperature
exceeds 30°C.
Fast freeze
process 4°C Use this when you wish to freeze your food or make ice in a short time.
Your refrigerator will return to its previous mode when the process is over.
If you think that your fridge compartment is not cold enough because of the
hot conditions or frequent opening and closing of the door, you may adjust
to these values.
2°C-18°C or colder
Explanations
Quick cool
process
You can use it when your fridge compartment is overloaded or if you wish to
cool down your food rapidly.
-18°C or colder
3Using your refrigerator
Control buttons
Control buttons allow you to make the settings of your refrigerator easily and without opening
the doors. Thus, heat loss is avoided.
10
Fridge/Freezer Door Open Indicator:
Fridge/Freezer Door Open Indicator is activated either fridge or freezer door is open. If the
door remains opened for 60 sec, buzzer is on to alarm. If any button on display is pressed
buzzer will be off even if the door is not closed.
Fast Freeze Button
Fridge Compartment
Temperature
Adjustment Button
Freezer Compartment
Temperature
Adjustment Button Quick Cool Button
Freezer
Compartment
Temperature
Adjustment Indicator
Failure and
Warning
Indicator
Fridge Compartment
Temperature
Adjustment Indicator
Fast Freeze
Indicator Quick Cool
Indicator
Freezer
Compartment Actual
Temperature Indicator
Fridge
Compartment
Actual Temperature
Indicator
min max max min
SET FastFreeze QuickCool SET
ºC ºC
EN
Freezer
Compartment
Adjustment
Fridge
Compartment
Adjustment

Making the fridge compartment temperature adjustment
When you want to change your refrigerator's temperature settings, you need to press the
“Fridge compartment temperature adjustment button” to make the fridge compartment
temperature adjustment. The fridge compartment temperature can be set to cooler degrees
every time you press on the button (such as 8, 6, 4, 2, 8, …).
Making the freezer compartment temperature adjustment
When you want to change your refrigerator's temperature settings, you need to press the
“Freezer compartment temperature adjustment button” to make the freezer compartment
temperature adjustment. The freezer compartment temperature can be set to cooler degrees
every time you press on the button (such as, -18, -20, -22, -24, -18, …).
Fast Freeze function
You can use this function of your refrigerator to rapidly freeze the food you put into the
freezer compartment for the first time or to obtain ice more quickly. If you want to keep your
food frozen for a long period, first apply the fast freeze function to them. Fast freeze is the
healthiest way of keeping the food for a long time. Temperature of your refrigerator's freezer
compartment drops down to -27°C during fast freeze process. You must read Part 4 carefully
before applying fast freeze process to your food.
When you want to use the “Fast Freeze” function, press on the fast freeze button. Fast
freeze indicator lights up when you press the button. Freezer Compartment Temperature
Adjustment Indicator turns to -27°C. While fast freeze function is activated, this compartment
reaches colder degrees than the adjusted values and all of the freezer compartment
temperature indicators may light up. Fast Freeze function lasts for maximum 24 hours. Your
refrigerator will automatically exit the fast freeze mode once the fast freeze process is
completed, fast freeze indicator lamp will go off and the refrigerator will turn back to the
previously adjusted temperatures. Freezer compartment temperature indicators will gradually
go off until the adjusted temperature value is attained.
If you have unintentionally switched your refrigerator to fast freeze mode or if you want to
cancel the process, just press the “Fast Freeze” button again to exit the fast freeze mode.
If you want to freeze large amounts of fresh food, press the fast freeze button 24 hours
before putting the food into the freezer compartment.
Quick cool function
This function can be used for food placed in the fridge compartment and desired to be
cooled down rapidly. Press quick cool button to activate the function. During this process,
the quick cool indicator will light up and fridge compartment temperature adjustment indicator
will turn into 1°C. While quick cool function is activated, this compartment reaches colder
degrees than the adjusted values. Meanwhile, all of the temperature indicators of the fridge
compartment may light up. Quick cool process will take about 2 hours and at the end of this
period, the quick cool indicator lamp will go off, and the refrigerator will turn back to the
previously adjusted temperatures.
11 EN

Icematic
• When the Icematic water supply reservoir
(1) is removed from its place in order to fill it
up, it must be replaced within two minutes
after it is filled with water. The nozzle of the
system will open and the Icematic cells will
be filled with water automatically as soon as
the cartridge is seated in its place. Your ice
will be ready approximately in two 2 hours.
• Do not remove the Icematic (2) from its
seating to take ice.
• Turn the knobs on it clockwise as illustrated
in the figure.
Ice cubes in the cells will fall down in to the
ice bank (3) below.
• You may take out the ice bank and serve
the ice cubes.
• If you wish, you may keep the ice cubes in
the ice bank.
The ice bank is just for accumulating ice
cubes. Do not put water in it. Otherwise,
it will break.
About water supply reservoir
Remove the water supply reservoir and fill it
up with water. After filled up with water, the
reservoir must be pushed forward into its
seating until a “click” sound is heard. If there
is any ice in the reservoir, wait until it melts.
Water supply reservoir has a capacity of
approximately 290 ml.
Using the accessories
• It must be preferred to wrap or cover the food before placing them in the refrigerator.
• Hot food must cool down to the room temperature before putting them in the refrigerator.
• The foodstuff that you want to freeze must be fresh and in good quality.
• Foodstuff must be divided into portions according to the family's daily or meal based
consumption needs.
• Foodstuff must be packaged in an airtight manner to prevent them from drying even if they
are going to be kept for a short time.
• Materials to be used for packaging must be tear-proof and resistant to cold, humidity, odor,
oils and acids and they must also be airtight. Moreover, they must be well closed and they
must be made from easy-to-use materials that are suitable for deep freeze usage.
• Food to be frozen must be put in the freezer compartment. (They should not be allowed
to come in contact with the previously frozen items to prevent their partial thawing. Freezing
capacity of our product is given in the technical specifications of your refrigerator.)
• Periods given in the information about deep freeze must be obeyed for storage times.
• Frozen food must not be used promptly after they are thawed and they should never be
re-frozen.
Keeping food in the refrigerator
12
1
2
3
EN

Sliding body shelves
Sliding body shelves can be moved back and
forth easily in the shelf channels. Thus, you
can easily reach the food you place behind
the shelf.
Breakfast tray
Breakfast tray located under the shelf can be
moved back and forth easily in the shelf
channels. You can keep your breakfast stuff
for a long time in this drawer which increases
the volume of the fridge compartment.
13 EN
Ice-matic
Fill the ice-matics with water and put them in
place. Your ice will be ready in about two
hours. It is not necessary to take the ice-matic
out in order to get ice; just turn it 90° to the
right, and the ice will drop into the ice-bowl
below. Then take out the ice-bowl to serve
the ice. If you wish, you can leave the ice in
the bowl for a while.
Attention!
The ice-bowl is only meant for collecting ice.
If you put water in, it will break.

Humidity control in the crisper
Humidity control can be adjusted by pulling
the humidity adjustment slider to right or left.
• If you detect drying in the food you store in
this compartment, switch the humidity
adjustment slider to the closed position.
• If you detect humidity in this compartment,
switch the humidity adjustment slider to the
open position.
14 EN
Crisper or Chiller (0°C i. e. zero degree
centigrade compartment (1))
• The drawer at the bottom of the fridge
compartment can be converted into a salad
crisper or a Chiller Compartment.
• The Chiller Compartment will keep the
temperature below the temperature in the
fridge compartment around 0°C and so, meat
or fish can be kept fresher for longer.
Chiller Compartment is also ideal for the
storage of ready cooked chilled food.
Important:
• Vegetables and fruits may freeze if the
adjustment slider (2) is kept at Chiller
Compartment position. Therefore, check the
position of the slider (2) before storing food.
• In ambient temperatures at 10°C or lower,
green leaf vegetables and other easily frozen
salad should be removed from this
compartment (1) and placed into the upper
crisper compartment. (3)
• Do not swap the position of these drawers
and make sure that the position adjustment
slider is set at the desired position i.e. salad
crisper or Chiller Compartment.
• In ambient temperatures at above 28°C, if
the compartment (1) is desired to use colder,
the adjustment slider (4) into the freezer can
be converted to open position. Be sure the
adjustment slider (4) into the freezer is in close
position when the ambient temperature is at
28°C or lower.

Egg holder
• You can install the egg holder to the desired
door or body shelf.
• Never store the egg holder in the freezer
compartment
Multi-purpose Shelf, Tinned Beverage
and Banisters
(May not exist in some models.)
You can use your multi-purpose shelf for your
food with a suitable size as illustrated in the
figure.
• You can use this compartment to store your
food and beverages that can fit into the
banisters. (Ketchup, mayonnaise and etc.)
• You can use the tinned beverage shelf by
placing your beverages sidelong.
15 EN

Water spring
In addition to allowing you to obtain cold water
without opening the door of your refrigerator,
this accessory also helps you to save energy
since you do not need to open and close the
door of your refrigerator frequently and thus,
the cold air is kept inside.
Using the water spring
Press in the latch of the water spring with
your glass. Water spring will open and water
will pour into your glass. Latch of the water
spring will return to its original position and
water flow will stop when you take your glass.
Filling in the water spring
Open the lid of the water spring located inside
of the door as illustrated and fill in with water
at room temperature or colder using a carafe.
Close the lid.
We suggest you to switch on the child lock in
order to avoid unintended water flow while
filling in the water spring.
Warning!
Water spring is only intended for use with
drinking water. Do not put hot water, juice,
milk and gaseous or alcoholic beverages
into the water spring.
Dripping Crenel
Water drops that drip while using your water
spring accumulates in the dripping crenel
at the lower side. Remove the dripping crenel
plastic cover by pressing in the right corner
of it in order to remove the accumulated
water. You can remove the water with a
sponge or a soft cloth.
16 EN

Cleaning the water reservoir
Remove the water reservoir as illustrated,
open the side latches and detach the upper
lid mechanism and reservoir apart. Clean the
water reservoir with warm water, install the
upper lid mechanism and fasten the latches.
While installing the reservoir to its place,
make sure that the hooks at the rear side of
the reservoir fits completely on the the
hanger in the door of the refrigerator. If you
have removed any other parts during
cleaning, make sure that they are correctly
installed to their places. Otherwise, water
leakage may occur.
(Washing in the dishwasher may cause the
water reservoir to get scratched.)
17 EN

18
Breakfast tray
Freezer
compartment drawer
Butter & Cheese
section
Egg holder
Fridge compartment
shelves
Fridge compartment
door shelves
Crisper
Crisper / zero degree
compartment
Freezer compartment
shelves
Breakfast stuff, delicatessen
Various frozen food such as meat, fish, ice cream, vegetables and etc.
Store the food such as meat, chicken, fish and etc. after wrapping with
thin cellophane.
Dairy products such as milk, butter, cheese
Egg
Food in pans, plates, closed containers
Small and packaged food or drinks (such as milk, fruit juice and beer)
Vegetables and fruits
Vegetables, fruits, meat and raw fish to be thawed
The cycle slider should be adjusted as required.
Check the cycle slider before placing your food.
Placing the food
EN

4
Food must be frozen as rapidly as possible when they are put in a refrigerator in order to
keep them in good quality.
The TSE norm requires (according to certain measurement conditions) the refrigerator to
freeze 4 kg of foodstuff at 32°C ambient temperature to -18°C or lower within 24 hours for
every 100-liters of freezer volume.
It is possible to keep the food for a long time only at -18°C or lower temperatures.
You can keep the freshness of food for many months (at -18°C or lower temperatures
in the deep freeze).
WARNING!
• The foodstuff that you want to freeze must be in good quality.
• Foodstuff must be divided into portions according to the family's daily or meal based
consumption needs.
• Foodstuff must be packaged in an airtight manner to prevent them from drying even
if they are going to be kept for a short time.
Materials necessary for packaging:
• Cold resistant adhesive tape
• Self adhesive label
• Rubber rings
• Pen
Materials to be used for packaging the foodstuff must be tear-proof and resistant to cold,
humidity, odor, oils and acids.
Foodstuff to be frozen should not be allowed to come in contact with the previously frozen
items to prevent their partial thawing.
You can check the freezing capacity of your refrigerator from “Technical Specifications”
section in Part 1.
Always follow the values in the tables for storage periods.
Frozen food must not be used immediately after they are thawed and they should
never be re-frozen.
Fast-Freeze information
To change the lamp used for illumination of your refrigerator, please call your Authorized
Service.
Should the light fail to work, proceed as follows.
1- Switch off at the socket outlet and pull out the mains plug.
You may find it useful to remove shelves for easy access.
2- Use a flat tipped screwdriver to remove the light diffuser cover.
3- First check that the bulb hasn't worked loose by ensuring it is screwed securely in the
holder. Replace the plug and switch on.
If the bulb works, replace the light cover by inserting the rear lug and pushing up to locate
the front two lugs.
4- If the light still fails to work, switch off at the socket outlet and pull out the mains plug.
Replace the bulb with a new 15 watt (max) screw cap (SES-E14) bulb.
5- Carefully dispose of the burnt-out light bulb immediately.
Replacement light bulb can easily be obtained from a good local electrical or DIY store.
Changing the illumination lamp
1. Do not keep the doors of your refrigerator open for a long time.
2. Do not put hot food or drinks in your refrigerator.
3. Do not overload your refrigerator so that the air circulation inside of it is not prevented.
4. Do not install your refrigerator under direct sunlight or near heat emitting appliances such
as oven, dishwasher or radiator.
5. Pay attention to keep your food in closed containers.
Things to be done for saving energy
19 EN
This manual suits for next models
14
Table of contents
Languages:
Other Beko Refrigerator manuals

Beko
Beko BCSA285K4SN Instruction Manual

Beko
Beko RBI 2300 HCA - ANNEXE 713 User manual

Beko
Beko RDNE700E41XB IL User manual

Beko
Beko RCF582DS User manual

Beko
Beko CSA29020 User manual

Beko
Beko CNA29121X User manual

Beko
Beko SN 140220 User manual

Beko
Beko BK9611NE User manual

Beko
Beko TLA 6018 User manual

Beko
Beko LSG1545DS User manual

Beko
Beko GNE60020X User manual

Beko
Beko CHA 27020 X User manual

Beko
Beko CN 142220 DB User manual

Beko
Beko RCNE720E30DP User manual

Beko
Beko BCFD373 Assembly Instructions

Beko
Beko GN163241XBRN User manual

Beko
Beko CFD 540B User manual

Beko
Beko RDNE455E20DS User manual

Beko
Beko DS227010 User manual

Beko
Beko BCSA306K2S Instruction Manual