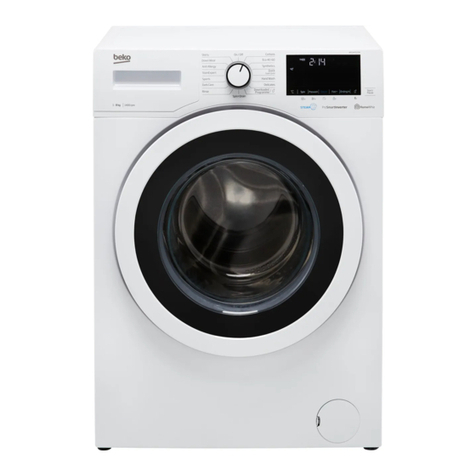
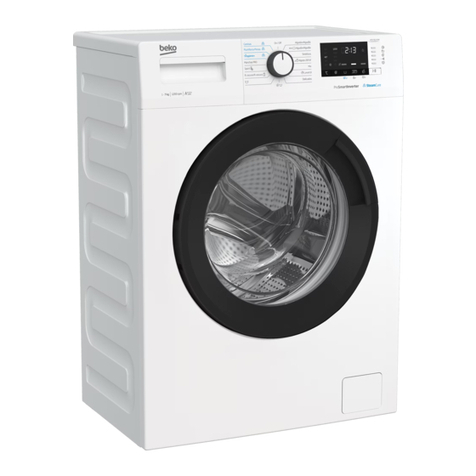
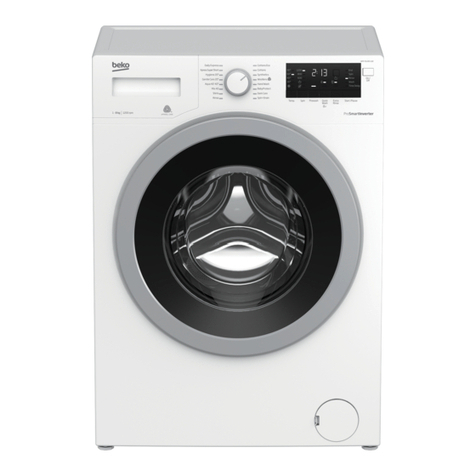
Beko WMB91242L Operating instructions

WMB91242LC
WMB91242LB
Automatic
Washing Machine

Please read this manual first!
Dear Customer,
We hope that your product which has been manufactured in modern facilities and passed
through a strict quality control procedure will give you the best results.
Therefore, we advise you to read through this manual carefully before using your product
and keep it for future reference.
This operation manual will…
…help you use your machine in a fast and safe way.
•PleasereadtheOperationManualbeforeinstallingandstartingyourmachine.
•Particularlyfollowtheinstructionsrelatedtosafety.
•KeepthisOperatingManualwithineasyreach.Youmayneeditinthefuture.
•Pleasereadalladditionaldocumentssuppliedwiththismachine.
PleasenotethatthisOperatingManualmaybeapplicableforseveralothermodels.
Differences between models will be identified in the manual.
Explanation of symbols
ThroughoutthisOperationManualthefollowingsymbolsareused:
C
Important information or useful hints about usage.
A
Warning for hazardous situations with regard to life and property.
B
Warning for supply voltage.
This appliance’s packaging material is recyclable. Help recycle it and protect the
environment by dropping it off in the municipal receptacles provided for this purpose.
Yourappliancealsocontainsagreatamountofrecyclablematerial.Itismarkedwith
this label to indicate the used appliances that should not be mixed with other waste.
This way, the appliance recycling organised by your manufacturer will be done under
the best possible conditions, in compliance with European Directive 2002/96/EC on
Waste Electrical and Electronic Equipment. Contact your town hall or your retailer for
the used appliance collection points closest to your home. We thank you doing your
part to protect the environment.
2820521374/020410.1559

3 - EN
TABLE OF CONTENTS
1 Your Washing Machine 4
Overview . . . . . . . . . . . . . . . . . . . . . . . . 4
Specifications . . . . . . . . . . . . . . . . . . . . 5
2 Warnings 6
General Safety. . . . . . . . . . . . . . . . . . . . 6
First Use . . . . . . . . . . . . . . . . . . . . . . . . 6
Intended use . . . . . . . . . . . . . . . . . . . . . 6
Safety instructions . . . . . . . . . . . . . . . . . 6
If there are children in your house... . . . . 7
Electrical connection . . . . . . . . . . . . . . . 7
3 Installation 9
Removing packaging reinforcement. . . . 9
Openingthetransportationlocks . . . . . . 9
Appropriate installation location . . . . . . . 9
Adjusting the feet. . . . . . . . . . . . . . . . . . 9
Connecting to the water supply. . . . . . 10
Connecting to the drain . . . . . . . . . . . . 10
Electrical connection . . . . . . . . . . . . . . 11
Destroying the packaging material. . . . 11
Disposing of the old machine. . . . . . . . 11
4 Initial preparations for washing12
Sorting the laundry . . . . . . . . . . . . . . . 12
Preparingclothesforwashing . . . . . . . 12
Correct load capacity . . . . . . . . . . . . . 12
Loading door. . . . . . . . . . . . . . . . . . . . 13
Detergents and softeners . . . . . . . . . . 13
5 Selecting a Program and
Operating Your Machine 15
Control panel. . . . . . . . . . . . . . . . . . . . 15
Display symbols. . . . . . . . . . . . . . . . . . 15
Turning the machine on . . . . . . . . . . . . 16
Programselection . . . . . . . . . . . . . . . . 16
Additional programs . . . . . . . . . . . . . . 16
Special programs . . . . . . . . . . . . . . . . 17
Temperature selection . . . . . . . . . . . . . 17
Spin Speed selection. . . . . . . . . . . . . . 18
Programandconsumptiontable . . . . . 19
Auxiliary functions . . . . . . . . . . . . . . . . 20
Time display . . . . . . . . . . . . . . . . . . . . 20
StartingtheProgram . . . . . . . . . . . . . . 21
Progressofprogram . . . . . . . . . . . . . . 21
Changing the selections after the program
has started . . . . . . . . . . . . . . . . . . . . . 22
Switching the machine to standby mode22
Child-proof lock. . . . . . . . . . . . . . . . . . 22
Ending the program through canceling 22
Programinrinseholdmode. . . . . . . . . 22
End of program . . . . . . . . . . . . . . . . . . 23
6 Quick instructions for daily use24
7 Cleaning and care 26
Detergent drawer. . . . . . . . . . . . . . . . . 26
The door and the drum . . . . . . . . . . . . 26
Outercabinetandcontrolpanel. . . . . . 26
Inlet water filters. . . . . . . . . . . . . . . . . . 26
Draining any remaining water and cleaning
the pump filter . . . . . . . . . . . . . . . . . . . 27
8 Solution suggestions for
problems 29
9 Guarantee 35
10 Service 36

4 - EN
1
Your Washing Machine
Overview
4
5
6
3
1
2
1 - Detergent Drawer
2 - Door
3 - Top Lid
4-ControlPanel
5 - Filter Cap
6 - Height-adjustable feet

5 - EN
Specifications
Specifications of this appliance may change without notice to improve the quality of the
product. Figures in this manual are schematic and may not match your product exactly.
Values stated on the machine labels or in the documentation accompanying it are obtained
in laboratory in accordance with the relevant standards. Depending on operational and
environmental conditions of the appliance, values may vary.
Models
Maximumdrylaundrycapacity(kg)
Height(cm)
Width(cm)
Depth(cm)
NetWeight(±4kg)
Electricity(V/Hz.)
TotalCurrent(A)
TotalPower(W)
Spinningcycle(rpmmax.)
WMB91242LC WMB91242LB
9 9
84 84
60 60
59 59
73 73
230 V / 50Hz 230 V / 50Hz
10 10
2200 2200
1200 1200

6 - EN
2
Warnings
Pleasereadthefollowinginformation.
Otherwise,theremaybetheriskof
personal injury or material damage.
Moreover,anywarrantyandreliability
commitment will become void.
General Safety
• Neverplaceyourmachineonacarpet
coveredfloor.Otherwise,lackofairflow
from below your machine may cause
electrical parts to overheat. This may
cause problems with your washing
machine.
• Ifthepowercableormainsplugis
damaged you must call Authorised
Service for repair.
• Checkwaterhosesforwear.Donotuse
old/used water inlet hoses. These may
cause stains on your laundry.
• Fitthedrainhoseintothewastewater
system securely to prevent any water
leakage and to allow machine to take
in and discharge water as required. It is
very important that the water intake and
drain hoses are not folded, squeezed,
or broken when the appliance is pushed
into place after it is installed or cleaned.
• Yourwashingmachineisdesignedto
continue operating when the power
restores after a power interruption.
YoucannotcancelanyProgramme
bypressingthe“On/Offbutton.”The
machinewillresumeitsProgramme
whenthepowerrestores.Pressthe
“Start/Pause/Cancel”buttonfor3
secondstocanceltheProgramme(See,
CancellingaProgramme)
• Theremaybesomewaterinyour
machine when you receive it. This is
from the quality control process and
is normal. It is not harmful to your
machine.
• Someproblemsyoumayencounter
maybecausedbythesoftware.Press
“Start/Pause/Cancel”buttonfor3
secondstocanceltheProgramme
set in your machine before calling the
Authorised service.
First Use
• Toprepareyourmachineforwashing,
carry out your first washing process
without loading your machine and
withdetergentunder“Cottons90°C”
Programme.
• Ensurethatthecoldwaterconnections
has been made correctly when installing
your machine.
• Ifthecurrentfuseorcircuitbreakeris
less than 13 Amperes, please have a
qualified electrician install a 13 Ampere
fuse or circuit breaker.
• Tomakeyourmachinereadyforuse,
please be sure that the tap water
supply and water drainage systems
are appropriate before calling the
Authorised service. If they are not, call a
qualified plumber to have any necessary
arrangements carried out.
Intended use
• Thisproducthasbeendesignedfor
home use.
• Theappliancemayonlybeusedfor
washing and rinsing of textiles that are
marked accordingly.
• Onlydetergents,softenersand
supplements suitable for washing
machines may be used.
• Observethecareinstructionslabelled
on textile products and any other
instructions given by companies that
produce detergents for your machine.
• Childrenshouldbesupervisedtoensure
that they do not play with the appliance.
• Thisapplianceisnotintendedforuse
bypersons(includingchildren)with
reduced physical, sensory or mental
capabilities, or lack of experience
and knowledge, unless they have
been given supervision or instruction
concerning use of the appliance by a
person responsible for their safety.
Safety instructions
• Thisappliancemustbeconnectedto
an earthed outlet protected by a fuse of
suitable capacity.
• Thesupplyanddraininghosesmust

7 - EN
always be securely fastened and remain
in an undamaged state.
• Fitthedraininghosetoawashbasinor
waste system securely before starting
up your machine. There may be a risk
of being scalded due to high washing
temperatures!
• Neveropenthedoororremovethefilter
while there is still water in the drum.
Otherwise,theremaybetheriskof
flooding and possible injury due to the
hot water.
• Neverforceopenthelockeddoor!The
door will be ready to open just a few
minutes after the washing cycle comes
to an end.
• Unplugthemachinewhenitisnotin
use.
• Neverwashdowntheappliancewitha
water hose! There is the risk of electric
shock! Always disconnect from the
mains by unplugging before cleaning.
• Nevertouchtheplugwithwethands.
Never unplug by pulling on the cable,
always pull out from the plug only. Do
not operate the machine if the power
cord or plug is damaged.
• Neverattempttorepairthemachine
yourself.Otherwise,youmaybeputting
yours and other’s lives in danger.
• Formalfunctionsthatcannotbesolved
byinformationintheoperatingmanual:
Turn off the machine, unplug it, turn
off the water tap and contact an
Authorised service agent.
If there are children in your
house...
• Electricalappliancesmaybedangerous
forthechildren.Keepchildrenaway
from the machine when it is operating.
Do not let them tamper with the
machine.
• Closethedoorwhenyouleavethearea
where the machine is located.
• Storealldetergentsinasafeplaceout
of reach of the children.
• UseChild/Keylocktopreventchildren
altering the settings
Electrical connection
Makesurethatyouhaveanearthedpower
outletsocketratedat13amps(minimum).
Attention!
If you place your machine under a worktop,
the socket must be reachable after
installation,oraseparateswitch(whichcan
disconnectthetwopoles)mustbeusedin
the installation.
Connect the power cord to the appropriate
electrical socket with an equivalent current
rating indicated on the rating plate at the
front of the machine behind the kick plate.
After removing the plug from its transit
position, please insert the plug seal to
prevent water spillage entering the machine.
Electrical requirements
Beforeyouinserttheplugintothewall
socket make sure that the voltage and
the frequency shown in the rating label
corresponds to your electricity supply.
We recommend that this appliance be
connected to the mains supply via a suitable
switched and fused socket in a readily
accessible position.
Should the mains lead of the appliance
become damaged or need replacing at
any time, it must be replaced by a special
purpose made mains lead which can only
be obtained from a Authorised Service
Agent.
B
This appliance must be earthed
If the fitted moulded plug is not suitable for
your socket, then the plug should be cut off
and an appropriate plug fitted.
Destroy the old plug, which is cut off as a
plug with a bare cord could cause a shock
hazard if inserted into a socket elsewhere in
the house.
The moulded plug on this appliance
incorporates a 13A fuse. Should the fuse
need to be replaced an ASTA approved
BS1362fuseofthesameratingmustbe
used. Do not forget to refit the fuse cover.
In the event of losing the fuse cover, the
plug must not be used until a replacement
fuse cover has been fitted. Colour of the
replacement fuse cover must be the same
colour as that visible on the pin face of the
8 - EN
plug. Fuse covers are available from any
good electrical store.
Important
Fitting a different plug
As the colours of the wires in the mains
lead of this appliance may not correspond
with the coloured markings identifying the
terminalsonyourplug,proceedasfollows:
1 Connect the green - yellow or green
(earth)wiretotheterminalintheplug
marked ‘E’ or with the symbol f or
coloured green and yellow or green.
2 Connecttheblue(neutral)wiretothe
terminal in the plug marked ‘N’ or
coloured black.
3 Connectthebrown(live)wiretothe
terminal in the plug marked ‘L’ or
coloured red.
With the alternative plugs a 13A fuse must
be fitted either in the plug or adaptor or in the
main fuse box. If in doubt contact a qualified
electrician.

9 - EN
3
Installation
Removing packaging
reinforcement
Tilt the machine to remove the packaging
reinforcement. Remove the packaging
reinforcement by pulling the ribbon.
Opening the transportation locks
C
Transportation safety bolts must be
removed before operating the washing
machine!Otherwise,themachinewillbe
damaged!
1. Loosen all the bolts with a spanner until
theyrotatefreely(“C”)
2. Remove transportation safety bolts by
turning them gently.
3. Fitthecovers(suppliedinthebagwith
theOperationManual)intotheholeson
therearpanel.(“P”)
C
Keepthetransportationsafetyboltsin
a safe place to reuse when the washing
machine needs to be moved again in
the future.
C
Never move the appliance without the
transportation safety bolts properly fixed
in place!
Appropriate installation location
Install the appliance in environments which
have no risk of freezing, in a stable and level
position.
C
The floor must be capable of carrying
the load on it!
C
If the washing machine and a drier
are placed on top of each other, their
approximate weight together may reach
180 kg when they are full.
Important:
• Donotplacetheapplianceontopof
the power cable.
• Keepatleast1cmdistancefromthe
edges of other furniture.
• Placethemachineonafirmsurface;do
not position it on a long pile rug or such
like surfaces.
Adjusting the feet
C
Do not use any tools to loosen the lock
nuts.Otherwise,theycanbedamaged.
1. Manually(byhand)loosenthelocknuts
on the feet.
2. Adjust them until the machine stands
level and firm.
3. Important:Tightenalllocknutsup
again.

10 - EN
Connecting to the water supply.
Important:
• Thewatersupplypressurerequiredto
runthemachinemustbe1-10bar(0,1
–1MPa).(Practically,itisnecessary
to have 10 – 80 liters of water flowing
from the tap in one minute to have
yourmachinerunsmoothly.)Attacha
pressure-reducing valve if the water
pressure is higher.
• Connectthespecialhosesuppliedwith
the machine to the water intake valves
on the machine.
• Inordertopreventwaterleakagethat
may occur at the connection points,
therearerubberseals(4sealsforthe
models with double water inlet and 2
sealsforothermodels)attachedtothe
hoses. These seals should be used at
the tap and machine connection ends
of the hoses. The plain end of the hose
fitted with a filter must be attached to
the tap and the elbowed end must be
attached to the machine. Tighten the
nutsofthehosewellbyhand;never
use wrenches to tighten the nuts.
• Openthetapscompletelyaftermaking
the hose connection to check if there
is any water leakage at the connection
points. Turn off the tap and remove the
nut in case of any leakage. Retighten
the nut carefully after checking the seal.
To prevent any water leakage and any
other damage to be caused by it, keep
the taps closed when the machine is
not in use.
• Modelswithasinglewaterinletshould
not be connected to the hot water
tap. Laundry may be damaged or the
appliance may switch to protection
mode and not work.
When returning the appliance to its place
after maintenance or cleaning, care should
be taken not to fold, squeeze or block the
hoses.
Connecting to the drain
The water discharge hose can be attached
to the edge of a washbasin or waste water
system. The drain hose should be firmly
fitted into the drain as to not loosen in its
housing.
Important:
• Theendofthedrainhosecanbe
directly connected to the wastewater
drain or to the washbasin. The
fitting must be secured in all types
ofconnections.Yourhousemaybe
flooded if the hose falls out of its
housing during water discharging.
• Thehoseshouldbeattachedtoa
height of at least 40 cm, and 100 cm at
most.
• Incasethehoseiselevatedafter
laying it on the floor level or close to
theground(lessthan40cmabovethe

11 - EN
ground),waterdischargebecomes
more difficult and the laundry may
come out wet. Therefore, the heights
described in the figure should be
followed.
• Topreventdirtywaterrefillingthe
machine, and to allow for easy
discharge, the end of the hose must not
be submerged in the drain water. The
end of the hose must be able to take in
air. The hose should be pushed into the
drainage for more than 15 cm. If it is too
long you may have it shortened.
• Theendofthehoseshouldnotbebent,
it should not be stepped on and it must
not be folded between the drain and the
machine.
• Thelengthofthehoseistooshort,
you may add an extension hose to the
original section. The length of the hose
must not be longer than 3.2 m after
coming out of the machine. To avoid
water leakage failures, the connection
between the extension hose and the
drain hose of the product must be fitted
well with an appropriate clamp as not to
come off and leak.
Electrical connection
Connect the machine to an earthed outlet
protected by a fuse of suitable capacity.
Important:
• Connectionshouldcomplywithnational
regulations.
• Powercordplugmustbewithineasy
reach after installation.
• Thevoltageandtheallowedfuse
protection are specified in the section
“TechnicalSpecifications”.
• Thespecifiedvoltagemustbeequalto
your mains voltage.
• Connectionviaextensioncordsormulti-
plugs should not be made.
B
A damaged power cable must be
replaced by a qualified electrician.
B
A faulty appliance must not be operated
whilst faulty until it has been repaired!
There is the risk of electric shock!
Destroying the packaging
material
Packagingmaterialcanbedangerousto
children.Keepthepackagingmaterialsout
of reach of children or dispose them by
classifying according to waste directives. Do
not dispose of them together with normal
domestic waste.
Packagingmaterialsofyourmachineare
manufactured from recyclable materials.
Disposing of the old machine
Dispose of your old appliance in an
environmental friendly manner.
• Youmayrefertoyourlocalagentor
solid waste collection center in your
municipality to learn how to dispose of
your machine.
Beforedisposingofyouroldwashing
machine, cut off the mains plug and make
the door lock unusable.

12 - EN
4
Initial preparations for washing
Sorting the laundry
• Sortthelaundryaccordingtotypeof
fabric, colour, and degree of soiling and
permissible water temperature.
Always follow the advice on the garment
labels.
Suitable for
drier
Do not dry
with drier
Can be ironed
with hot iron
Can be
ironed with
warm iron
Dry on a
hanger
Do not iron
Washing water
temperature
Do not use
bleach
Bleach can be
used
Non machine
washable
Hang without
spinning
Do not
dry-clean
Dry
horizontally
Do not wash
Dry-cleanable
Wash with
sensitive, short
programmes.
Preparing clothes for washing
Laundry items with metal attachments such
as, bras, belt buckles and metal buttons
will damage the machine. Remove metal
attachments or place the items in a clothing
bag, pillow case, or something similar.
• Emptypocketsandremoveallforeign
objects such as coins, pens and paper
clips. If possible, turn pockets out and
brush.
• Placesmallitemslikeinfants’socksand
nylon stockings, etc. in a laundry bag,
pillow case or something similar. This
will also save your laundry from getting
lost.
• Placecurtainsinthemachinewithcare.
Remove curtain rails and pullers.
• Fastenzippers,sewloosebuttonsand
mend rips and tears.
• Wash“machinewashable”or“hand
washable”labelledproductsonlywith
anappropriateProgramme.
• Donotwashcoloursandwhites
together. New, dark coloured cottons
may release a lot of dye. Wash them
separately.
• Toughstainsmustbetreatedproperly
before washing. If you are not sure,
check with a dry cleaner.
• Useonlydyes/colourchangersandlime
removers suitable for machine wash.
Always follow the instructions on the
packaging.
• Washtrousersanddelicateclothes
turned inside out.
• KeeplaundryitemsmadeofAngora
wool in the freezer for a few hours
before washing. This will reduce pilling.
Correct load capacity
• Themaximumloadcapacitydepends
on the type of laundry, the degree of
soilingandthewashingProgrammeyou
wish to use.
C
The machine adjusts the amount of
water according to the amount of
laundry placed inside.
C
Pleasefollowtheinformationinthe
"ProgrammeSelectionTable".Washing
results will degrade when the machine
is overloaded.

13 - EN
Following weights are given as examples.
Laundry type Weight(gr.)
Bathrobe 1200
Napkin 100
Duvet cover 700
BedSheet 500
Pillowcase 200
Tablecloth 250
Towel 200
Evening gown 200
Underclothing 100
Men’soveralls 600
Men’sshirt 200
Men’spyjamas 500
Blouse 100
Loading door
ThedoorislockedduringProgramme
operation. The door can be opened after
sometimefollowingtheProgrammeend.
• Openthedoor.
• Placelaundryitemslooselyinthe
machine.
• Pushthedooruntilitclicksintoplace
tightly. Ensure that no items are caught
in the door.
Detergents and softeners
Detergent drawer
The detergent drawer is composed of three
compartments:
The detergent dispenser may be in two
different types according to the model of
your machine.
-(I)forprewash
-(II)formainwash
-(III)siphon
–( )forsoftener
Detergent, softener and other cleaning
agents
Add detergent and softener before starting
thewashingProgramme.
Never open the detergent dispenser drawer
whilethewashingProgrammeisrunning!
WhenusingaProgrammewithoutpre-
wash, no detergent should be put into the
pre-washcompartment(Compartmentno.
I).
AProgrammewithoutpre-washshouldbe
selected if a detergent bag or a dispensing
ballisgoingtobeused.Youcanplacethe
detergent bag or the dispensing ball directly
among the laundry in your machine.
Choosing the detergent type
The type of detergent to be used depends
on the type and colour of fabric.
• Usedifferentdetergentsforcoloured
and white clothes.
• Washwoollenwithaspecialdetergent
specifically for woollens.
• Useonlydetergentsmanufactured
specifically for automatic washing
machines.
Detergent quantity
The amount of washing detergent to be
used depends on the amount of laundry, the
degree of soiling and water hardness.
• Donotuseamountsexceedingthe
quantities recommended on the
package to avoid problems of excessive
foam, poor rinsing, financial savings and
finally, environmental protection.
• Usesmallamountsofdetergentata
suitable measure for small amounts of
laundry or for only slightly soiled laundry.
• Useexactmeasuresforhighly
concentrated detergents.
Detergent
quantity
for prewashing 1/2 measure
for main washing 1 measure
with hard water an additional 1/2
measure

14 - EN
Softener
Putthesoftenerintothesoftener
compartment of the detergent dispenser.
• Usetheproportionsrecommendedon
the packet.
• Neverexceedthe(>max<)level
marking;otherwise,thesoftenerwillbe
wasted without being used.
• Ifthesoftenerhaslostitsfluidity,dilute
dense softener with water before
placing it in the detergent drawer.
Liquid detergent
When using liquid or gel washing
detergents,pleasenotethefollowing:
• Theliquiddetergentmayleavestains
on your laundry if time delay feature is
selected.
• Donotuseliquiddetergentifyouwant
to wash using the time delay feature.
• Donotuseliquiddetergentforthemain
wash in a cycle with pre-wash.
• Usethedetergentmanufacturer’s
measuring cup and follow the
instructions on the package.
Starch
• Addliquidstarch,powderstarch
or the fabric dye into the softener
compartment as instructed on the
package.
• Neverusefabricsoftenerandstarch
together in the same washing cycle.
• Wipetheinsideofthedrumafterusing
starch.
Eliminating lime formation
• Whenrequired,useonlyappropriate
lime removers developed specifically for
washing machines and always follow
the instructions on the package.

15 - EN
5
Selecting a Program and Operating Your Machine
Control panel
1 - SpinSpeedAdjustmentButton
2 - Display
3 - TemperatureAdjustmentButton
4 - ProgramSelectionKnob
5 - On/OffButton
6 - TimeDelayingButton(+/-)
7 - AuxiliaryFunctionButtons
8 - Start/Pause/CancelButton
Display symbols
F1 F2 F3 F4
a b c d e f
g
h
i
jkl
m
a - Spin Symbol
b - Spin Speed Indicator
c–Watercut-offsymbol(Accordingto
yourmachine’smodel)
d - Economy Symbol
e - Temperature Indicator
f - Temperature Symbol
g - Door Locked Symbol
h - Standby Symbol
i - Start Symbol
j - Auxiliary Function Symbols
k - Remaining Time and Delaying Time
Indicator
l -ProgramIndicatorSymbols(pre-wash/
mainwash/rinse/softener/spin)
m - Time Delaying Symbol
1
6 7 8
2 3 4 5

16 - EN
Turning the machine on
Pluginyourmachine.Turnthetapon
completely. Check if the hoses are
connectedtightly.Placethelaundryinthe
machine.Adddetergentandsoftener.Press
the“On/Off”button.
Program selection
Select the appropriate program from the
program table according to type, amount
and degree of soiling of the laundry and
washing temperatures.
TurntheProgrammeSelectionKnobtothe
program mode that you wish to wash your
laundry.
The recommended temperature and spin
speed for the selected program appear.
Press“Start/Pause/Cancel”buttontostart
the program.
Main programs
Depending on the type of textile, the
followingmainprogramsareavailable:
Each of these main programs comprise
of a complete washing process, including
washing, rinsing and, if required, spin
cycles.
A
When selecting the program you are
going to use, always consider type
of fabric, color, degree of soiling and
permissible water temperature.
A
Always select the lowest required
temperature. Higher temperature means
higher power consumption.
C
For further program details, see
“ProgramSelectionTable”
• Cottons
Youcanwashyourdurableclotheswith
thisprogram.Yourlaundrywillbewashed
with vigorous washing movements during
a longer washing cycle. It is recommended
foryourcottonitems(suchasbedsheets,
duvet and pillowcase sets, bathrobes,
underclothing,etc.).
• Synthetics
Youcanwashyourlessdurableclotheson
this program. Gentler washing movements
and a shorter washing cycle is used
comparedtothe“Cottons”program.Itis
recommended for your synthetic clothes
(suchasshirts,blouses,synthetic/cotton
blendedgarments,etc.).Forcurtainsand
lace,the“Synthetic40”programwithpre-
wash and anti-creasing functions selected
is recommended. Detergent should not be
put in the pre-wash compartment. Less
detergent should be put in the main wash
compartmentaslooseknitfabrics(lace)
foam too much due to its meshed structure.
• Woollens
Youcanwashyourmachine-washable
woolen garments on this program. Wash
by selecting the proper temperature
according to the labels of your clothes.
It is recommended to use appropriate
detergents for woolens.
Additional programs
For special cases, there are also extra
programsavailable:
C
Additional programs may differ
according to the model of your
machine.
• Cottons Eco
Youmaywashyourlaundrytobewashed
in cottons program in longer periods which
ensure very good washing performance.
C
Cottons economy program consumes
less energy compared to other cottons
programs.
• Baby+Toddler Clothing
Increased hygiene is provided by a longer
heating period and an additional rinse cycle.
It is recommended for baby clothes and
clothes worn by allergic people.
• Hand Wash
Youcanwashyourwoolen/delicateclothes
thatbear“notmachine-washable”labels
for which hand wash is recommended on
this program. It washes the laundry with
very tender washing movements without
damaging your clothes.
• Daily Quick
This program is used to wash lightly soiled
and unstained cotton garments in a short
time.
• Xpress Super Short
Youcanusethisprogramtoquicklywasha
small number of lightly soiled and unstained
cottongarments.E.g.:bathrobes,duvet
covers, sport wear, daily clothes and etc.
used only once.
• Dark Care
Use this programme to wash your dark
coloured laundry, or the coloured laundry
that you do not want them get faded. This

17 - EN
programme washes your laundry with
low mechanical movements and at low
temperature. We recommend you to use
liquid detergent or woolen shampoo for dark
coloured laundry.
• Mixed Fabrics
Youcanusethisprogramtowashcottons
and synthetics together. There is no need to
sort them.
• Shirts
Youcanusethisprogramtowashtheshirts
made of cotton, synthetic and synthetic
blended fabrics.
• Freshen Up
Youcanuse“Refreshing”programto
remove odors from laundry that are used
only for once and do not have any spots or
dirt on them.
• Eco Clean
Youcanusethisprogram,whichismore
sensitive to environment and natural
resources, to wash lightly soiled and
unspottedcottonlaundry(max3.5kg)
in a short time and economical way. It is
suggested to use liquid or gel washing
detergents.
• Self Clean(Drum cleaning)
It is suggested to run this program with
certainintervals(e.g.oncein1or2months)
for the self-cleaning of your machine. This
program must certainly be run without any
laundryinthemachine.Makesurethat
the machine is empty before starting the
program. For more effective cleaning, you
can run the program by adding powder
lime remover for washing machines into
compartment II of the detergent drawer.
After the program is completed, leave the
door ajar to allow the inside of the machine
get dry.
C
This is not a program for washing
laundry. This is a maintenance program
for the machine.
C
Never use this program if there is
something in your machine.
C
When this feature is started your
machine senses the load inside of it
automatically, if any, and interrupts the
program.
Special programs
For specific applications, select any of the
followingprograms:
• Rinse
This program is used when you want to
rinse or starch separately.
• Spin+Drain
This program spins with maximum possible
rpm in the default setting after the water
drains from the machine.
C
Use a lower spin speed for delicate
laundries.
Temperature selection
Whenever a new program is selected, the
temperature anticipated for that program
appears on the temperature indicator .
To change the temperature, press the
temperature button. Temperature decreases
in 10° increments.
Coldselectionisshownwith“-”symbol.
Whenthe“Temperature”buttonispressed
after Cold is selected, the maximum
temperature of the program you have
selected will be displayed.
To decrease the temperature, press the
“Temperature”buttonagain.
90˚C
Normally soiled, white cottons and
linens.(Ex.:coffeetablecovers,
tablecloths,towels,bedsheets)
60˚C
Normally soiled, fade proof colored
linens, cottons or synthetic clothes
(Ex.:shirts,nightgowns,pajamas)
and lightly soiled white linen clothes
(Ex.:underwear)
40˚C
30˚C
Cold
Blendedclothesincludingsynthetics
and woolens as well as delicates.
Economy Symbol
Shows energy saving programs and
temperature selections.
As“Intensive”and“Hygiene”programsare
long programs with higher temperature
selectionstoensurehygiene,“Economy”
Symbol will not light up.

18 - EN
Spin Speed selection
Whenever a new program is selected,
the maximum spin speed of the selected
program is displayed on the spin speed
indicator.
To decrease the spin speed, press the
“Spin”button.Spin speed decreases
gradually. Then, rinse hold and no spin
options are shown respectively.
Rinse hold is shown with “ ”andnospin
is shown with “ ”symbols.
F2 F4
F1 F3
If you are not going to unload your clothes
immediately after the cycle, you may use
rinse hold function in order to prevent your
clothes become wrinkled when there is no
water in the machine. With this function,
your laundry is kept in the final rinsing water.
If you want to spin your laundry after the
rinseholdfunction:
- Adjust the spin speed.
- Press“Start/Pause/Cancel”button.
Programresumes.Yourmachinedrains
the water and spins your laundry.
Youcanusenospinfunctioninorderto
drain the water without spinning at the end
of the program.

19 - EN
Program and consumption table
•:Selectable
*:Automaticallyselected,notcancellable.
**:EnergyLabelprogramme(EN60456)
*** If maximum spin speed of your machine is lower, selection may be made until maximum
spin speed.
-:Seeprogramdescriptionformaximumload.
C
The auxiliary functions in the table vary according to the model of your machine.
C
Water and power consumption and program duration differ from the table subject to
changes in water pressure, water hardness and temperature, ambient temperature,
type and amount of laundry, selection of auxiliary functions, and changes in supply
voltage.
C
Programdurationwillbedisplayedonthescreenofyourmachineaccordingtoyour
selection.
EN 2Auxiliary functions
Programme(°C)
Max.Load(kg)
WaterConsumption(l)
Energy Consumption
(kWh)
Max.Speed***
Prewash
Quick Wash
Extra Rinse
Anti- Crease
Rinse Hold
Pethairremoval
Selectable
temperature range
°C
Cottons 90 9 87 2.70 1600 •••••• 90-Cold
Cottons 60 9 85 1.80 1600 •••••• 90-Cold
Cottons 40 9 85 1.00 1600 •••••• 90-Cold
Baby&ToddlerClothing 90 9 80 2.70 1600 * •90-30
Cottons Eco 60** 9 66 1.35 1600 •••••• 60-Cold
Cottons Eco 40 9 80 0.95 1600 •••••• 60-Cold
Synthetics 60 4 55 1.00 1000 •••••• 60-Cold
Synthetics 40 4 55 0.52 1000 •••••• 60-Cold
Eco Clean 20 3.5 45 0.16 1600 •20
MixedFabrics 40 4 55 0.62 1000 •••••• 40-Cold
Duvet 40 - 60 0.60 1000 60-40
Xpress Super Short 30 2 42 0.10 1400 • • 30-Cold
Daily Quick 90 9 70 2.02 1400 • • 90-Cold
Daily Quick 60 9 70 1.20 1400 • • 90-Cold
Daily Quick 30 9 80 0.30 1400 • • 90-Cold
Woollens 40 2 56 0.30 1000 • • 40-Cold
Hand Wash 30 1.5 40 0.25 1000 30-Cold
Dark Care 40 4 95 0.60 1000 * •40-Cold
Self Clean 70 - 110 2.00 800 * 70
Freshen up - 2 35 0.03 1000 •-

20 - EN
Auxiliary functions
Auxiliary Function Selection Buttons
a b c d
• Dependingontheprogram,youcan
select the desired auxiliary function by
pressing the buttons a, b, c,d.
• Selecttherequiredauxiliaryfunctions
before starting the program.
• Somecombinationscannotbeselected
together.Ex.:Pre-washandQuick
Wash.
• Symboloftheselectedauxiliaryfunction
will light up.
Auxiliary function selection
If an auxiliary function that should not be
selected together with a previously selected
function is chosen, the first selected function
will be cancelled and the last auxiliary
function selection will remain active.
Ex.:Ifyouwanttoselectpre-washfirstand
then quick wash, pre-wash will be cancelled
and quick wash will remain active.
Auxiliary function that is not compatible
withtheprogramcannotbeselected.(see,
“ProgramSelectionTable”)
• Prewash
Whenyouselectthisfunction(a),thedisplay
willindicate“F1”symbol.
• Apre-washisonlyworthwhilefor
heavily soiled laundry. Without pre-wash
you save energy, water, detergent and
time.
• Pre-washwithoutdetergentis
recommended for lace and curtains.
• Quick Wash
Withthisfunction(b),thewashtimeis
shortened.“F2”symbollightsuponthe
display.
• Usethisfunctionforsmalleramountsor
slightly soiled laundries.
• Extra Rinse
Whenthisfunction(c)isselected,washing
and rinsing is performed with plenty of
water.“F3”symbollightsuponthedisplay.
• Anti- Crease
Withthisfunction(d),drummovement
will be lessened to prevent creasing and
spinning speed is limited. In addition,
washing is carried out at a higher water
level.“F4”symbollightsuponthedisplay.
• Usethisfunctionfordelicatelaundries
that crease easily.
C
Whenever you select this auxiliary
function, load your machine with half of
the maximum laundry specified in the
program table.
• Rinse Hold
If you are not going to unload your clothes
immediately after the program completes,
you may use rinse hold function and keep
your laundry in the final rinsing water in order
to prevent them become wrinkled when
thereisnowaterinthemachine.Press
“Start/Pause”buttonafterthisprocessifyou
want to drain the water without spinning.
Programresumes.Yourmachinedrainsthe
water and program completes.
If you want to spin your laundry that you left
inwater:
- Adjust the spin speed.
-PressStart/Pausebutton
Programresumes.Yourmachinedrains
the water, spins the laundry and program
completes.
Time display
The display shows the time remaining for
the program to complete while a program
is running. Time is displayed in hours and
minutes as “01:30”.
Time delay
Withthe“Timedelay”functionyoucan
delay the program start up to 24 hours.
Setting can be made in intervals of 30
minutes.
This manual suits for next models
2
Table of contents
Other Beko Washer manuals

Beko
Beko WMB 61031 M User manual

Beko
Beko WTX 91232 WI User manual

Beko
Beko WTIK76121 User manual

Beko
Beko WEY94P64EB User manual

Beko
Beko WTK72042B User manual

Beko
Beko WMB 51041 User manual

Beko
Beko WUE 8612 XS0 User manual

Beko
Beko WMB 81223LW User manual

Beko
Beko WMB 51221 CS PT User manual

Beko
Beko CM 10120 User manual

Beko
Beko BAW 386 UK User manual

Beko
Beko T8100R User manual

Beko
Beko WTE11745X0MSTD User manual

Beko
Beko WMD 75125 User manual

Beko
Beko WMA 10 W Operating instructions

Beko
Beko WMB 51232CSPT User manual

Beko
Beko WITC 7612 B0W User manual

Beko
Beko XWUE77265CSH3B User manual

Beko
Beko WTV9744XWAT User manual

Beko
Beko WUX81282WI/IT User manual