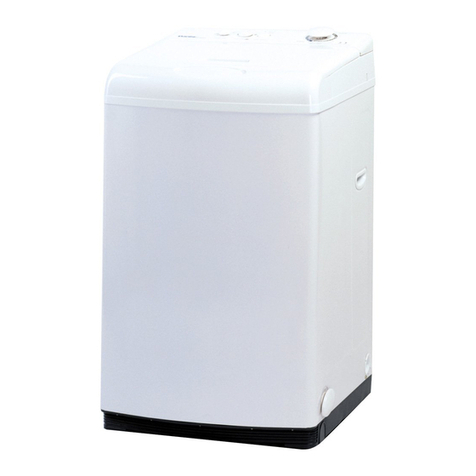
Danby DTT100A1WDB Assembly instructions

Model • Modèle • Modelo
V3.05.13.DM
• OWNER’S USE AND CARE GUIDE
• GUIDE D’UTILISATION ET SOIN DE PROPRIÈTAIRE
• MANUAL DE INSTRUCTIONS PARE EL USO Y EL
CUIDADO DE SU UNIDAD
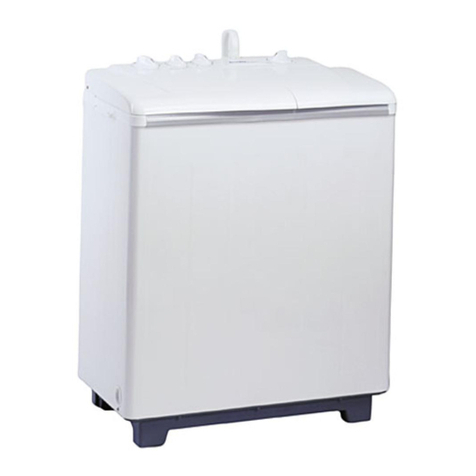
TWIN TUB WASHING MACHINE
LAVEUSE-ESSOREUSE
LAVADORA DE DOBLE TINA
MODE L •MODÈLE • MODELO
DTT100A1WDB
Danby Products Limited, Ontario, Canada N1H 6Z9
Danby Products Inc., Findlay, Ohio, USA 45840
ENGLISH
TABLE OF CONTENTS ............................
FRANÇAIS
TABLE DES MATIÈRES ...........................
ESPAÑOL
ÍNDICE .....................................................
1
13
25

TABLE OF CONTENTS
Safety instructions .....................................................................................................
Parts identification .....................................................................................................
Cautions regarding use .............................................................................................
Grounding instructions ..............................................................................................
Installation Instructions ..............................................................................................
Washing procedure ...................................................................................................
Laundry method with intermediate spin ....................................................................
Cleaning after use .....................................................................................................
Before requesting service .........................................................................................
Warranty ....................................................................................................................
2
4
5
5
6
7
10
10
11
12
INTRODUCTION
Thank you for buying a Danby appliance. Before operating this unit please read and save these
instructions.
Model Number: Serial Number:
Date of Purchase: Place of Purchase:
Dealer’s Name and Address:
This information will be required if your unit requires servicing and/or for general inquiries. To contact
a Customer Service Representative, call Danby TOLL FREE. 1-800-26 -DANBY
CAREFULLY READ AND SAVE THESE INSTRUCTIONS
These instructions for use are intended for the user. They describe the appliance and correct instal-
lation and operating procedures for safe use.
NOTE:
This appliance was carefully packed and thoroughly inspected before leaving our factory.
Responsibility for its safe delivery was assumed by the carrier upon acceptance of the shipment.
Claims for loss or damage sustained during transit must be made directly to the carrier.
1

SAFETY INSTRUCTIONS
Save these instructions
1. Please read this instruction manual carefully
before operating.
2. Refer to the Grounding Instructions in the
Installation manual for the proper grounding of
the washer.
3. Do not wash articles that have been
previously cleaned in, washed in, soaked in or
spotted with gasoline, dry-cleaning solvents,
other flammable or explosive substances as
they give off vapors that could ignite or
explode.
4. Do not allow children to play on or in the
washer. Close supervision of children is
necessary when the washer is used near
children.
5. Do not reach into the washer if the inner tub or
agitator is revolving.
6. Do not install or store the washer where it will
be exposed to water and/or weather.
7. Do not tamper with the controls.
8. Do not repair or replace any part of the
washer, or attempt any servicing unless
specifically recommended in the user
maintenance instructions trouble shooting
guide that you understand and have the skills
to carry out.
9. Do not add gasoline, dry-cleaning solvents, or
other flammable or explosive substances to
the wash water. These substances give off
vapors that could ignite or explode.
10. Under certain conditions, hydrogen gas may
be produced in a hot water system that has
not been used for two weeks or more.
HYDROGEN GAS IS EXPLOSIVE. If the hot
water system has not been used for such a
period, before using this washer, turn on all
hot water faucets and let the water flow from
each for several minutes. This will release
any accumulated hydrogen gas. THE GAS IS
FLAMMABLE, DO NOTSMOKE OR USE AN
OPEN FLAME DURING THIS TIME.
11. Replace worn power cords and/or loose
plugs.
12. To reduce the risk of an electric shock or fire,
DONOTuse an extension cord or an adapter
to connect the washer to the electrical power
source.
13. Use your washer only for its intended
purpose, washing clothes.
14. ALWAYS disconnect the washer from
electrical supply before attempting any
service. Disconnect the power cord by
grasping the plug, not the cord.
15. Install the washer according to the
INSTALLATION INSTRUCTIONS. All
connections for water, drain electrical power
and grounding must comply with local codes
and be made by licensed personnel when
required. Do not do it yourself unless you
know how!
16. To reduce the risk of fire, clothes which have
traces of any flammable substances such as
vegetable oil, cooking oil, machine oil,
flammable chemicals, thinner etc. or anything
containing wax or chemicals such as in mops
and cleaning cloths, must not be put into the
washer. These flammable substance may
cause the fabric to catch on fire by itself.
17. Do not use fabric softeners or products to
eliminate static unless recommended by the
manufacturer of the fabric softener or
product.
18. Keep your washer in good condition.
Bumping or dropping the washer can
damage safety features. If this occurs, have
your washer checked by a qualified
serviceman.
19. Be sure water connections have a shut-off
valve and fill hose connections are tight.
CLOSE the shut-off valves at the end of each
wash day.
20. The LID MUST BE CLOSED any time the
washer is to spin. DO NOTby-pass the safety
switch by permitting the washer to spin with
the lid open. A brake will stop the inner tub
within seconds if the lid is opened during
spinning. If the inner tub does not stop when
the lid is opened, remove the washer from
use and call a serviceman.
2
SAFETY INSTRUCTIONS
21. Always follow the fabric care instructions
supplied by the garment manufacturer.
22. Never operate the washer with any guards
and/or panels removed.
23. DO NOT operate the washer with broken or
missing parts.
24. DO NOTby-pass any safety devices.
25. Failure to install, maintain, and/or operate
this machine according to these instructions
may result in conditions which can produce
bodily injury and/or property damage.
3
The WARNING AND IMPORTANT SAFETY
INSTRUCTIONS appearing in this manual
are not meant to cover all possible condi-
tions and situations that may occur. It must
be understood that common sense, caution
and carefulness are factors which CAN
NOT be built into the washer. These factors
MUST BE supplied by the person(s)
installing, maintaining, or operating the
washer.
Always contact your dealer, distributor,
service agent or the manufacturer about
any problems or conditions you do not
understand.
IMPORTANT
To reduce the risk of electric shock, dis-
connect this appliance from the power
supply before attempting any user mainte-
nance. Turning the controls to the OFF
position does not disconnect this appliance
from the power supply.
WARNING

PARTS IDENTIFICATION
1. Water Inlet
2. Wash timer
3. Wash action selector
4. Drain strainer
5. Drain selector
6. Spin-tub lid
7. Spin timer
8. Spin-tub inner lid
9. Power cord
10. Spin-tub
11. Hose-hook
12. Panel front
13. Drain hose
14. Rub-wash section
15. Overflow strainer
16. Pulsator (with lint filter)
17. Wash-tub
18. Wash-tub lid
4
1
2374
6
5
Lint Filter

CAUTIONS REGARDING USE
Heat
Many parts of this washing machine are made of
plastic; never place hot or burning objects on or
near the washing machine.
Using Hot Water
Use only water under 50C. If the hot water to be
used is 50C or above, first partly fill the washing
machine with cold water, and then add the hot
water.
Articles that shouldn’t be washed or
spun
Don’t put shoes, utensils etc. into the tub to wash
or spin. Doing so could cause trouble.
Putting in the clothes
• Do not overload the washing machine.
• Fold up bulky clothing before putting it into the
tub
• Do not let the clothes cover the top of the
agitator. Doing so could cause a decline in the
washing efficiency.
Water tap
Control the water supply by adjusting the tap
valve If the water pressure is too high, the water
can be sprinkled on the floor
CAUTIONS REGARDING USE
This appliance must be grounded. In the event of an electrical short circuit, grounding reduces the
risk of electric shock by providing an escape wire for the electric current. This appliance is equipped
with a cord having a grounding wire with a grounding plug. This plug must be plugged into an outlet
that is properly installed and grounded.
USE A 3 PRONGED PLUG
3-pronged plug Recepticle box cover
3-pronged
recepticle
5
This appliance is equipped with a “Water
Overflow” safety feature, designed to auto-
matically activate the pump in the event of
accidental water overflow. However, this
feature is only operational while the appli-
ance remains connected to an electrical
source.
IMPORTANT
Improper use of the grounding plug can
result in a risk of electric shock. Consult a
qualified electrician or service person if the
grounding instructions are not completely
understood, or if doubt exists as to
whether the appliance is properly ground-
ed. If it is necessary to use an extension
cord, use only a three wire extension cord
that has a three blade grounding plug, and
a three slot receptacle that will accept the
plug on the appliance. The marked rating of
the extension cord should be equal to or
greater than the electrical rating of the
appliance.
WARNING

INSTALLATION INSTRUCTION
Place of installation
Choose a place on a horizontal solid floor. If the
machine is installed on an unstable floor, heavy
vibration will result during spin.
Keep the machine body more than 5 cm apart
from the wall surface. If it comes into contact
vibration may occur.
Hose Installation
For your convenience, this washing machine is
equipped with a “Quick Connect” hose kit.
Please follow these instructions:
1. Connect the “faucet adapter” to your water
supply
2. Pressure fit the open end of the hose
assembly at least half way down the “water
inlet” nipple. No clamps are required to secure
this connection because it is not a pressurized
line application.
3. Install the “quick connect” fitting to the faucet
adapter by pulling down the white collar. Pull
down on the white collar to disconnect.
4. For portable applications, avoid disconnecting
the water hose assembly from the “water inlet
nipple” connection. Always disconnect the
hose from the “quick connect” side. A “hanger
hook” is provided on the “quick connect” which
allows you to conveniently hang the hose on
the side of the cabinet.
Installing the drain hose
Install the drain hose properly as shown below.
Secure the drain hose to the drain outlet pipe,
using the clamp provided.
Faucet Adaptor
Quick connect
Water inlet nipple
Hook drain hose over the edge of sink or
directly into your drain pipe.
6

WASHING PROCEDURE
A) Laundry Guide
Wash
Load
Type
of fabric
Wash
Time
Wash
Action
Water
Level
Amount of
Detergent
Up to 1.4 kg
Wool, Silk, Polyester
Rayon, Thin Clothes
2 min. Soft
LOW
36 L
Approx.
40 g
Cotton, Linen
T-shirts, underwear
7 min. Normal
Heavy soiled cotton
Workclothes, Sheets
10 min. Normal
1.4-2.8 kg
Wool, Silk, Polyester
Rayon, Thin Clothes
Cotton, Linen
T-shirts, underwear
Heavy soiled cotton
Workclothes, Sheets
4 min.
7 min.
10 min.
Soft
Normal
Normal
MEDIUM
43 L
Approx.
47 g
Above 2.8 kg
Wool, Silk, Polyester
Rayon, Thin Clothes
Cotton, Linen
T-shirts, underwear
Heavy soiled cotton
Workclothes, Sheets
4 min.
7-10 min
10-15 min
Soft /
Normal
Normal
Heavy
HIGH
50 L
Approx.
55 g
• The amount of laundry detergent will vary according to the type of detergent used; carefully read
the instructions accompanying the detergent.
B) Preparation
• Connect the inlet hose to water tap
• Unhook the drain hose and set it properly
• Plug the power cord into an electric outlet.
7

WASHING PROCEDURE
.C) Wash
1. Water Level
Set the water level properly according to the
size of the load to be washed.
2. Drain Valve selection switch
Set the drain valve selection switch on
“Wash/Rinse” position
3. Detergent
Put in the laundry detergent (If the detergent
does not dissolve easily, fill the washing
machine with a small amount of water and mix
the detergent with the water for a few minutes)
4. Clothes
Put in the clothes
(remove any matches, coins, pins, etc., that
may be in the pockets of the clothes.)
5 Water supply
Open the water tap and fill the tub to a suitable
water level for the wash load.
6. Wash action
Select a wash action according to the type of
fabric to be washed: Gentle, Normal
7. Wash-tub lid
Close the wash tub lid
8. Wash timer
Turn the wash timer clockwise, until you reach
the desired wash time position. The wash cycle
starts immediately.
D) Rinse
1. Drain
Set the drain valve selector switch on DRAIN
position It takes about two minutes for the water
to drain thoroughly away.
2. Drain switch
Set the drain valve selector switch on
WASH/RINSE position again, to stop the drain
cycle
3. Water supply
Open the water tap and fill the tub to a suitable
level for the laundry
4. Rinse-wash timer
Turn the wash timer to clockwise
Set the time to 2-4 minute position
5. Repeat processes 1 to 4 twice or three
times according to the condition of the
washed laundry.
8
Wash/Rinse Drain
Wash timer
Soft
Wash action
Heavy

WASHING PROCEDURE
E) Spin
1. Putting in the clothes
Put the wet clothes into the spin-tub
Distribute the clothes in the tub being sure that
they are well balanced. Put the safety cover properly
on top of the clothes
2. Closing the lids
Close the spin-tub lid and inner lid
The machine will not spin if the spin-tub lid is
open
3. Spin timer
Turn the timer clockwise until you reach the
desired spin time position
Safety Cover
Correct Incorrect
Inner lid Spin tub
lid
Spin Time
Type of Fabric
Clothes that wrinkle easy
(synthetics, fibers, delicate materials)
Clothes that do not wrinkle easy
(workclothes, sheets, underwear)
Spin Time
1 - 3 min.
3 - 5 min.
Unbalance
If there is any abnormal vibration during spin-
ning, open the lids to stop the spin-tub and
rearrange the clothes evenly.
Simultaneous Drain
If the drainage from the wash-tub and spin-tub
occur simultaneously, the drainage from spin-tub
will be obstructed and there may be a malfunc-
tion. Therefore, if you need to drain the wash-tub
while spinning, be sure to drain the wash-tub
after at least one minute’s spinning.
9
Spin dry timer

LAUNDRY METHOD WITH INTERMEDIATE SPIN
You can improve the rinsing effect and save
rinsing water by using an intermediate spin
between wash and rinse process:
1. WASH
• Operate the wash process as described in
wash procedure
2. Drain
• Drain the wash-tub by turning the drain valve
selection switch to DRAIN position
3. Intermediate Spin
• Move the laundry to the spin-tub
• Operate the spin process for about three
minutes as described in the spin procedure
4. Rinse
• Move the laundry to the wash-tub
• Operate the rinse process for about two to
three minutes
5. Intermediate spin
• Move the laundry to the spin-tub
• Operate the spin process for about three
minutes as described in the spin procedure
6. Overflow Rinse
• Move the laundry to the wash-tub
• Open the water tap
• Operate the rinse process for about two to
three minutes continuing water supply
7. Final spin
• Move the laundry to the spin-tub
• Operate the spin process
CLEANING AFTER USE
Cleaning after use will extend the life of your
washing machine. Before cleaning, shut off the
power switch and disconnect the power cord
from the electrical outlet, being sure to take
hold of the plug.
Cleaning the body
• Wipe with a soft cloth
• If extremely dirty, wipe with a cloth soaked in
a solution of water and dish detergent or
soap.
• Do not spray the washing machine with water
or use paint thinner, abrasive cleanser,
benzene, alcohol, etc., to clean it.
Cleaning the overflow strainer
• Remove the
filter frame by
pulling it
upward
• Turn the filter
inside out and
wash the lint
off with water
• Insert the
filter frame
into the center
agitator as it
was
• Remove
the strainer
by pulling it
forward
• Wash off
the lint
stuck in the
strainer
during
overflow
• Re-install
the strainer
1) Remove the drain
strainer from the bottom
of the tub using a sharp
tool such as a screw
driver
2) Wash off the lint stuck
in the strainer
3) Re-install the strainer
10
Cleaning the lint filter Cleaning the drain strainer

BEFORE REQUESTING SERVICE
When you suspect your washing machine requires maintenance before calling for service, please
check the following points to save unnecessary cost. You may be pleasantly surprised that an
apparent malfunction can be easily rectified by following the chart below.
Problem Location to be checked
The washing machine
will not operate at all
The washing machine
will not drain properly
There is an abnormal
noise during washing
Water is not supplied
The washing machine
will not spin
There is a bumping
noise of the spin-tub
against the wash-tub
• Is there a power blackout?
• Is the power cord correctly connected to an electricla outlet?
• Is the electric fuse or breaker blown?
• Did you turn the “Wash Timer” knob or “Spin Timer” knob to
begin operation?
• Is the drain hose clogged with lint?
• Is the drain hose kinked?
• Is any part of the hose higher than 90 cm (35 inches)?
• Is extension hose longer than 3 m (9 feet)?
• Is a narrow hose being used?
• Is something touching the agitator as it rotates?
• Is the inlet hose connected and the water shut off?
• Has the water supply been shut off due to a water shortage in
your area?
• Is foreign matter clogging the water inlet?
• Is the spin-tub lid open?
• Have any clothes dropped between the spin-tub and the
wash-tub?
• Is the washing machine level?
• Have the clothes in the tub collected on one side?
(Redistribue them evenly)
11

LIMITED IN-HOME APPLIANCE WARRANTY
This quality product is warranted to be free from manufacturer’s defects in material and workmanship, provided that the unit is used under the normal operating
conditions intended by the manufacturer.
This warranty is available only to the person to whom the unit was originally sold by Danby Products Limited (Canada) or Danby Products Inc. (U.S.A.) (hereafter
“Danby”) or by an authorized distributor of Danby, and is non-transferable.
TERMS OF WARRANTY
Plastic parts, are warranted for thirty (30) days only from purchase date, with no extensions provided.
First Year During the first twelve (12) months, any functional parts of this product found to be defective, will be repaired or replaced, at warrantor’s
option, at no charge to the ORIGINAL purchaser.
To obtain Danby reserves the right to limit the boundaries of “In Home Service” to the proximity of an Authorized Service Depot. Any appliance
Service requiring service outside the limited boundaries of “In Home Service” ,it will be the consumer’s responsibility to transport the appliance
(at their own expense) to the original retailer (point of purchase) or a service depot for repair. See “Boundaries of In Home Service”
below. Contact your dealer from whom your unit was purchased, or contact your nearest authorized Danby service depot, where service
must be performed by a qualified service technician.
If service is performed on the units by anyone other than an authorized service depot, or the unit is used for commercial application, all
obligations of Danby under this warranty shall be void.
Boundaries of If the appliance is installed in a location that is 100 kilometers (62 miles) or more from the nearest service center your unit must be
In Home Service delivered to the nearest authorized Danby Service Depot, as service must only be performed by a technician qualified and certified for
warranty service by Danby. Transportation charges to and from the service location are not protected by this warranty and are the
responsibility of the purchaser.
Nothing within this warranty shall imply that Danby will be responsible or liable for any spoilage or damage to food or other contents of this appliance, whether
due to any defect of the appliance, or its use, whether proper or improper.
EXCLUSIONS
Save as herein provided, Danby, there are no other warranties, conditions, representations or guarantees, express or implied, made or intended by Danby or its
authorized distributors and all other warranties, conditions, representations or guarantees, including any warranties, conditions, representations or guarantees
under any Sale of Goods Act or like legislation or statue is hereby expressly excluded. Save as herein provided, Danby shall not be responsible for any damages
to persons or property, including the unit itself, howsoever caused or any consequential damages arising from the malfunction of the unit and by the purchase of
the unit, the purchaser does hereby agree to indemnify and hold harmless Danby from any claim for damages to persons or property caused by the unit.
GENERAL PROVISIONS
No warranty or insurance herein contained or set out shall apply when damage or repair is caused by any of the following:
1) Power failure.
2) Damage in transit or when moving the appliance.
3) Improper power supply such as low voltage, defective house wiring or inadequate fuses.
4) Accident, alteration, abuse or misuse of the appliance such as inadequate air circulation in the room or abnormal operating conditions
(extremely high or low room temperature).
5) Use for commercial or industrial purposes (ie. If the appliance is not installed in a domestic residence).
6) Fire, water damage, theft, war, riot, hostility, acts of God such as hurricanes, floods etc.
7) Service calls resulting in customer education.
8) Improper Installation (ie. Building-in of a free standing appliance or using an appliance outdoors that is not approved for outdoor application).
Proof of purchase date will be required for warranty claims; so, please retain bills of sale. In the event warranty service is required, present this document to our
AUTHORIZED SERVICE DEPOT.
Danby Products Limited
PO Box 1778, Guelph, Ontario, Canada N1H 6Z9
Telephone: (519) 837-0920 FAX: (519) 837-0449
Danby Products Inc.
PO Box 669, Findlay, Ohio, U.S.A. 45840
Telephone: (419) 425-8627 FAX: (419) 425-8629
04/09
1-800-263-2629
Warranty Service
In-home

TABLE DES MATIÈRES
-
Importantes consignes de sécurité ...........................................................................
Identification des pièces ............................................................................................
Précautions ...............................................................................................................
Mise à la terre ...........................................................................................................
Instructions d’installation ...........................................................................................
Blanchissage .............................................................................................................
Lavage avec essorage intermédiaire ........................................................................
Entretien de l’appareil ...............................................................................................
En cas de problème ..................................................................................................
Garantie ....................................................................................................................
14
16
17
17
18
19
22
22
23
24
INTRODUCTION
Nos félicitations sur votre achat d'un appareil Danby. Avant d'utiliser cet unité, veuillez lire et sauveg-
arder ces instructions.
Numéro de modèle: Numéro de série:
Date d’achat: Endroit d’achat:
Nom et adresse du marchand:
Cette information sera requise en cas de problèmes ou d'enquètes générales. S'il vous plaît con-
tactez notre Département de Service à la Clientèle sans frais au 1-800-26-DANBY
LISEZ ATTENTIVEMENT ET SAUVEGARDEZ CES INSTRUCTIONS:
Ces instructions d'utilisation sont destinées pour l'utilisateur. Elles décrivent l'appareil et les procé-
dures d'installation et d'opération pour l'usage sûr.
NOTEZ:
Cet appareil a été emballé soigneusement et examiné en détail avant de quitter notre usine.
La responsabilité pour sa distribution sûre a été supposée par le transporteur à l'acceptation de la
cargaison. Les réclamations de perte ou de dommage soutenu en transit doivent être faites
directement au transporteur.
13

IMPORTANTES CONSIGNES DE SÉCURITÉ
Sauvegardez ces instructions:
1. Veuillez lire ce manuel d'instruction
attentivement avant l'utilisation initiale de
ce produit.
2. Référez aux Directives de Mise à la Terre
(dans le manuel d'instruction) pour la mise à la
terre correcte de la laveuse.
3. Ne lavez pas les vêtements qui ont été
trempés de substances inflammables (du gaz,
de solvants de nettoyage-sec, etc.) puis qu'ils
dégagent les vapeurs qui pourraient
s'enflammer ou éclater.
4. Ne permettez pas aux enfants de jouer sur ou
dans la laveuse. Prendre soin des enfants
pendant le lavage.
5. Il ne faut jamais tendre la main dans la cuve
de la laveuse pendant le fonctionnement.
6. La laveuse ne doit pas être située dans un
endroit où elle peut être frappée par la pluie
et/ou par les rayons de soleil.
7. Ne touchez pas les commandes de lavage.
8. Si vous croyez que l'appareil est en panne,
veuillez vérifier les solutions dans le guide de
dépannage avant d'appeler un technicien de
service. (Si votre problème n'apparait pas ici,
n'essayez pas de réparer l'appareil vous --
même -- appellez un technicien de service.)
9. N'ajoutez jamais des substances inflammables
(du gaz ou de solvants de nettoyage-sec) à
l'eau de lavage. Ces substances dégagent les
vapeurs qui pourraient s'enflammer ou éclater.
10. Dans certaines conditions, le gaz
d'hydrogène peut être produit dans un
système d'eau chaude qui n'a pas été utilisé
pendant plus que deux semaines. LE GAZ
D'HYDROGÈNE EST EXPLOSIF. Si le
système d'eau chaude n'a pas été utilisé
pendant une telle période, avant d'utiliser
cette laveuse, ouvrez tous les robinets
d'eau chaude et laissez l'eau découler de
chacun pendant plusieurs minutes. Ceci
libérera n'importe quel gaz d'hydrogène
accumulé. LE GAZ EST INFLAMMABLE. NE
FUMEZ PAS ET N'UTILISEZ PAS UNE
FLAMME NUE PENDANT CE TEMPS.
11. Remplacez les cordons d'alimentation usés
et/ou les prises lâches.
12. Pour réduire le risque de choc électrique ou
de feu, N'UTILISEZ PAS un cordon
d'extension ou un adapteur pour brancher la
laveuse au courant électrique.
13. Utilisez la laveuse seulement pour son bût
destiné, le lavage de vêtements.
14. IL FAUT TOUJOURS débranchez la laveuse
du courant électrique avant de tenter le
service. Débranchez le cordon d'alimentation
en tirant par la fiche et pas le cordon.
15. Installez la laveuse selon LES
INSTRUCTIONS D'INSTALLATION. Tous
raccordements (de l'eau, du drain, du courant
électrique et de la mise à la terre) doivent se
conformer aux codes locaux et lorsqu'il est
nécessaire doivent être fait par personnel
authorisé. Ne le faites pas vous-même à
moins que vous sachiez!
16. Pour réduire le risque de feu, les vêtements
qui ont des traces de substances
inflammables telle que l'huile végétale, l'huile
à cuire, l'huile d'usine, les produits chimiques
inflammables, le diluant, etc., ou un produit
qui contient la cire ou des produits chimiques
tels que dedans des vadrouilles et des tissus
d'essuyage, ne doivent pas être mis dans la
laveuse. Ces substances inflammables
peuvent causer le tissu de se prendre au feu.
17. N'employez pas les produits assouplissants
ou les produits pour éliminer la charge
statique d'à moins que recommandé par le
fabricant du produit assouplissant.
18. Gardez votre laveuse en bon état. Frapper et
relâcher la laveuse peut endommager les
caractéristiques de sécurité. Si ceci se
produit, faites votre laveuse contrôler par un
technicien de service qualifié.
19. Soyez sûr que les connections d'eau ont une
soupape d'arrêt automatique et les
connections de tuyau de remplissage sont
serrées. FERMEZ les soupapes d'arrêt
automatique à la fin de chaque jour de
lavage.
14

IMPORTANTES CONSIGNES DE SÉCURITÉ
20.LE COUVERCLE DOITÊTRE FERMÉ quand
la laveuse doit essorer. NE CONTOURNEZ
PAS la commande de sécurité en permettant
à la laveuse d'essorer avec le couvercle
ouvert. Si le couvercle est ouvert pendant
l’essorage, un frein arrêtera immédiatement la
cuve. Si la cuve n'arrête pas quand le
couvercle est ouvert, retirez la laveuse de
l'utilisation et contactez un technicien de
service.
21.Suivez toujours les instructions de soin de
tissu assurées par le fabricant de vêtement.
22.N'actionnez jamais la laveuse avec dispositifs
de sûreté et/ou panneaux étant enlevés.
23.N'ACTIONNEZ JAMAIS la laveuse avec les
pièces cassées ou manquantes.
24.Ne sautez aucun dispositif de sécurité
25.Le manque d'installer de mettre à jour et/ou
actionner cette machine selon ces instructions
peut avoir comme conséquence les
conditions qui peuvent produire des blessures
corporelles et/ou des dégâts matériels.
15
Pour réduire le risque d'électrocution,
débrancher cet appareil avant d'effectuer
un entretien normal. Mettre l'appareil en
mode arrêt ne veut pas dire qu'il est
débranché.
AVERTISSEMENT
L'AVERTISSEMENT ET LES IMPORTANTES
CONSIGNES DE SÉCURITÉ qui paraissent
en ce manuel ne sont pas censés pour cou-
vrir toutes les conditions et situations pos-
sibles qui puivent se produire. Il doit être
comprit que le bon sens, le soin et l'atten-
tion sont des facteurs qui ne peuvent pas
être établis dans la(les) personne(s) instal-
lant, mettant à jour ou actionnant la
laveuse. Ces facteurs DOIVENTÊTRE
FOURNIS par la(les) personne(s) qui
installe, mette à jour et actionne la laveuse.
Contactez toujours votre marchand, distrib-
uteur, agent de service ou fournisseur au
sujet de tous les problèmes ou des
conditions que vous ne com-
IMPORTANT

IDENTIFICATIONS DES PIÈCES
1. arrivée d’eau
2. minuterie de lavage
3. commande de lavage
4. grille de drain
5. commande de drain
6. couvercle de l’essoreuse
7. minuterie de l’essoreuse
8. couvercle intérieur de
l’essoreuse
9. cordon d’alimentation
10. cuve de l’essoreuse
11. attache boyau
12. panneau de devant
13. boyau de débordement
14. espace pour frottage-lavage
15. grille de débordement
16. ondulateur (avec filtre à
charpie)
17. cuve de lavage
18. couvercle de la cuve de
lavage
16
1
2374
6
5
Filtre à charpie

PRÉCAUTIONS
Chaleur
Plusieurs pièces de la laveuse-essoreuse sont
fabriquées de plastique; il ne faut jamais déposer
d’objets chauds ou brûlants au-dessus ou proche
de l’appareil.
Eau chaude
Il faut seulement utiliser l’eau en dessous de
50°C. Si l’eau est trop chaude, remplissez par-
tiellement la laveuse d’eau froide, et le reste
d’eau chaude.
Articles qui ne doivent pas être lavés
ou essorés
Il ne faut jamais laver ou essorer des chaus-
sures, d’ustensiles, etc.. Ceci peut occasionner
des dommages.
Brassée
• Il ne faut pas surcharger la laveuse.
• Pliez les vêtements lourds avant de les
déposer dans la cuve.
• La brasée ne doit pas recouvrir l’ondulateur.
Ceci peut réduire l’efficacité de la laveuse.
Soupape d’eau
Réglez le courant d’eau en ajustant la soupape
du robinet.
Vêtements coincés entre la cuve de
l’essoreuse et la laveuse
1) Fermez l’interrupteur, et débranchez le cordon
d’alimentation de la prise de courant.
2) Prenez le devant de la plaque de dessous et
soulevez.
3) Enlevez les vêtements coincés.
4) Replacez la plaque de dessus en appuyant
sur son devant.
MISE À LA TERRE
Cet appareil doit être mise à la terre. Si un court circuit se produit, la mise à la terre réduit le risque
de choc électrique car elle permet l’échappement de courant par un fil électrique. Cet appareil est
agencé d’un cordon d’alimentation contenant un fil de mise à la terre et d’une fiche à trois dents.
Cette fiche doit être branchée dans une prise de courant mise à la terre.
UTILISEZ UNE FICHE À 3 DENTS
SEULEMENT
Fiche à 3 dents Couvercle de prise murale
Prise de courant à
3 dents
17
Cet appareil est équipé d’un mécanisme de
sécurité contre le débordement d’eau. Cette
caractéristique est concue pour la mise en
marche automatique de la pompe dans les
cas de débordement accidentels. Ce
mécanisme fonctionne seulement lorsque
l’appareil est branché au courant
électrique.
IMPORTANT
L’utilisation inexacte de la fiche à trois
dents peut causer le risque de choc élec-
trique. Consulter un électricien ou un tech-
nicien qualifié si vous ne comprenez pas
les instructions de mise à la terre, ou si
vous n’êtes pas sur que l’appareil est cor-
rectement mise à la terre. Si un fil de ral-
longe est nécessaire, assurez qu’il a trois
fils, une fiche à trois dents et une prise
mise à la terre qui peut se marier à la fiche
à trois dents de l’appareil. L’ampérage du fil
de rallonge doit être égal ou plus haut que
l’ampérage électrique de l’appareil.
AVERTISSEMENT

INSTRUCTIONS D’INSTALLATION
Emplacement
Choisissez un endroit plat. Si la laveuse n’est
pas à niveau, elle peut vibrer pendant
l’essorage.
Éloignez l’appareil au moins 5 cm du mur.
Il peut vibrer s’il touche le mur.
Installation du Boyau
Cette laveuse est équipée d’un ensemble à rac-
cord rapide pour le BOYAU. Prière de suivre les
instructions suivantes.
1. Connectez l’adapteur de robinet à l’arrivée
d’eau.
2. Raccordez à pression le bout libre du montage
du BOYAU à mi-point de raccord de l’arrivée
d’eau. Un collier n’est pas nécessaire pour
fixer ce raccord car le BOYAU n’est pas sous
pression à cet endroit.
3. Installez le raccord rapide à l’adapteur du
robinet en tirant le collier blanc vers le bas.
Répétez les mèmes actions pour déconnecter
le raccord.
4. Pour l’utilisation portative, évitez de
désaccoupler le boyau d’eau du “raccord
d’arrivée d’eau”.
Désaccouplez toujours le boyau sur le côté du
“raccord rapide”. Un “support de boyau” incor-
poré au “raccord rapide” vous permet d’ac-
crocher le boyau sur le côté de la carrosserie
Installation du boyau d’écoulement
Complétez l’installation du boyau d’écoulement
tel qu’indique l’illustration ci-dessous. Attachez le
boyau d’écoulement au tuyau d’écoulement en
utilisant le collier à ressort fourni.
Adapteur de robinet
Raccord rapide
Raccord de l’arrivée d’eau
Accrochez le boyau d’écoulement sur le
rebord de l’évier ou directement dans le
pipe du drain.
18

BLANCHISSAGE
A) Guide de blanchissage
Brassée
de lavage
Genre
de Tissu
Durée
de lavage
Action
de lavage
Niveau
d’eau
Détergent
nécessaire
Jusqu’à
1,4 kg
laine, soie, polyester
rayon, tissus minces
2 min. Douce
BAS
36 L
Approx.
40 g
coton, toile
T-shirt, sous-vêtements
7 min. Normale
coton très sale, draps,
vêtements de travail,
10 min. Normale
1,4-
2,8 kg
laine, soie, polyester
rayon, tissus minces
coton, toile
T-shirt, sous-vêtements
coton très sale, draps,
vêtements de travail,
4 min.
7 min.
10 min.
Douce
Normale
Normale
MÉDIUM
43 L
Approx.
47 g
Au-dessus
2,8 kg
laine, soie, polyester
rayon, tissus minces
coton, toile
T-shirt, sous-vêtements
coton très sale, draps,
vêtements de travail,
4 min.
7 à 10
min.
10 à 15
min.
Douce /
Normale
Normale
Lourde
HAUT
50 L
Approx.
55 g
• Le détergent nécessaire varie selon la marque; prière de lire les instructions de fabricant de
détergent.
B) Préparation
• Installez le boyau d’arrivée d’eau au robinet.
• Détachez le boyau d’écoulement et installer-le dans l’évier.
• Branchez le cordon d’alimentation dans une prise de courant.
19
Table of contents
Languages:
Other Danby Washer manuals

Danby
Danby DWM045WDB Assembly instructions

Danby
Danby DWM055WDB User manual

Danby
Danby DWM030WDB-6 User manual

Danby
Danby DWM055A1WDB-6 User manual

Danby
Danby DTT420 Operating and maintenance manual

Danby
Danby DWM99W User manual

Danby
Danby Simplicity SWM5500W User manual

Danby
Danby DWM045DB User manual

Danby
Danby DWM060WDB Assembly instructions

Danby
Danby DWM17WDB User manual

Danby
Danby DWM055A1WDB-6 User manual

Danby
Danby DWM030WDB-6 User manual

Danby
Danby DWM12C1WDB User manual

Danby
Danby DWM5500W User manual

Danby
Danby DWM5500W User manual

Danby
Danby DWM060WDB User manual

Danby
Danby DWM028WDB-3 User manual

Danby
Danby DWM17WDB Assembly instructions

Danby
Danby DWM5500W User manual