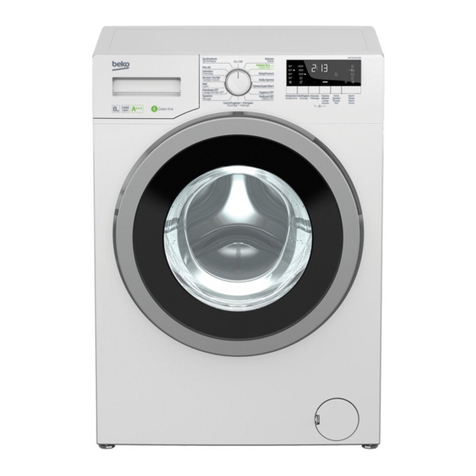
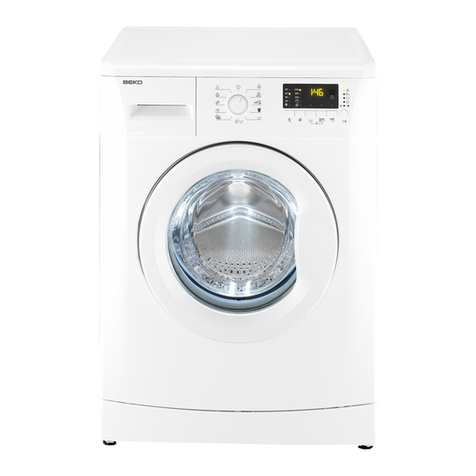
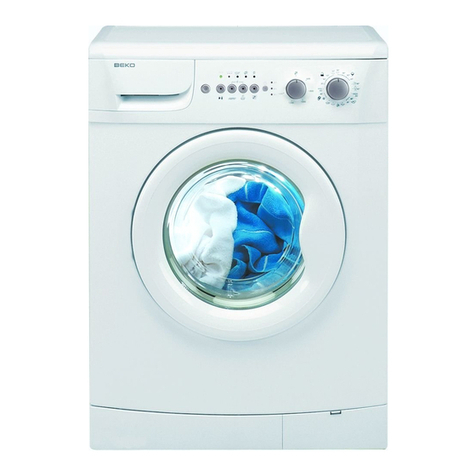
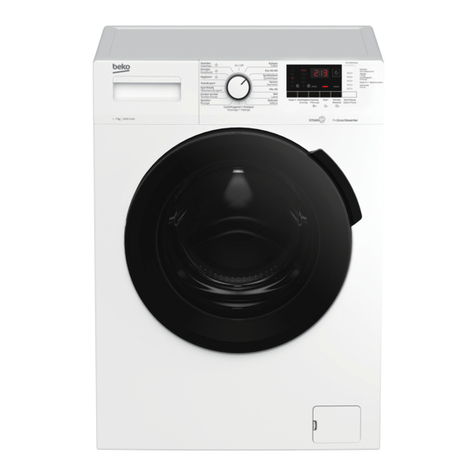
Beko WMB91242LC User manual

2820524353 / 15-10-15.(11:09)Document Number=
Washing Machine
User Manual
WMB 91242LC
EN

This product was manufactured using the latest technology in environmentally friendly conditions.

3/ EN Washing Machine / User’s Manual
1 Important nstructons for safety and envronment
This section contains safety instructions that will help protect from risk of personal
injury or property damage. Failure to follow these instructions shall void any warran-
ty.
1.1 General safety
lack experience and knowledge provided that they are supervised or trained on
-
with your product.
Authorized Service Agent. There is the risk of electric shock!
-
-
thout grounding in accordance with the local regulations.
-
loading door to open, the door and the lock mechanism may get damaged.
electric shock!
-
chines only.
repairing procedures.

4/ EN Washing Machine / User’s Manual
-
ce.
-
ted and plastic surfaces.
1.2 Intended use
accordingly.
-
portation.
1.3 Chldren's safety
place away from reach of the children.
lock to prevent children from intervening with the product.
is located.
-
-
kage.
While washing the laundry at high temperatures, the loading door
from the loading door of the machine while the washing operation
is in progress.
1.4 Package nformaton
packaging materials together with the domestic or other wastes. Take them to

5/ EN Washing Machine / User’s Manual
1.5 Dsposng of the waste product
with normal domestic waste at the end of its service life. Take it to a collection
local authorities to learn the nearest collection point. Help protect the environ-
1.6 Complance wth WEEE Drectve
waste product with normal domestic and other wastes at the end of its
service life. Take it to the collection center for the recycling of electrical
Compliance with RoHS Directive:

/ EN Washing Machine / User’s Manual
2 Installation
Refer to the nearest Authorised Service Agent for
installation of the product. To make the product ready
for use, review the information in the user manual
and make sure that the electricity, tap water supply
necessary arrangements carried out.
C
water and waste water installations at the place of
Make sure that the water inlet and discharge
pinched or crushed while pushing the product into
its place after installation or cleaning procedures.
B
WARNING:
the Authorized Service Agent. Manufacturer shall
A
WARNING:
your safety.
2.1 Appropriate installation location
a long pile rug or similar surfaces.
-with full load- when they are placed on top of each
product on a solid and flat floor that has sufficient
load carrying capacity!
of other furniture.
2.2 Removing packaging reinforcement
reinforcement. Remove the packaging reinforcement
2.3 Removing the transportation locks
A
WARNING:
reinforcement.
WARNING:
Remove the transportation safety
they rotate freely
(C)
.
gently.
3. Attach the plastic covers supplied in the User
(P)
C
moved again in the future.
Never move the product without the transportation
2.4 Connecting water supply
C
from the fully open tap in one minute to have your
machine run smoothly. Attach a pressure reducing
valve if water pressure is higher.
product as a single
(cold)
water-inlet unit, you
must install the supplied stopper to the hot water

7/ EN Washing Machine / User’s Manual
A
WARNING:
Models with a single water inlet
such a case the laundry will get damaged or the
product will switch to protection mode and will not
operate.
WARNING:
your laundry.
1. Connect the special hoses supplied with the product
A
WARNING:
Ensure that the cold and hot water
connections are made correctly when installing the
at the end of the washing process and wear out.
when tightening the nuts.
hose connection to check for water leaks at the
tap and remove the nut. Retighten the nut carefully
after checking the seal. To prevent water leakages
when the machine is not in use.
2.5 Connecting to the drain
connected to the wastewater drain or to the
A
WARNING:
hose comes out of its housing during water
discharge. Moreover, there is risk of scalding due
to high washing temperatures! To prevent such
situations and to ensure smooth water intake
and discharge of the machine, fix the end of the
discharge hose tightly so that it cannot come out.
difficult and the laundry may come out excessively
figure.
100cm
40cm
machine and to allow for easy discharge, do not
immerse the hose end into the dirty water or do not
cut it short.
adding an original extension hose. Length of the
fitted well with an appropriate clamp as not to come
off and leak.
2.6 Adjusting the feet
A
WARNING:
the product may move from its place and cause
2. Adjust the feet until the product stands level and
A
WARNING:
2.7 Electrical connection
Connect the product to a grounded outlet protected
any damages that will arise when the product is
used without grounding in accordance with the local
regulations.
installation.

/ EN Washing Machine / User’s Manual
voltage.
multi-plugs.
B
WARNING:
Transportation of the product
2. Remove water drain and water supply connections.
order of removal procedure;
C
Never move the product without the
A
WARNING:
place away from reach of the children.
3 Preparation
3.1 Sorting the laundry
tags.
3.2 Preparing laundry for washing
damage the machine. Remove the metal pieces or
pillow case.
pens and paper clips, and turn pockets inside out
Remove curtain attachment items.
and tears.
programme.
coloured cottons release a lot of dye. Wash them
separately.
the instructions on the package.
out.
reduce pilling.
the inner parts of the machine in time and can cause
damage.
3.3 Things to be done for energy saving
Following information will help you use the product in
an ecological and energy-efficient manner.
packaging.
soiled laundry.
laundry that is not heavily soiled or stained.
highest spin speed recommended during washing
process.

9/ EN Washing Machine / User’s Manual
Detergent Drawer
The detergent drawer is composed of three
compartments:
compartment.
1
3
2
Detergent, softener and other cleaning agents
washing programme.
washing programme is running!
put any detergent into the prewash compartment
detergent into the prewash compartment
the laundry in the machine.
Choosing the detergent type
laundry.
used solely for delicate clothes.
specifically for woolens.
A
warning:
Use only detergents manufactured
specifically for washing machines.
warning:
Adjusting detergent amount
on the amount of laundry, the degree of soiling and
water hardness.
financial savings and finally, environmental
protection.
recommended on the detergent package.
3.4 Initial use
Before starting to use the product, make sure that
all preparations are made in accordance with the
To prepare the product for washing laundry, perform
user manual.
C
machines.
Some water might have remained in the product
3.5 Correct load capacity
The maximum load capacity depends on the type
of laundry, the degree of soiling and the washing
programme desired.
The machine automatically adjusts the amount of
water according to the weight of the loaded laundry.
A
warning:
3.6 Loading the laundry
locking sound. Ensure that no items are caught in
the door.
C
The loading door is locked while a programme is
the programme comes to an end.
A
warning:
3.7 Using detergent and softener
C
instructions on the package carefully and follow
the suggested dosage values. Use measuring cup if

/ EN Washing Machine / User’s Manual
soiled clothes.
Using softeners
the detergent drawer.
softener compartment.
Using liquid detergents
If the product contains a liquid detergent cup:
Clothes
Lght colours and whtes
°
Soiling Level
Heavly Soled
such as grass,
coffee, fruits
recommended for heavily soiled clothes.
detergents to clean clay and soil stains
and the stains that are sensitive to
Normally
Soled
stains caused
collars and
at dosages recommended for normally
soiled clothes.
Lghtly Soled
at dosages recommended for lightly
soiled clothes.
Clothes
Colours
°
Soiling Level
Heavly Soled
at dosages recommended for heavily
use powder detergents to clean clay
and soil stains and the stains that are
Normally
Soled
at dosages recommended for normally
soiled clothes. Use detergents without
Lghtly Soled
at dosages recommended for lightly
soiled clothes. Use detergents without
Dark colours
°
Soiling Level
Heavly Soled
dosages recommended for heavily
soiled clothes.
Normally
Soled
dosages recommended for normally
soiled clothes.
Lghtly Soled
dosages recommended for lightly soiled
clothes.
Delicates/Woollens/Silks
°
Soiling Level
Heavly Soled
for delicate clothes. Woollen and silk
woollen detergents.
Normally
Soled
for delicate clothes. Woollen and silk
woollen detergents.
Lghtly Soled
for delicate clothes. Woollen and silk
woollen detergents.

11 / EN Washing Machine / User’s Manual
If the product does not contain a liquid detergent
cup:
programme with prewash.
Using gel and tablet detergent
and similar detergents.
cup, put the gel detergent into the main wash
detergent compartment during first water intake.
programme.
C
laundry, close to the lower part of the drum in
future washings.
the prewash function.
Using starch
into the softener compartment.
washing cycle.
clean cloth after using starch.
Using bleaches
As an alternative application, select a programme
the machine is taking water from the detergent
compartment during first rinsing step.
them.
agent and rinse the clothes very well as it causes
the clothes and do not use it for coloured clothes.
programme that washes at a lower temperature.
detergents; however, if its thickness is not the same
with the detergent, put the detergent first into the
wait until the detergent flows while the machine is
same compartment while the machine is still taking
in water.
Using limescale remover
manufactured specifically for washing machines
only.

12 / EN Washing Machine / User’s Manual
4 Operating the product
4.1 Control panel
1
87
6
2 3 4 5

13 / EN Washing Machine / User’s Manual
4.2 Display symbols
F1 F2 F3 F4
4.3 Preparing the machine
softener.
4.4 Programme selection
and soiling degree of the laundry in accordance with
Normally soiled, coloured, fade proof linens,
C
When selecting a programme, always consider
Higher temperature means higher power
consumption.
4.5 Main programmes
main programmes.
washed with vigorous washing action for a longer
washing cycle.
Use this programme to wash your synthetic clothes
washes with a gentle action and has a shorter washing
cycle compared to the Cottons programme.
programme with prewash and anti-creasing functions
selected. As their meshed texture causes excessive
put detergent in the prewash compartment.
Use this programme to wash your woolen clothes.
Select the appropriate temperature complying with
the tags of your clothes. Use appropriate detergents
for woolens.

14 / EN Washing Machine / User’s Manual
4.6 Additional programmes
in the machine.
C
Additional programmes may differ according to
the model of the machine.
heating time and an additional rinsing step provide a
higher level of hygiene.
You can wash your delicate clothes in this programme.
recommended.
Use this programme to wash your woolen/delicate
with a very gentle washing action to not to damage
clothes.
Use this programme to wash your little amount of
lightly soiled cotton clothes in a short time.
Use this programme to wash your dark coloured
laundry or the laundry that you do not want it get
faded. Washing is performed with little mechanic
coloured laundry.
Use this programme to wash your cotton and synthetic
clothes together without sorting them.
Use this programme to wash the shirts made of cotton,
C
separately in this programme.Soiling level and
programme.
garments.
loaded the duvet correctly in order not to damage
the machine and the duvet. Remove the duvet cover
duvet into two and load it into the machine. Load the
duvet into the machine paying attention to place it in a
C
C
contain cotton in the machine.
A
warning:
such as carpets, rugs and etc. in the machine.
hygiene. Run the programme without any laundry
limescale remover for washing machines into the
over, leave the loading door ajar so that the inside of
the machine gets dry.
C
maintenance programme.
machine detects that there is a load inside and

15 / EN Washing Machine / User’s Manual
4.7 Specal programmes
For specific applications, select any of the following
programmes.
Use this programme when you want to rinse or starch
separately.
Use this programme to apply an additional spin cycle
for your laundry or to drain the water in the machine.
Before selecting this programme, select the desired
machine will spin the laundry with the set spin speed
and drain the water coming out of them.
then select the No Spin function with the help of Spin
C
Use a lower spin speed for delicate laundries.
4.8 Temperature selection
Whenever a new programme is selected, the maximum
temperature for the selected programme appears on
the temperature indicator.
To decrease the temperature, press the Temperature
cold wash option appears on the display.
C
recommended temperature for the selected
decrease the temperature.
Economy symbol
provide energy savings.
C
and Hygiene programmes since washing is
performed in long times and at high temperatures
in order to provide hygiene. Similarly, Economy
Cleaning, Spin and Rinse programmes as well.
4.9 Spin speed selection
Whenever a new programme is selected, the
recommended spin speed of the selected programme
is displayed on the spin speed indicator.
To decrease the spin speed, press the Spin Speed
of these options.
C

/ EN Washing Machine / User’s Manual
4.10 Programme and consumption table
- : See the programme description for maximum load.
C
electric voltage.
EN 2Auxiliary functions
Programme (°C)
Max. Load (kg)
Water Consumption (l)
Energy Consumption
(kWh)
Max. Speed***
Prewash
Quick
Easy Iron
Rinse Hold
Pet Hair Removal
Selectable
temperature
range °C
Cottons 90 9 87 2.70 1600 ••••• 90-Cold
Cottons 60 9 85 1.80 1600 ••••• 90-Cold
Cottons 40 9 85 1.00 1600 ••••• 90-Cold
Allergy 90 9 73 2.70 1600 •90-30
Cottons Eco 60** 9 65 2.10 1600 •60-Cold
Easy Care 60 4 55 1.00 1200 ••••• 60-Cold
Easy Care 40 4 55 0.52 1200 ••••• 60-Cold
Mix 40 4 55 0.62 1200 ••••• 40-Cold
Delicates 30 1 50 0.25 1200 •30-Cold
Wool 40 2 56 0.30 1200 •40-Cold
Bedding/Blanket 40 - 60 0.60 1200 60-40
Quick 14 30 2 40 0.10 1400 •30-Cold
Daily/Quick 90 9 70 2.02 1400 •90-Cold
Daily/Quick 60 9 70 1.20 1400 •90-Cold
Daily/Quick 30 9 80 0.30 1400 •90-Cold
Shirts 40 4 45 0.60 800 • • *•60-Cold
Jeans 40 4 95 0.60 1200 •40-Cold
Sports 40 3 54 0.44 1200 • • 40-Cold
Self Clean 70 - 110 2.70 800 70

17 / EN Washing Machine / User’s Manual
the programme. Furthermore, you may also select
function you are going to select or cancel.
selected auxiliary function appears on the display.
C
second auxiliary function conflicting with the first
second auxiliary function selection will remain
active. For example, if you want to select Quick
remain active.
the model of the machine.
detergent and time.
F1 appears on the display when you select this
F2 appears on the display when you select this
C
When you select this function, load your machine
with half of the maximum laundry specified in the
rinsing in addition to the one already made after the
F3 appears on the display when you select this
This function creases the clothes lesser when they
addition, washing is done with a higher water level.
F4 appears on the display when you select this
after the programme completes, you may use rinse
hold function to keep your laundry in the final rinsing
water in order to prevent them from getting wrinkled
to drain the water without spinning your laundry.
the water.
The programme resumes. Water is drained, laundry is
spun and the programme is completed.
This function helps to remove pet hair that remain on
your garments more effectively.
Rinse steps are added to the normal programme. Thus,
pet hair is removed more effectively.
A
Never wash your pets in the washing machine.
4.12 Time display
Remaining time to complete the programme appears
on the display while the programme is running. Tim is
C
on the water pressure, water hardness and
the type of laundry, auxiliary functions selected
and the changes at the mains voltage.
Delayed start
minutes.
C
clothes.
C
delayed start period. At the end of the countdown,
starts and the time of the selected programme
appears on the display.

/ EN Washing Machine / User’s Manual
Changing the delayed start period
Cancelling the Delayed Start function
start the programme immediately:
4.13 Starting the programme
4.14 Progress of programme
remain lit at the end of the programme. The
programme step.
Prewash
prewash step has started.
Main Wash
has started appears on the display.
Rinse
started appears on the display.
Softener
started appears on the display.
Spin
C
4.15 Loading door lock
There is a locking system on the loading door of the
machine that prevents opening of the door in cases
4.16 Changing the selections after
programme has started
Switching the machine to pause mode
display indicating that the machine is paused. Start
Changing the speed and temperature settings for
you may cancel or activate the auxiliary functions; see,
You may also change the speed and temperature
Adding or taking out laundry
C
The loading door will not open if the water
temperature in the machine is high or the water
4.17 Child Lock
Use Child Lock function to prevent children from
tampering with the machine. Thus you can avoid any
changes in a running programme.
C
you switch on the machine again, programme will
resume from where it has stopped.
To activate the Child Lock:
nd
and 4
th
C
Same phrase will appear on the display if you press

19 / EN Washing Machine / User’s Manual
To deactivate the Child Lock:
nd
and 4
th
C
programme.
4.18 Cancelling the programme
appears on the display and the programme is cancelled.
C
water in the machine.
4.19 Machine is in Rinse Hold mode
when the machine is in Rinse Hold mode.
in this mode:
and spins the laundry.
and discharges the water only.
4.20 End of programme
lit. Auxiliary function, spin speed and temperature
remain selected.
4.21 Your machne s equpped wth a
“Standby Mode”
5 Maintenance and cleaning
5.1 Cleaning the detergent drawer
prevent accumulation of powder detergent in time.
compartment and pull towards you until the
compartment is removed from the machine.
C
softener mixture starts to gather in the softener
2. Wash the detergent drawer and the siphon with
avoid touching of the residues in the drawer with
your skin when cleaning.
and make sure that it is seated well.
following figure:
C
Lift the rear part of the siphon to remove it as
seating and push its front section downwards to
5.2 Cleanng the loadng door and the drum
For products with drum cleaning programme, please
steps
to clean the drum:
Select
Additional Water
or
auxiliary
functions. Use a Cottons
programme
without
pre-wash. Set
the temperature to the level
recommended on the drum cleaning agent which
can be provided from authorized services.
Apply
this procedure
without any laundry in the product.
Before starting the programme, put 1 pouch of special
after the programme has come to an end.

/ EN Washing Machine / User’s Manual
C
C
machines.
After every washing make sure that no foreign
C
using cleaning agents for stainless steel. Never use
steel wool or wire wool.
A
warning:
These will damage the painted and plastic surfaces.
5.3 Cleaning the body and control panel
non-corrosive mild gel detergents as necessary, and
dry with a soft cloth.
Use only a soft and damp cloth to clean the control
panel.
5.4 Cleaning the water intake filters
There is a filter at the end of each water intake valve
at the rear of the machine and also at the end of each
water intake hose where they are connected to the
in the water to enter the washing machine. Filters
1. Close the taps.
2. Remove the nuts of the water intake hoses to
access the filters on the water intake valves. Clean
them.
3. Take out the filters on the flat ends of the water
intake hoses together with the gaskets and clean
thoroughly under running water.
4. Replace the gaskets and filters carefully in their
5.5 Draining remaining water and cleaning
the pump filter
The filter system in your machine prevents solid items
pump impeller during discharge of washing water.
clean the pump filter.
A
warning:
may damage your machine or may cause noise
water:
1. Unplug the machine to cut off the supply power.
A
warning:
Temperature of the water inside the
machine cools down.
out towards yourself.
sides at the top to open.
C
downwards with a thin plastic tipped tool, through
tipped tools to remove the cover.
3. Some of our products have emergency draining
hose and some does not have. Follow the steps
emergency draining hose:
Other manuals for WMB91242LC
1
Table of contents
Other Beko Washer manuals

Beko
Beko B3WFT510415W User manual

Beko
Beko WMY 81283 LB3 User manual

Beko
Beko D1 5062 B User manual

Beko
Beko WHT814EIN User manual

Beko
Beko WUX71031W-IT User manual

Beko
Beko WTV 8612 XSS User manual

Beko
Beko WMY 71283 LMSB2 User manual

Beko
Beko WX 742430S User manual

Beko
Beko WTL 90019 G User manual

Beko
Beko WM6167 Operating instructions

Beko
Beko WTE 7636 XB User manual

Beko
Beko WMI 71641 WMI 71441 User manual

Beko
Beko WTB1041R4W User manual

Beko
Beko WMD 61 W Operating instructions

Beko
Beko CM 9101 User manual

Beko
Beko BWFT710416WB User manual

Beko
Beko WTE10745X0D User manual

Beko
Beko WMI 81442 User manual

Beko
Beko WKE 15080 D User manual

Beko
Beko WMD 25120 T User manual