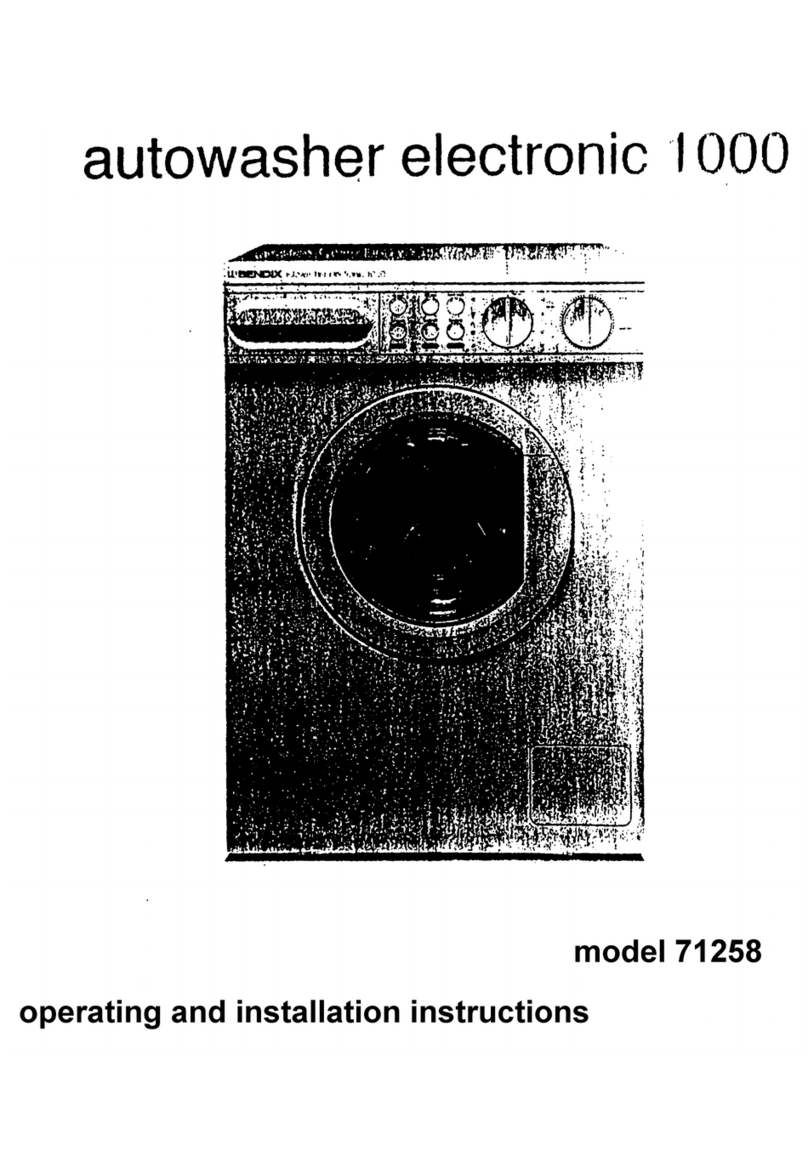
BENDIX 71258 User manual

autowasher
electronic
1000
model
71258
operating
and
installation
instructions


BENDIX
Aiitowasher
electronic
I
*>w>
Modem?**
M'
You
are
now
the
proud
owner
of
a
Bendix
Autowasher
electronic,
you
will
be
Ij,..
pleased
to
find
that
it
washes,
rinses
and
spins
without
you
having
to
handle
the
hi
\
clothes
in
between
times.
pj
;;
You
will
obviously
want
to
obtain
the
best
possible
wash.
By
reading
and
following
the
instructions
in
this
booklet
you
will
achieve
excellent
results.
Pleasoensure
that
the
Installation
Instructions
have
been
carried
out.
If
you
should
need
any
further
advice
or
assistance
please
contact
the
Bendix
agent
from
whom
your
machine
was
purchased
or
your
nearest
Tricity
Bendix
Customer
Service
Centre,
listed
in
the
yellow
pages
under
'Domestic
Appliances’.
i

Model
7I21S8
i...i
„
4
.
Aulowaslier
t...
i
.
,,
,,
electronic
1000
Height,
overall
(H)
850
mm
33
'/»in
Electrical
loadings:
2.5
kW
Width
(W)
595
mm
23
'/sin
Heater
Depth
•
door
closed
(D)
570
mm
22’/sin
Motor
-
tumble
250W
•
dooropen(d)
960
mm
37
-'/..in
-
spin
300W&
Height,
to
services
(HS)
765
mm
30
in
550W
Rear
projection
(C)
50
mm
2
in
95W
Weight-empty
87kg
192
ib
Dram
Pump
2

•
-v*u
UNPACKING
P«
INS
I
Al
I
V'.
inn
Remove
the
protective
packing
and
polystyrene
base.
Remove!
back
panel
screws
and
lift
panel
clear.
Using
the
spanner
provided,
remove
the
four
integral
transit
straps
as
shown
in
the
diagram
below,
together
with
the
three
chassis
bracing
straps
and
store
in
a
convenient
place
together
with
the
fixing
bolts
and
washers.
Insert
the
four
plastic
plugs
provided
into
the
four
bolt
holes
vacated
by
the
transit
fixing
bolts
in
the
back
panel.
Relocate
and
fix
the
back
panel.
Always
refit
the
transit
straps
before
transporting
the
appliance.
Connect
the
hoses,
making
sure
that
the
sealing
washers
Y
are
in
place.
Note.
Some
hoses
now
incorporate
the
sealing
washers
Y
into
the
connectors
Remove
polystyrene
base
by
pulling
off.
Do
not
lay
machine
on
its
side.
I'!’
SITE
REQUIREMENTS
||l
A
firm,
level,
and
a
relatively
smooth
floor,
with
:•
;
1
the
services
brought
to
the
appliance.
A
minimum
of
12
mm
(Vs
In)
clearance
Is
required
each
side
of
the
appliance
to
permit
removal
for
servicing.
__

Mains
lead:
3
core
2.7
m
9
ft
Fuse
ratings:
13A
Fused
and
earthed
supply:
240V
50Hz
a.c.
riii
i
i
.1:
:.s»'HLI;\IMLF.MUSI
BE
6AHTHED
If
this
appliance
is
fitted
with
a
non-rewireable
plug
for
which
your
socket
is
unsuitable
then
it
should
be
cut
off
and
an
appropriate
plug
fitted.
The
remdved
plug
should
be
disposed
of
as
Insertion
of
the
plug
into
a
13
A
socket
is
likely
to
cause
an
electrical
hazard.
If
It
is
necessary
to
change
the
fuse
in
a
non-rewireable
plug
the
fuse
cover
must
be
refitted.
If
the
fuse
cover
is
lost
or
damaged
the
plug
must
not
be
used
until
a
replacement
is
obtained.
Replacement
fuse
covers
are
available
from
Trlcity
Bendlx
Customer
Parts
Centre,
PO
Box
14,
Newton
Aycliffe.
PL5
6XA.
ft
is
important
that
the
colour
of
the
replacement
fuse
cover
corresponds
with
the
colour
marking
on
the
base
of
the
plug.
The
wires
in
the
mains
lead
are
coloured
in
accordance
with
the
following
code:
GREEN
AND
YELLOW
EARTH
'
BLUE
NEUTRAL
BROWN
LIVE
As
the
colours
of
the
wires
in
the
mains
lead
of
this
appliance
may
not
correspond
with
the
coloured
markings
identifying
the
terminals
in
your
plug
proceed
as
follows:
The
wire
which
is
coloured
green
and
yellow
must
be
connected
to
the
terminal
which
is
marked
with
the
letter
‘E’
or
by
the
‘Earth’
symbol
or
coloured
green
or
coloured
green
and
yellow.
The
wire
which
is
coloured
blue
must
be
connected
to
the
terminal
which
is
marked
with
the
letter
‘N’
or
colour
black.
The
wire
which
is
coloured
brown
must
be
connected
to
the
terminal
which
Is
marked
with
the
letter
‘L’
or
coloured
red.
The
appliance
must
be
protected
by
a
13
A
ASTA
approved
(BS
1362)
fuse
if
a
13
A
(BS
1363)
plug
or
a
non-rewireable
plug
is
used
or
if
any
other
type
of
plug
is
used
by
a
15
A
fuse
either
In
the
plug
or
adapator
oral
the
distribution
baord.
li.
.)!•,
Supply:
Hot
&
Cold,
or
Cold-only,
using
‘F‘
connector
25115.
Pressure
-minimum
25kN/m
2
3.5lt?/in
2
-maximum
1000kN/m
2
140
lb/in
2
Temperature:
Hot
water
60°C
maximum
Inlet
connection
VtBSP
3
/«BSP
Inlet
hose
length
1.35
m
53
in
Inlet
height
HS2
0.3
m
10
ft
Preferred
stopcock
position:
at
side
of
machine
300
mm
1
ft
Stopcock
recommended:
Bendix
24041
hot
&
24042
cold
i..
i,..
u
.
iCttSUPPLY
The
diagram
shows
a
typical
domestic
plumbing
system.
Connections
can
be
made
by
fitting
tee-pieces
in
the
existing
pipework.
Before
using
the
new
pipework
for
the
first
time
flush
out
swarf
and
flux.
Permanent
connections
to
Bendix
stopcocks
located
at
the
lefthand
;
side
of
the
appliance
are
recommended.
Ensure
that
they
are
positioned
near
enough
to
the
appliahce
to
permit
it
being
moved
lor
servicing.
Where
necessary
the
appliance
can
be
used
on
Cold-oniy
water
supply
by
connecting
both
water
inlets
by
means
ol
a
Bendix
F-connector
25115.
The
grey
hose
supplied
with
the
machine
is
marked
‘25°C
maximum’.
This
should
only
be
connected
to
the
cold
water
supply.
Always
use
for
connection
to
the
cold
water
supply
be
means
of
the
F-connector.
The
recommendations
set
out
are
suggestions
only.
All
installations
must
comply
with
the
requirements
of
local
authorities
or
public
utilities.
4

Instantaneous
Water
Moat
err.
This
mode!
is
suitablo
for
use
wifh
somo
makos
of
instantaneous
gas
wator-hootors.
i
nil
details
of
compatible
water-heaters
should
be
obtained
from
the
healer
manufacturer
or
Gas
showroom
The
use
of
these
heaters
may
require
more
frequent
cleaning
of
the
Autowasher
water
inlet
filters
than
would
be
necessary
with
other
water
heating
methods.
DRAINAGE
Length
of
drain
hose
1.2
m
4ft
Standpipe
bore
(B)
38-40
mm
1
'/?in
Standpipe
to
floor
(SH)
-maximum
1
m
40
in
-
minimum
0.6
m
‘
24
in
Preferred
minimum
standpipe
(S)
380
mm
15
in
Suggested
trap*
Bottle
type
Bottle
type
Fall
to
drain
(F)
100
mm/m
1
in/ft
CONNECTING
THE
HRAINAGE
important
Before
using
your
machine
for
the
first
time
ensure
that
the
drain
screen
is
fitted
correctly.
Failure
to
do
so
may
result
in
a
flood.
A
standpipe
is
recommended,
with
the
dimensions
shown.
The
hose
can
be
hooked
over
the
edge
of
a
sink.
Permanent
drainage
arrangements
should
conform
to
the
dimensions
given.
There
must
be
an
airbreak
or
the
appliance
may
syphon.
The
drain
pipe
should
not
be
pushed
into
the
standpipe
more
than
200
mm
(8
in).
The
dimensions
given
In
these
instructions
are
not
intended
to
be
direct
conversions
between
metric
and
Imperial
units.
Please
work
in
one
set
only.
‘The
recommendations
set
out
are
suggestions
only.
Alt
installations
must
comply
with
the
requirements
of
local
authorities
or
public
utilities.
This
appliance
complies
with
European
Economic
Community
Radio
Interference
Direclive
02'499
EEC
OPTIONAL
EXTRAS
Optional
fittings
are
available
from
your
Bendix
stockist
and
will
ease
the
installation
and
use
of
the
appliance:
Stopcocks:
'Hot'
24041
'Cold'
24042
Cold-fill
F
connector
25115
Stacking
Kits:
with
pull-out
shelf
28300
without
shelf
28301
For
use
with
model
74568
The
dimensions
given
in
these
instructions
are
not
intended
to
be
direct
conversions
belween
metric
and
imperial
units.
Please
work
in
one
set
only.
This
appliance
must
be
installed
in
accordance
with
the
IEE
regulations,
in
particular
wifh
regard
to
installation
In
bathrooms;
if
not
we
reserve
the
right
to
refuse
to
service
it.

;.m-UK:i
a>H)C
nutowashet
electronic
t
>
t
.
1
1
:
1
1
-
»
i
i
«
•!
./.
)
*.*'..1
1
(
The
detergent
dispenser
is
designed
so
that
detergents
and
additives
will
(lush
automatically
jnlo
your
machine.
II
is
divided
into
three
compartments
A'
lor
pre-wash
or
bio,
B'
lor
main
wash
powders
and
C'
lor
additives,
i.e.
labric
softeners
such
as
Comfort.
At
the
end
of
the
wash
programme,
any
remaining
water
will
be
automatically
syphoned
oul
leaving
the
dispenser
ready
for
the
next
wash.
The
detergent
dispenser
drawer
and
housing
should
be
cleaned
to
prevent
a
build
up
of
detergent
and
fabric
softener.
This
dispenser
drawer
is
easily
removed
by
pulling
out.
Rinse
the
dispenser
drawer
under
the
tap.
dry
and
replace
by
inserting
in
the
opening
and
pushing
home.
111-1
lur...
Vi>nr
IVni’iM
l(JOC)
Inis
six
t:
mti
ol
hol.i
i
options:
bio
wash
half
load
quick
wash
no
pause
heater
off
low
temp
Llio
Vl/yt
h
Push
for
a
bio-wash,
otherwise
the
machine
will
commence
with
a
pre-wash.
It
.If
t
oad
When
pushed
this
limits
the
quantity
of
water
to
be
heated.
Suitable
for
smaller
loads.
I
.'.licit
it/.
:t.
Push
lor
a
quick
wash
lor
lightly
soiled
clothes
and
with
any
programme
selected.
The
quick
wash
can
also
be
used
with
the
low
temp'
or
heater
off
buttons
pushed.
For
the
quickest
wash
push
heater
off
and
quick
wash'
buttons.
1.
.1
..U
Synthetic
programmes
l3j
Idi
\§J
\®l
&
19/
incorporate
a
pause'
feature
where
the
ctolhes
are
held
in
the
final
rinse
water
to
prevent
creasing.
Push
the
‘no
pause
button
when
programming
the
machine
to
override
this
feature,
so
allowing
the
machine
to
continue
automatically
through
to
the
end
of
the
selected
programme
llcator
Of
f
When
selected,
the
machine
will
wash^af
the
temperature
of
the
water
entering
the
machine
unless
this
is
less
than
30'
C.
low
Ti;iii|>
If
selected
the
wash
temperature
will
be
reduced,
thus
saving
electricity.
By
way
of
compensation
the
wash
agitation
time
is
increased.
INDICATOR
LIGHTS
Your
BeiuJix
Autowasher
1000
h$s
three
indicatorlights:
programme
selector
dial
wash
indicator
dial
pause
heater
door
light
light
light
Pause'
Synthetic
programmes
\3/
lij
(6/
\8J
&
^9/
incorporate
a
'pause'
feature
where
the
clothes
are
held
in
the
final
rinse
water
to
prevent
creasing.
This
stage
of
the
programme
is
indicated
by
the
'pause'
light
glowing.
To
complete
the
programme,
push
the
‘no
pause'
button.
'Heater*
Glows
to
indicate
when
the
wash
water
in
the
machine
is
being
heated
to
the
temperature
required
lor
the
best
wash
results.
‘Door'
Glows
when
the
safety
door
lock
is
operating.
At
the
completion
of
the
wash
cycle
it
will
go
out
and
the
door
may
then
be
opened.
Do
not
attempt
to
force
the
door
open
until
the
indicator
light
goes
out.
DIAI
S
There
an:
tn:o
dials:
l-'imjramtue
Selector
Use
this
lo
select
the
wash
programme
required.
A
useful
guide
for
matching
fabrics
to
wash
programme
can
be
seen
on
pages
10
and
11.
VJar.h
Indicator
Dial
Turned
in
a
clockwise
direction
to
the
required
start
position,
it
starts
the
programme
and
then
continues
lo
indicate
the
progress
of
the
machine.

Drain
Screen
The
removable
drain
screen
which
protects
the
pUmp
from
tint
and
foreign
matter
needs
to
be
cleaned
periodically.
How
often
will
depend
on
your
wash
load,
e.g.
cotton
towels
and
nappies
cause
more
lint
to
collect
than
nylon
loads.
Open
the
service
door
by
pressing
on
the
right
hand
side.
Turn
anticlockwise
and
pull
the
drain
screen
out.
Have
a
cloth
or
shallow
tray
under
the
drain
screen
housing,
as
a
small
quantity
of
water
may
run
out.
You
may
find
It
helpful
to
first
set
the
machine
to
spin
then
remove
the
drain
screen.
This
procedure
reduces
the
amount
of
water
released.
Clean
the
screen
under
running
water
to
help
remove
the
trapped
lint.
Replace
the
screen
by
sliding
back
into
the
housing.
Lastly
turn
clockwise
to
secure.
Under
no
circumstances
should
the
drain
screen
be
removed
whilst
the
machine
is
full
of
water.
Transit
Straps
(ns
shown
in
the
Installation
Instructions)
These
must
be
removed
before
use.
PnioiMi.J
lim¬
it
Is
vital
that
these
are
not
kinked
or
the
machine
will
not
operate
correctly
f.'trl
m
>
It
is
important
that
the
machine
is
stable
and
level
during
operation.
To
help
you
obtain
these
conditions
the
machine
is
fitted
with
adjustable
front
feet.
To
adjust
the
feel,
loosen
the
locking
nuts
using
the
spanner
provided
and
adjust
both
(eet
to
give
a
level
and
stable
position
and
then
retighten
the
locking
nuts.
Note:
If
the
appliance
is
to
be
located
on
an
area
which
is
carpeted,
then
we
recommend
the
use
of
a
piece
of
hardboard
beneath
the
machine
in
its
final
operating
resting
position
to
help
you
locate
the
machine
correctly,

i
>.
i*
..
i
dutowasherelectronic
1000
Always
use
a
low
sudsing
detergent
In
your
machine,
e
g.
Persil
Automatic,
as
these
are
specially
formulated
to
work
in
conjunction
with
your
Autowasher
electronic
machine
to
give
the
best
results.
Initially
water
enters
the
machine
and
flows
directly
to
the
drum
bypassing
the
detergent
dispenser,
preventing
waste
of
detergent
into
the
sump.
Detergents
will
then
be
flushed
automatically
into
the
machine
from
the
detergent
dispenser.
The
suds
level
should
never
rise
more
than
halfway
up
the
porthole.
Too
much
foam
will
not
only
impede
the
wash
action
of
your
machine
but
will
rise
through
the
detergent
dispenser
and
make
a
mess
on
the
floor!
II
this
should
happen
clear
excessive
suds
by
advancing
the
Wash
Timer
Dial
to
the
beginning
of
the
first
rinse
and
allow
the
machine
to
rinse
out.
The
following
quantities
of
powder
are
a
guide
for
average
water
supplies.
If
the
water
is
very
hard
more
powder
may
be
needed.
If
very
soft
less
will
be
needed.
If
you
are
in
doubt
refer
to
the
Instructions
on
the
packet.
Main
Wash
200g
(7oz)
If
you
have
a
more
heavily
soiled
load
and
decide
to
use
the
pre-wash
before
a
main
wash
use#
approximately
one
third
of
the
powder
in
the
pre¬
wash
compartment
'A‘
of
the
dispenser
and
the
remaining
two
thirds
in
the
main
wash
’B’
compartment.
Note:
an
average
teacup
holds
(2'/2*3
oz)
75g-
90g.
.
1
1
.
,
i.
Miitut
t
All
fabrics
particularly
towels
and
nappies,
benefit
from
the
use
of
fabric
conditioners
in
the
final
rinse.
Hems
of
laundry
feel
softer,
are
more
easily
ironed
and
the
clinging
effect
of
synthetics
is
considerably
reduced.
•
:>
Pour
the
conditioner
into
the
"Additives'
compartment
"C"
of
the
detergent
dispenser
to
the
level
indicated
on
the
syphon.
Under
no
circumstances
overfill,
as
the
conditioner
will
immediately
be
syphoned
into
the
machine.
Preparation
Before
You
Wash
Many
garments
carry
a
label
under
-
the
International
Textile
Care
Labelling
(ITCL)
scheme
indicating
the
correct
type
of
wash
>
treatment
required.
You
will
find
that
this
label
corresponds
to
the
Wash
Chart
on
Pages
10
&
11
.
.
Sort
your
washing
according
to
the
Care
Label
number
given
on
the
garment,
or
If
absent,
:
according
to
the
fabric
and
type
of
wash
v
-
treatment
required.
Your
Bendix
Auibwasher
electronic
takes
up
to
10
lb
(4.5
kg)
dry
weight
of
s
cotton
clothes.
>
If
you
decide
for
one
reason
or
another
to
mix
>
fabrics,
always
use
the
wash
programme
for
the
most
delicate
fabric
in
the
load.
For
example
a
wash
load
made
up
with
fabrics
from
the
wash,
groups
\1J
and
should
be
washed
on
\2f,
similarly
a
wash
load
with
fabrics
from
\3j
and
‘
(4J
should
be
washed
on
\4j
etc.
While
nylon,
polyester/cotton
articles
and
delicate
items
l.e.
programmes
\3j
.
\4j,
\6J,
should
be
washed
separately.
Make
sure
that
all
pockets
have
been
emptied,
zips
fastened
and
apron
strings
tied.
Remove
pins
and
other
small
objects
which
could
harm
clothes
if
they
become
separated
In
the
machine.
If
possible
make
up
loads
of
similar
soiling
keeping
heavily
soiled
items
separate
from
lightly
soiled
clothes.
Heavily
soiled
parts
such
as
shirt
cuffs
and
collars
may
be
pre-treated
by
brushing
with
a
solution
of
detergent
and
water.
Stain
Removal
Most
household
stains
come
out
In
the
normal
wash,
but
there
are
some
which
require
special
treatment.
See
page
9.

Coff«’o.
Tea.
I
ir/j
r
P
.
Gi
«i‘ihih
.
n
-ir,.
.;,,i
i
'
■
«
•»r
t-.
1»
h
'in
Moultl
G»
ear;n,
Fat,
Lipstick
Hlootl,
Hgci,
MiJU
Ci
cnin,
Meat
Juice
Mil
tie
w
These
are
usually
removed
in
the
wash.
For
old
stains,
soak,
Ihen
launder
in
ihe
usual
way.
Dab
with
methylated
spirits
over
a
soft
cotton
pad,
then
launder
in
the
usual
way.
Do
not
use
methylated
spirits
on
Tricel.
Treal
ink
stains
on
Tricel
with
glycerine.
Scrape
off
excess,
dab
with
petrol,
over
a
soft
cotton
pad.
(Caution.
Petrol
is
inflammable)
Moisten
light
stains
and
soak
in
glycerine
then
wash.
If
stains
remain,
soak
in
one
part
hydrogen
peroxide
to
nine
parts
water;
wash
through
and
rinse
thoroughly.
Soak
light
stains
in
lemon
juice,
press
between
damp
cotton,
repeat
if
necessary.
Treal
with
a
proprietary
grease
solvent.
Soak,
then
launder
in
the
usual
way.
Treat
with
peroxide.
Soak
(using
one
part
hydrogen
peroxide
to
nine
parts
water),
rinse
well.
Care
must
be
taken
with
coloured
fabrics.
Before
washing
your
coloured
garments
-
check
that
the
colours
are
last!
Usually
il
is
recommended
that
coloureds
be
washed
separately
from
whites,
but
some
last
dyed
ilems
i.e.
sheets,
towels
can
safely
be
washed
together
with
your
family
household
linen.
Non-fast
coloured
articles
should
be
washed
at
the
recommended
temperature.
When
using
a
stain
remover,
follow
the
maker's
directions
carefully.
Never
use
full
strength
bleach
on
any
fabrics.
Rinse
thoroughly
after
any
special
treatment.
Chemicals,
left
in
fabrics
can
weaken
or
destroy
some
fibres.
Test
delicate
fabrics
for
possible
damage
lo
fibres
before
tackling
Ihe
stained
area
For
Especially
Stub
hot
n
Stains
or
Soil
Use
the
‘Low
Temperature'
feature
to
give
an
extended
wash
time
e
g
Programme
(I.T.C.L.)
I
:
)
'
H
i
r
a
m
'
-
'
1
1
•
'
Hi
Sel
normally
to
allow
temperature
to
rise,
for
15
mins.
Press
‘Low
Temp‘
button
12J
Set
1
and
press
‘Low
Temp’
button
12J
Set
9
and
press
‘Low
Temp’
button
I4J
Set
3
and
press
‘Low
Temp’
button
15
i
■
Set
4
and
press'Low
Temp’button
t§1
Set
4
and
press
Low
Temp’butlon
1
11
Not
available
©
Not
available
IB
AsU/
Q

I'royra
fitowash^
0
PreuJ«h
30
o
Main
Wash
low
1
emperutu!
i
1
Whites,
cottons
linen
Yes,
select
if
required
Yes.
select
if
required
60"C
plus
extende
wash
period
Colour
last
cotton
and
linen
Yes.
select
il
required
Yes,
select
if
required
60
C
50°C
plus
extender
wash
period
n
While
nylon.
Sturdy
synthetics
Yes,
select
if
required
Yes.
select
if
required
60
C
50°C
plus
extendec
t
wash
period
Coloured
nylon,
Polyester,
cotton
mixtures,
terylene
drip
dry
Yes,
select
if
required
Yes,
select
if
required
50“C
40°C
plus
extended
wash
period
\k
Non-colour
last
cotton
and
linen
Yes,
select
if
required
Yes,
select
if
required
40
°C
30°C
plus
extended
wash
period
Oelicate
fabrics
Yes,
select
if
required
Yes,
select
if
required
40"C
30
a
C
plus
extended
wash
period
&
Machine
washable
woollens
No
No
40"C
30°C
&
Silks
and
printed
acetate
fabrics
No
No
30°C
No
1
&
Cotton
articles
with
special
finishes
capable
ol
being
boiled,
but
requiring
drip
drying
Yes,
select
if
required
Yes,
select
if
required
95°C
60°C
plus
extended
wash
period
The
heater
will
not
operate
once
the
‘Heater
Off'
button
Is
depressed
unless
the
incoming
water
temperatur
of
the
programme
selected.
To
obtain
the
drip
dry
facility
on
programmes
[3/,
\4j,
\6J,
yj/
and
\9/
proceed
as
follows.
When
the
mi
all
the
water
has
drained
away
turn
the
wash
indicator
knob
to
the
O'
position.

3uide
mber
of
llnsos
3
Pmise
Spin
Speed
Full
Load
Half
Load
Notca
No
1000
10
lb
(4.5
kg)
,
•
-
1.
6
lb
(2.7
kg)
A
very
high
temperature
maximum
wash
action
which
allows
oxygen
bleaches
to
work
to
maximum
etlect.
Keeps
whites
white.
1
3
No
1000
10
lb
(4.5
kg)
6
lb
(2.7
kg)
A
hot
wash
with
maximum
wash
action
to
keep
colours
bright
and
fresh
looking.
•
.
3
Yes
1
500
4
V*
lb
(2
kg)
21b
(1kg)
A
hot
wash
with
medium
wash
*
action
for
white
nylon
and
white
polyester/cotton
mixtures.
Always
wash
white
nylon
separately
as
it
picks
up
dyes
from
coloured
synthetics.
3
Yes
*
r
'
•
1
!
600
.
i
1
t'!,:.
4Valb(2kg):,
.
'
!
•
:
M
;
..
.
I'j
1
•
:
;
.1
1
/):(:
2
lb
(1
kg)
A
warm
wash
with
medium
wash
action
to
preserve
the
appearance
of
coloured
synthetic
fibre
and
cotton'I
1
mixtures.
'
3
No
1000
101b(4.5kg)"
'
61b
(2.7
kg)
A
tepid
wash
with
maximum
wash
action
to
prevent
the
transfer
of
colour
from
non
fast
coloured
cottons
and
linens
etc.
3
Yes
500
*
4V?lb(2
kg)
2ib(1
kg)
A
tepid
wash
with
a
minimum
wash
,
action
to
care
for
delicate
labrics.
3
No
-l
1000
.
'
1
Mi
<
'
,’i
\
/
■
:
•
■
mm
No
always
use
lull
load
setting
A
tepid
wash
with
special
wash
action
approved
by
I.W.8.
to
care
for
machine
washable
woollens,
f
•
•
■
.
y
I
•
!,
3
Yes
*!.«.
■
500
.
3’/^
lb
(1.5
kg)
a;.
No
always
use
full
load
setting
,
.
*>
A
cool
wash
wlih
a
special
short,
<
•
*,
wash
cycle
for
|he
special
care
of
j
.
silk
and
printed
acetates;
j
t
,-
i
3
1
Yes
>
!•;
•
J
i
>iVW
00
1.
1
.
i>f
10lb(4.5kg)
•:
.
-
1
1-
.
V
..
6
lb
(2.7
kg)
V
,
■
i
M
v
n
i
r
■
A
very
high
temperature
maximum
wash
action
to
care
for
white
cotton
*
articles
with
speclaf
finishes,
a
.:j
k
•
d
^-1.
,
t
*|.
’.
,i
r
•
•
«
,
:
;
,,
J
*
!
.TJ»
.
s
than
30®
C.
Jhe
wash
load
will
be
washed
at
the
temperature
of
the
Incoming
water,
regardless
tas
reached
the
'pause'
position,
turn
the
wash
Indicator
knob
clockwise
to
drain
the
water,
when

I.M.r;!
i»«
‘
lie
i
>n
When
you
have
a
large
wash
load
made
up
of
shirts,
towels,
pillowcases,
pyjamas
and
other
similar
small
Items,
pack
them
loosely
into
the
drum.
Large
Items,
a
candlewick
bedspread
for
instance,
should
be
washed
individually.
When
washing
a
mixed
load,
put
medium
and
small
sized
Items
Into
the
drum
alternately.
A
sheet
should
be
picked
up
by
the
centre
tentwlse,
shaken
and
then
folded,
pressing
out
the
air.
VV
'I'hP'ofirmmnei
The
choice
of
programmes
on
your
machine
enables
you
to
select
the
best
programme
for
your
wash
load.
The
programmes
on
the
Programme
Selector
correspond
to
the
Care
Labelling
Code
•
of
the
International
Care
Labelling
Scheme.
See
the
chart
on
pages
10
and
11.
Pio
Wrsh
It
could
be
that
you
have
Items
of
laundry
which
would
benefit
from
a
Bio-wash,
e.g.
blood,
gravy,
egg
stains
etc.
Follow
the
above
procedure,
making
sure
that
the
low
suds
bio
detergent
goes
into
the
detergent
dispenser
compartments
A.
Press
In
the
Bio.
Button
to
reveal
the
green
Indicator.
Start
the
machine
by
turning
the
wash
indicator
dial
clockwise
to
the
position
marked
'bio/prewash';
’
The
Bio
wash
lasts
for
approximately
50
minutes,
after
which
time
your
machine
will
complete
the
selected
programme.
Start
the
machine
by
turning
the
wash
indicator
dial
clockwise
to
the
position
marked
'bio/
prewash.
The
Blo-wash
and
Pre-wash
start
at
the
same
position
with
a
pre-fill.
Once
the
water
has
Been
heated
to
the
correct
temperature
the
machine
automatically
advances
to
the
beginning
of
the
Pre-wash.
The
Pre-wash
will
take
approximately
12-14
minutes
after
which
time
your
machine
will
complete
the
rest
of
the
selected
programme.
Do
not
push
the
'bio'
button
(the
green
Indicator
should
not
be
visible)
if
you
only
require
a
prewash.
T
Main
Wash
To
start
the
machine
without
a
Bio-wash
or
pre¬
wash
ensure
that
the
Programme
Selector
knob
is
turned
to
the
desired
programme,
and
the
correct
quantity
of
low
suds
detergent
Is
in
the
main
wash
compartment
B’
of
the
detergent
dispenser.
Turn
the
wash
indicator
dial
clockwise
to
the
position
marked
‘main
wash’.
i
Pre
Fill
At
the
start
of
the
Pre-wash/Bio-wash
and
Main
wash
the
machine
will
pre-fill.
This
means
that
Initially
water
will
flow
into
the
machine
bypassing
the
soap
dispenser.
This
will
prevent
loss
of
detergent
Into
the
sump.
Pr-f-Wush
On
heavily
soiled
wash
loads
a
Pre-wash
will
help
to
obtain
a
better
wash.
It
will
disperse
any
superficial
dirt
and
help
loosen
soil
ready
for
the
main
wash.
It
can
be
used
in
conjunction
with
mosttwash
programmes
-
synthetics
as
well
as
natural
fibres.
Wool’ens
Your
Bendix
Autowasher
electronic
has
a
programme
for
woollen
articles
switch
has
been
approved
by
the
International
Wool
Secretariat
for
machine
washable
articles.
Turn
the
Programme
Selector
to
Woollens
\7|
.
This
will
automatically
ensure
that
the
woollens
will
only
be
washed
in
full
depth
of
water.
After
loading,
turn
the
wash
indicator
dial
clockwise
to
the
position
marked
’main
wash'.
Don't
wash
woollens
In
your
Bendix
unless
the
garment
Is
labelled
'Machine
Washable'.

I
This
means
that
tt
has
been
especially
treated
to
minimise
shrinkage.
However,
■
It
Is
advantageous
to
spin
any
woollen
articles
that
have
been
washed
and
rinsed
by
hand,
as
this
removes
most
of
the
excess
water.
To
do
this,
set
the
programme
selector
to
\7J
and
turn
the
wash
Indicator
dial
to
the
position
marked
'spin'.
After
spinning
the
clothes
remove
from
the
drum,
pull
Into
shape
and
dry
flat
If
possible
avoiding
direct
heat.
Dry
woollens
carefully
to
help
preserve
their
texture
and
shape.
Do
not
be
tempted
to
put
woollen
garments
Into
any
tumble
drier
as
shrinkage
and
felting
will
result.
1
1
".
Blankets
•y.ii
Rinsing
,
^
.
i
.
All
wash
cycles
automatically
Include
$
deep
f
rinses
and
the
programmes
for
natural
flbrjia
go
on
to
spin
automatically.
It
Is
during
ffte
last
pf
the
3
rinses
that
any
a<Mttyes
e.g.
fab^a
1*
*-
taken
Into
the
Machine.
The
$,prpgr
synthetics
and
delicate
fabrics
(sep
jj
and11)haveapausefeafure,giving|jn
w
then
retaining
the
last
rinsing
water.
Ttjjaj
prevents
excess
creasing.'Men
yotipt
to
remove
the
clothes
from
tf|p
machine
{
(
‘no
pause'
button
to
advance
the
programme
to
spin.
The
programme
Is
then
:
at||oriiafically
completed.
|f
you
require
a
'pause’
cphdljiph
for
your
next
wash,
remember
to
reset
bV
Ashing
the
‘no
pause’
button
again.
■
;
if-
&,
Blankets
that
are
labelled
'Machine
Washable'
j
:
Items
that
have
been
hand
washed
can
be
rinsed
can
be
safely
washed
on
Programme
5
^
;
and
spun
In
your
Bendlx.
Just
select
the
(40°C).
The
water
level
should
not
be
set
at
'half
programme
to
suit
the
fabric
and
advance
the
load'
.
Most
blanket
manufacturers
I
Issue
Wash
Timer
Dial
to
tfie
beginning
of
final
specific
treatment
for
their
products.
Sometimes
V
|
^
rinse.
'
’
.
H
•
they
will
stipulate
hand
washing
or
dry
cleaning.
-J
J
■
■
•
:
;
1
,
This
particularly
applies
to
wool
fcellular
and
1
As
Spinning
*
:
honeycomb
blankets
which
should
not
be
The
S
p|
n
8
p
eec
j
j
S
automatically
selected
by
the
machine
washed.
v
programme
chosen.
.
(See
Wash
Programme
.,
,
J
■
'
chart.)
To
spin
Items
that
have
been-hand
Before
washing
your
coloured
garments
-
check
>
\
washed,
select
the
programme
according
to
the
that
the
colours
a$e
fast.
Usually
It
ms
,
type
of
fabric
required,
load
the
clothes
Into
the
!
recommended
that
coloured
items
be
washed
(
jjnjpr,
and
ad
vance
the
programme
to
the
separately
from
whites,
but
some'
fast
dyed
.
beginning
of
’spin’
by
turning
the
wash’lndlcator
Items,
l.e.
some
sheets,
towels
can
safely
be
k
.
dlalclockwlse
•
;<(
v.
;
.’
>.
washed
together
with
your
family
household
linen.-
BEFOREUSINGCHECKTHAT.
1.
The
machine
is
plugged
In
and
switched
on.
2.
Both
HOT
and
COLD
stopcocks
are
fully
open
(unless
a
cold
water
adapator
has
been
fitted.
Bendlx
Part
No.
25115).
3.
The
hoses
are
not
kinked.
4.
The
laundry
is
loaded
Into
the
machine
and
the
door
Is
dosed
firmly.
5.
The
appropriate
amount
of
detergent
and
fabric
softener
has
been
added
to
the
detergent
dispenser.
6.
The
'half
load'
button
has
been
pressed
where
appropriate.
7.
If
a
Pre-wash
or
Bio-wash
is
necessary,
then
the
button
is
set
accordingly.
8.
The
'LowTemp'
or
'Heater
Off'
button
has
been
set
where
appropriate.
9.
The‘no
patise’button
has
been
resef
If
required.
!
10
The‘quick
wash’option
has
been
selected
if
required.
.'t

'
■
fj'.
-
if
AFTER
USE
.
1.
Turn
off.
the
hot
and
cold
stopcocks
to
the
«
t
,
Ji
machine.,
j.
^
.
-
*
2.
Make
sure
(hat
both
the
Programme
Selector
and
Wash
Indicator
Dial
are
at
the
'O'
position,
and
that
the
'door*
light
has
gone
out
before
attempting
to
open
the
door.
3.
Switch
off
and
disconnect
from
the
power
supply.
4.
Leave
the
porthole
door
slightly
ajar
to
help
machine
to
dry
out.
?
i
14

Guide
to
wash
load
weights
Regular
Wash
1
Personal
i
Special
Wash
Sheet...Cotton
Other
than
cotton
Cot
Sheet
Pillowslips
Cotton
Others
Bath
Towel
Hand
Towel
Tablecloth
Small
■
Large
4
table
napkins
Shirt
...Cotton
Others
Blouse
...Cotton
Others
Cotton
Vest
Underslip
Panties
Bras
Pyjamas
Nightdress
Socks...
Long
2
pairs.
Short
2
pairs.
6
Hankies
1
doz.
Nappies
Candlewlck
Bedspread
Double
‘
•
1
Single
Blanket...
Wool
Acrylic
Dress...
Cotton
Others
Sweater
...Wool
Others...
Heavy
Lightweight
Crimplene
Suit
Heavyweight
!
Lightweight
Skirt
(Double)
2'/?lb.
t.1
kg
(Single)
1
’/alb.
670g
(Double)
1
'Mb.
670g
(Single)
1
'/ilb.
560g
6oz.
170g
4oz.
113g
3oz.
85g
1
’/alb.
670g
9oz.
255g
8oz.
227g
1
'Mb
670g
6oz.
170g
lOoz.
283g
7oz.
198g
5oz.
142g
4oz.
113g
4oz.
1i3g
4oz.
113g
2oz.
56g
loz.
28g
12oz.
340g
5oz.
142g
6oz.
170g
3oz.
85g
3oz.
85g
2'/
2
lb.
1.1kg
7lbs
3.18kg
5lbs.
2.27kg
4141b,
2kg
3%lb.
1.5kg
12oz.
340g
12oz.
340g
14oz.
400g
12oz.
340g
6oz.
170g
31b.
1.36kg
21b.
910g
702.
198g

Care
Labelling
Many
garments
carry
a
label
under
dje
International
Tpxtlle
Care
Labelling
scheme
Indicating
the
correct
type
of
wash
treatment
required.
Sort
your
washing
according
to
the
Care
Labe!
present.
Uf
This
process
Is
used
for
white
cotton
and
linen
articles
without
special
finishes
and
provides
the
most
vigorous
washing
conditions.
Wash
temperature
can
be
up
to
boiling
(100°Cj
and
agitation
and
spinning
times
are
maximum.
This
ensures
good
whiteness
and
stain
removal.
!
„
;
.
:
\;||
Process
2
;
i
s
for
cotton,
linen
or
rayon
articles
vyithout
special
finishes
where
colours
^
are
fast
at
60°C<
It
provides
vigorous
wash
Conditions
but
at
a
temperature
which
maintains
fast
colours.
,
■
-
>
Used
for
white
nylon
or
white
polyester/cottori
mixtures,
this
process
Is
less
vigorous
than
either
1
or
2.
The
wash
temperature
(60
e
Ci)
Is
high
enough
to
prolong
whiteness,
and
cold
rinsing
followed
by
a
short
spinning
minimises
creases.
i
*
,
,
'
'
•'*
<»
-
t
This
process
is
for
coloured
nylon,
polyester;.cotton
and
rayon
articles
with
special
finishes;
acrylic/cotton
mixtures
and
coloured
poiyester/cotton
mixtures.
In
all
respects
except
for.washing
temperature
It
Is
the
same,
as
process
3.
The
lower
temperature
hand
hot
(50°C)
safeguards
the
colour
and
finish.
v
1
Suitable
for
cotton;
linen
or
rayon
articles
where
colours
are
fast
at
40°C,
but
not
a
60°C,
this
process,
has
warm
wash
(40°C),'.medium
agitation,
normal
spinning
or
wringing.
The
low
wash
temperature
is
essential
to
safeguard
colour
fastness!
81
1301
91
Zli
*i
4
This
is
for
those
articles
which
require
low
temperature
washing
(40°C)
minimum
agitatiorj,
k
cold
rinse
and
a
short
spin
e.g.
acnyllcs;
pcetate
and
triacetate,
Including
bilxtijres
with
wool;
polyester/wool
blends.
These
conditions
preserve
colour
and
shape
and
minimise
creasing.
J
r
r
Urr
1
I!
t-
j
-
•
'
!
•
'!
.
Similar
To
process
6;
this
process
Is
for
wool,
Including
blankets,
and
wool
mixtures
with
cotton
or
rayon;
silk,
which
needs
low
temperature
washing
(40°C)
and
minimum
agitatloH
but
requlrp^
normal
spinning,
Wdshlrig
In
this
way
preserves
colour,
size
and
Handld.
These
fabrics
should
not
be
subjected
to
hand
wringing
or
rubbing.
.
H
M:
.
'
th.r'’'
'}
L
Unlikely
to
appear,on
UK
produced
goods,;this
process
Is,for
silk
and
printed
acetate
itocs,
with
colours
..which
are
not
fast
at.dbfC^equiring
to
be
washed
at
a
very
low
temperature
(30°C),
with
minimum
agitation
and
spinning.
i
:
V
1
i
■
1
>
Again
rarely
to
be
found
on
UK
produced
goods,
this
process
is
for
cotton
articles
with
special
finishes
which
benefit
from
a
high
temperature
(95°C)
wash
but
require
drip
drying.
<
i
-:'
This
symbol
indicates
those
articles
which
must
not
be
machine
washed.
J
!
;
1
Articles
which
must
not
be
washed
at
all
will
bear
this
sign.
16

Hi
i>6>
t>
Washing
Temperatures
100°C
Boil
Self-explanatory
95°C
Very
hot
Water
heated
to
near
boiling
temperature.
60°C
Hot
Hotter
than
the
hand
can
bear.
The
temperature
of
water
coming
from
many
domestic
hot
taps.
50°C
Hand-hot
As
hot
as
the
hands
can
bear,
40°C
Warm
Pleasantly
warm
to
the
hand
30°C
Cool
Feels
cool
to
the
touch
1
BLEACHING
Thisksymbol
indicates
that
household
(chlorine)
bleach
could
be
used.
Care
musf
be
taken
to
follow
the
manufacturer's
instructions.
•t‘
.t.
.
,'.1*
-
/.;
•
I
......
.
4
When
this
symbol
appears
on
a
label
jiousehold
bleach
must
not
be
used.
.IRCJNINGj.
n
.
?,i|l
u
■
»
■
.i
:
The
number
of
dots
in
tfle
ironing
symbol
indicates
the
correct
temperature
setting
-
the
fewer
the
dots
the
cooler
the
Iron
setting.
CO(k
WARM':
1
.
HOT
!
t
DO
NOT
IRON
Fabric
Softeners
-
e.g.
Comfort
All
fabrics
particularly
towels
and
nappies
benefit
from
the
use
of
fabric
conditioners
in
the
final
rinse.
Items
of
latfridrylTefel
Softer,'and
easier
to
iron
and
the
clinging
effect
of
nylon
is
considerably
reduced.
;
To
use
follow
the
manufacturer’s
instructions
on
the
bottle.
TUMBLE
DRYING
,
Articles
marked
with
O
:
symbol
will
benefit
from
tumble
drying.
Articles
marked
with
should
not
be
tumble
dried.

v
f
A#
f|
4
What's
gone
wfrbhg?
If
your
machine
won’t
work*
,cheqk
the
follpwijp^^i^qmake
sufe.thai
you
jiaven’t
overlooked
anything
which
might
prevent,
yoyr\
Bendix
t
f
rom
functioning.
It
will
certainly
help
you
and
us.
1.
Check
that
your
Bendix
is
plugged
In
and
switched
on.
2.
Check
the
13
amp
fuse
in
the
plug..,Ypu
cpgfcl
Iry
ariolher
appliance
from
the
same
outlet
in
case
the
main
fuse
has
blown.
3.
Be
sure
that
the
hot
and
cold
taps
have
been
turned
on
fully.,
4.
•
hiave
you
selected
the
^ogramni^
1
'
5.
Look
to
see
If
the
door
Is
fully
closed*.
The
door
safety
switch
prevents
the
heater
and
motor
operating
if
the
door
is
dpeft
*
*
m:
l;
,f>
*
1
■
’
'
■
•
"
<
*
*
i:
-
6.
Is
your
machine
overloaded?
if
so
the
motor
protector
switch
yvill
stop
the
i
tnach)nd;Hf
overloading
is
the.hroblen^
simply
irdmbve
sortib
of
the
clothes
taking
care
not
to
scaid
yourself
in
dblni^
$b,$
*'
r
.
?
H
h
•'
;
7.
.;
Check
that
the
drain
and
fill
hoses
kre
not
kinked
and
have
been
fitted
correctly
S
is
is
a
very
common
cause
particularly,
if
the
rjiachlne
hab
been
moved
for
y
reason).
Does
the
drain
screen
need
cleaning?
(See
page
7
but
first
drain
off
any
water
in
the
appliance).
'
•••(?
hr
1
!.
;
■
i
1
•]
(
iM'i
*
!>*«»»»
:h
lj>V
[
^
*»
•
!
,
<
1
!
;
«)
i
If
ypur,rpachine
still
doeq
not,yvqr^
pftqr^ec^in^the
)ist
contact
ypur;
nearest
Jrlcity
Bendix
Customer
Service
Centre
(listed
at
the
back
of
this
leaflet)!!
Note
|f
on
making
a
service
call,
our.engineer
discovers
that,the
only
attention
required
1$
to
remedy
one
of
the
above
conditions*
a
charge
will
have
io
be
made
whether
the
machine
Is
In
or
out
of
the
guarantee
period
j
or
underjServicdpontract.
Moving
House
••
n.'
>l
:
w
^
r
hr
.
:'?‘v
f.
ij
;
I
.
.
•
*
•«
I*
j
j
*•
;
If
you
plan
to
move,
contact
yop^authorised
^epdi^Serylcpmanlo^ee,what
should
be
dond.before
and
during
the
rnoving
of
your
hiachlne,
particularly
in
respect
of
refitting
the
transit
straps.
18
Other manuals for 71258
2
Table of contents
Other BENDIX Washer manuals
BENDIX
BENDIX BIW 105 W User manual
BENDIX
BENDIX 71288 User manual
BENDIX
BENDIX BIW 145 W User manual
BENDIX
BENDIX 7133 User manual
BENDIX
BENDIX 7126 Product guide
BENDIX
BENDIX 7168 User manual
BENDIX
BENDIX 71678 Assembly instructions
BENDIX
BENDIX AW400 User manual
BENDIX
BENDIX BENDIX 7129 User manual
BENDIX
BENDIX 7148C Specification sheet
BENDIX
BENDIX 7003/1 User manual
BENDIX
BENDIX BIW 103 W User manual
BENDIX
BENDIX Super Compact 71968A Specification sheet
BENDIX
BENDIX 7001 Quick guide
BENDIX
BENDIX BENDIX 7129 User manual
BENDIX
BENDIX BIW 103 W Product guide
BENDIX
BENDIX BIW 100 User manual
BENDIX
BENDIX BIW 125 W Product guide

BENDIX
BENDIX 7123 User manual

BENDIX
BENDIX BIW 126 W User manual
