The models shown in this document may not be available in all markets and are subject to change at any time. For current
details about model and specification availability in your country, please go to our website www.fisherpaykel.com or contact
your local Fisher & Paykel dealer.
9
FOR MORE INFORMATION
For detailed information on the features
of your washer and warranty information see your user guide
see your user guide booklet or contact us
NZ toll-free, 24/7 0800 372 273
AU toll-free, 24/7 1300 650 590
www.fisherpaykel.com
If you…
have any questions or comments
need a Fisher & Paykel Authorised Repairer
to service your product
need replacement parts or accessories
want to register your product
Before you call for service or assistance…
Check the things you can do yourself including:
1the product is correctly installed, and that it is level
2you are familiar with its normal operation.
8
FINAL CHECKLIST
Complete and keep for safe reference:
Model
Serial No.
Purchase Date
Purchaser
Dealer Address
Installer's Name
Installer’s Signature
Installation Company
Installation Date
Have the transit bolts been removed?
Is the drain hose threaded through the ‘U bend‘
(with no more than 20mm extended) and hooked into
your standpipe?
Is the hot hose connected to the Hot valve? Is the cold
hose connected to the Cold valve?
Is the machine correctly levelled and feet locked?
Have you performed the installation test cycle?
TO BE COMPLETED BY THE INSTALLER
6
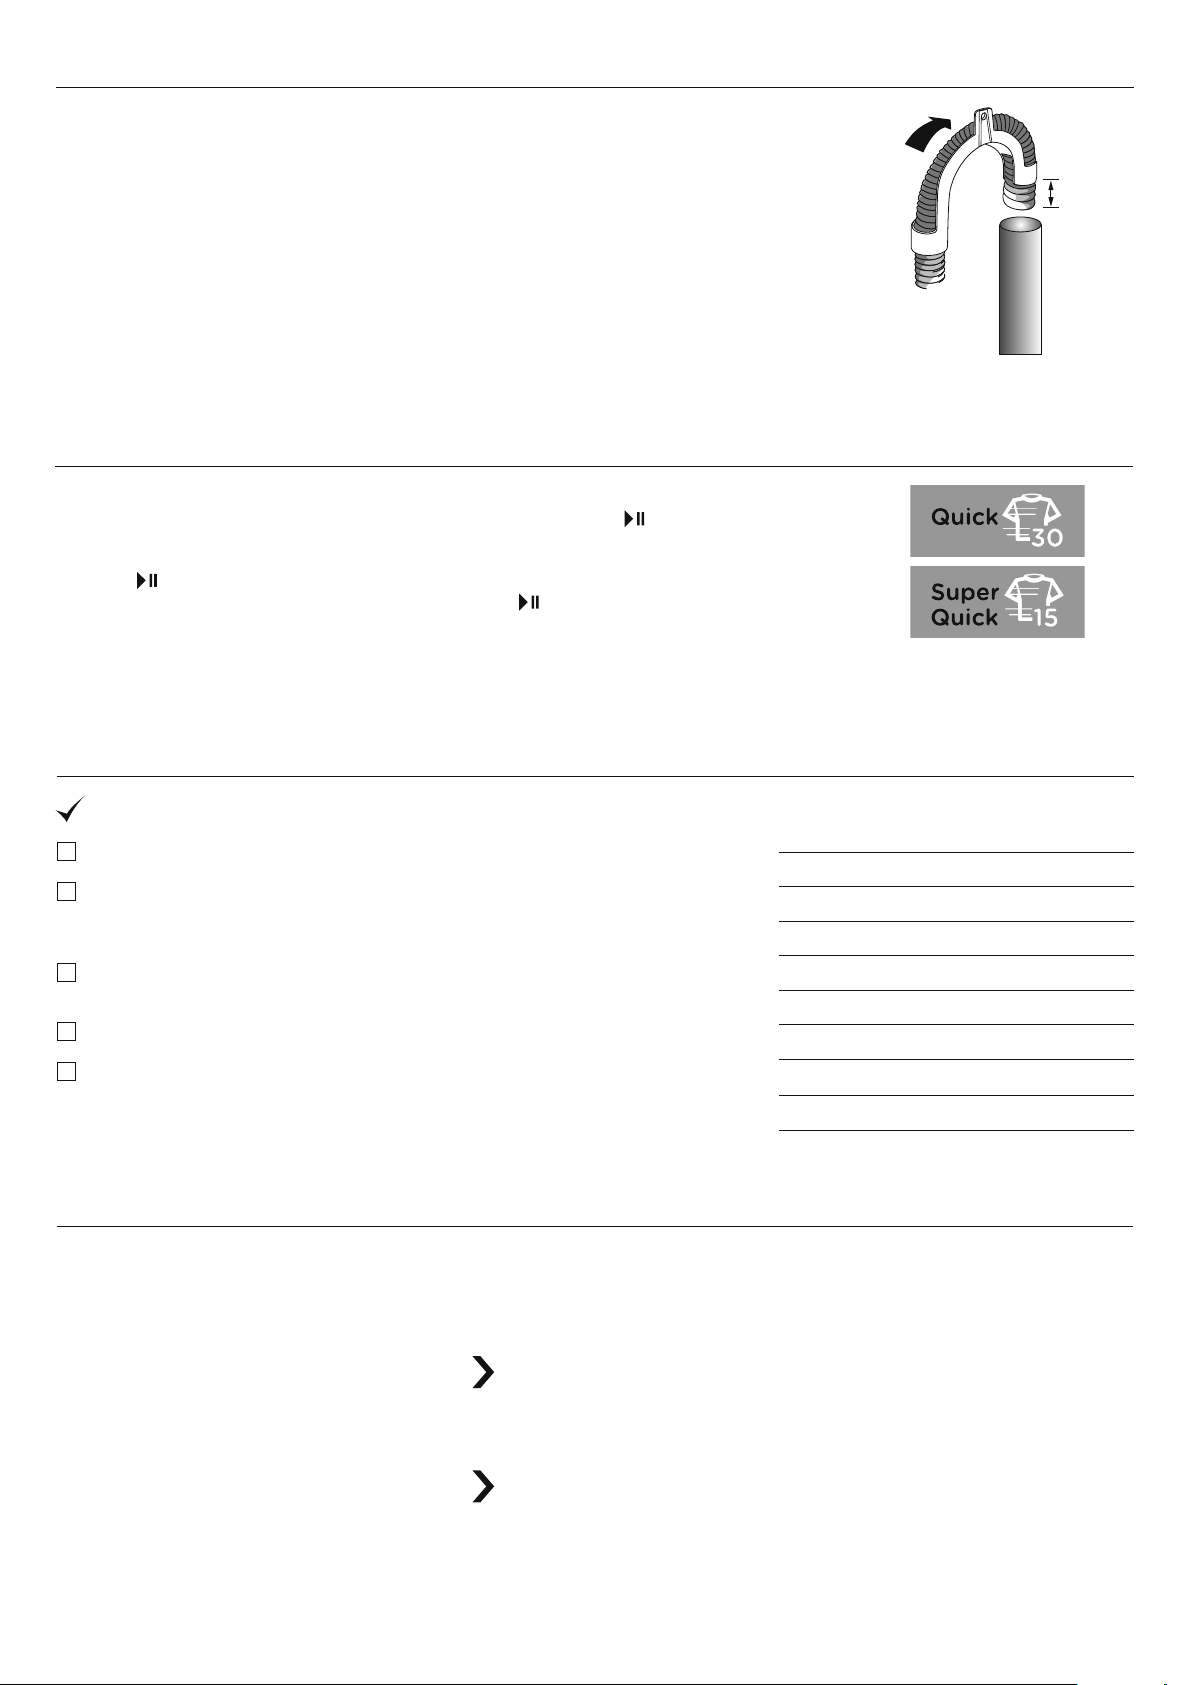
DRAIN HOSE
Drain hose placement in a stand pipe or tub
1To guide the drain hose over the tub or standpipe the hose guide must be fitted to the
drain hose. The height of the standpipe or tub should be between 800 – 1200mm.
2Secure the hose guide so it cannot become dislodged from the standpipe or tub.
IMPORTANT!
If the drain hose is placed on the ground or if the standpipe or tub is less than 800mm
high, the washing machine will continuously drain while being filled (siphon).
Regularly check that your standpipe or tub is free from lint or other obstructions, which
may affect how your machine works or may cause flooding.
Pull hose
through
guide
(20 mm)
maximum
Fitting the drain hose guide
Standpipe 800 – 1200 mm
7
TESTING THE INSTALLATION
Check the operation of the machine using the following procedure:
1Press ‘POWER’ and turn dial to ‘Quick’ or ‘Super Quick’, then touch .
Check that the hoses are not leaking at the machine and tap end, while waiting until you see
water appear in the drum.
2Touch then press ‘POWER’ to stop the cycle and turn the machine off.
3Press ‘POWER’ again, turn the dial to ‘Spin’ and touch .
4Check the outlet hose is firmly secured in a standpipe or tub, or to a spigot and the machine
pumps out and spins.
429177E 10.19


