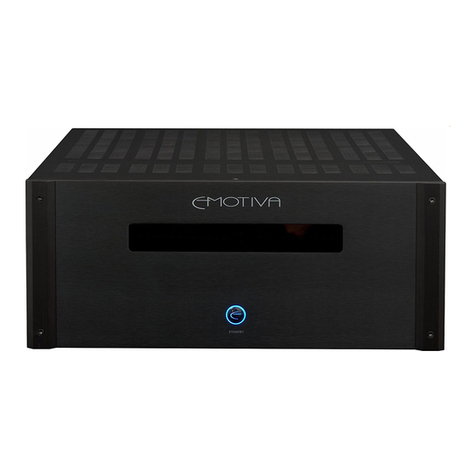
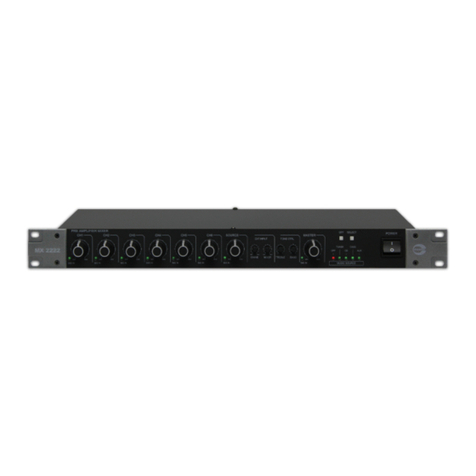
BePro LX-480 User manual

ŌŢųŢŰŬŦġłŮűŭŪŧŪŦų
AV Surround

.

●
●
●
●
●
●
●
●
●
●
●
Pure Direct function can make the musical
fidelity straightly close to the Hi-Fi.
Built-in the music effect and the function
of surround simulation from American
professional BBE and SRS.
Provided with Mic Compressor / Limiter that
can inhibit burst sound pressure.
Incorporated variety of sound effects from
the advanced DSP Echo + Reverb to
microphone.
Embedded the Mic Low Cutoff circuitry to
suppress the resonance at low frequency.
Built-in functions of automatic volume
balance AGC and automatic volume setup.
Applied the design of high-order Parametric
EQ to avoid microphone’s howling.
Mounted the high-order YAMAHA DSP YSS-
205F chip to obtain a timbre of exquisiteness.
Externally connected the expansion loop
configuration to further ease the treatment of
sound effect.
Applied the OSD display to make the user
interface easy for operation.
Can be linked to remote control computer
through RS-232.
●
●
●
Try to avoid placing the product under direct
sun light or near a heating source.
Try to avoid placing the product at a badly
ventilated, or a moist and dusty place.
For the purpose of heat dissipation, please
pay attention to the space around the
machine; a clearance distance of 20cm (8
inches) at least shall be reserved while the
vent shall not be blocked.
●
●
●
●
●
Before wiring the power supply, please firstly
switch over the voltage selector to the local
voltage of power supply.
Never place objects or liquids of any kind on
the machine as their entry into the machine
may result in abnormal voltage or short-
circuit phenomena; once thus phenomena
are encountered, please unplug the plug
from the socket immediately and consult with
the dealer.
Please do not attempt to dismantle this
machine to avoid the injury by electric shock
of high voltage from the interior of machine,
the trouble or failure of machine; thus action
will void the warranty of machine.
When there is a presence of unusual noise
or smell, please turn off the power supply,
unplug the plug from the socket and consult
with the dealer.
When the use of machine is not desired for
an extended period of time or before going
on a long journey, please turn off the main
power supply and unplug the plug from the
socket immediately.
Important safeguards
Features
Precautions

Front panel controls and their functions
PURE - Oure Direct indicator
This is a listening mode of high fidelity that
provides the highest possible signal purity. When it
is selected, the signal follows the most direct path
while functions of timbre tuning and sound effect
are not operational (SETUP MENU disabled); an
ON indicator indicates that the function is in use.
1
ENGINE-Power switch
This is a listening mode of high fidelity that
provides the highest possible signal purity. When it
is selected, the signal follows the most direct path
while functions of timbre tuning and sound effect
are not operational (SETUP MENU disabled); an
ON indicator indicates that the function is in use.
ON OFF
2
3
MIC FREQ CUT-For adjusting the cutoff
frequency at bass band for microphone.
4
5
Remote signal receiver
To receive the control signal from the remote
controller. Please do not block it from receiving the
signal.
MIC PEQ
Parametric equalizer of microphone
BASS To tune the timbre up and down
of bass for microphone.
* Preset value is the center position.
GAIN To tune the timbre up and down
of mid-frequency for microphone.
* Preset value is the center position.
FB-EREQ To tune the frequency in mid-
frequency band for microphone.
* Preset value is 1KHz.
TREMBLE To tune the timbre up and down
of tremble for microphone.
* Preset value is the center position.
Tuning method: When microphone is howling, firstly
rotate the Gain to 9 o’clock position; turn the FB-FREQ
rightward to eliminate large portion of tremble howling
and leftward to eliminate the bass howling; after that,
tune the Gain to an appropriate position to complete the
tuning.
13
578
911
10 12 13 14 15
46
216

MIC INPUT-Microphone input jacks
Both the jack 1 here and the jack 1 at rear panel
can be used for microphone input; also, both the
jack 2 here and the jack 2 at rear panel can be
used for microphone input.
Pushbuttons/indicators for selecting the
input of channel
Can be selected the input channel corresponding
to the video and audio input jacks on the rear
panel.
REVERB
Volume adjustment knob to adjust the volume of
reverberation.
ECHO
Volume adjustment knob to adjust the volume of
echo.
BAL-Balance control knob
To balance the output proportion between the left
amplifier and the right amplifier.
* Preset value is the center position (left and right
balanced).
6
MIC VOL
Volume adjustment knobs for microphones.
1 : Volume adjustment knob for microphone 1.
*To adjust the volume for microphone 1.
2 : Volume adjustment knob for microphone 2.
*To adjust the volume for microphone 2.
3 : Volume adjustment knob for microphone 3.
*To adjust the volume for microphone 3.
7
MUSIC MASTER VOL
Adjustment knob to adjust the output volume of
music.
11
* If the function of automatic volume setup is
enabled, preset position will be selected when
turning on the machine; meanwhile, it will be
restricted by the setup of maximum volume under
remote control mode (Adjustment of setup should
be made from the setup menu.)
MIC MASTER VOL.
Adjustment knob to adjust the output volume of
microphone.
* If the function of automatic volume setup is
enabled, preset position will be selected when
turning on the machine; meanwhile, it will be
restricted by the setup of maximum volume under
remote control mode (Adjustment of setup should
be made from the setup menu.)
12
8
EFFECT-Pushbuttons to select the
sound effect of microphone
4 types of selection for the sound effect of
microphone are available to be selected from the
functional setup items.
9
MUSIC-BBE/SRS selection switch/
indicator
Selection of sound field and sound effects are
available when listening to the music is desired
so that the music can be further vivid and felt just
like at the field.
10
DSP KEY CONTROLLER-Selective
switches / indicators for tuning the key of
music up and down.
Able to change the key of music at a range of 10
steps, ±2.5 pitch of each step.
* Function to restore the standard key automatically
is included.
13
14
15
MULTI / PARTNER selection switch
LED General playing and singing.
PARTNER Automatic linking and singing function
MULTI
Accompanying function
16
To tune the timbre and filter out the unwanted
sound at bass band for microphone. ADJ -
Adjustment range: OFF, 20Hz ~ 1KHz.
* Preset value is OFF position.
Adjustment method:
After power is ON, turn ADJ rightward to eliminate large
portion of bass band; do not over adjust it. After that,
redo the MIC BASS for a fine adjustment to its optimum.

12 13 14 15 16
13578 9 11
10
4
62
Audio input jack for VOD (Video-On-
Demand)
Input jack to link with the audio signal of VOD
channel.
1
Audio input jack for DVD player
Input jack to link with the audio signal from DVD
player.
2
3
Input jack for TAPE deck
Input jack to link with the TAPE audio device.
4
Audio input jack for AUX (auxiliary) device
Input jack to link with external audio device.
5REC AUDIO-Audio output jack of
recording output device
SUB
Subwoofer management
PHASE : Phase selection switch
FREQ :Frequency selection switch
BALANCE :To adjust the mixing ratio
of subwoofer output between MIC and
MUSIC.
LEVEL :To adjust the output level.
7
8Pre-output level adjustment
Used to adjust the level of audio output to the post
amplifier.
* The default value of level adjustment device is
the maximum value.
PRE-Pre-output jack
Output the audio signal to other post amplifier or
mixer, electronic crossover device for expanding
the output signal or obtaining a higher power
output.
AMP-Post-input jack
Used to link with other pre-amplifier or signal
processor.
Rear panel controls and their functions
BGM audio input jack
The input jack to link the audio device of BGM
(Back Ground Music).
6
To link with the recording device, for example,
the cassette deck; able to record the same audio
signal as the amplifier.
MIC LEVEL – to adjust the output magnitude of
recording microphone.
INPUT LEVEL
Can be used to intensify or attenuate the input
signals from the DVD player according to the
personal favor.
* Preset value for this level adjustment device is the
maximum value.

Example of application:
Connect the “PRE-OUT” to electronic crossover device,
output the tremble from electronic crossover device to
the “AMP IN” by routing through the amplifier system in
this machine (responsible for actuating the mid-range
speaker and tweeter); in addition, output the audio
signal of electronic crossover device to another set of
amplifiers.
VOLTAGE SELECTOR
Used to select the input voltage of power supply.
Please select the local voltage of power supply
with power supply connector plugged.
*Please be cautious to select the correct voltage; any
wrongly selected voltage will result in faulty action,
damage or burning to the machine.
Receptacle for power supply
Provided to connect the power supply cord.
Please firmly secure the power supply cord onto
the receptacle without any insulating shielding or
metal exposure occurred to the power supply cord;
meanwhile, please do not place heavy stuffs on
the power supply cord, either.
SPEAKER SYSTEM-jacks of speaker
system
To connect the speakers, 4 speakers the utmost.
Please select to use a speaker with an impedance
of 8Ω- 16Ω.
COMPRESSOR/LIMITER-Compressor/
limiter switch and adjustment
Red LED indicator will ON when acting.
THRESHOLD:To set up the point to activate the
compressor/limiter of microphone; setting the position
between 0 and -12 is recommended.
RATIO:To set up the compression ratio after the
compressor/limiter of microphone is activated; setting the
position between 2:1 and 3:1 is recommended.
GAIN:To adjust the magnitude of total output level after
being processed by compressor/limiter of microphone.
9
MIC INPUT-Microphone input jacks
Both the jack 1 here and the jack 1 at front panel
can be used for microphone input; also, both the
jack 2 here and the jack 2 at front panel can be
used for microphone input.
REMOTE-Jack to receive remote
control signal from other devices
Use other external devices to control this machine;
for example, external infrared receiving device, or
control from external control panel.
A plugged jack will disable the remote receiving
device on the panel.
RS232-Jack to receive remote control
signal from other devices
Can be linked to external control device; for
example, personal computer; also can be used
for remote control to control and read the status of
machine.
SUB OUT-Audio output jack for
subwoofer
To output a balanced subwoofer signal to link the
active type subwoofer or the amplifier plus passive
type subwoofer.
GND-Grounding screw of machine
casing
In order to prevent the machine from the electric
shock or the generation of noise when connected
to other equipment, or try to stay away several
unknown causes; please connect the grounding
wire.
16
10
11
MIC LOOP-Microphone’s expanding
connection loops
Output/input jacks to be used for microphone
expansion and linked to graphic equalizer and
other devices.
*There is a U-type jumping pin shortcircuit. Removing it
may disable the output of microphone.
14
15
13
VIDEO IN jacks
Link to receive the input video signal from different
devices and relay to output the signal to the
corresponding video output port according to the
selected channel.
VIDEO OUT jacks
Link to connect video devices, for instances: TV
set, overhead projector, monitor, ,, etc., through
the use of this video output device, user can easily
understand the current status of machine.
12

AUDIO PARTNER/MLTI/NORMAL
Pushbutton to select automatic linking and singing
function and accompanying function. PURE / MONO-Pushbutton to select the sound
effect and the pure sound of music
Switches are provided to select 4 types of sound
effect for music available when listening to the
music is desired so that the music can be further
vivid and felt just like at the field.
PURE : To control the pure sound output; function of E
- group will be cancelled when used.
MONO : Pushbutton to control the output of subwoofer.
MUTING-Muting switch
Mute control switch, the indicators aside the music
and microphone’s volume adjustment knobs will
blink at the same time.
A
INPUT SELECT
Depress left or right selection pushbutton to select
the channel with thereof status displayed in 6 on
front panel.
B
C
DAUDIO PARTNER/MLTI/NORMAL
General playing and singing.
Automatic linking and singing function
Accompanying function.
*Effective only when the playing source is a video &
audio file in KARAOKE format.
NORMAL :
PARTNER :
MULTI :
SETUP-Pushbutton group to set up the
function
Pushbutton group for manipulating the setup
screen. Depress the SETUP to enter into the setup
screen. Other pushbuttons will be disabled when
manipulating the setup screen.
E
ECHO-Pushbutton to adjust the volume of
echo
To adjust the output volume of echo effect for
microphone.
H
K
MUSIC-Pushbutton to adjust the music
volume
To adjust the output volume of music.
*If automatic volume setup function is enabled, the
restricted setting of the maximum volume will be
activated under the remote control mode; therefore, the
volume can only be reached the preset maximum value.
J
MIC-Pushbutton to adjust the volume of
microphone
Depress to adjust the output volume of
microphone.
*If automatic volume setup function is enabled, the
restricted setting of the maximum volume will be
activated under the remote control mode; therefore, the
volume can only be reached the preset maximum value.
G
ECHO
REVERB
RC-480
SETUP
RETURN
MIC EFFECTS
EFF 1 EFF 2 EFF 3 EFF 4
SIMBBE
DOWN
KEY
AUDIO
PARTNER MULTI NORMAL
INPUT SELECT
RESET UP
SRS 1 SRS 2
PURE MONO
MIC
MUSIC
A
B
C
D
E
F
G
H
K
I
J
Remote controller
EFF1/EFF2/EFF3/EFF4 -Pushbutton to
select the sound effect of microphone
Four types of sound effect selection for microphone
available; can be set up from the functional setup
item.
F
REVERB-Pushbutton to adjust the volume
of reverberation
To adjust the output volume of reverberant effect
for microphone.
I

●
●
Depress the SETUP from the remote
controller to enter into the setup function
screen.
Seven (7) pushbuttons on the remote
controller shall be used for functional setup.
●
●
●
●
●
The effective distance of remote controller is
about 5 meters at an angular travel of 30
left and right respectively.
Remote controller will fail to perform its
functions when failed to aim at the controlled
object or be blocked by obstacle.
Please note the positive and negative
polarity when loading the battery cells.
Do not mix the new and used battery cells for
application.
Please take out the battery cells when
the use of machine is not desired for an
extended period of time.
Attention! !
●
●
●
●
When entering into the setup screen is
desired, please hook up the TV or monitor
first and turn off the PURE listening mode.
After entering into the setup screen, other
pushbutton on the remote controller will be
disabled their functions; meanwhile, the
indicators in the front panel will make their
indication correspondingly.
Function setup menu can be used to
establish different settings according to
various environment and personal interests.
When performing the function setup, the
normal use of music and microphone is still
available; however, because of the items
of setup may be different, certain action of
music or microphone will be affected. All the
established numerical values will be reserved
after exiting the selection menu.
INCRENENT or ENTER
BACK TO PREVIOUS
PAGE
DOWN
ENTER SETUP
FUNCTION
DECREASE
UP
DEMO
Input Level adj. ►SET
AGC level : 600mV SET
Bass 0
Treble ◄± 1 ►
Operate with button
when this sign shows up.
In general, use
buttons to select
an item, press
button to enter a selec-
tion, and press RETURN
button to exit.
Operate with and buttons
when this sign shows up.
Setup Menu
Main setup screen
System setup
AUTO Input Select
Able to select signal input automatically; depress
the rightward direction key to access the following
functions and sequence:
OFF : Disable the auto selection of signal input.
ON : Detect the music signal only. * When there
is no signal input, take BGM as the first choice.
1.SYSTEM SETUP
2.MUSIC SETUP
3.EFFECT SETUP
EXIT
IR Key Shift
Infrared remote controller controls the up & down
keys of music.
ON: Able to control the up & down keys of music.
OFF: Disable the control for the up & down keys of music.
Its purpose is to prevent the functions for increasing &
decreasing the keys inside the computerized karaoke
from interfering with one another.

Music Setup
Background Color
When there is no video image input from
externality, the displayed background color will
change in the following sequence when the
rightward direction key is depressed:
Blue ►Skyblue ►Green ►Brown
Red ►Olive ►Teal ►Purple
Power Amp IN
Post input selection
Ext.:audio signal shall be input from the post input
jack in the rear panel;
Int.:used for outputting the general input signal.
Volume Limit set.
Auto volume/volume limit function
When set to ON, the volume will be shifted
automatically to the initial position. When an
external control device is applied to control the
volume, the volume will be limited to its maximum
value.
Initial:Volume auto aligning position when turning on
the machine.
Maximum:The maximum limit value of volume when
remote control mode enabled.
*The setup of volume beginning position shall
not be higher than the maximum limit value of
volume.
Input Level adj.
Level adjustment for the input audio signal that can
adjust the input signal –6dB ~ +6dB independently.
When returning to the previous page is desired,
firstly move the white-highlighted cursor to the
RETURN position, and then depress the rightward
direction key. * Preset value is 0.
AGC level : 600mV
Automatic Gain Control level
Input signal lower or higher than 600mV will
be modulated to 600mV when enabled; able to
adjust the application setup for the input channels
independently. When returning to the previous
page is desired, firstly move the white-highlighted
cursor to the RETURN position, and then depress
the rightward direction key. * Preset value is OFF.
Balance L / R
Balance L/R
To adjust the proportion of music between left and
right; able to adjust the input signal from 0dB to
-30dB (L/R). * Preset value is 0/0.
BBE effect
To adjust the brightness for the sound effect
of music; able to adjust the input signals: high
frequency: from 0 to 12, low frequency: from 0 to
12..
* Preset values are High: 4 and Low: 3.
Bass
To adjust the bass quality for the music; able to
adjust the input signal from -12dB to +12dB.
* Preset value is 0.
Treble
To adjust the treble quality for the music; able to
adjust the input signal from -12dB to +12dB.
* Preset value is 0.
MIC EFFECT MEMORY
Memory selection for the sound effect of
microphone that set up the sound effect of
microphone when turning on the machine.
Available selections are as follows: LAST/EFF1/
EFF2/EFF3/EFF4.
Microphone sound effect setup
EFFECT SETUP
To set up the sound effect of microphone; 4 types
of mode are available for selection and can be set
up thereof singing mode respectively. Depress
rightward pushbutton to enter into the setup mode.
* This mark represents the effect setup of microphone
currently in use.
ECHO - DELAY TIME
Set up the delay time; depress the rightward
direction key for increment and the leftward
direction key for decrement; adjustment value: 0
~ 30ms; delay of stereo is adjustable to access
different delay times.
ECHO - REPEAT Percent
Set up the value; depress the rightward direction
key for increment and the leftward direction key for
decrement; adjustment value: 0 ~ 70.
ECHO - DEPTH
Microphone effect – depth-adjust the depth percent
of sound, -50% ~ 0 ~ +50%.
REVERB - TIME
Set up the reverb time; depress the rightward
direction key for increment and the leftward
direction key for decrement; adjustment value: 0.3
~ 10 Sec.

●
●
●
Mic Compressor / Limiter:
Microphone compressor & limiter is an important
function for the adjustment and the receiving &
recording of sound at field. It can dynamically
compress to process an excessive sound
pressure that is unexpectedly input or the
distortion status of peak value when receiving &
recording the sound as an effort to protect the
equipment.
Reverb:
Reverberative effect. The reverb is a sound
reflected from more than one (N pieces) plane to
be heard one after another by the ears in a sealed
space as a sound effect. Reverb effect is better
than ECHO in singing; it is clear and bright. Its
effect can be further demonstrated when applied
to sing a quick rhythm and powerful song. Since
it has no directly reflective sound at all, especially
when there are several microphones used
together, it can better express the synchronized
ensemble of human-voice without being
disordered by the reflective sound in the space.
Mic Low Cut: Microphone low frequency cutoff.
The low frequency feedback from microphone
is a very difficult issue for the accompanying
master unit to overcome; it involves the high &
low positions for placing the speakers and the
reflection and plus resonance generated from
the characteristic of microphone itself. Purely
using the MIC-TONE (BASS) can not handle
the foregoing issues while this function can help
you remove these issues. After finishing this
adjustment, then just go back to use MIC-TONE
(BASS) to make fine adjustment of compensation.
Glossary
SRS , SRS and symbols are trademarks of SRS
Labs, Inc. SRS technology is incorporated under
license from SRS Labs, Inc.
Manufactured under license from BBE Sound, Inc.
Licensed by BBE Sound, Inc. under one or more
of the following US patents: 5510752, 5736897.
BBE and BBE symbols are registered trademarks
of BBE Sound,Inc.
REVERB - PRE-DELAY
Set up the reverb delay time; depress the rightward
direction key for increment and the leftward
direction key for decrement; adjustment value: 0 ~
250ms.
REVERB - TYPE
Microphone effect – reverb- set up the reverb
mode; depress the rightward direction key and the
leftward direction key for selection.
* Preset value is STAGE.
INITIAL DATA
To set up the initial settings for the microphone
effect; able to restore the ex-factory set values.
REVERB - L . P . F
Microphone effect – reverb- set up the Low Pass
Filter; depress the rightward direction key and the
leftward direction key for selection; adjustment
value: 4 ~ 13KHz.
●
●
●
●
●
●
●
●
Music AGC: Automatic balance for the volume of
music.Able to process every song and output an
average value of thereof volume. This function is
unable to demonstrate a satisfactory performance
when receiving an excessively poor audio source.
MIC Parametric EQ: Microphone Parametric
Equalizer. Equipped only to the unit of high-class
model. It can help you adjust the microphone
feedback (howling sound).
DSP YSS-205F:
This is YAMAHA DSP stereo up & down key IC of
high-order.
Pure Direct:
After inputting the signals into the amplifier, the
signals will be transmitted to the power amplifier
by following the most direct path. Therefore,
variety of distortions will be very little as a result
from the short path while the richer overtone can
be maintained.
OSD: Video On Screen Display
To control the display of image on screen.
RS-232: A communication and control interface
for external digital signal.
BBE: A registered trademark of American BBE
Company. This function is very suitable to be
applied to the computerized accompanying
karaoke machine.
SRS: A registered trademark of American SRS
Company. Suitable for processing the music
listening, space surrounding, expansion of sound
field and dynamic enhancement, etc.

May.15
■ Audio output power........... 10W+110W(8Ω)
■
Audio output power(1KHz,8Ω).................
0.05%
■Audio input ( sensitivity / impedance )
MIC ....................... 3.5mV/3.3KΩ
MUSIC....................... 350mV/33KΩ
■Audio output ( level / impedance )
PRE - OUT..................... 2.8V/1KΩ
Overload Output Voltage....... 9.6V/1KΩ
SUB OUT....................... 5.2V/1KΩ
Recording output............. 340mV/1KΩ
PRE - OUT( Banance ) * DSP-8000 Type Only
L / R.................. 2.8V/1KΩ
SL / SR................ 2.8V/1KΩ
CENTER................. 2.8V/1KΩ
■Frequency response
MIC ...........20Hz ~ 15KHz ,-0.2 ~ -1dB
MIC LOW CUT.................. 20Hz ~ 1KHz
MUSIC..........20Hz ~ 20KHz ,-1 ~ -0.5dB
SUBWOOFER...................20Hz ~ 200Hz
■Tone control response
MIC BASS............+9 ~ -11dB(100Hz)
GAIN........+11.5 ~ -13.5dB(1KHz)
FREQ................... 95 ~ 4KHz
TREBLE.......+6.5 ~ -8.5dB(10KHz)
LOW CUT......... 20 ~ 1KHz(-18dB)
MUSIC BASS.............. ±8.5dB(100Hz)
TREBLE............ ±9.5dB(10KHz)
BBE - LOW.............. +8(100Hz)
BBE - HIGH............. +9(10KHz)
■ Speaker impedance(A/B)............8Ω ~ 16Ω
■ Music key control range ...11Step ±2.5Pitch
■ Video input (sensitivity/input impedance )..
1Vp-p/75Ω
■Video output (output level/output impedance).
1Vp-p/75Ω
■Power supply.............110/120 VAC 50~60Hz
220/240 VAC 50~60Hz
■Power consumption....................... 500W
■Dimensions ( W x H x D )....... 430x136x415mm
■Weight ..................... .............13kg
■Remote control unit RC480................. x1
■Dry cell batteries ( UM-4 )................x2
■Power core.................................x1
■User's Menu................................x1
■Warranty certificate.......................x1
Amplifier
Specifications subject to change without prior notice.
Power Supply
Other
Accessories
SPECIFICATIONS
■ Echo delay time ( MAX )...............300ms
■ Echo repeat time ( MAX ).............. 5 Sec
■ Reverb delay time ( MAX ).............10 Sec
Table of contents
