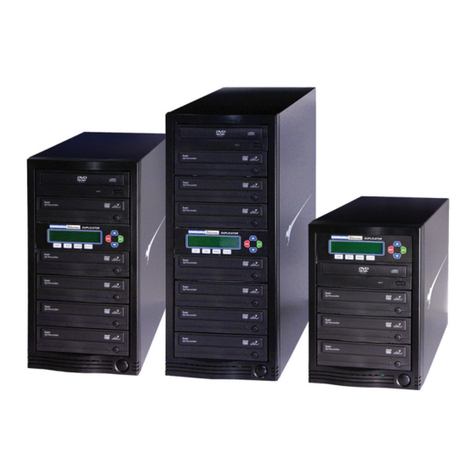
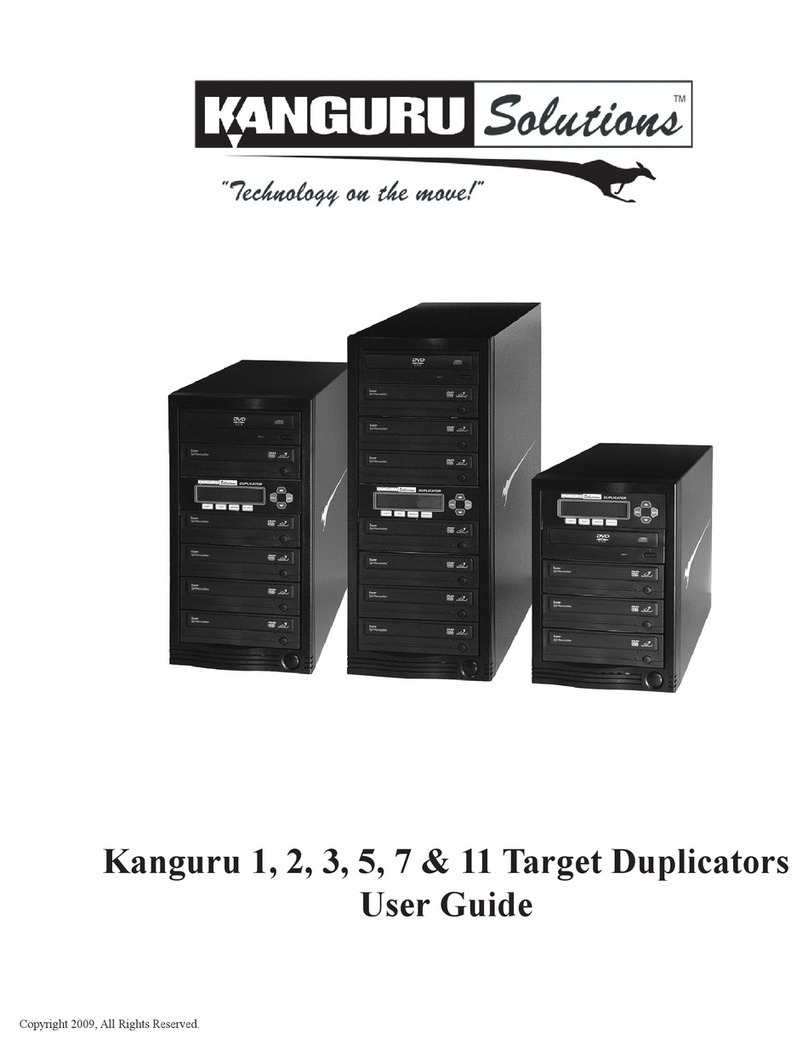
BestDuplicator BD18xxL Controller User manual

BestDuplicator
CD/DVD/Blu-ray/Lightscribe
Duplicator
User Guide
V1.0


3
Content Index
Disclaimer of Warranties 4
Before You Start 5
Important Notice 5
Safety Precautions 5
Definition 5
Chapter 1.
Basic Introduction
1. Features 7
2. System Overview 7
2-1. Package Content 7
2-2. SATA DVD/BD Duplicator Controller 8
2-3. Other Components for Assembling the
Duplicator 8
2-4. Installation of SATA Controller 9
2-5. Front View 9
Chapter 2.
Function Table
Function Table-CD/DVD/BD
Duplication
10
Chapter 3.
Quick Operation Guide
1. Installation 13
2. Quick Guide 14
-Quick Guide for Disc-to-Disc Copy 14
Chapter 4.
Operation
1. Copy 16
2. Test 16
3. Compare 17
4. Copy & Compare 18
5. Set Burn Speed 19
6. Select Source 19
7. Utility 20
7-1. Information 20
7-2. Erase Disc 21
7-3. PreScan Source 22
7-4. Track Edit 23
7-5. Eject All Disc 23
7-6. Copy Counter 23
7-7. Update BIOS 24
7-8. PRINT LS Label 25
7-9. Verify Disc 25
8. Setup 25
8-1. Auto Start Time 25
8-2. Display Mode 25
8-3. Button Beep 26
8-4. Eject On Start 26
8-5. Reader Speed 26
8-6. Compare Speed 27
8-7. Language 27
8-8. Clear Setup 27
8-9. Advanced Setup 27
9. HDD Manager (For HDD-installed duplicator) 28
9-1. Select Image 28
9-2. Disc to Image 29
9-3. Set Reader Speed 30
9-4. Show Image Info. 30
9-5. Rename Image 30
9-6. Delete Image 31
9-7. Show HDD Info. 31
9-8. Format HDD 32
9-9. Load & Copy 32
Chapter 5.
Specification 33
Appendix A. LightScribe Operation 34
Appendix B. Troubleshooting 38
-Error Message 38
-FAQ & Maintenance Guide 39
Appendix C. Do & Don't 42

Disclaimer of Warranties
4
Disclaimer of Warranties
This manual contains materials protected under the International Copyright
Laws. All rights reserved. No part of this manual may be reproduced,
transmitted, or transcribed without the expressed written permission of the
manufacturer and author of this manual.
BestDuplicator's controllers are used for copying and editing personal audio
and video data. Violating Copy Right is a criminal act and will not be tolerated.
BestDuplicator's duplicator controller only supports legal back up operation.
BestDuplicator is not responsible for illegal recording in any means.
For additional questions regarding our Disclaimer please contact
BestDuplicator Technical support @ 1800-929-9343.
BestDuplicator can also be reached at the Contact us portion of the site.
BestDuplicator is not responsible for any user incurred "Physical Damage". Any
parts that are physically damaged, warranty will be automatically voided.
For warranty purposes, please ensure you keep the original box of your
Duplicator for proper shipping.
Thanks and enjoy!

Before You Start
5
Before You Start
Important Notice
Read the complete operation instructions carefully. This contributes to better
operation. Make sure the source device is correct and workable.
To guarantee data consistency, it is strongly suggested that the capacity of
source and targets should be the same. It is strongly suggest to use function
“Copy&Compare” to achieve perfect duplication.
Safety Precautions
The warranty will expire if damage is incurred resulting from non-compliance
with these operating instructions. Please turn off the power before replacing
the socket. Never turn off the power while processing the firmware update.
Use only approved power sources. The product is only suitable for operation
in a dry, dust free, clean environment. Do not allow liquids or foreign objects to
enter. Failure to do so may severely damage your duplicator.
Definition
Media
Media including compact discs, memory card, and flash drive.
Example: BD1812L installed
Controller
Drive/Disc
SATA Cable
BestDuplicator
DVD/Blu-ray
Duplicator
User Guide
V1.0
Display LCD
Backward
Forward
ESC
OK
SATA ports
DVD/Blu-ray
Duplicator
User Guide
V1.0
Power buon
OK
ESC
Disk drive
Eject buon
LED
LCD
Forward
Backward
Capacity
The maximum data amount can be contained in discs.
Data size
Q'ty of target disc

Before You Start
6
Drive
A flexible ejected case used to place discs.
Example: BD1812L installed
Controller
Drive/Disc
SATA Cable
BestDuplicator
DVD/Blu-ray
Duplicator
User Guide
V1.0
Display LCD
Backward
Forward
ESC
OK
SATA ports
READER
WRITER
DVD/Blu-ray
Duplicator
User Guide
V1.0
Power buon
OK
ESC
Disk drive
Eject buon
LED
LCD
Forward
Backward
Source Drive
Reader
Drive 2
Drive 3
Drive 4
4
10
11
12
Drive 5
Drive 6
Drive 7
Drive 8
Drive 9
Drive 10
Drive 11
Drive 12
5
6
7
8
9
2
3
Reader
4
10
11
12
5
6
7
8
9
2
3
DVD Duplicator
SATA Por t
A mechanical construction used to connect between controllers and drivers.
Example: BD1812L installed
Controller
Drive/Disc
SATA Cable
BestDuplicator
DVD/Blu-ray
Duplicator
User Guide
V1.0
Display LCD
Backward
Forward
ESC
OK
SATA ports
READER
WRITER
DVD/Blu-ray
Duplicator
User Guide
V1.0
Power buon
OK
ESC
Disk drive
Eject buon
LED
LCD
Forward
Backward
Source Drive
Reader
Drive 2
Drive 3
Drive 4
4
10
11
12
Drive 5
Drive 6
Drive 7
Drive 8
Drive 9
Drive 10
Drive 11
Drive 12
5
6
7
8
9
2
3
Reader
4
10
11
12
5
6
7
8
9
2
3

Chapter 3. Quick Operation Guide
7
1. Installation
1. Find SATA cables and SATA ports on the controller board. The reader drive
is the default source drive. The #2, #3 …..#n ports should be connected to
that drive number as below.
Example: BD1812L installed
Controller
Drive/Disc
SATA Cable
BestDuplicator
DVD/Blu-ray
Duplicator
User Guide
V1.0
Display LCD
Backward
Forward
ESC
OK
SATA ports
READER
WRITER
DVD/Blu-ray
Duplicator
User Guide
V1.0
Power buon
OK
ESC
Disk drive
Eject buon
LED
LCD
Forward
Backward
Source Drive
Reader
Drive 2
Drive 3
Drive 4
4
10
11
12
Drive 5
Drive 6
Drive 7
Drive 8
Drive 9
Drive 10
Drive 11
Drive 12
5
6
7
8
9
2
3
Reader
4
10
11
12
5
6
7
8
9
2
3
2. Connect SATA cable to the SATA port. Insert the controller to the top of the
tower. Connect the other side of SATA cable to the drive as the following
arrangement.

Chapter 3. Quick Operation Guide
8
Example: BD1812L installed
Controller
Drive/Disc
SATA Cable
BestDuplicator
DVD/Blu-ray
Duplicator
User Guide
V1.0
Display LCD
Backward
Forward
ESC
OK
SATA ports
R
E
AD
E
R
WR
I
T
E
R
DVD/Blu-ray
Duplicator
User Guide
V1.0
Power buon
OK
ESC
Disk drive
Eject buon
LED
LCD
Forward
Backward
Source Drive
Reader
Drive 2
Drive 3
Drive 4
4
10
11
12
Drive 5
Drive 6
Drive 7
Drive 8
Drive 9
Drive 10
Drive 11
Drive 12
5
6
7
8
9
2
3
Reader
4
10
11
12
5
6
7
8
9
2
3
※Note:
Wait over 5 seconds to power on after shutdown to prevent the abnormal
operation of the system.
2. Quick Guide
2-1. Quick Guide for Disc-to-Disc Copy
1. Connect power cord and power on.
The LCD screen will display 1.Copy once the machine is started;
otherwise, press / until you see 1.Copy .

Chapter 3. Quick Operation Guide
9
2. Insert source disc in the first drive from the top (by default).
3. Insert target disc(s) in any drive(s) except the top one.
4. Press to start copy.
5. Once finished, target disc(s) will be ejected automatically.
By default, the duplicator will start copying 5 seconds after source and target
disc(s) are inserted, please refer to Function Table 8-1 if you need to change
this setting.

Chapter 1. Basic Introduction
10
1. Features
• Independent 13, 9 SATA ports can really achieve high speed 1-12,
1-8 DVD/Blu-ray duplication.
• Advanced separate analog and digital control board design prevent
signal interference, enhance control board’s power supply and stability.
• High speed DDR2 SDRAM.
• Support high speed 20X DVD, 52X CD, 8X Blu-ray burning.
• High compatibility with variety brands of burner.
• Auto Load & Copy Technology
• Easy assembly SATA port arrangement
• Support LightScribe printing
2. System Overview
2-1. Package Content
Example: BD1812L installed
Controller
Drive/Disc
SATA Cable
BestDuplicator
DVD/Blu-ray
Duplicator
User Guide
V1.0
Display LCD
Backward
Forward
ESC
OK
SATA ports
READER
WRITER
DVD/Blu-ray
Duplicator
User Guide
V1.0
Power buon
OK
ESC
Disk drive
Eject buon
LED
LCD
Forward
Backward
Source Drive
Reader
Drive 2
Drive 3
Drive 4
4
10
11
12
Drive 5
Drive 6
Drive 7
Drive 8
Drive 9
Drive 10
Drive 11
Drive 12
5
6
7
8
9
2
3
Reader
4
10
11
12
5
6
7
8
9
2
3
Controller SATA Cables(180˚) User Manual

Chapter 1. Basic Introduction
11
2-2. SATA DVD/BD Duplicator Controller
Example: BD1812L installed
Controller
Drive/Disc
SATA Cable
BestDuplicator
DVD/Blu-ray
Duplicator
User Guide
V1.0
Display LCD
Backward
Forward
ESC
OK
SATA ports
READER
WRITER
DVD/Blu-ray
Duplicator
User Guide
V1.0
Power buon
OK
ESC
Disk drive
Eject buon
LED
LCD
Forward
Backward
Source Drive
Reader
Drive 2
Drive 3
Drive 4
4
10
11
12
Drive 5
Drive 6
Drive 7
Drive 8
Drive 9
Drive 10
Drive 11
Drive 12
5
6
7
8
9
2
3
Reader
4
10
11
12
5
6
7
8
9
2
3
2-3. Other Components for Assembly the Duplicators
Example: BD1812L installed
Controller
Drive/Disc
SATA Cable
BestDuplicator
DVD/Blu-ray
Duplicator
User Guide
V1.0
Display LCD
Backward
Forward
ESC
OK
SATA ports
READER
WRITER
DVD/Blu-ray
Duplicator
User Guide
V1.0
Power buon
OK
ESC
Disk drive
Eject buon
LED
LCD
Forward
Backward
Source Drive
Reader
Drive 2
Drive 3
Drive 4
4
10
11
12
Drive 5
Drive 6
Drive 7
Drive 8
Drive 9
Drive 10
Drive 11
Drive 12
5
6
7
8
9
2
3
Reader
4
10
11
12
5
6
7
8
9
2
3
CD/DVD-ROM CD/DVD-RW
Writer
Tower Box

Chapter 1. Basic Introduction
12
2-4. Installation of SATA Controller
Example: BD18112L installed
Example: BD1812L installed
Controller
Drive/Disc
SATA Cable
BestDuplicator
DVD/Blu-ray
Duplicator
User Guide
V1.0
Display LCD
Backward
Forward
ESC
OK
SATA ports
READER
WRITER
DVD/Blu-ray
Duplicator
User Guide
V1.0
Power buon
OK
ESC
Disk drive
Eject buon
LED
LCD
Forward
Backward
Source Drive
Reader
Drive 2
Drive 3
Drive 4
4
10
11
12
Drive 5
Drive 6
Drive 7
Drive 8
Drive 9
Drive 10
Drive 11
Drive 12
5
6
7
8
9
2
3
Reader
4
10
11
12
5
6
7
8
9
2
3
**Each SATA port is independent (without Master and Slave ports).
2-5. Front View
Example: BD1812L installed
Controller
Drive/Disc
SATA Cable
BestDuplicator
DVD/Blu-ray
Duplicator
User Guide
V1.0
Display LCD
Backward
Forward
ESC
OK
SATA ports
READER
WRITER
DVD/Blu-ray
Duplicator
User Guide
V1.0
Power buon
OK
ESC
Disk drive
Eject buon
LED
LCD
Forward
Backward
Source Drive
Reader
Drive 2
Drive 3
Drive 4
4
10
11
12
Drive 5
Drive 6
Drive 7
Drive 8
Drive 9
Drive 10
Drive 11
Drive 12
5
6
7
8
9
2
3
Reader
4
10
11
12
5
6
7
8
9
2
3

Chapter 2. Function Table
13
Function Table-CD/DVD/BD Duplication
Function Itmes Description
1. Copy To copy disc to disc or copy disc from HDD.
2. Test To simulate copy process.
3. Compare To compare bit-for-bit between source disc
and copied discs.
4. Copy & Compare To copy first and compare the copied discs
later. To ensure data correctness.
5. Set Burn Speed To set burning speed for duplication.
6. Select Source To select source from any optical drive or hard
disk drive.
7. Utility
1. Information
1. Disc Info. To check the format of disc, burning speed
supported and total capacity or data size.
2. Drive Info. To check the version, model No. and brand
name.
3. System Info. To check the model No. and firmware version.
2. Erase Disc
1. Quick Erase To quick erase data from rewritable disc.
2. Full Erase To full erase data from rewritable disc.
3. PreScan Source To check source disc’s readability.
4. Track Edit
1. Copy Track To select and combine audio tracks from
various CDs into a single customized audio
CD.
2. Close Disc To close the disc after track copying to make
the CD playable on CD player.
3. Disc Info. To check the audio CD’s status of usage.
5. Eject All Disc To eject all trays.
6. Copy Counter
1. Show Count To check how many discs copy successfully
and failed.
2. Enable Counter To enable or disable counter setting.
3. Clear Counter To delete the record.
7. Update BIOS To update the system’s firmware.
8. PRINT LS Label To print Lightscribe image.
9.Verify Disc To check the readability of discs.

Chapter 2. Function Table
14
8. Setup
1. Auto Start Time Allow the system to do the Copy, Test, Compare
and Copy & Compare functions automatically
2. Display Mode
1. Basic
2. Show Speed
3. Show Timer
3. Button Beep To enable or disable key sound
4. Eject On Start
1. Eject All Discs To eject all trays with disc inside once the
system is booted up.
2. Do Not Eject No eject any tray or disc once the system is
booted up.
3. Eject Target Only Only eject target trays with disc inside once the
system is booted up.
4. Eject Source Only Only eject source disc once the system is
booted up.
5. Eject All Trays To eject all trays once the system is booted up.
5. Reader Speed To adjust the reading speed of source drive.
6. Compare Speed To adjust the speed of drives while comparing.
7. Language To set language interface
8. Clear Setup To reset all the function back to manufacturer’s
default setting.
9. Advanced
Setup
1. Power On Time To set a warm-up time from 5 seconds to 99
seconds
2. Startup Menu To select which function you would like to show
up in the beginning
3. Skip Reader Error To set skip the read error and keep copying.
4. Change Bad Master
To make the system eject source disc and
ask for another one while the source disc is
unreadable for system.
5. CD Overburn Set to copy overburn CD.
6. Show HDD Image
Name
To show HDD image name or capacity on
Copy, Test, Copy + Compare and Compare
function
7. Keep Buffer To set enable or disable load source to the
buffer.
8. Boot Password To enable or disable the user administr ative
password.
9. Setup Password To set up the login password
10.Count Password To set password for function "7.6.1 Show
Count".
11.Eject Tray if no disc
To set whether users would like to eject trays
if no discs are inserted in when operating the
duplicator.

Chapter 2. Function Table
15
9. HDD Manager
1. Select Image To select image file from HDD as your source
for copy.
2. Disc=> Image To load your source disc to the built-in HDD.
3. Set Reader Speed To adjust the speed of source reader while
you load image file from the reader to HDD.
4. Show Image Info. To check the disc format and data size of im-
age file
5. Rename Image To change the name of image file
6. Delete Image To delete image file in the built-in HDD
7. Show HDD Info.
To check the information of the built-in HDD
includes how many discs are stored and the
free space is available
8. Format HDD To format the built-in HDD
9. Load & Copy
1. Synchronous To load the source to HDD and make copy at
the same time.
2. Load First To load source to HDD first and copy from
HDD to disc.
3. OFF To disable Load & Copy function.

Chapter 4. Operation
16
1. Copy
It is important to make sure that your source disc is placed in the right drive.
You can check or select your source reader by 6.Select Source. (Plase refer to
6.Select Source)
1. Select 1.Copy and place source disc and blank discs into the
proper trays. Then the system will detect the source disc and show the
information.
Data size
Q'ty of target disc
2. Press to start copy
Data size
Copied data size
Speed of burning
Copy process %
Q'ty of target
3. Once the copy task is finished, the copied discs will be ejected and the
result of copy task will show on the LCD:
Elapsed time
※Note:
Due to default setting of auto start time, the duplicator will start to
copy automatically within a few seconds. You can set “OFF” to close
the auto start function or set a longer waiting time. The default setting
is 5 seconds. (About this setting please refer to 8-1.Auto Start Time.)
If HDD is selected to be the source reader, you have to upload the source to
the built-in HDD and then follow copy process to do your copy task. How to
upload data from disc to HDD please refer to 9-2.Disc to Image.
※Note:
The default setting of source reader is the first drive.

Chapter 4. Operation
17
2. Test
This function will simulate the copy process to ensure error free duplication.
During the simulation, it will be nothing left in the recordable discs.
1. Use / to select 2.Test and press .
2. Press to start test
3. Once the test task is finished, the discs will be ejected and the result of the
pass and fail discs for the test task will show on the LCD:
※Note:
This function is unable to support DVD+R blank disc.
2If you use CD/DVD rewritable discs as your blank media in the simulation,
all the content inside the discs will be erased permanently during test
simulation.
3. Compare
This function will do bit-for-bit comparison between source disc and copied
discs to ensure the copied discs are identical to source disc.
1. Place source disc and blank discs into Reader and Writers separately.
2. Use / to select 3.Compare and press to start compare.

Chapter 4. Operation
18
3. The system will detect the source and target discs automatically.
4. After detecting, the system will start to compare.
5. When the comparison has finished, the system will show the compare result.
4. Copy & Compare
This function will to do copy task first and execute comparison automatically
when copy process has been finished.
※Note:
In Copy, Test, Compare and Copy&Compare functions
If there is no source and target discs inside the duplicator,there will
be nothing show on LCD.
If the built-in HDD is selected as source, the information presents
different:
The information display of these 4 functions will be different based
on the display mode you selected. (Plase refer to 8-2.Display
mode.)

Chapter 4. Operation
19
5. Set Burn Speed
You can adjust the burning speed of CD/Audio CD/DVD/DVD DL/Blu-ray by
this setting. The default setting of CD is 40X, Audio CD 24X, DVD 8X, DVD DL
2X and Blu-ray 2X.
1. Use / to select 5.Set Burn Speed and press .
2. Press /to adjust the burning speed of CD and press to
confirm it, or press to select Audio CD,DVD, DVD DL or Blu-ray to adjust
the burning speed.
6. Select Source
You can set any drive or built-in HDD in the duplicator to be your source
reader.
1. Use / to select 6.Select Source.
2. Press to check the current source reader, or select the proper drive to be
the source reader by pressing / , once the source reader is selected,
press to confirm the setting and back to the menu list.
※Note:

Chapter 4. Operation
20
7. Utility
7-1. Information
You can check the information of disc, drive and system by this function. By
pressing / , each disc or drive’s information will show on the LCD.
1. Use / to select 7.Utility, press to enter the sub menu. Then,select
1.Information and press .
2. Use / to select 1.Disc Info. or 2.Drive Info or 3.System Info., and
press to see the related information.
3. The information will show on the LCD as below:
• Disc Info.: You can check the format of disc, burning speed supported
and total capacity. If the disc has data inside, you also can check the size
of data.
Burning Speed
Capacity/Data size
Disc Format
• Drive Info.: The version, model No. and brand name can be checked
here.
Drive version
Brand name
• System Info.: The model No. and firmware version can be checked here.
Table of contents
